All objects sliced for the SLA printers are completely solid by default. There is no infill pattern like in FFF/FDM 3D printing. Solid objects printed from the liquid resin can be heavy and robust, but the resin consumption is high compared to hollow objects, especially when printing large models.
Hollowing out your 3D model is a great way to:
- save a considerable amount of material (lowers the print price)
- lower the surface area of each layer - which decreases the force needed to detach the print from the display when moving to the next layer
- reduce the number of needed supports (lower weight of printed model)
We suggest adding at least two drainage holes. Without them, the uncured resin would end up being trapped inside your finished print.
Using the Hollowing tool
Hollowing can be configured for each model individually using the Hollowing tool in the left toolbar. Alternatively, you can configure hollowing for all models at once in Print Settings - Hollowing.
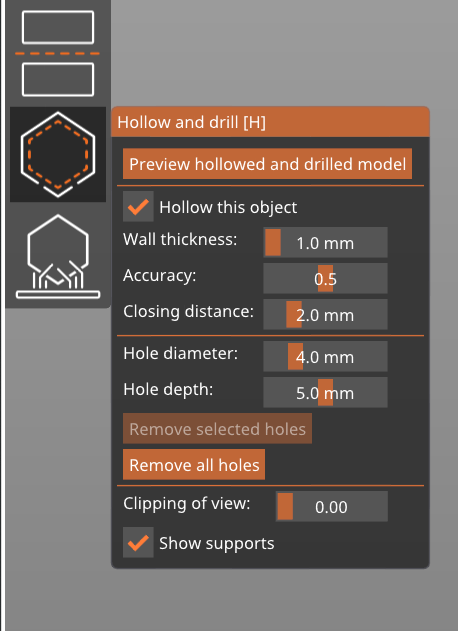
The model hollowing is configured with the following parameters:
Hollowing thicknessThe thickness of the resulting shell. The minimum value is 1 mm. Hollowing accuracyA trade-off between accuracy and performance. If a low hollowing accuracy is set, the resulting model wall thickness may be uneven. Therefore a higher hollowing accuracy is recommended for a small hollowing thickness (for thin shells) to ensure minimum wall thickness. Hollowing closing distanceHollowing suppresses cavities narrower than the closing distance threshold, and it also fills in sharp concave corners of the inner wall, from which it would otherwise be difficult to remove the uncured highly viscous resin. |
|
Adding drainage holes
Drainage holes can be added by left-clicking on the object when the SLA hollowing gizmo is active.
The holes can later be repositioned by dragging them on the mesh.
Each hole is always perpendicular to the surface and its diameter and depth can be configured - the current settings will be used for newly placed holes.
You can remove holes by right-clicking on any of them.
If you need to input an exact value or the slider does not have enough range for your, you can Ctrl+Left click the value to edit it.
Confirm and preview the hollowed mesh
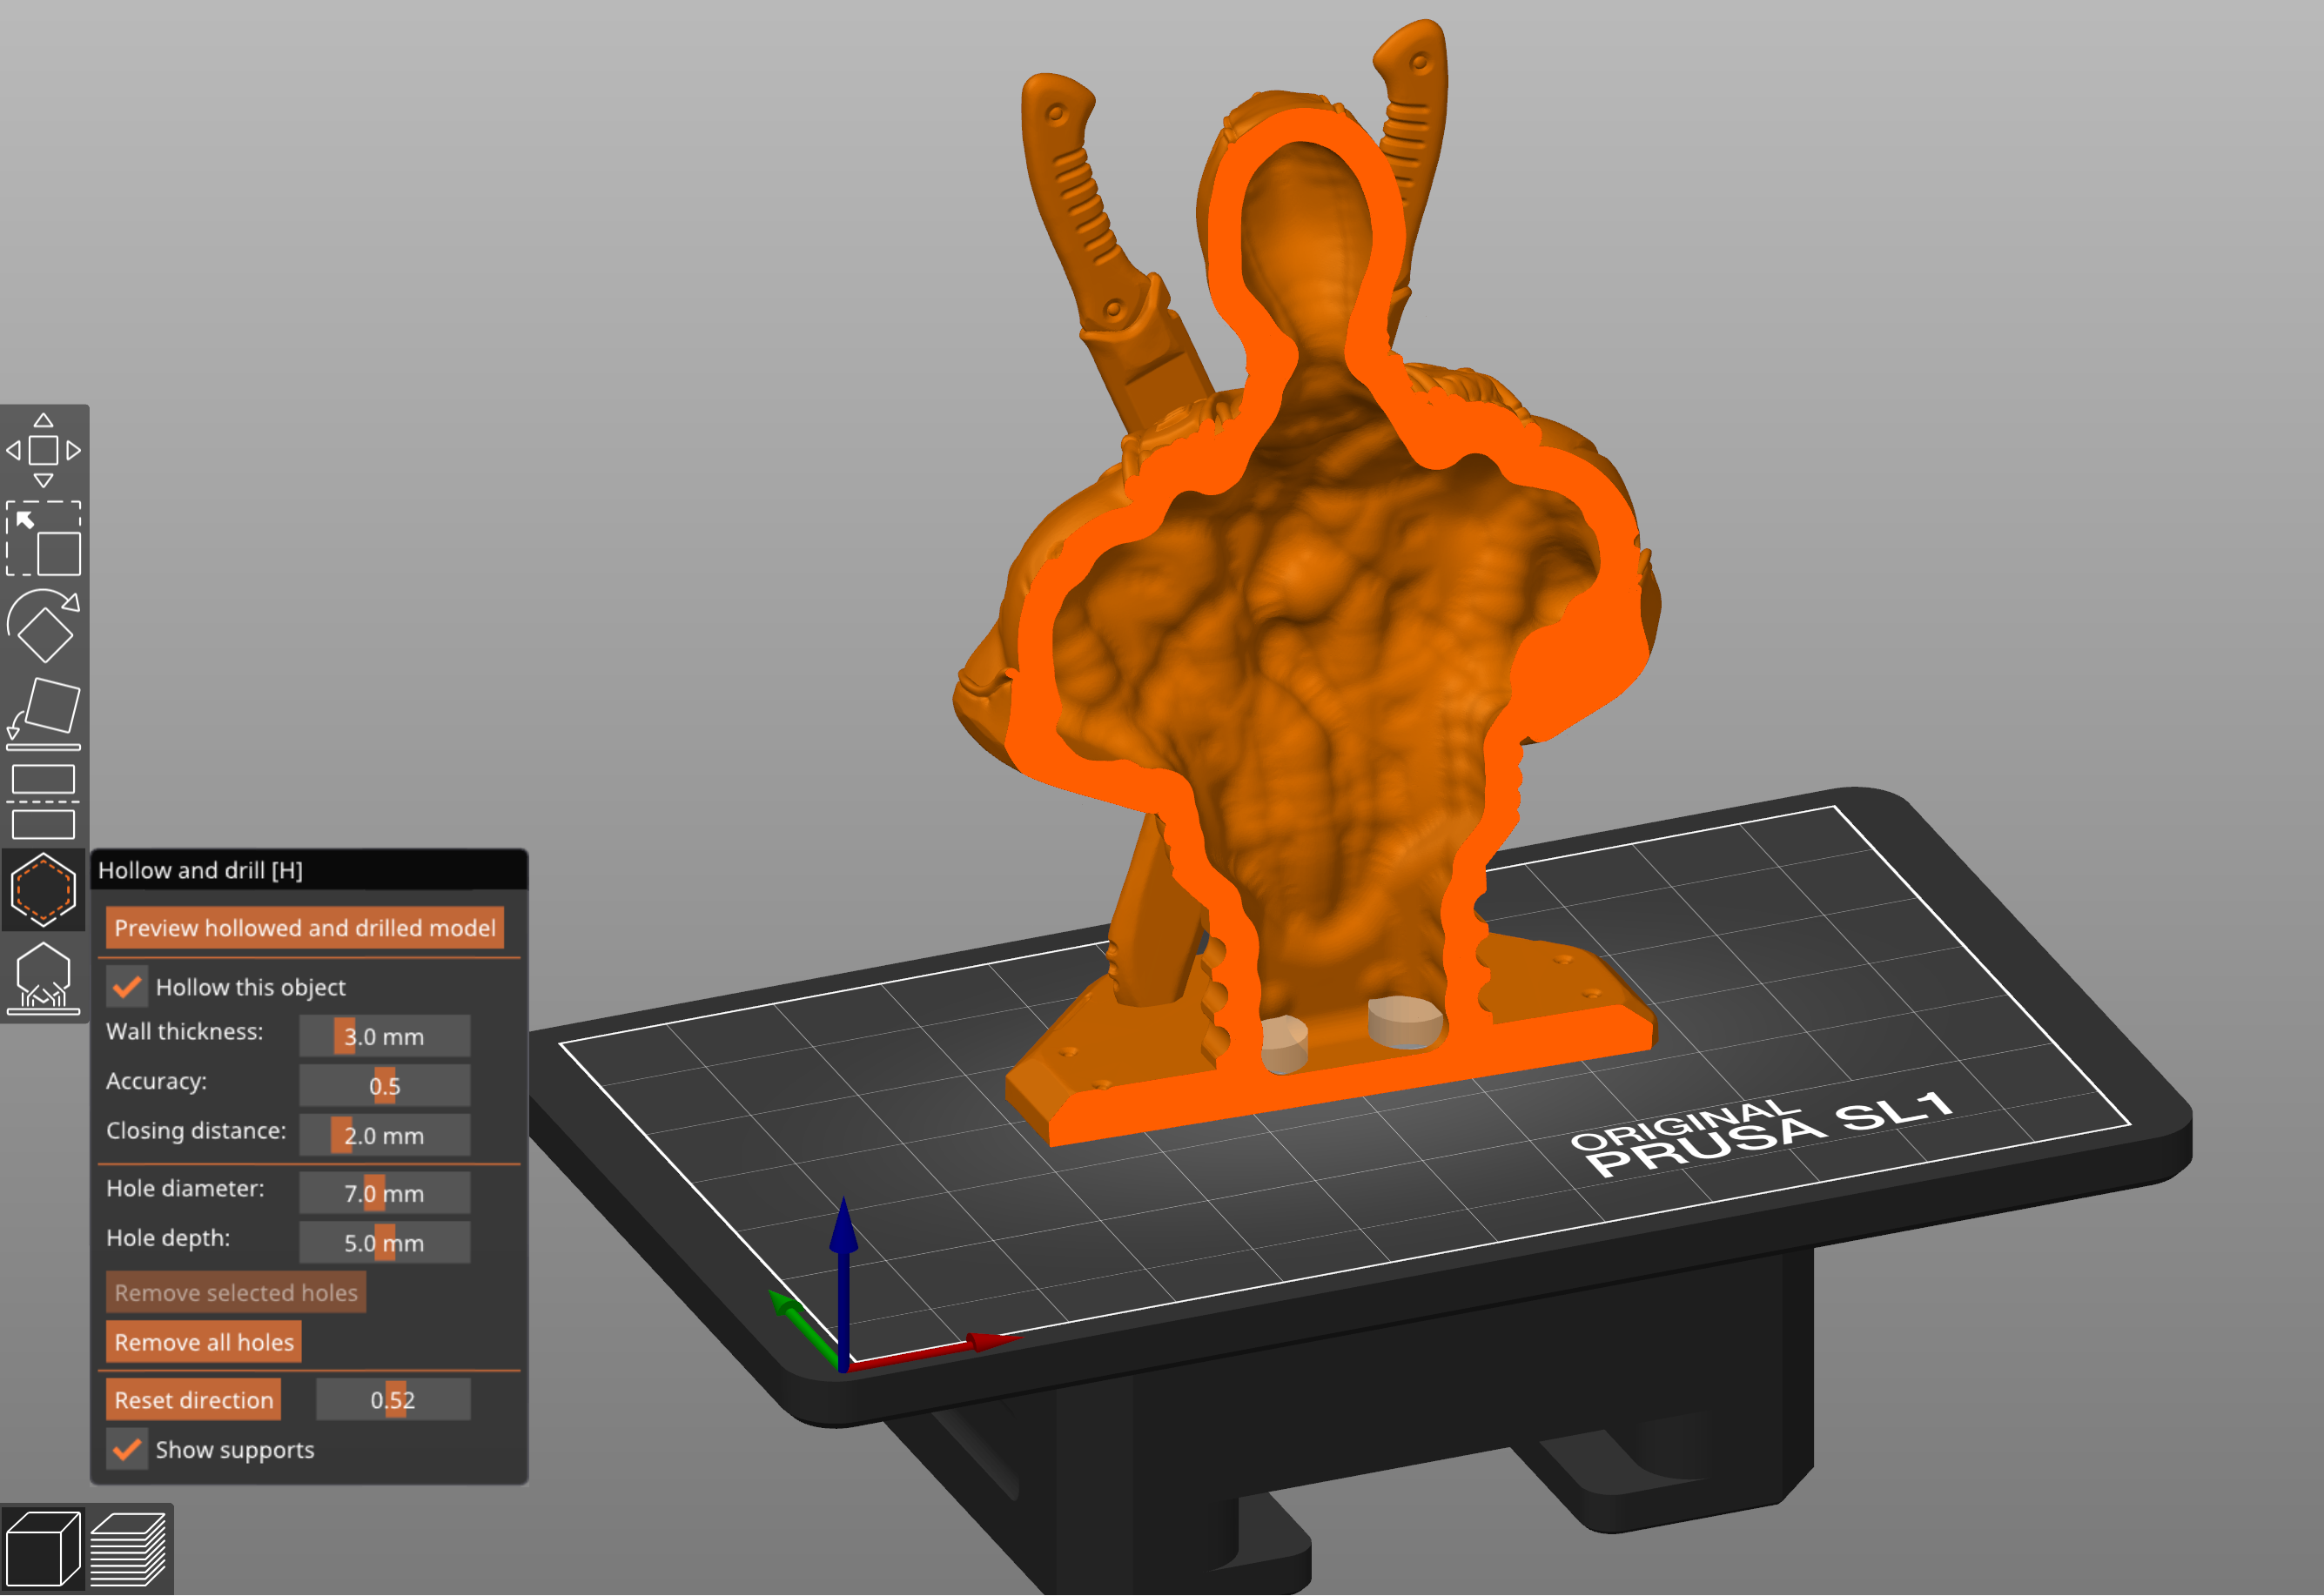
The hollowing and hole-drilling are performed after the Preview hollowed and drilled model button is pressed. Note that both hollowing and hole-drilling are computationally expensive tasks and will take some time, especially with complex models. In case the user does not press the button himself, the hollowing and drilling will be performed during the slicing process.
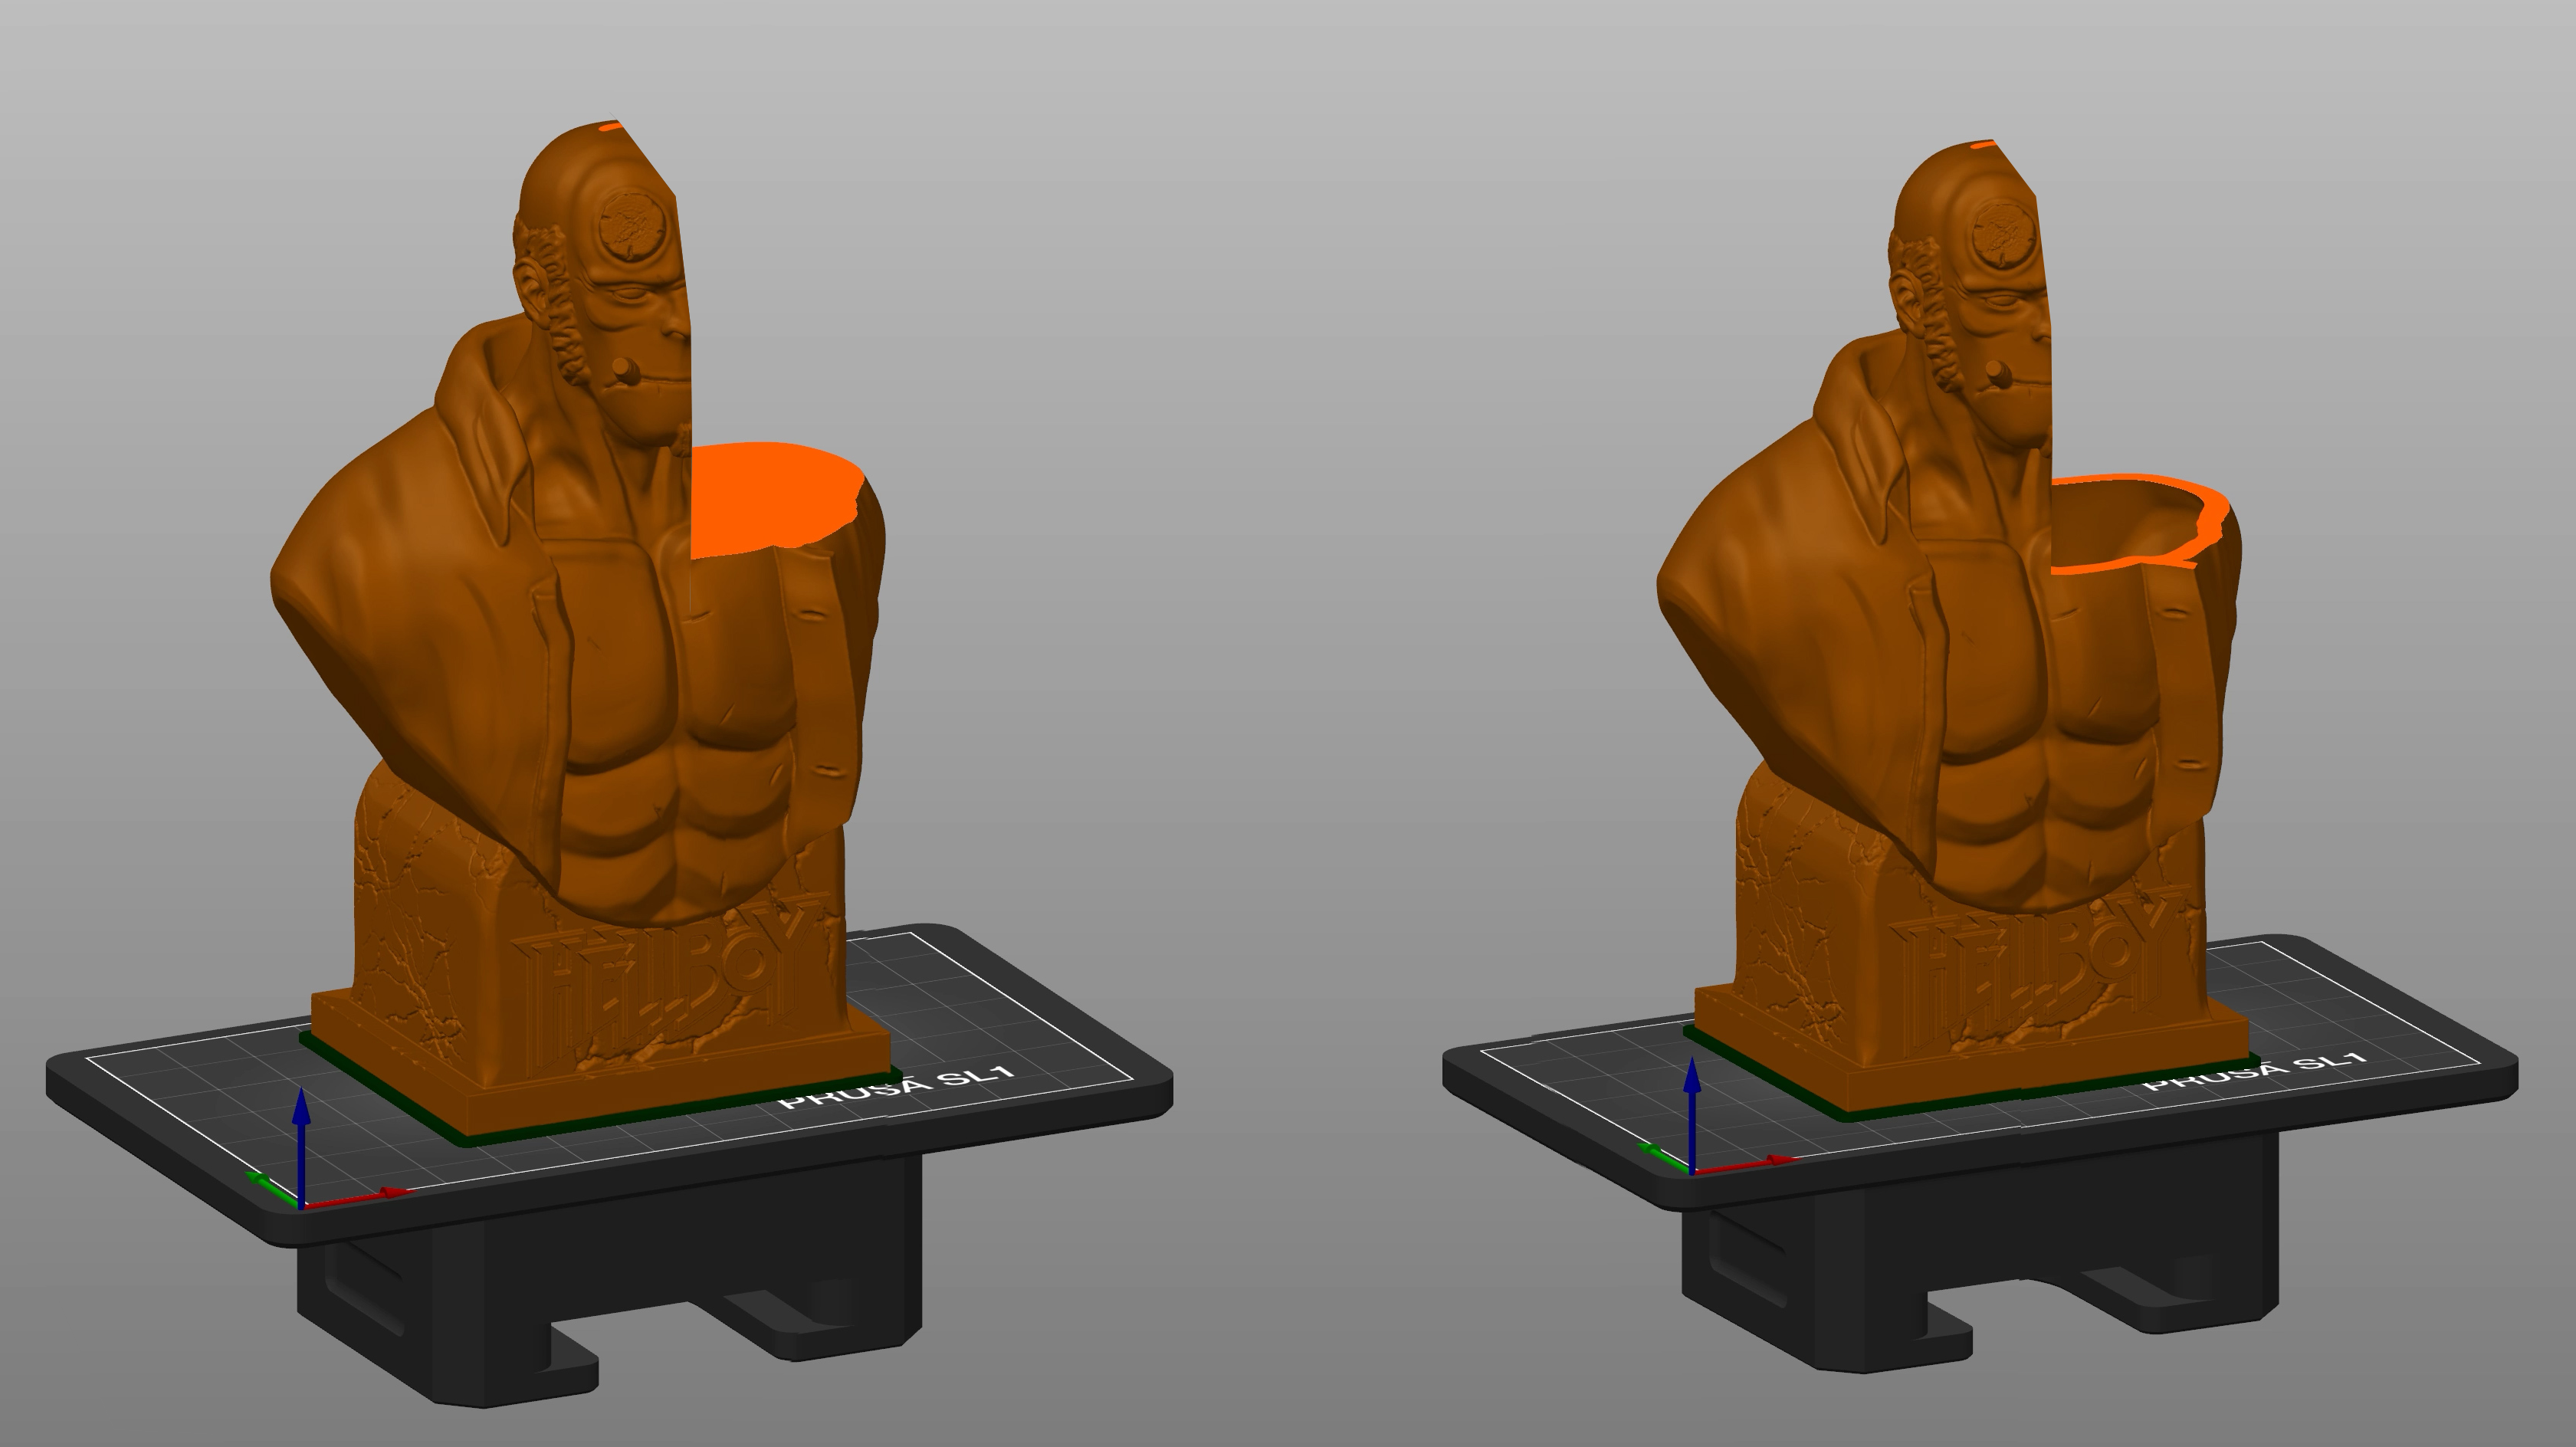
The Clipping plane tool can be used to peek inside an object (the same tool is present in the SLA support points editing gizmo). Move the slider from left to right to move the clipping plane. You can review the hollowed geometry and place the drainage holes appropriately.
![]()
The Reset direction button will align the clipping plane tool parallel to the current camera view. E.g. if you want to have the clipping plane moving up-down, look at the model from the top (Top view 1 ) and hit the Reset direction button.
Solid vs hollowed model example
Solid model: 237 ml, $13.75 resin cost
Hollowed model: 81 ml, $4.70 resin cost