En la Original Prusa XL multicabezal es posible combinar diferentes materiales en una misma impresión. Hay que tener en cuenta los siguientes aspectos y consideraciones para lograr una impresión satisfactoria.
Información preliminar
Cuando un extrusor está aparcado, la boquilla instalada en ese extrusor se enfría.
Las altas temperaturas sin imprimir pueden hacer que un filamento cargado se degrade y que aumente la presión en la zona de fusión. Mientras un extrusor está inactivo, enfriar la boquilla ayuda a contrarrestar este proceso, especialmente durante un tiempo prolongado de estar aparcado.
En cualquier momento en que la temperatura de la boquilla sea alta, la humedad absorbida por el filamento tendrá que escapar por algún sitio. Por lo general, esto provoca un aumento de la presión en la boquilla, lo que suele dar lugar al goteo. El filamento rezumado se deposita en la torre de purga, posiblemente creando un pegote.
Para limitar estos efectos negativos, es fundamental mantener el filamento seco. Es posible que haya que ajustar con precisión algunos parámetros del filamento, y es fundamental que el sello de la boquilla esté en la posición correcta para todas las herramientas. La magnitud de estos efectos también depende del material específico del filamento.
Si decides utilizar filamento flexible, consulta nuestra guía en vídeo sobre cómo cargar filamento flexible en la Original Prusa XL.
Ajustes de la torre de limpieza
Purga mínima en la torre de limpieza
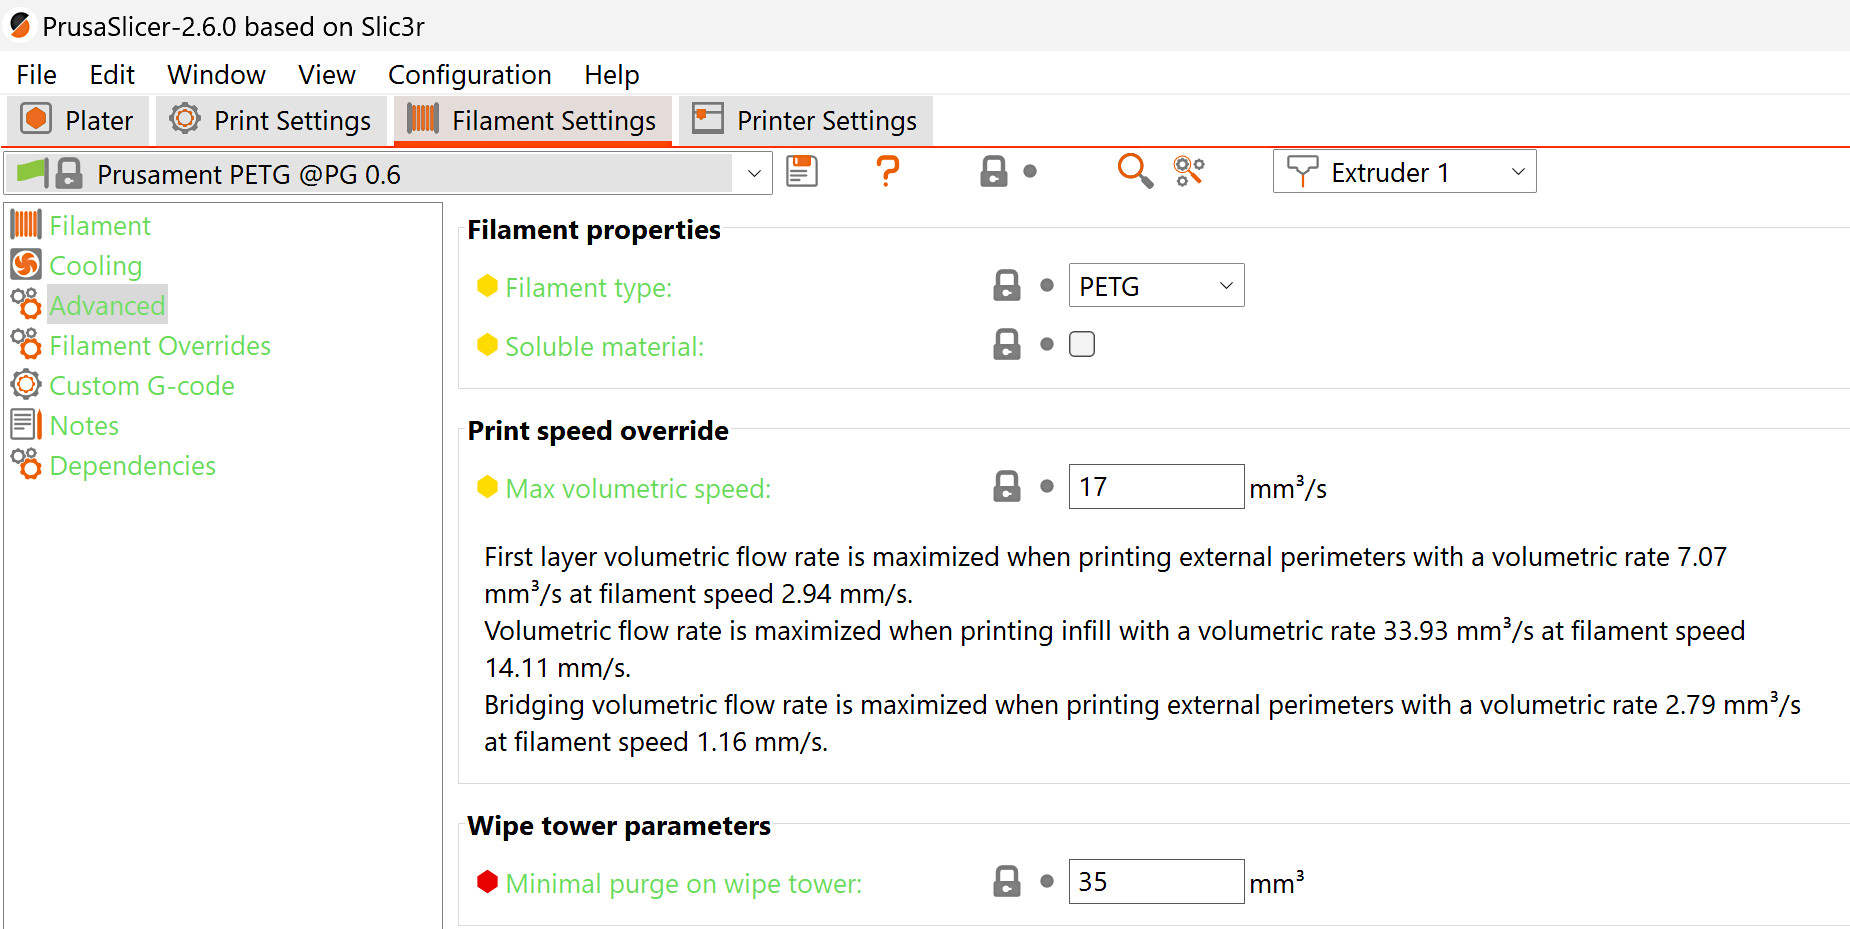
La purga mínima en torre de limpieza ajusta la cantidad mínima de material a imprimar en la torre de purga. Su valor se puede ajustar en Configuración de Filamento -> Avanzado. El goteo que se produce cuando se recoge la herramienta provoca la pérdida de material. Aumentar este volumen reducirá la posibilidad de que se produzca subextrusión al inicio de la impresión.
Para impresiones en PLA, el valor por defecto y recomendado para este ajuste es 15mm³. Para cualquier otro material, el valor por defecto es 35mm³. También recomendamos establecer el valor en 35mm³ para cada extrusor para una impresión con una combinación de PLA y otro material.
El TPU es muy propenso al hilado debido a que absorbe una gran cantidad de humedad. Aunque se ha probado con la purga mínima en la torre de limpieza a 35mm³, en caso de problemas con el hilado y el goteo, recomendamos aumentar aún más este valor, incluso hasta 70mm³. El TPE es un buen material flexible alternativo, ya que suele absorber menos humedad que el TPU, pero hay que tener en cuenta que el TPE tiene una mala adherencia a la base.
Cuando se imprimen filamentos rígidos sobre TPE o TPU, las capas inferiores de TPE o TPU pueden desplazarse debido a la impresión del filamento rígido sobre ellas. Esto también se puede contrarrestar aumentando la purga mínima en la torre de limpieza.
Extrusor de la torre de limpieza
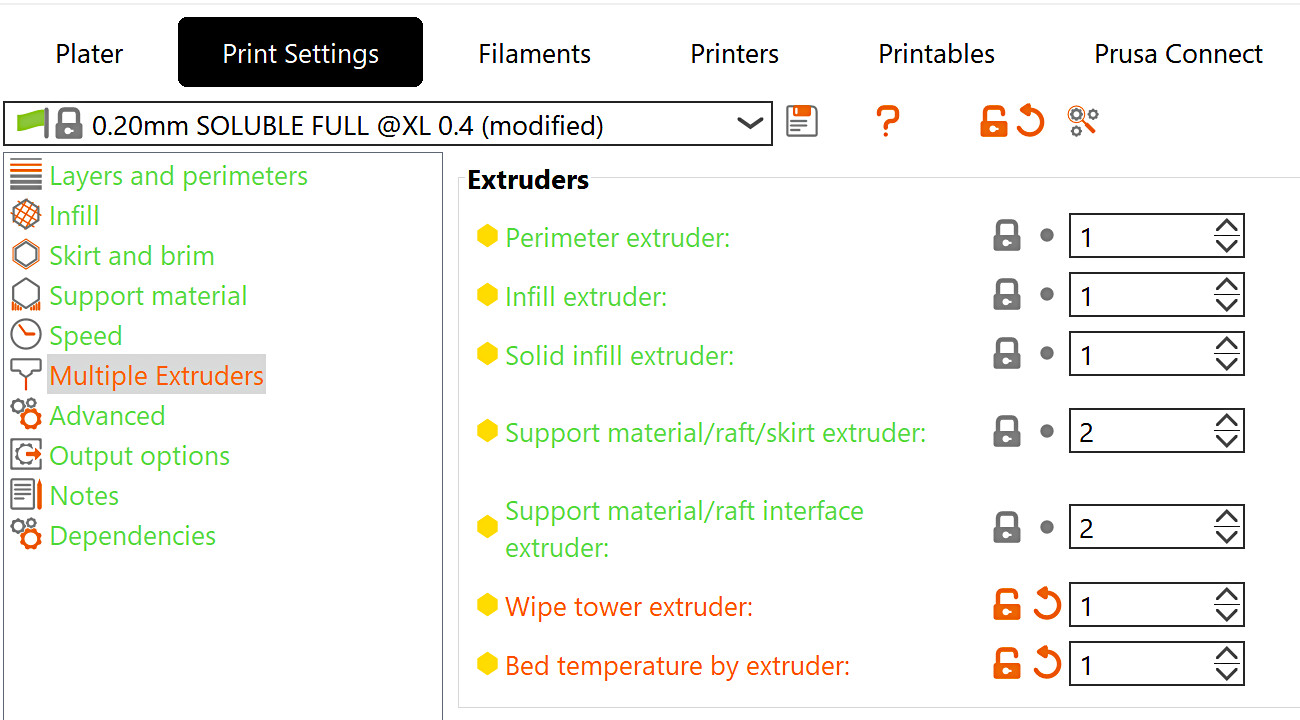
En la torre de purga, es posible que los filamentos no se adhieran entre sí. Esto puede hacer que la torre se rompa y provoque fallos en la impresión. Para evitarlo, ve a Configuración de la Impresión -> Múltiples Extrusores -> Extrusor de la torre de limpieza, y seleccionar un extrusor para la torre de limpieza. Esto hará que uno de los extrusores con un filamento específico actúe en todas las capas de la torre, aunque no se utilice en la impresión, haciendo que la torre sea más estable. Dejando el valor a 0 se utilizará la herramienta que esté disponible, que es la última utilizada en esa capa. Esto ahorra tiempo pero, cuando se imprime con más de un tipo de material, hace que la torre de limpieza sea menos fiable.
Ángulo del vértice del cono de estabilización
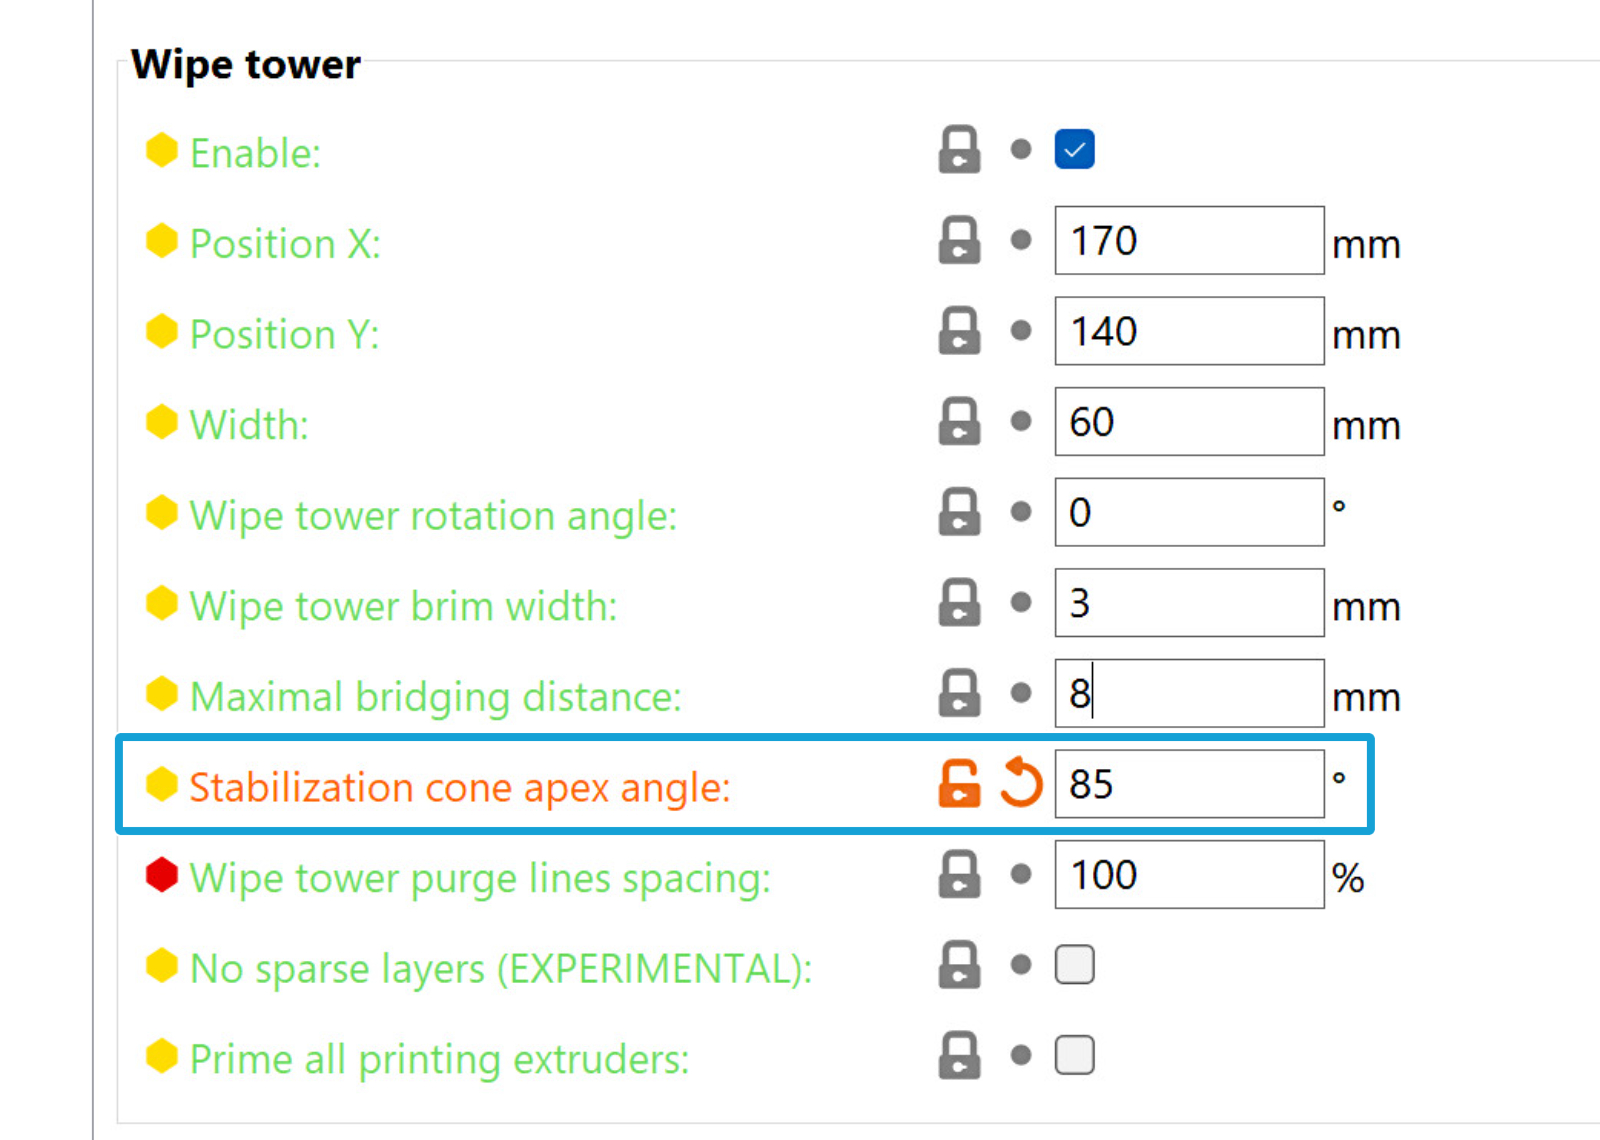
Para aumentar la estabilidad y la superficie inferior de la torre principal, es posible añadir una forma cónica que se combinaría con la forma de la torre principal. El ángulo del vértice de este cono puede fijarse entre 0 y 90 grados, en Configuración de Impresión -> Múltiples Extrusores, con un ángulo mayor, lo que significa que la base del cono es más grande y la torre principal más estable.
PLA + PETG
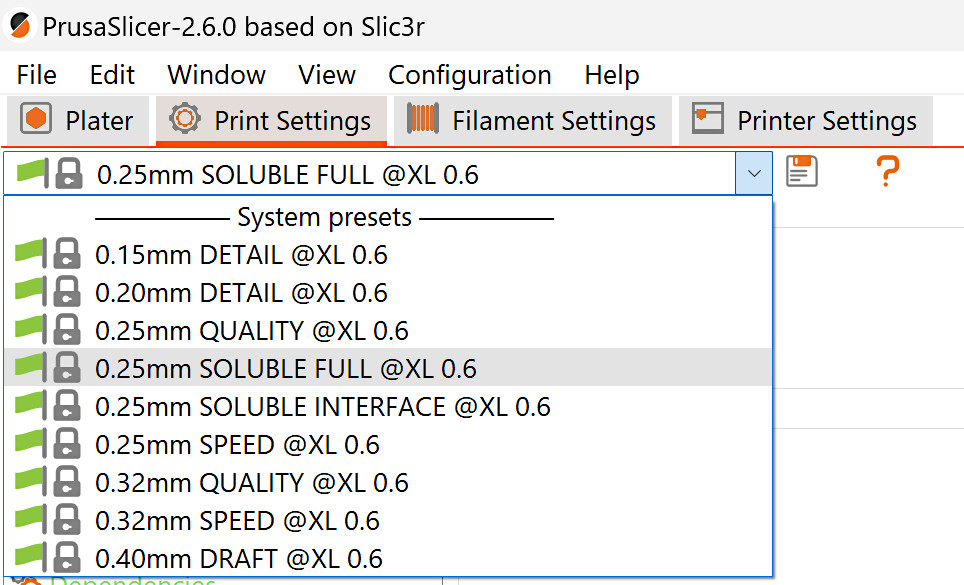
El PETG ha sido probado con soportes PLA con éxito, así como PLA con soportes PETG. Para ello, la configuración de impresión PrusaSlicer debe ser completamente soluble.
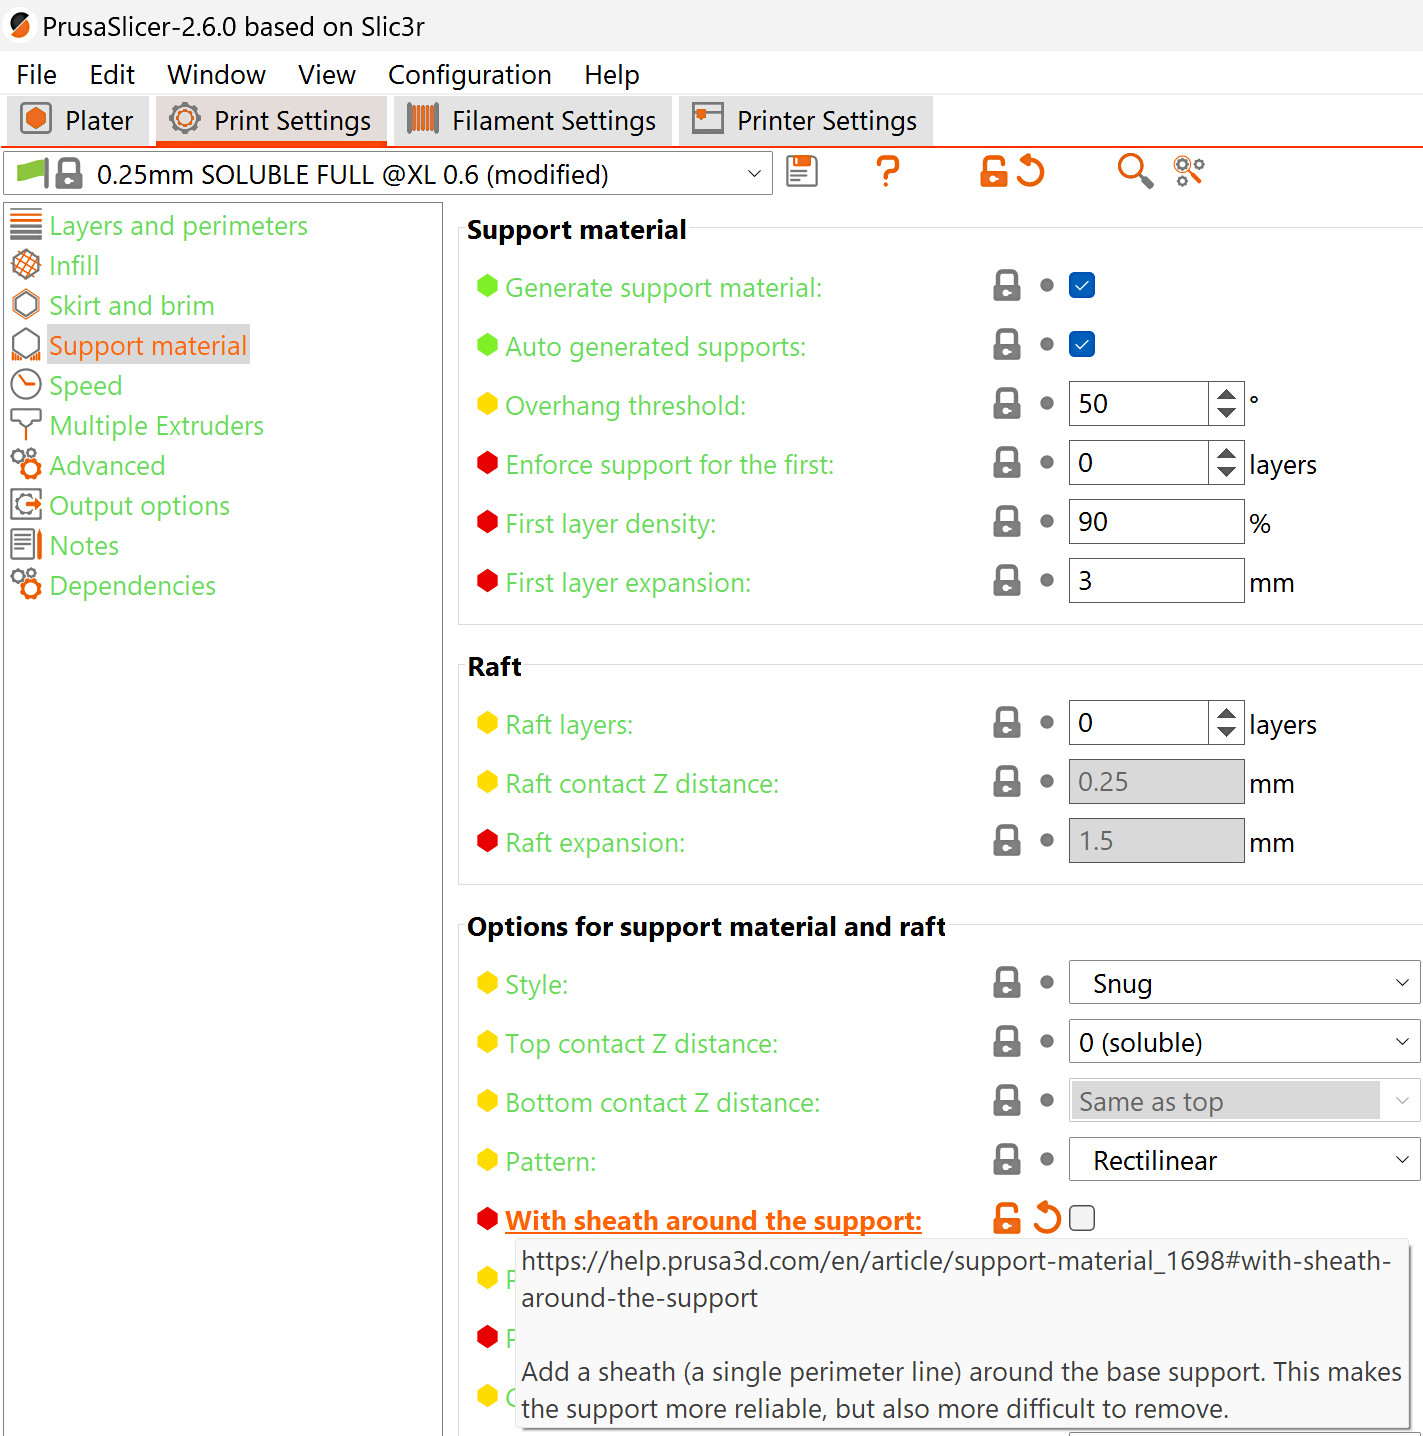
Por defecto, se generará una vainilla sólida (una pared perimetral) alrededor de los soportes fijados como solubles, lo que dificultará mucho su eliminación. Recomendamos deseleccionar esta opción, en Configuración de la impresión -> Material de soporte.
Esta característica solo se puede utilizar con Soportes Orgánicos cuando se utiliza un Torre de limpieza. Cambiar el extrusor de soportes con cualquier otro estilo de soporte que no sea Orgánico desactivará la torre de limpieza.
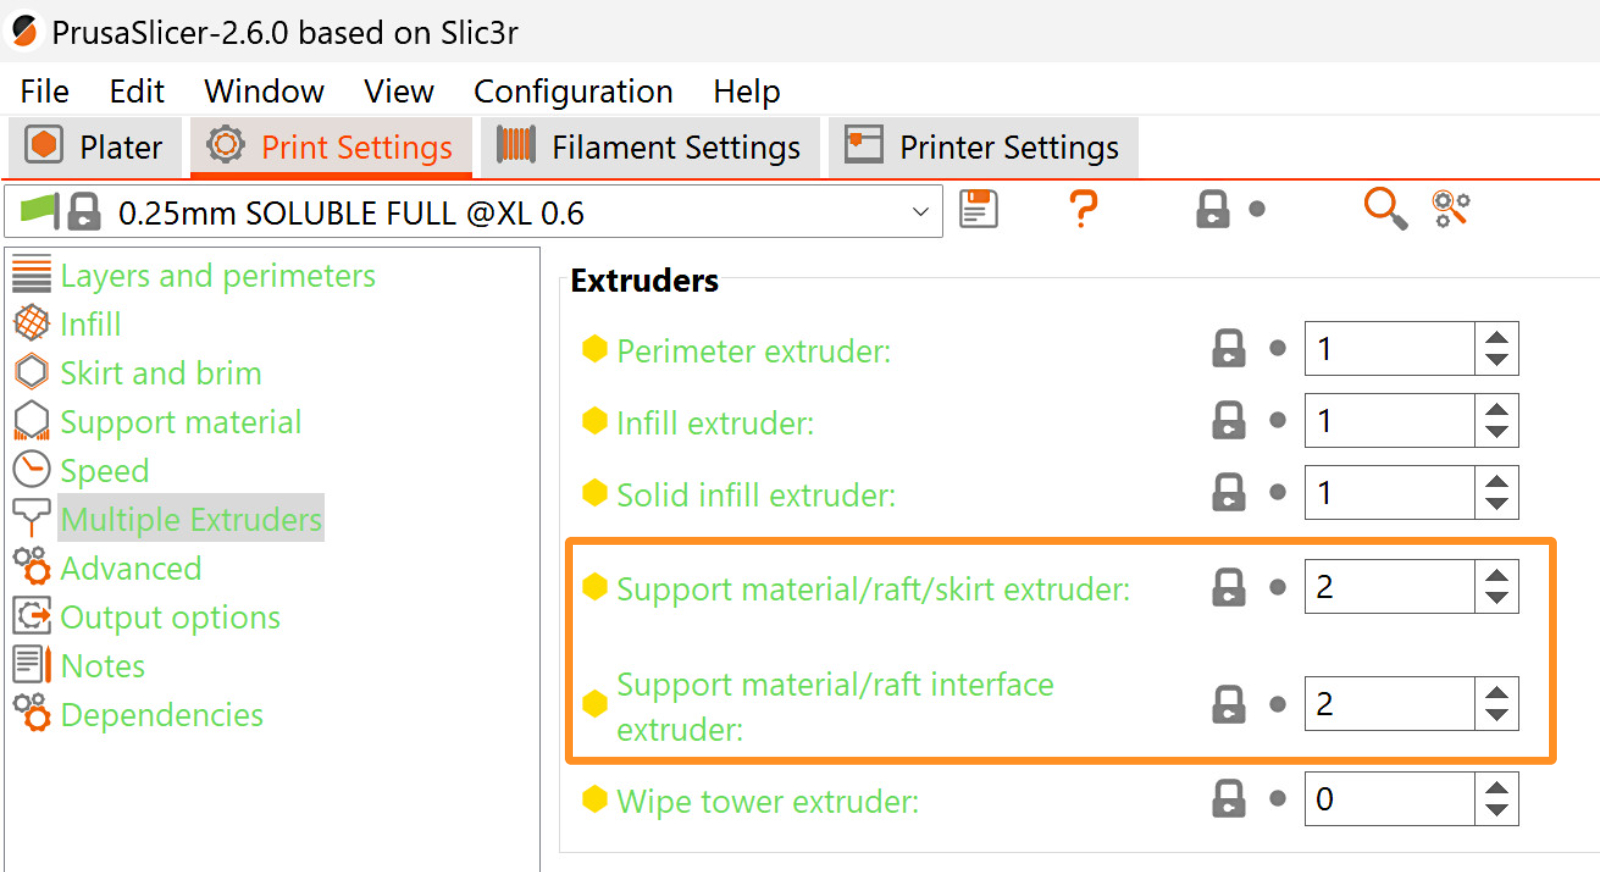
Por defecto, el material de soporte está configurado para estar en el Extrusor 2. Si es necesario, puede cambiarlo seleccionando la opción extrusor para el material de soporte/falsa/balsa y el extrusor para la interfaz de soporte/falda/balsa en Configuración de Impresión -> Extrusores Múltiples.
Filamento flexible
Por su blandura, Los filamentos flexibles necesitan una atención especial cuando se cargan. Si decide utilizar un filamento flexible, siga las instrucciones del vídeo siguiente:
Otros ajustes de PrusaSlicer
Temperatura de la base calefactable
Por defecto, en la primera capa, la temperatura de la base calefactable se basa en el primer material cargado en la impresión; a partir de la segunda capa, se basa en el primer filamento cargado en la segunda capa. Dependiendo de la combinación de filamentos, esto puede generar problemas, como la falta de adherencia.
PrusaSlicer muestra una advertencia en caso de que las temperaturas de la base calefactable difieran significativamente.

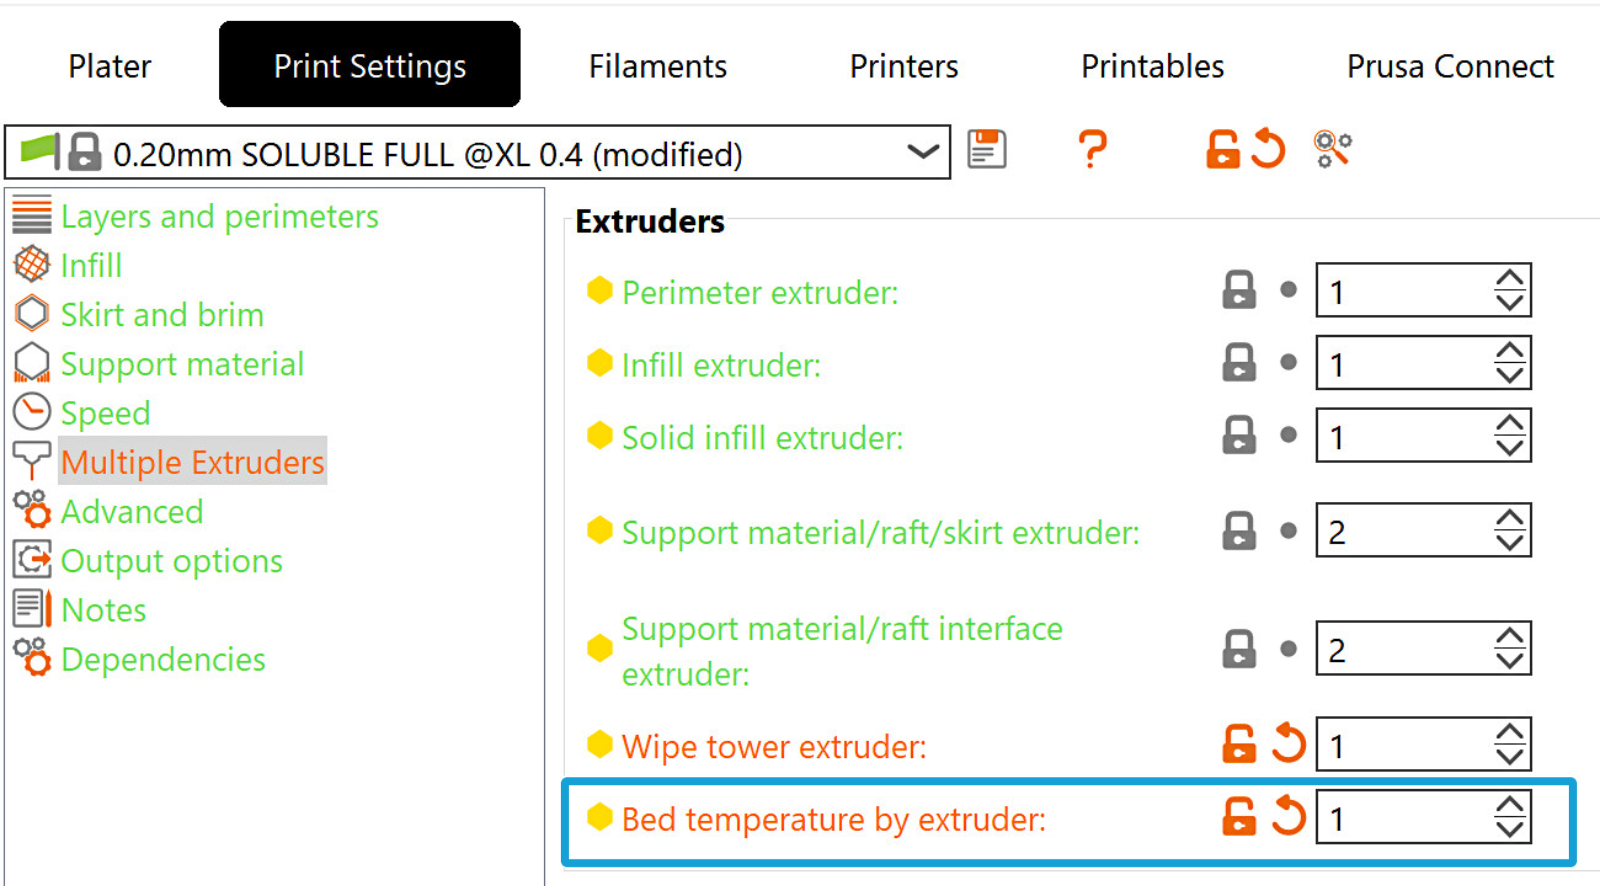
Para modificar esta configuración, navega hasta la opción en Configuración de Impresión -> Múltiples Extrusores -> Extrusores -> Temperatura de la base según extrusor.
El ajuste especifica el extrusor del que se tomará la temperatura de la capa. Si se establece en cero, se utiliza la lógica predeterminada de que la temperatura de la primera capa siempre se toma del primer extrusor de impresión, y la temperatura de la base de todas las demás capas se toma del primer extrusor que imprime la segunda capa.
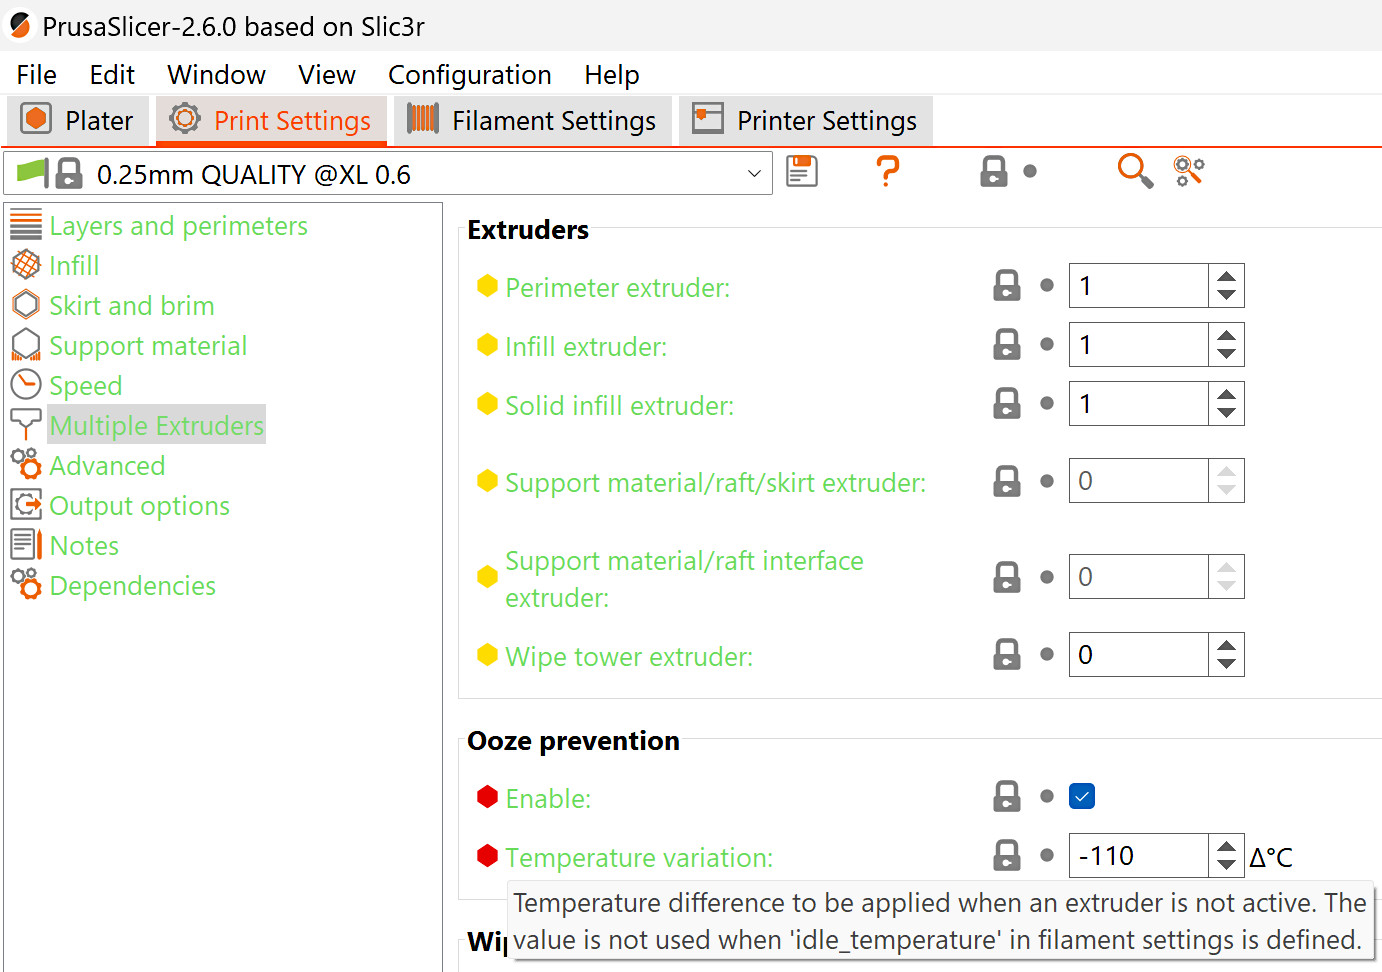
Prevención del goteo
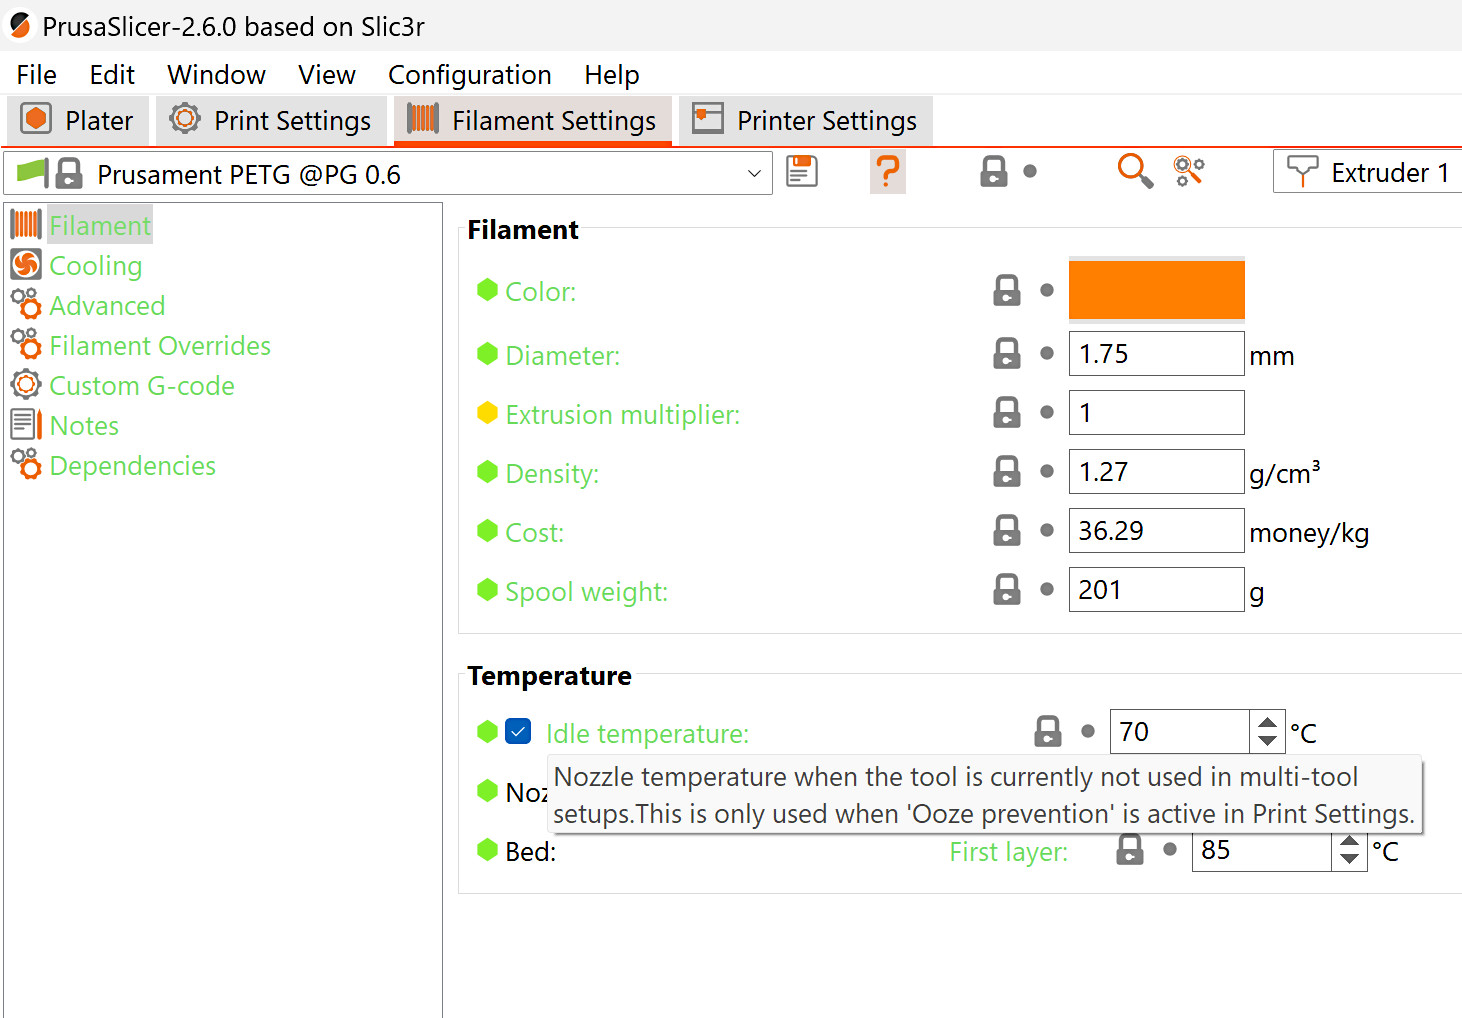
En PrusaSlicer, en Configuración de Impresión -> Extrusores Múltiples, deja activada la prevención del goteo. Esto permitirá que la temperatura de reposo en Configuración de Filamento -> Filamento -> Temperatura de reposo para permanecer a la mejor temperatura en reposo para el filamento específico. La temperatura en el ajuste de temperatura de reposo tiene prioridad sobre la variación de temperatura en el ajuste de prevención de goteo.
Si la prevención de goteo está desactivado, todos los extrusores permanecerán a su temperatura de impresión durante toda la impresión. Esto conduce a un goteo importante, la degradación del material en la zona de fusión, y posiblemente la obstrucción de la boquilla.
 |  |
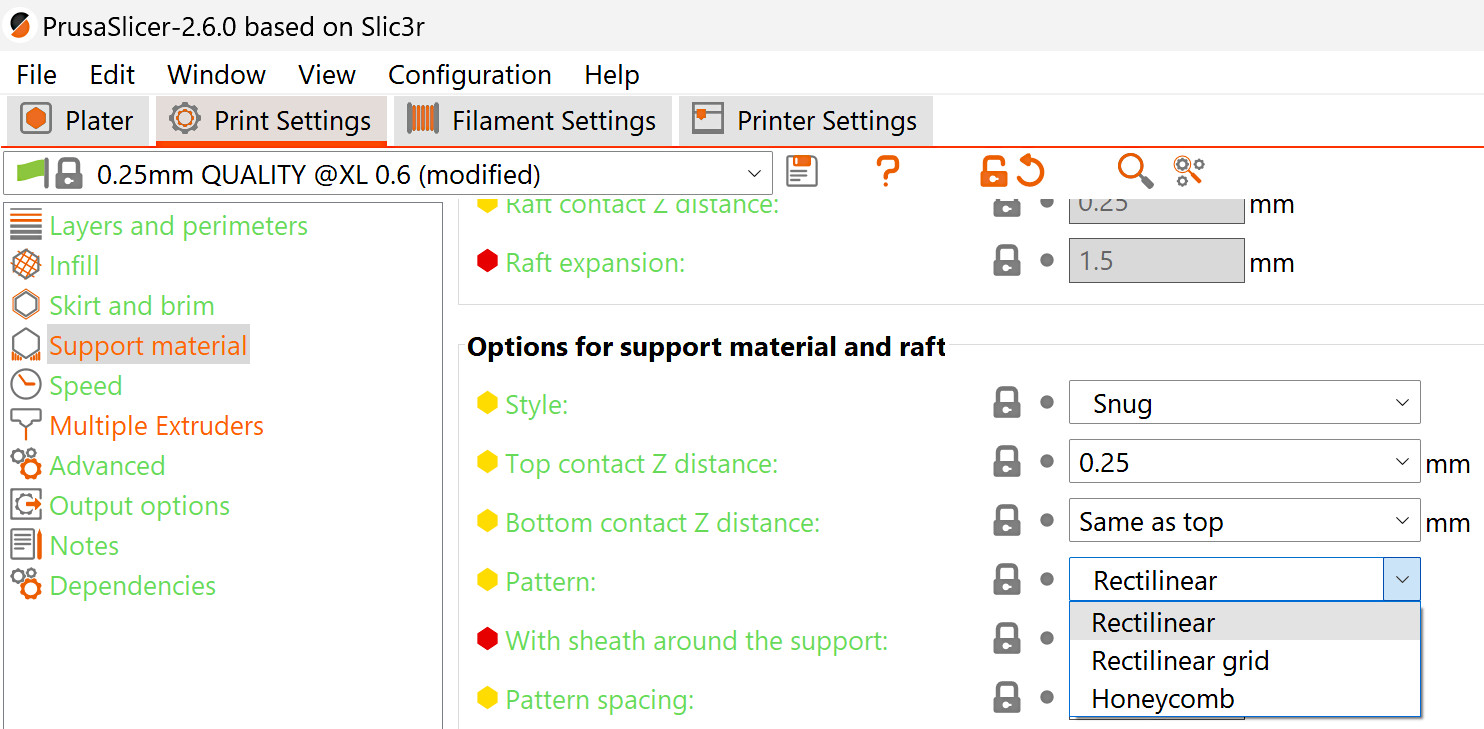
Consideraciones sobre los estilos de soporte
Al utilizar soportes ajustados, comprueba en el objeto laminado si hay partes del material de soporte que puedan ser muy altas y finas, ya que podrían caerse o romperse en medio de la impresión. Si lo observas en el objeto laminado, le recomendamos que cambia el material de soporte, patrón, y/o cambiar el estilo de soporte a rejilla.
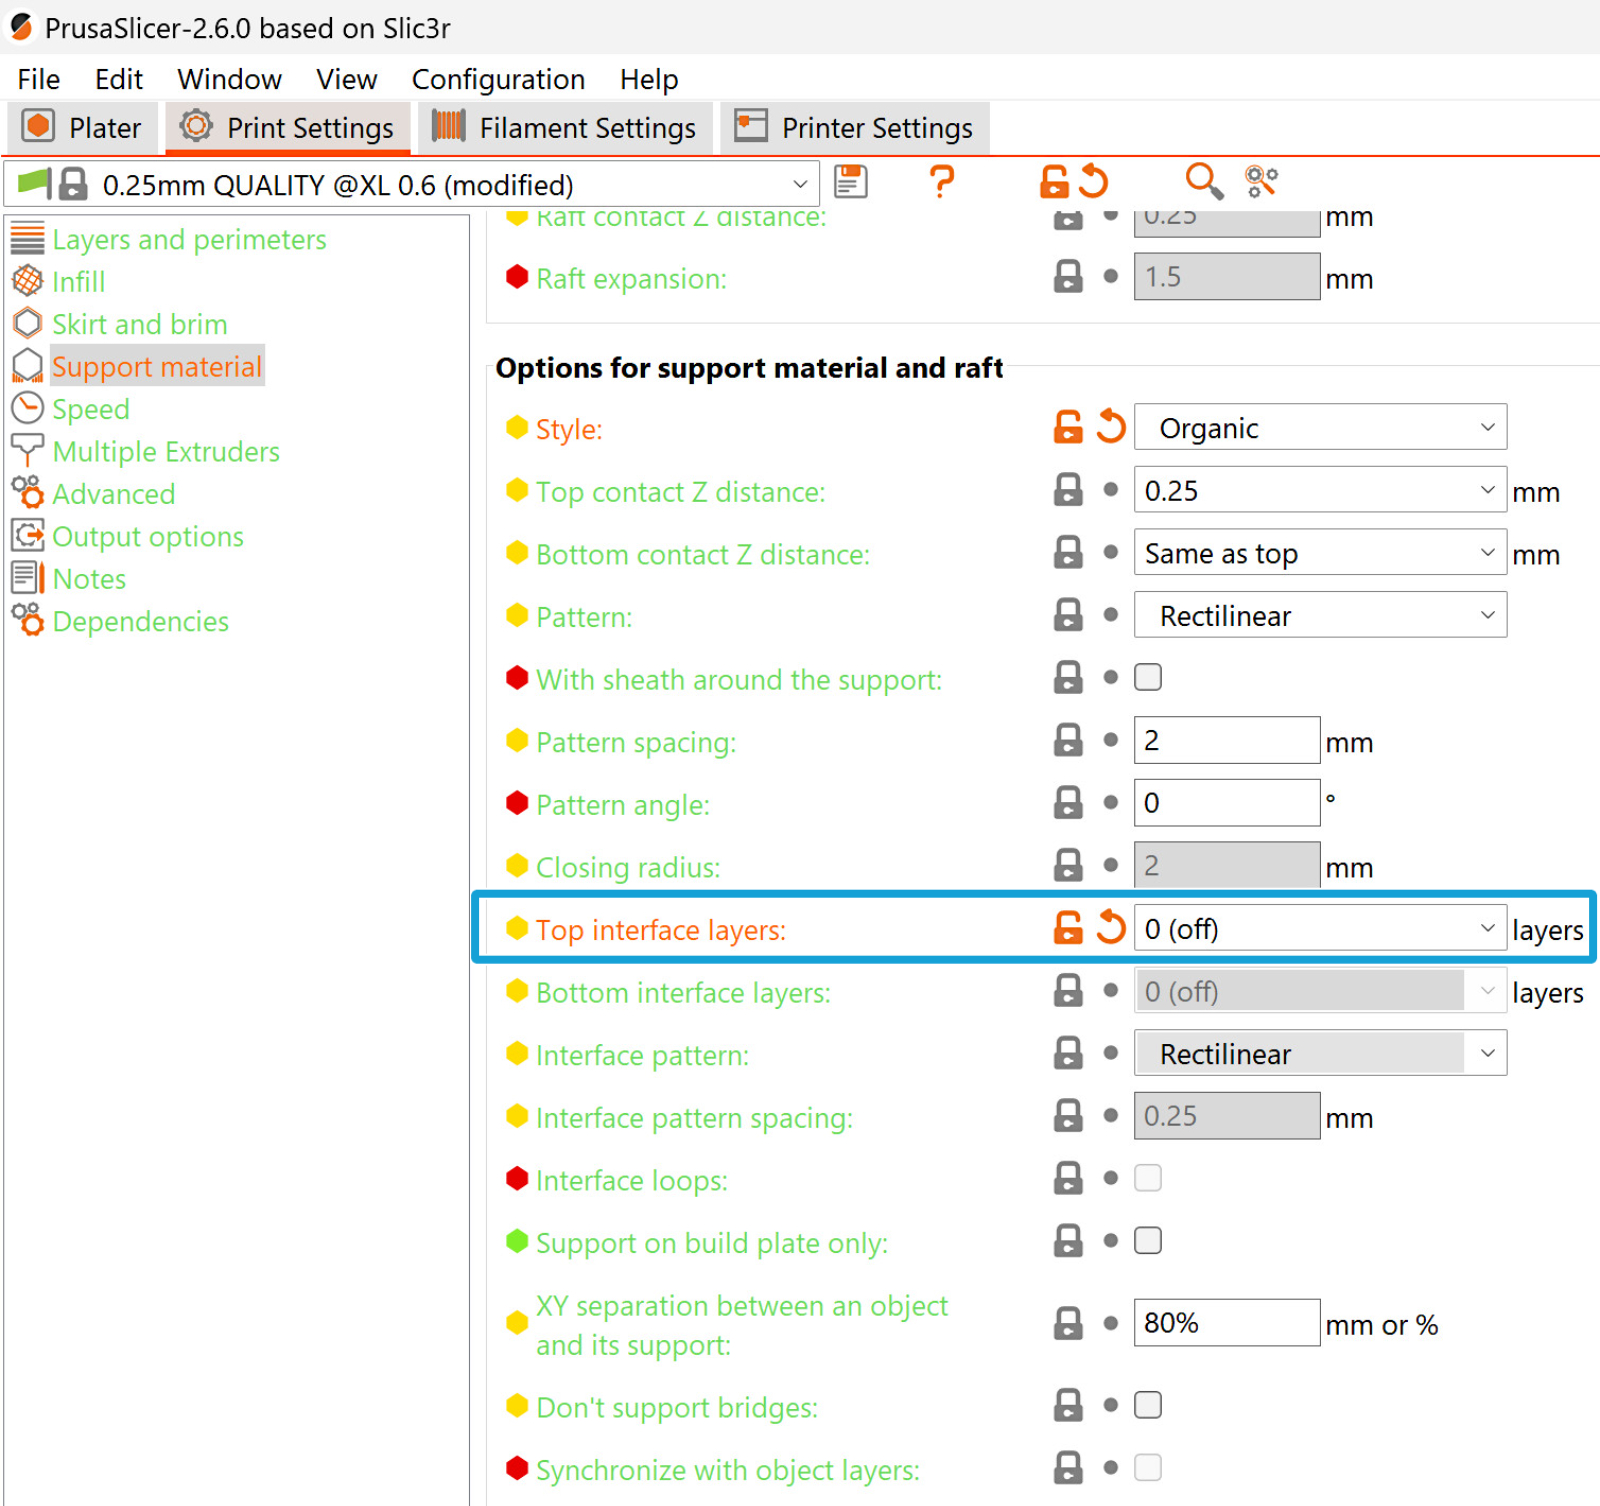
Al utilizar soportes orgánicos, no uses capas de interfaz, o crearán artefactos no imprimibles.