Funkce Input Shaper na tiskárnách Prusa CORE One/+ a Original PrusaMK4/S, MK3.9/S a MK3.5/S lze kalibrovat pomocí volitelného akcelerometru.
Sestava akcelerometru se skládá z malé desky plošných spojů uzavřené v tištěném krytu, který se připojuje k tiskárně. Upozorňujeme, že použití akcelerometru vyžaduje částečné rozebrání tiskárny.
Input shaper je zaklibrován už během výroby, takže tato kalibrace je u sériové tiskárny obvykle zbytečná. Pokud jste však na hardwaru tiskárny provedli nějaké úpravy, může být výhodné nastavení pomocí akcelerometru překalibrovat.
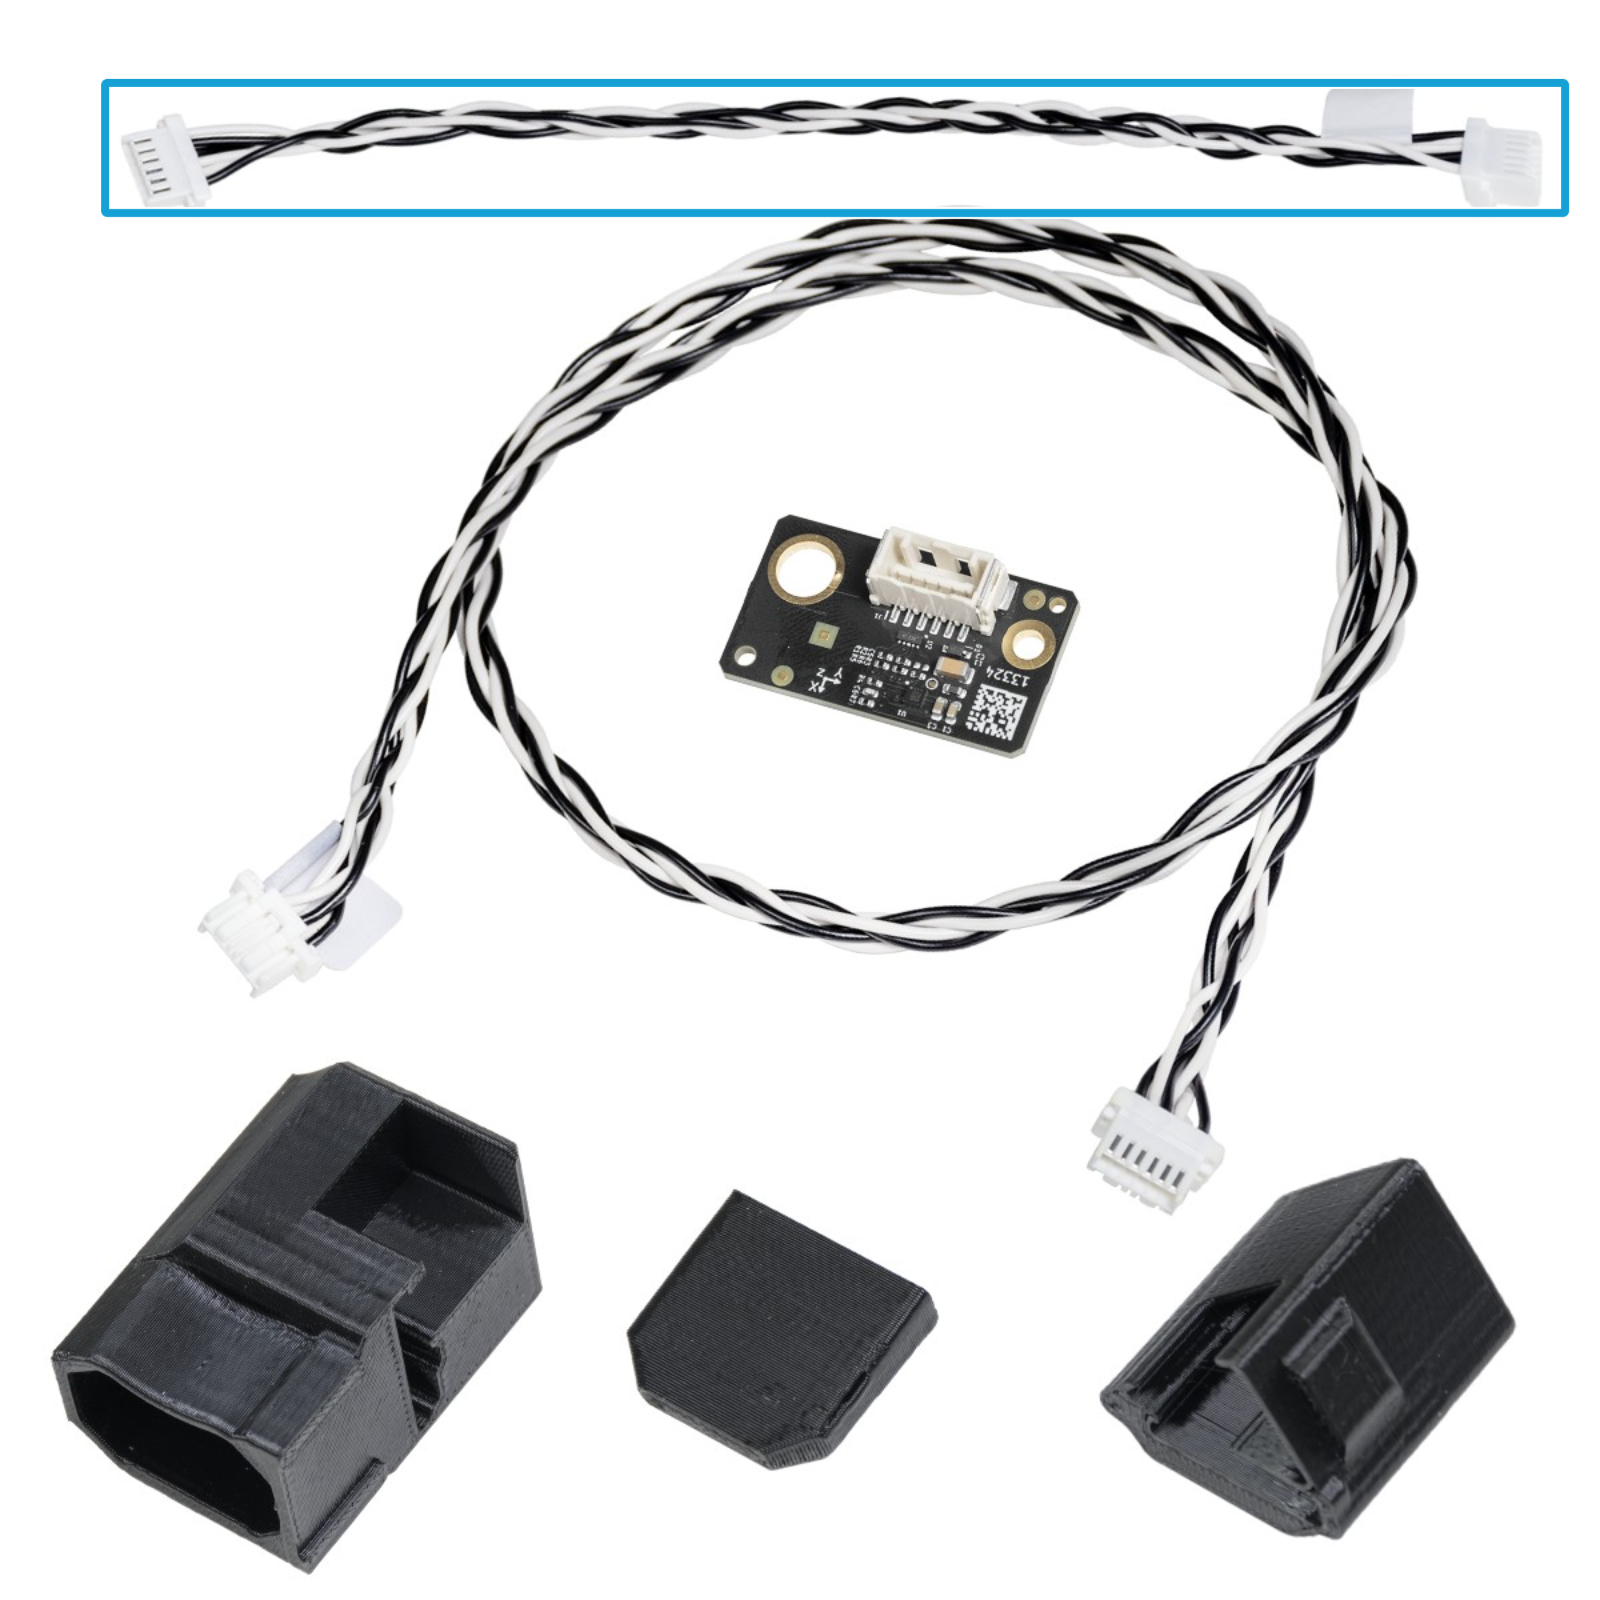
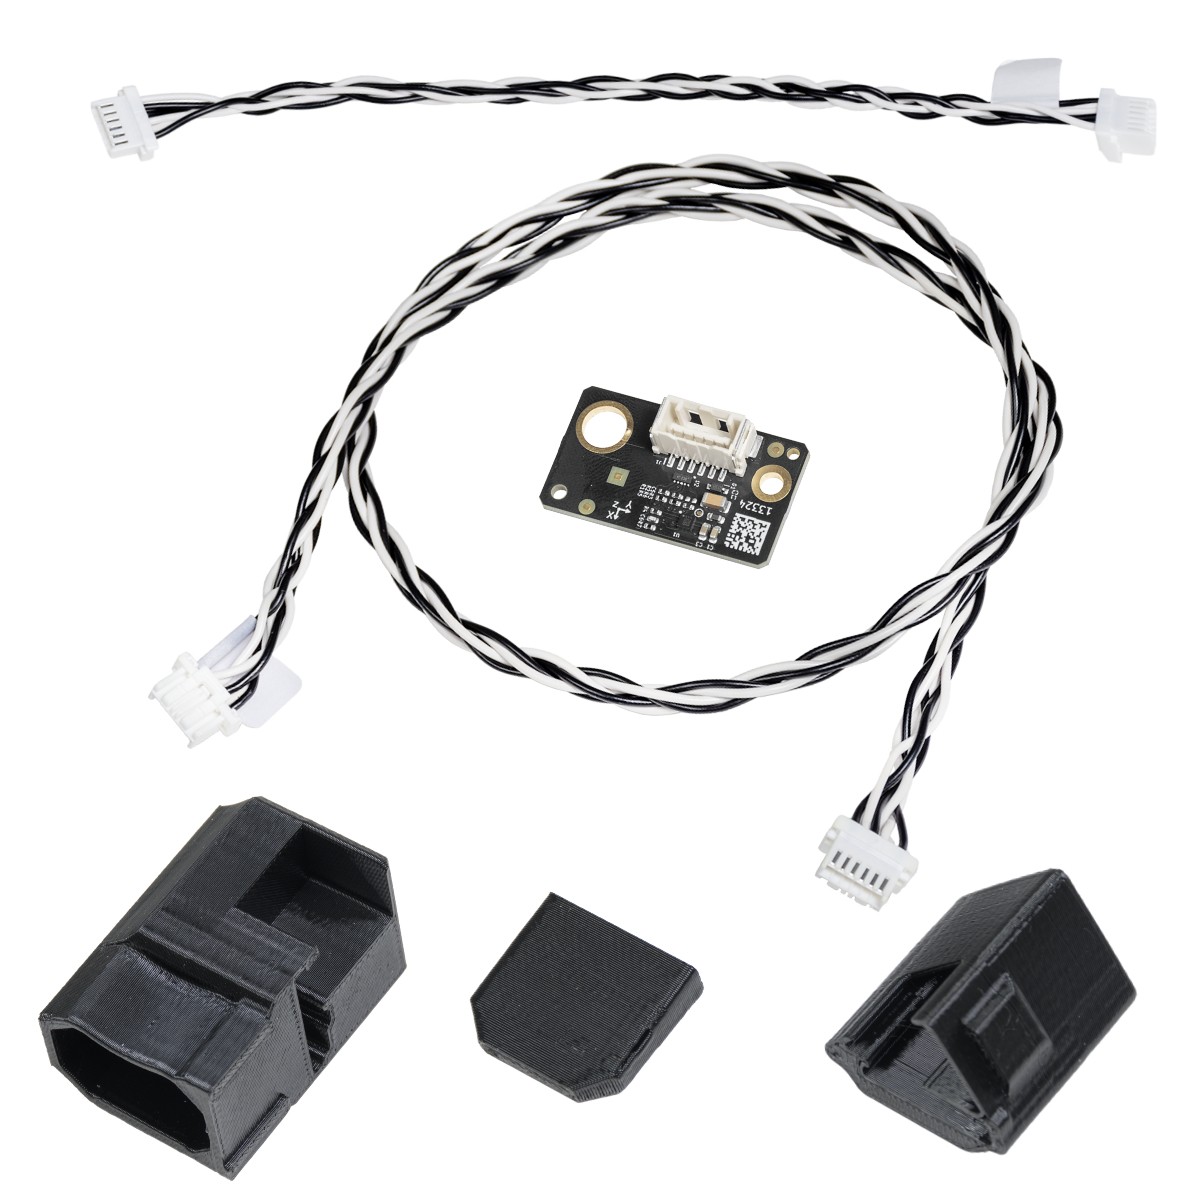 Obsah sady akcelerometru.
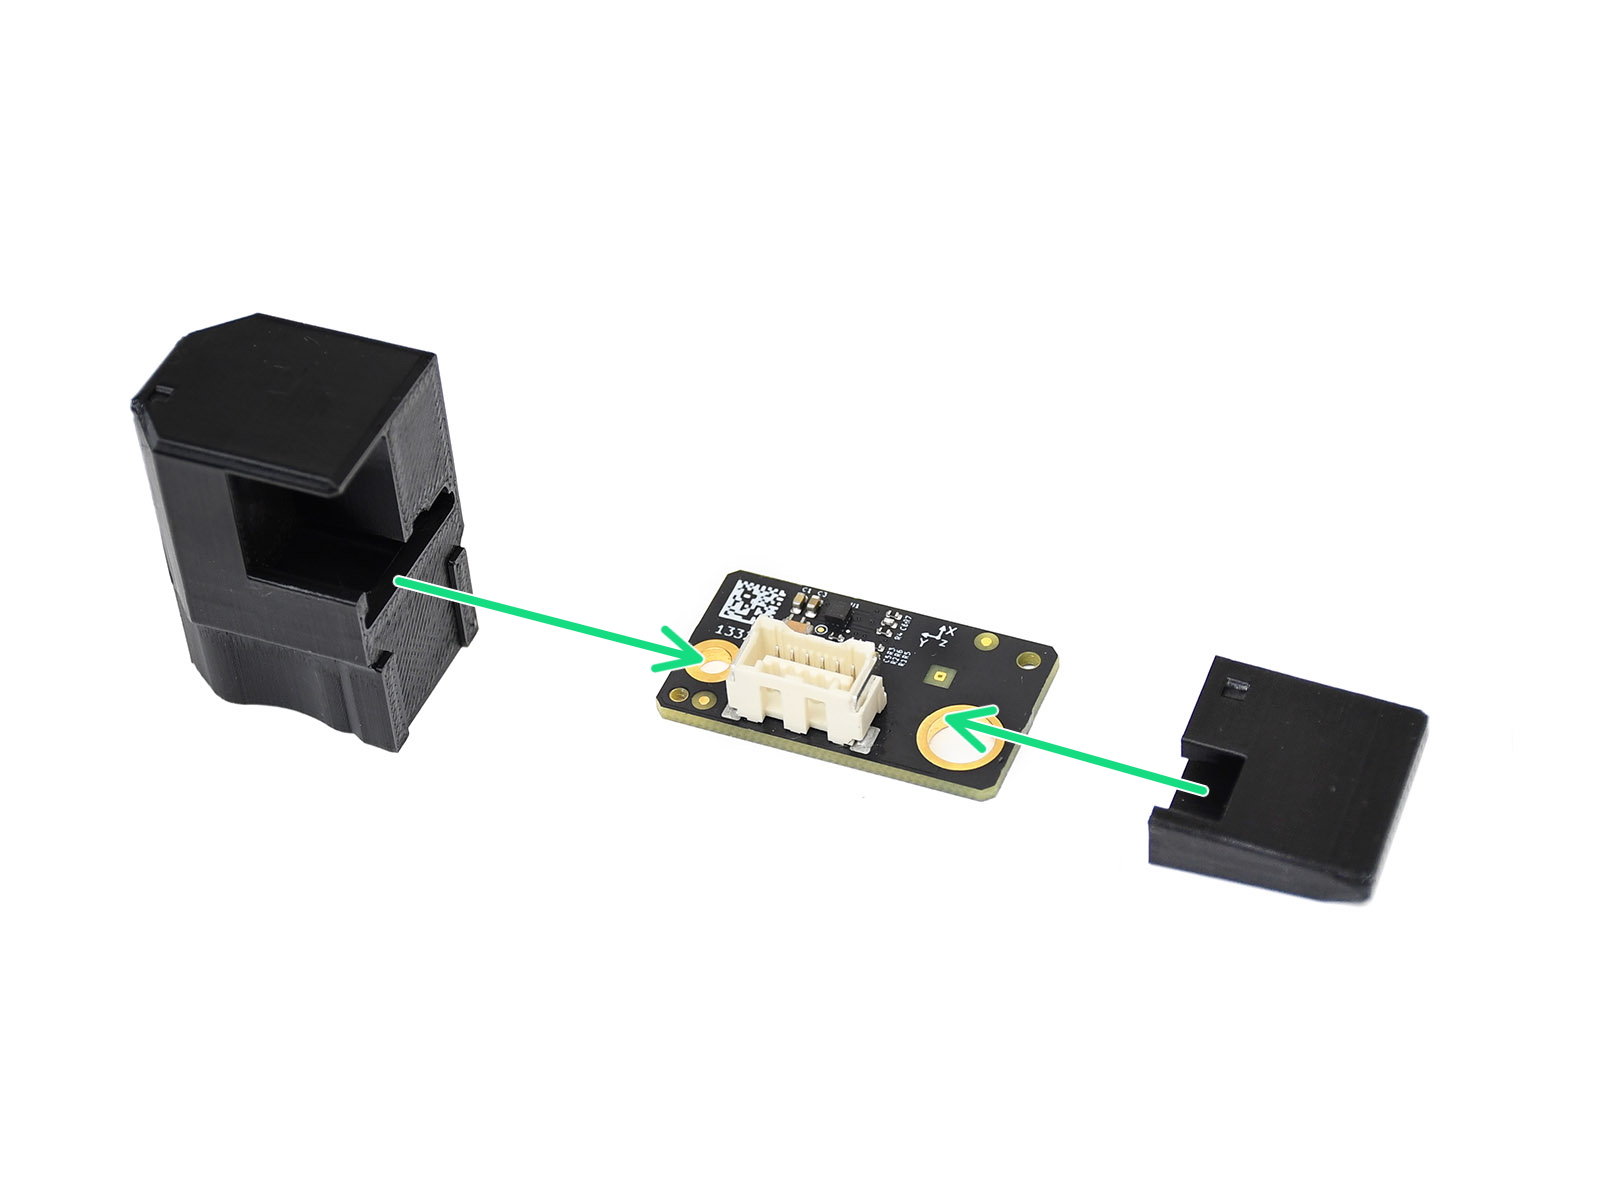 | 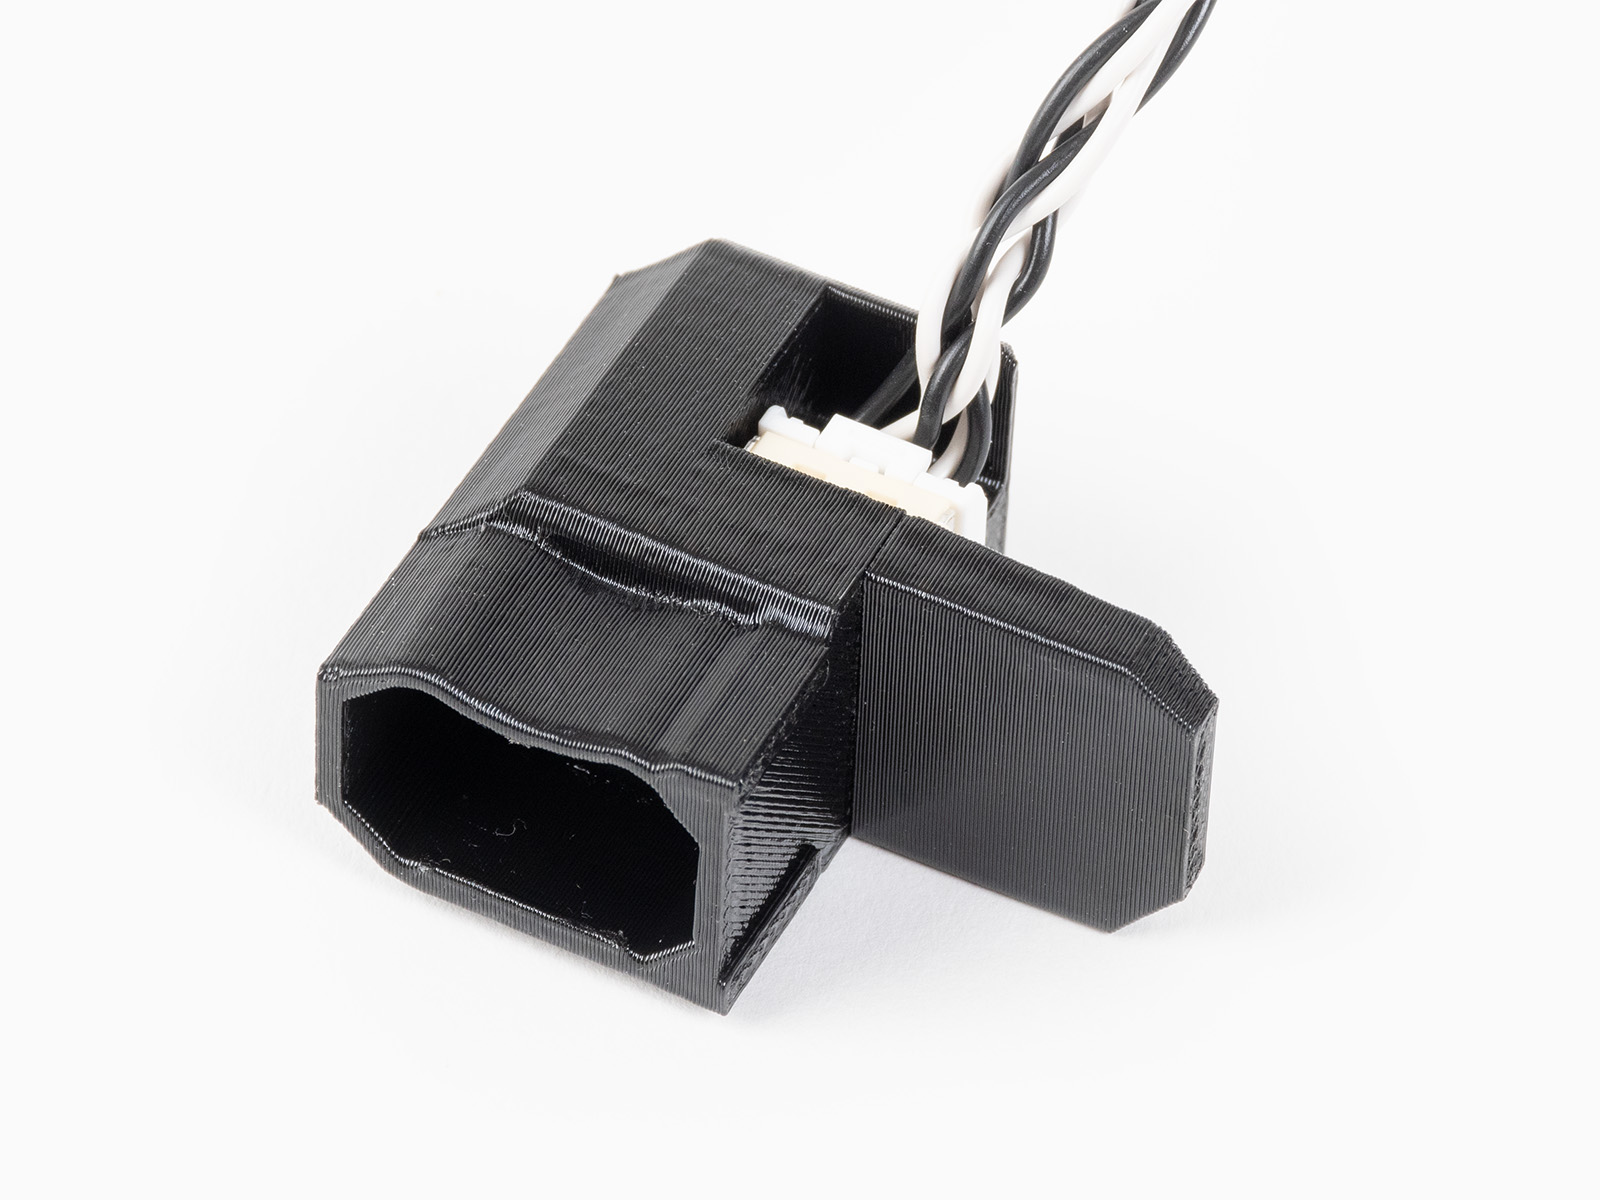 |
| Sestavení akcelerometru pro CORE One/+, MK4/S, MK3.9/S. | Sestavený akcelerometr pro CORE One/+, MK4/S, MK3.9/S. |
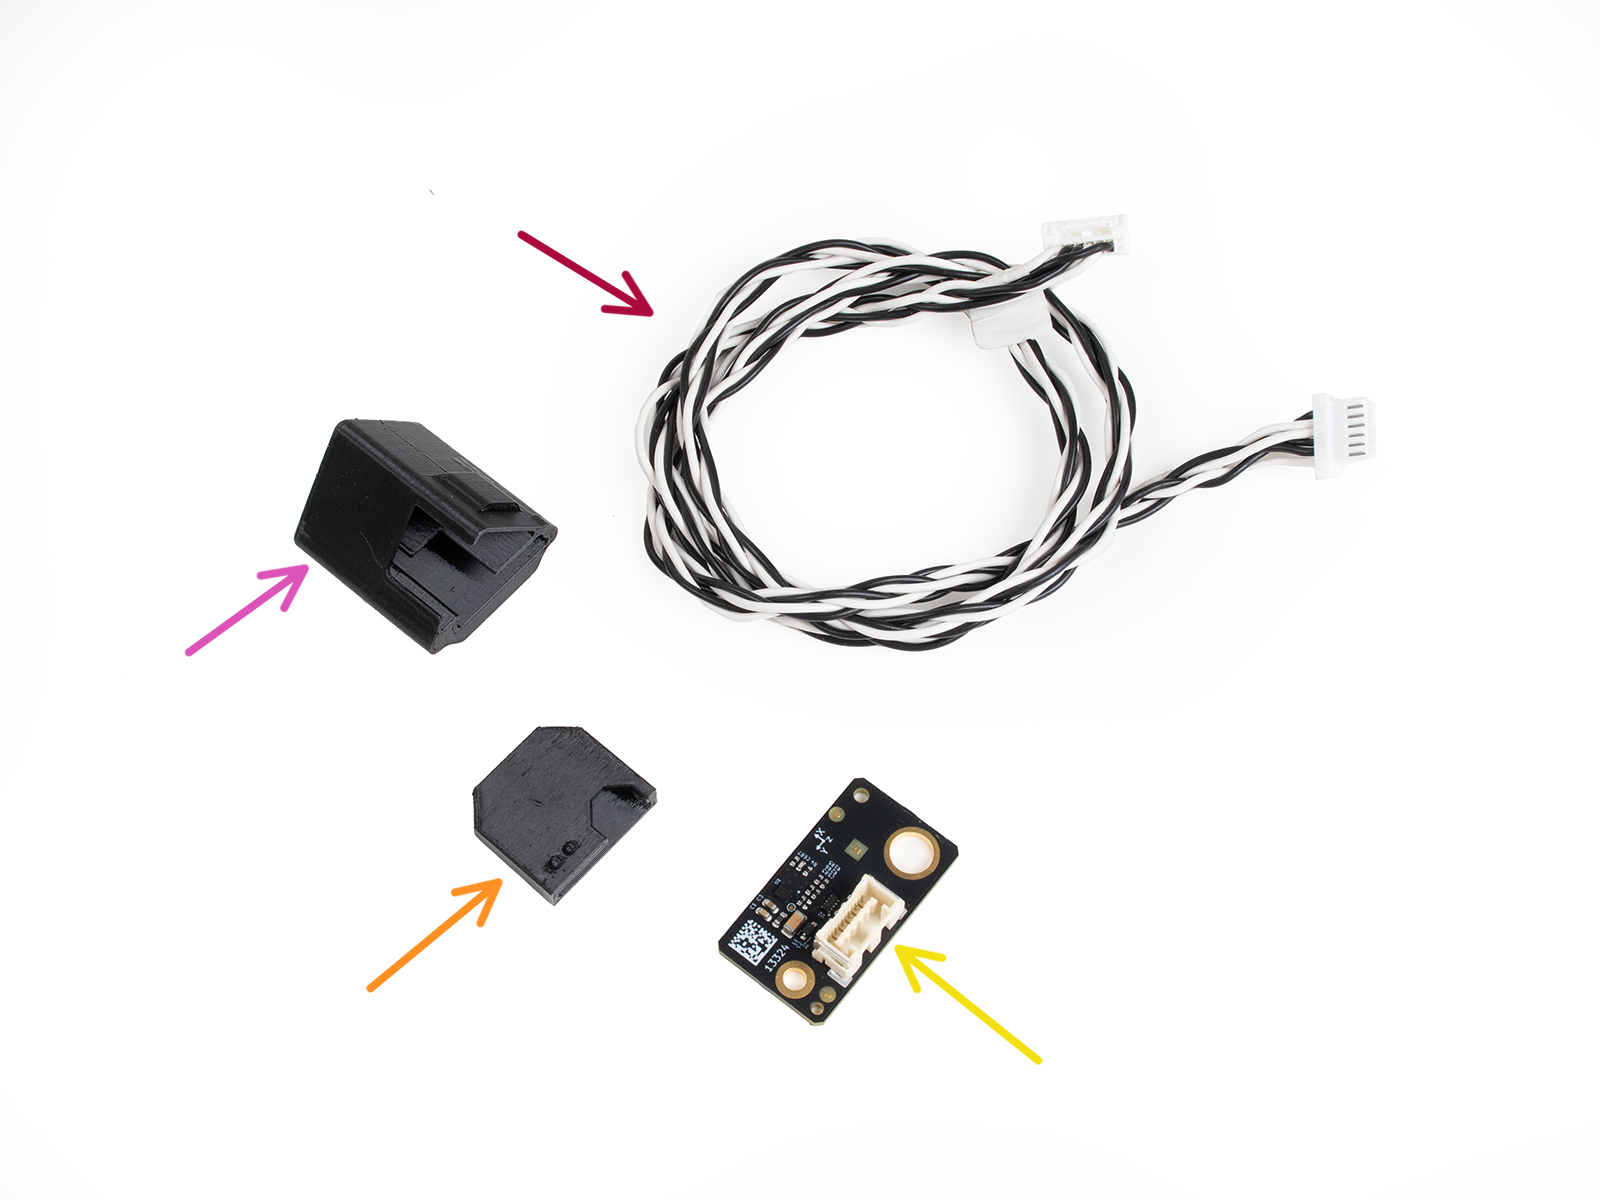 |  |
| Sestavení akcelerometru pro MK3.5/S | Sestavený akcelerometr pro MK3.5/S |
Prusa CORE One/+
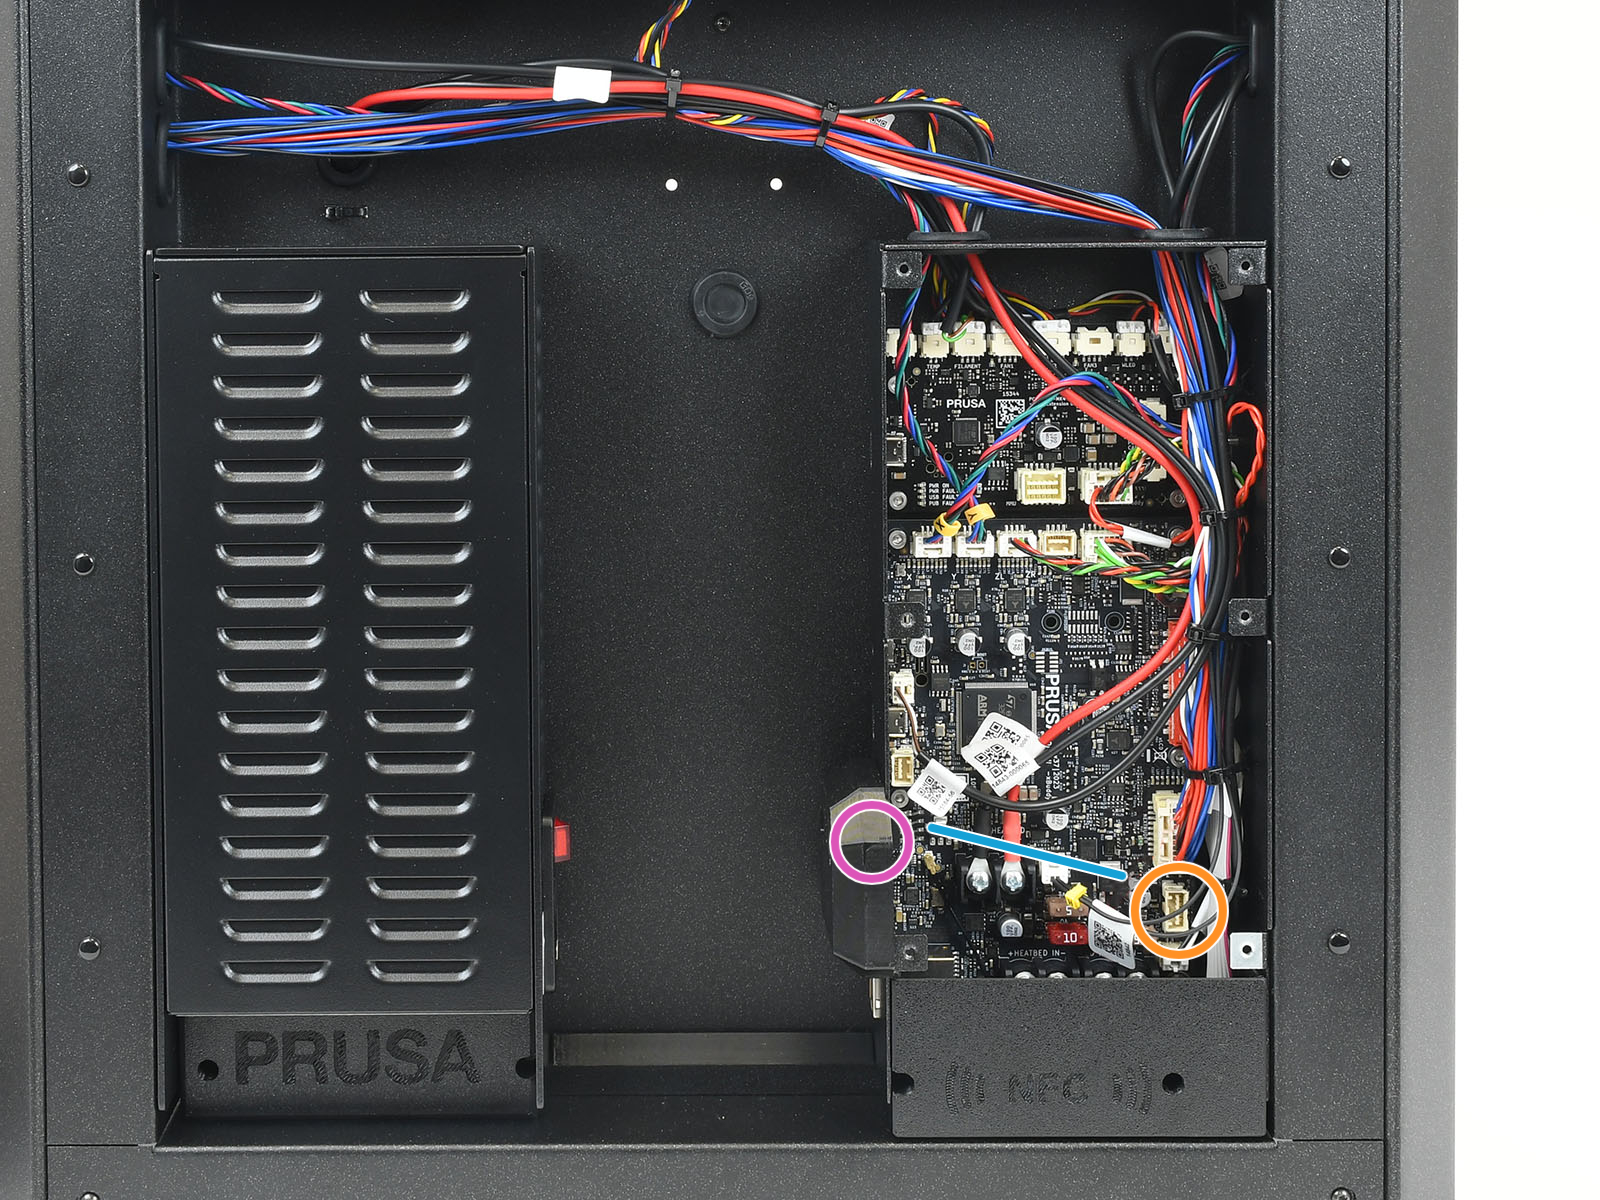
Dočasně odstraňte kryt desky Wi-Fi povolením šroubu M3x12.
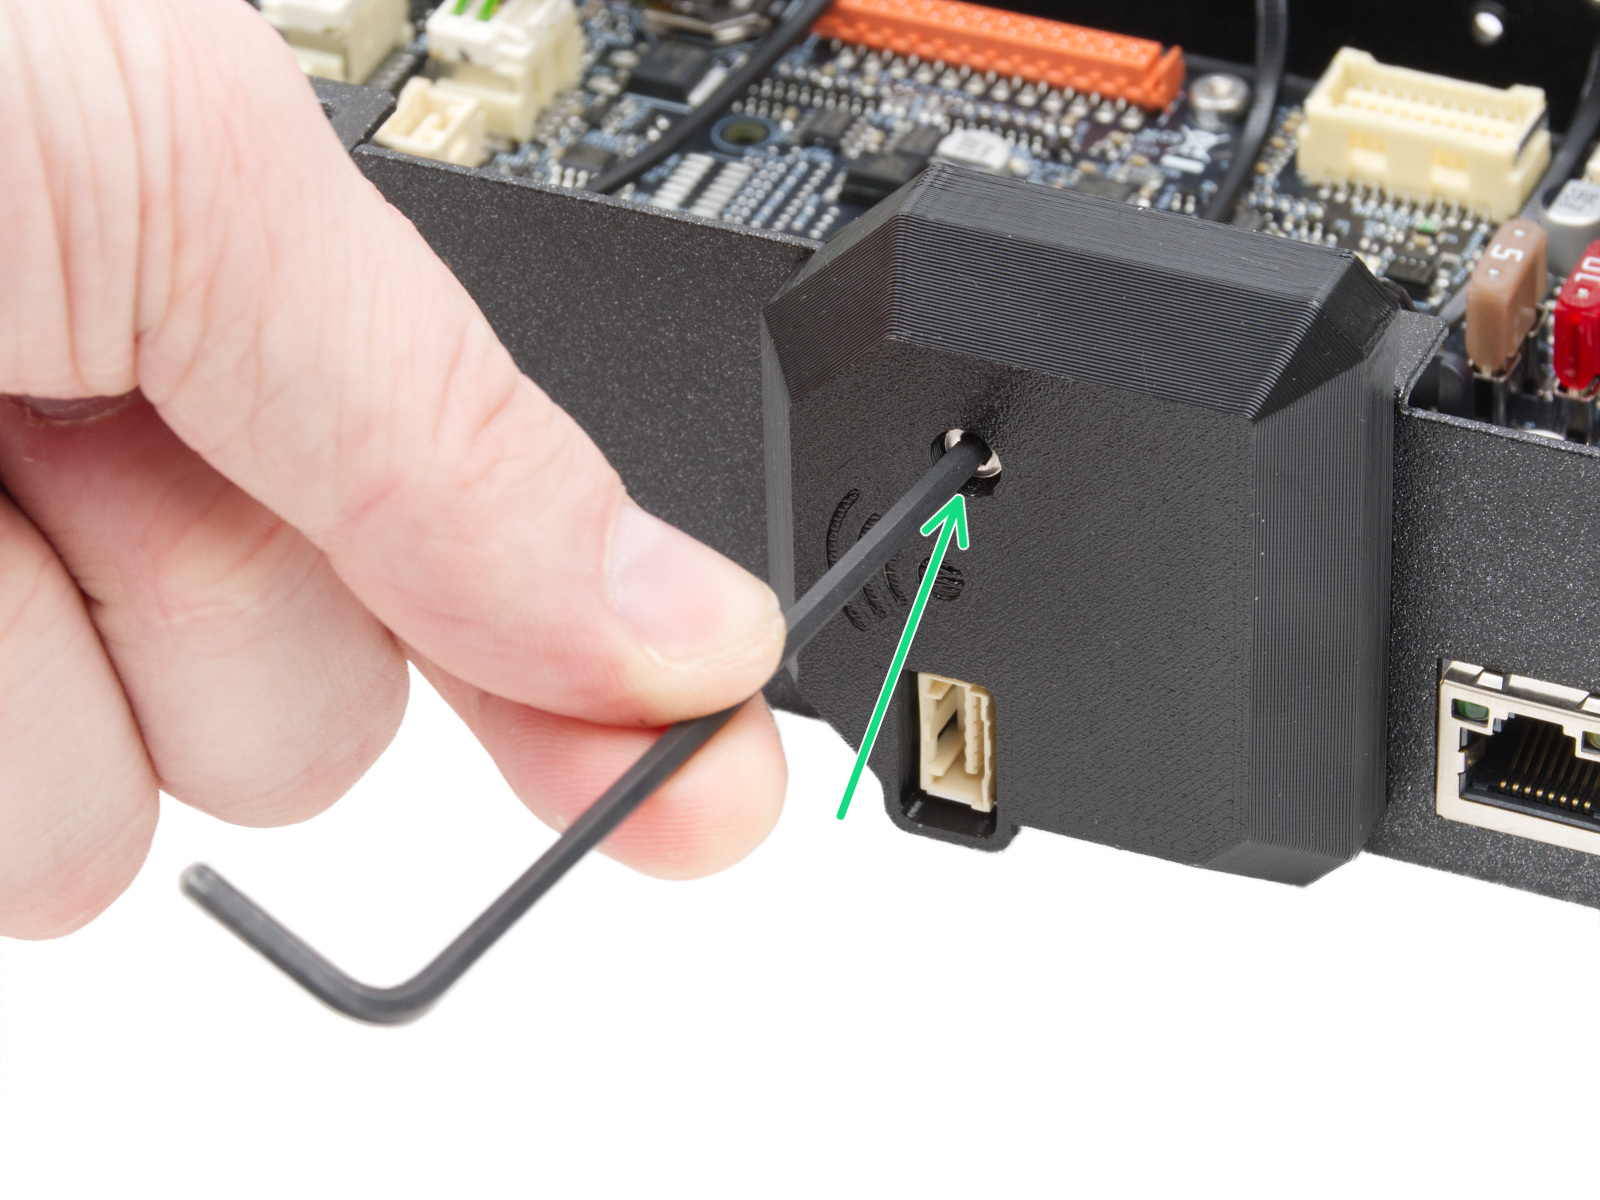
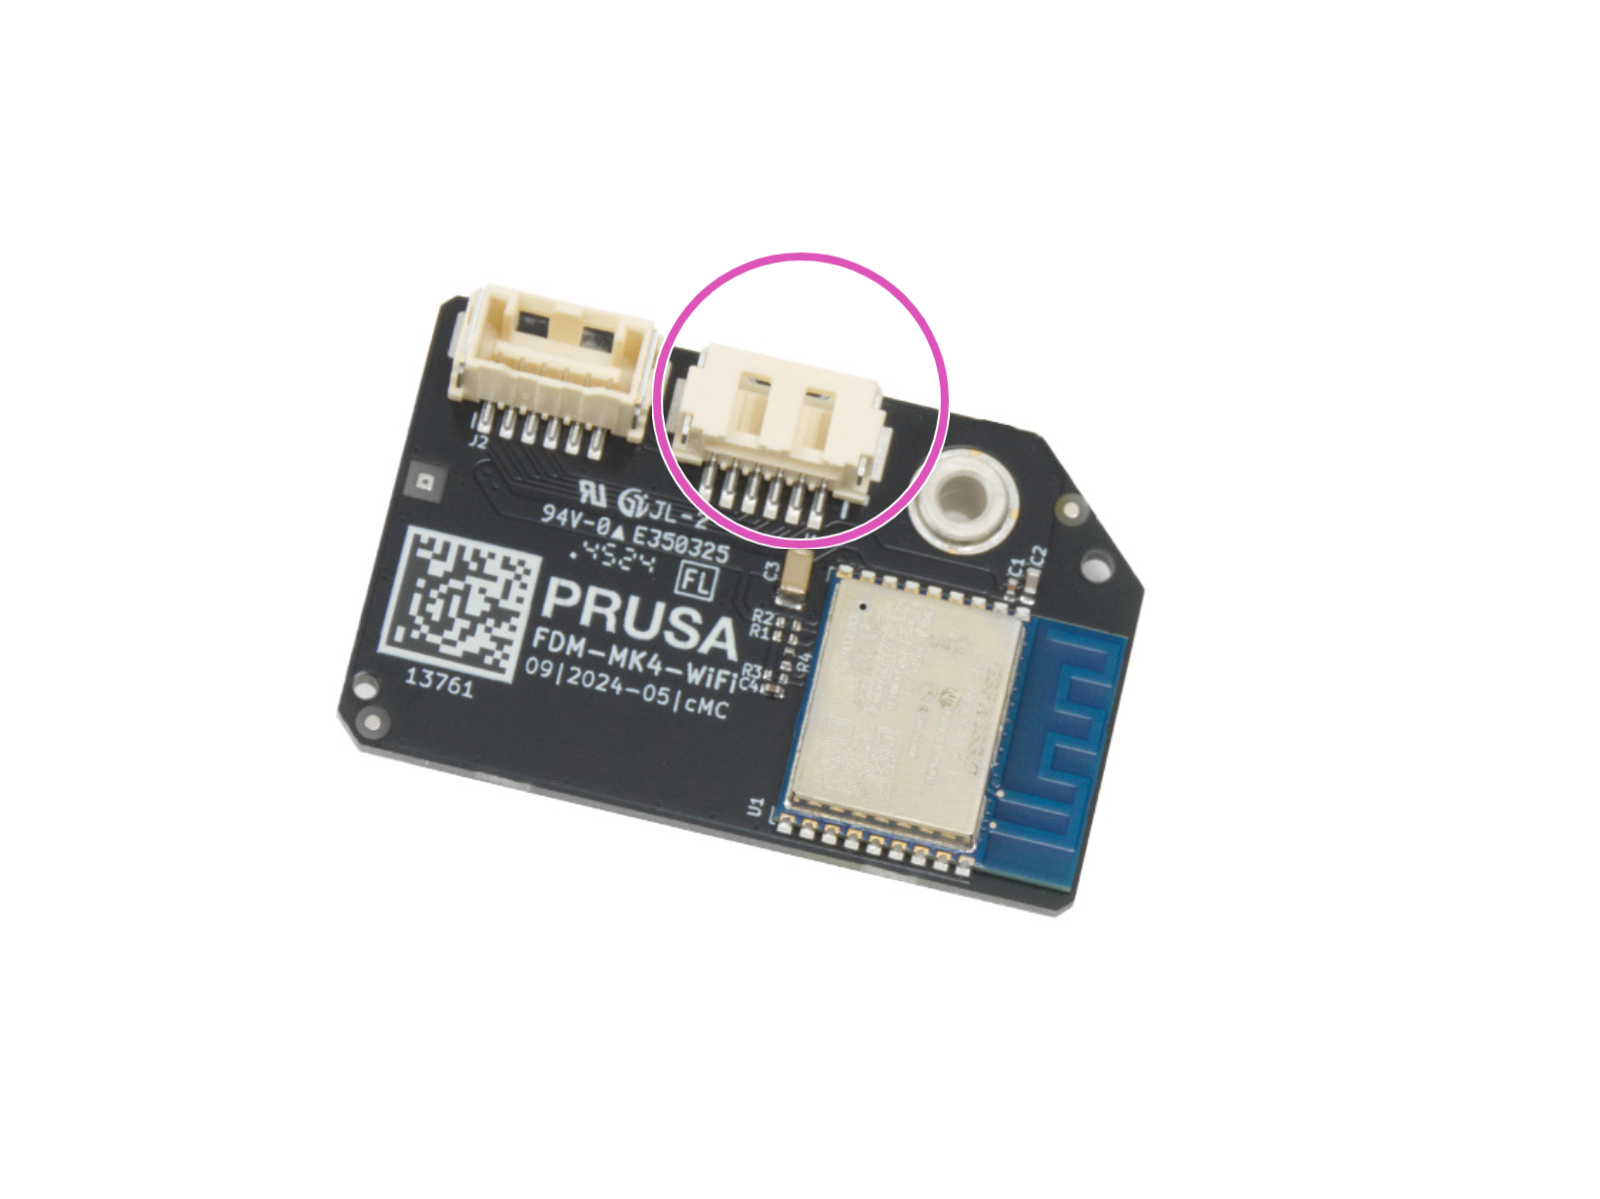
Připojte propojovací kabel mezi konektor xBuddy a konektor modulu Wi-Fi.
 |  |
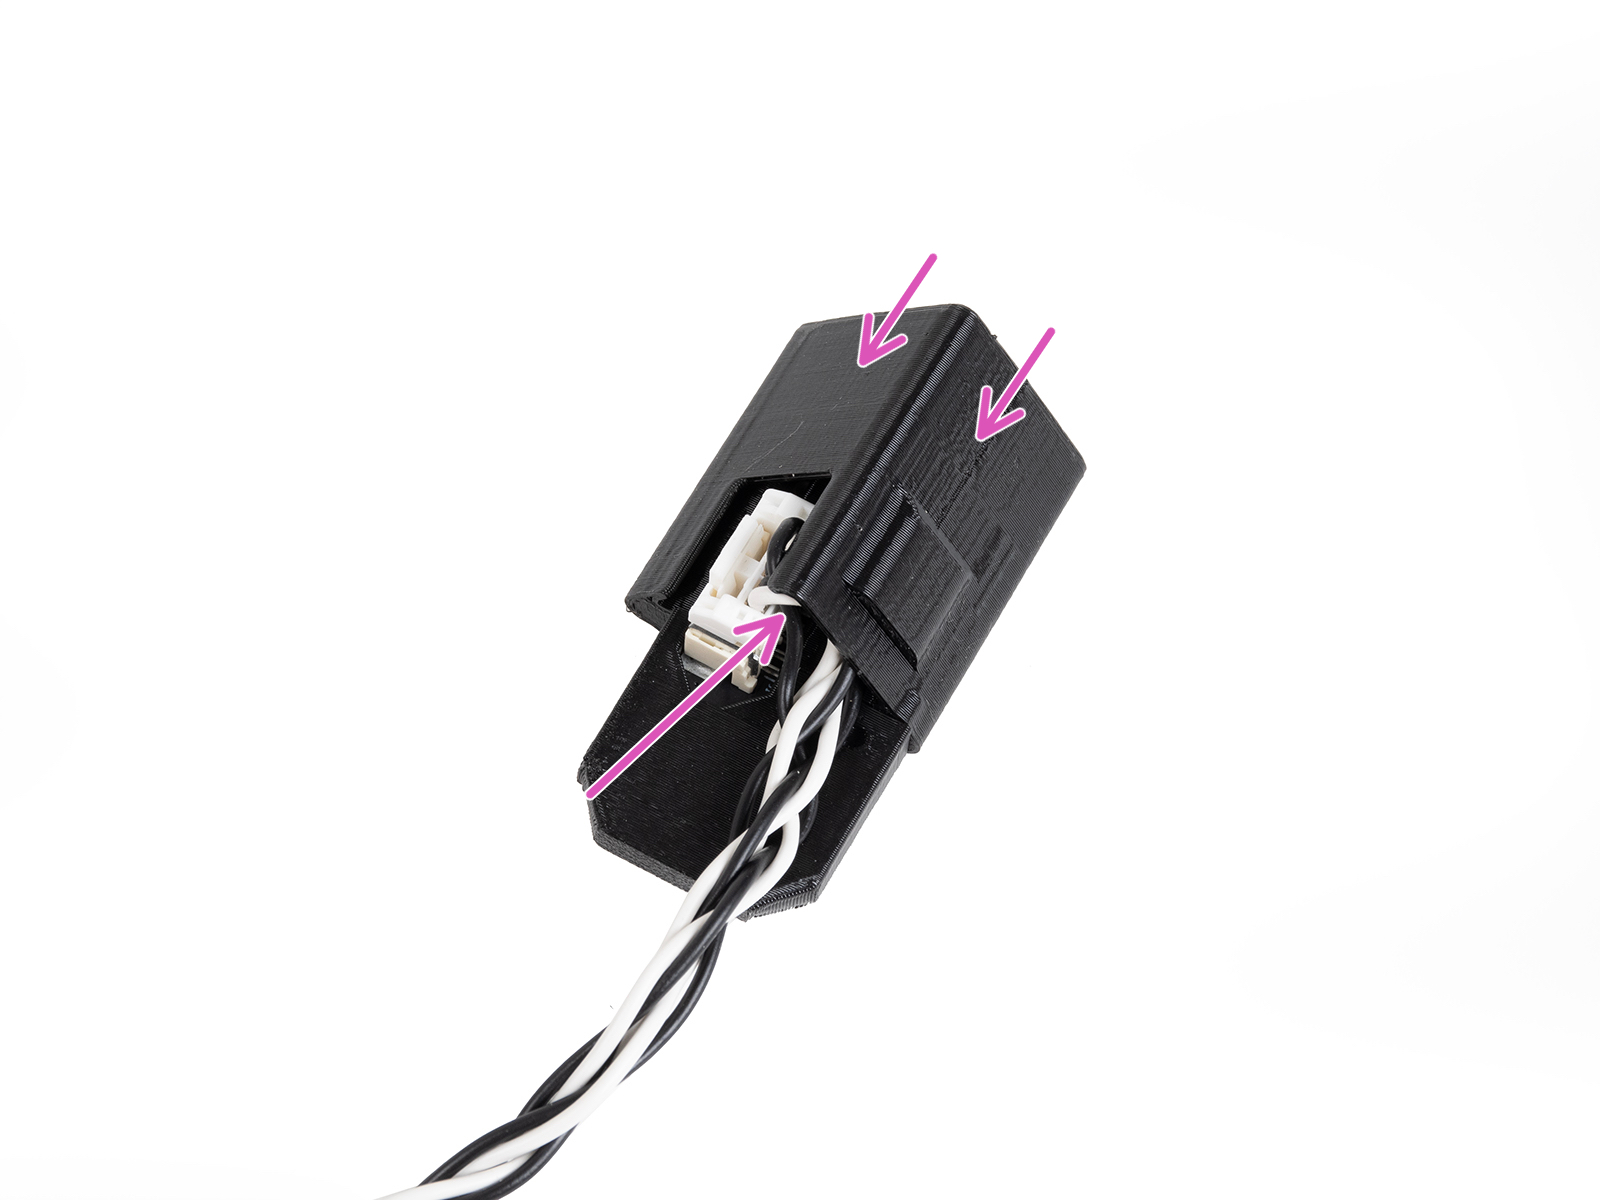
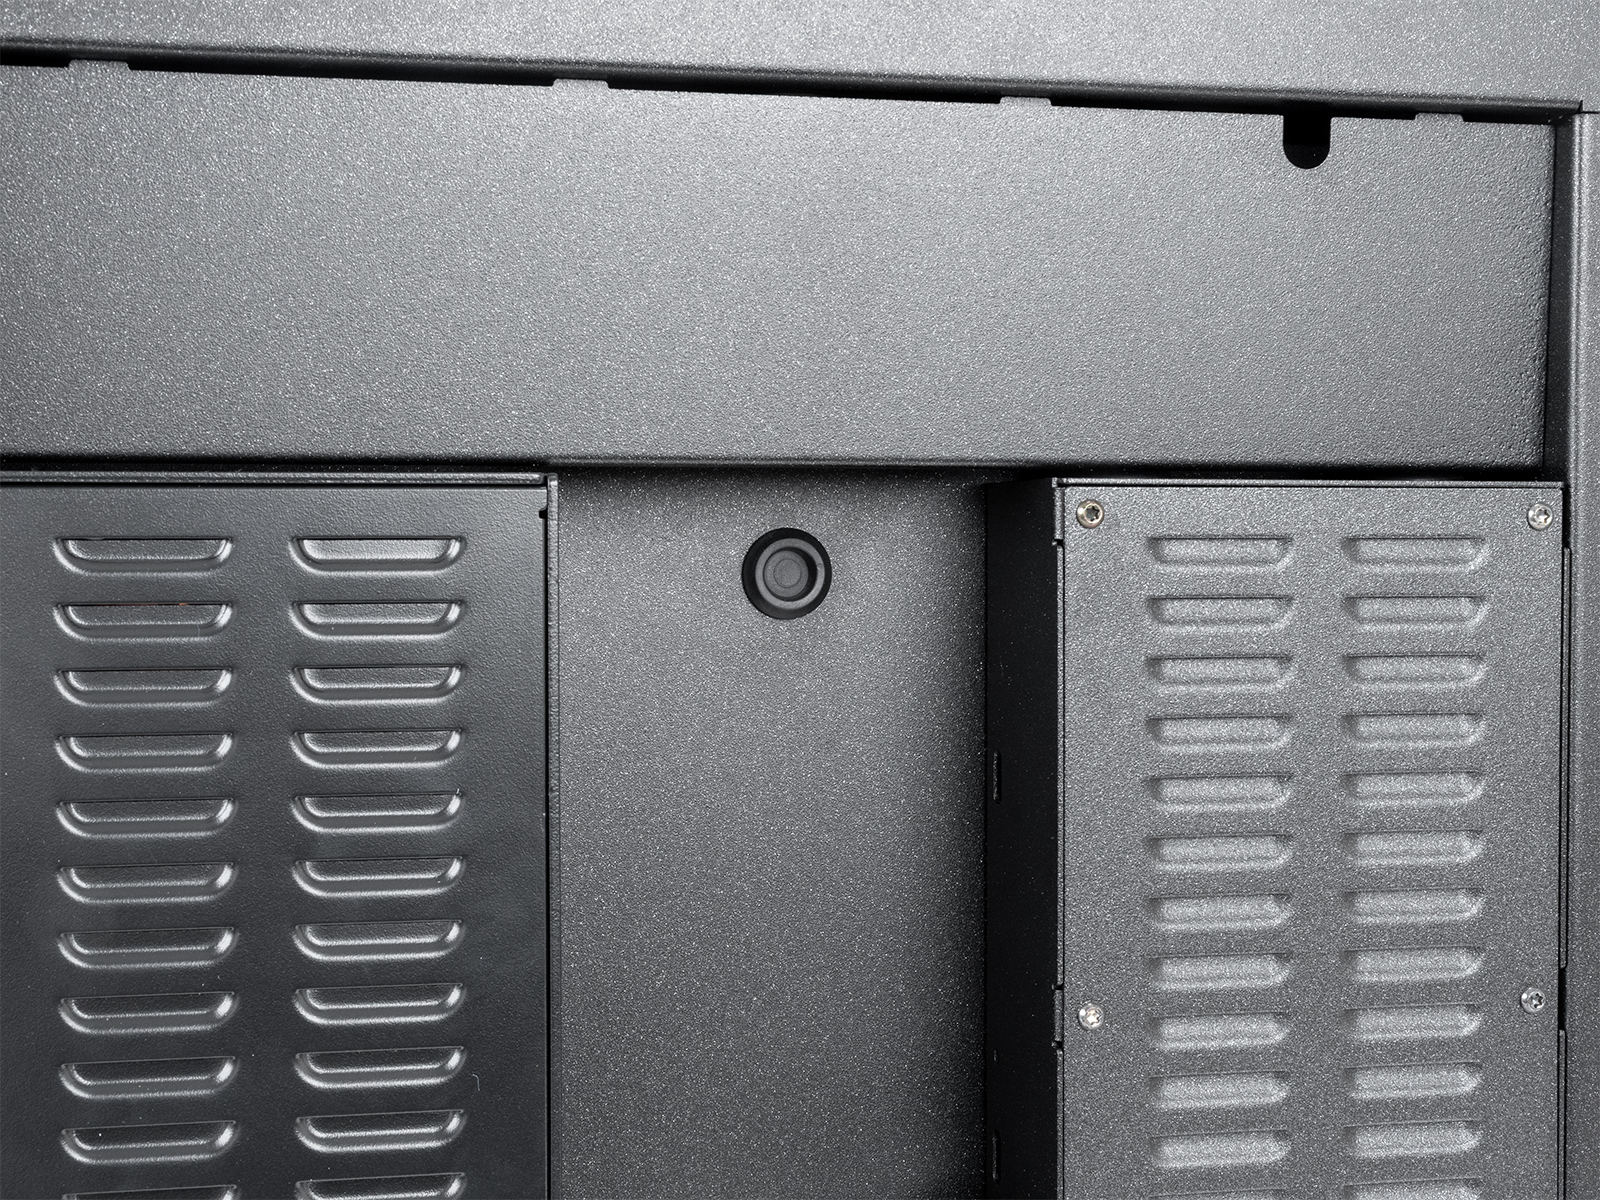
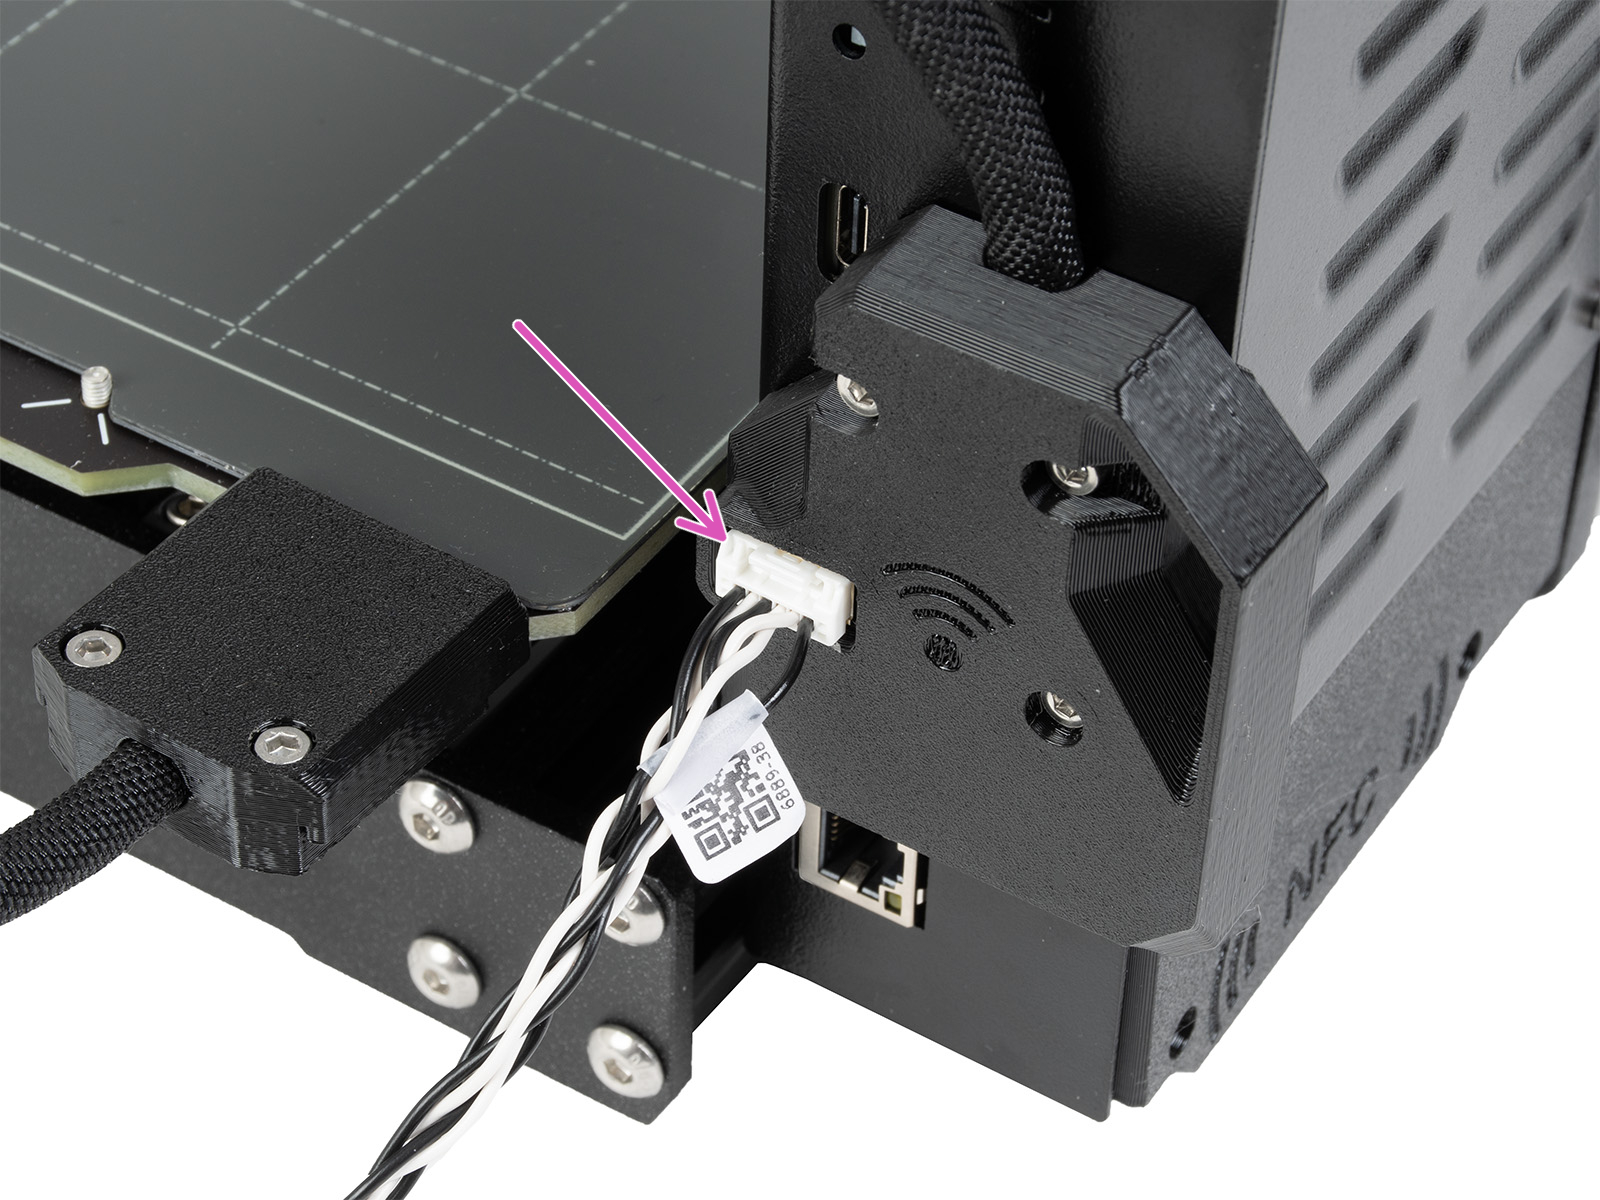
Sejměte kruhový kryt na zadní straně. Poté veďte kabel akcelerometru do otvoru.
 |  |
Připojte kabel akcelerometru ke konektoru na zadní straně tiskárny.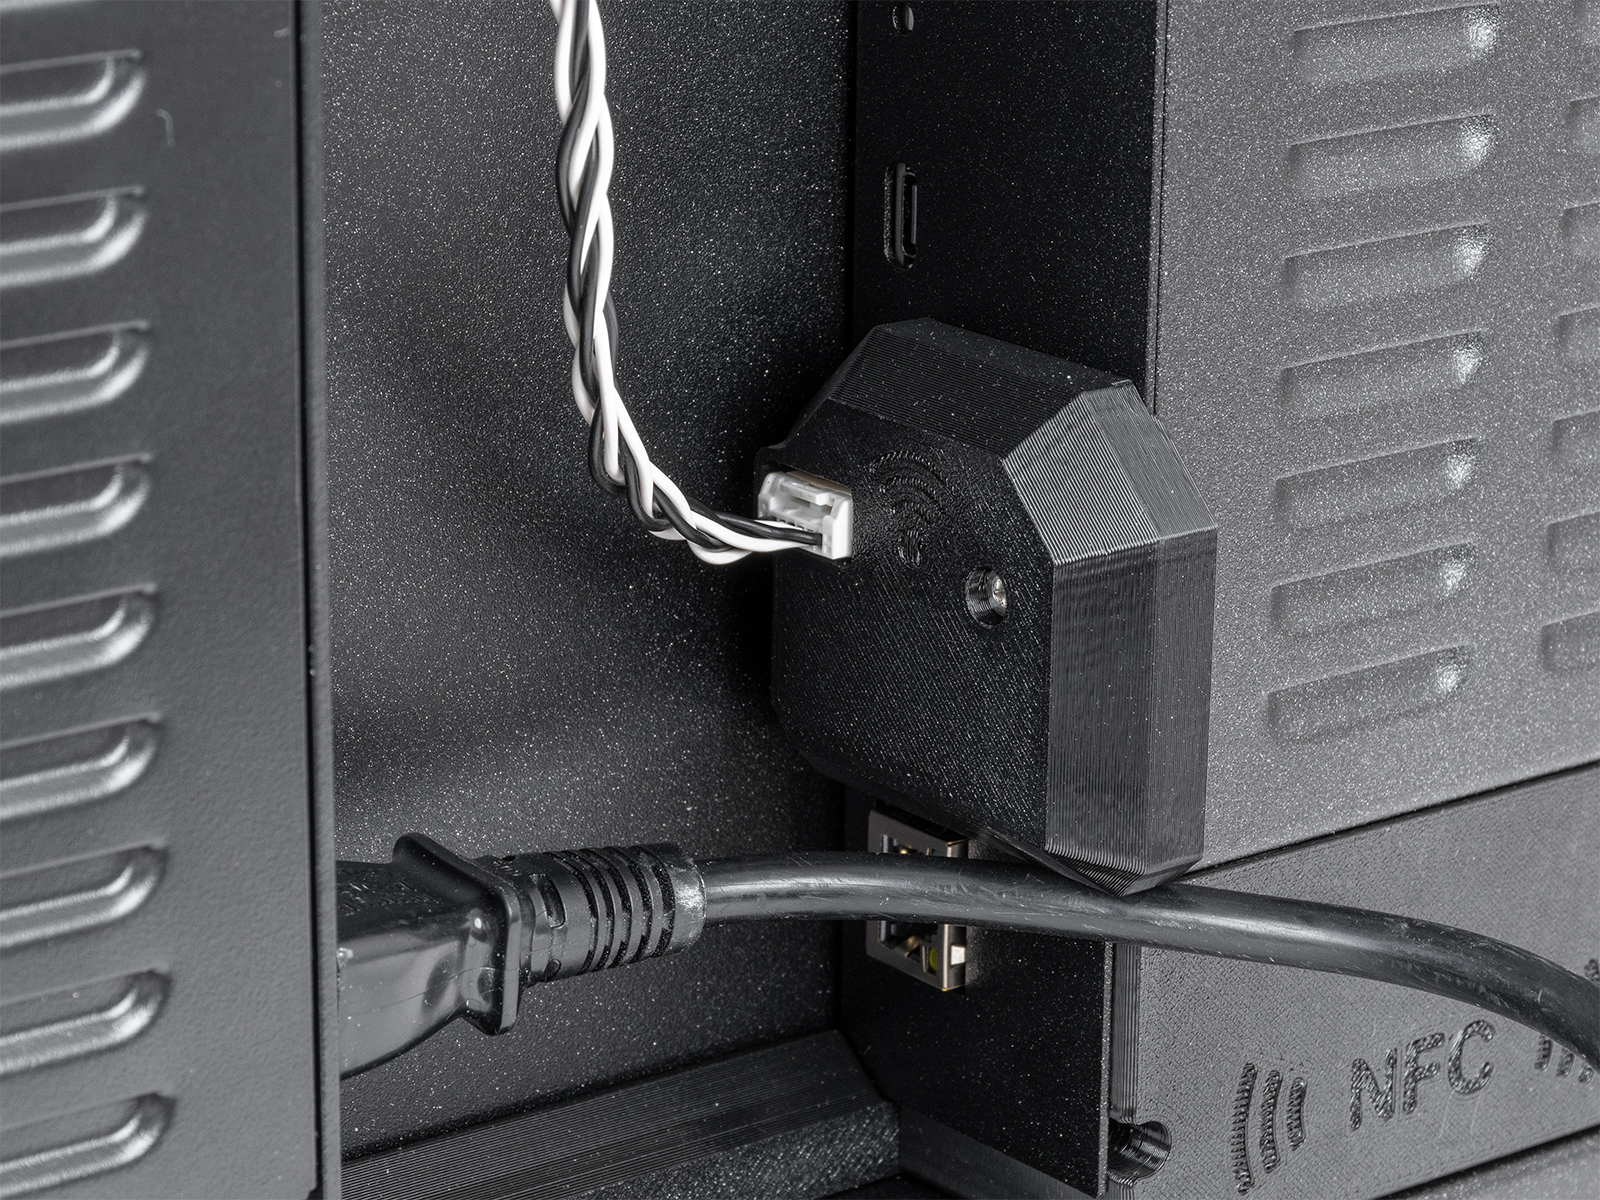
Original Prusa MK4/S, MK3.9/S
U modelů MK4S a MK3.9S připojte akcelerometr k vyhrazenému portu na desce xBuddy.
Alternativně můžete desku xBuddy připojit k modulu Wi-Fi krátkým kabelem na zadní straně tiskárny. Akcelerometr pak můžete připojit ke konektoru na zadní straně tiskárny .
U modelů MK4 a MK3.9 připojte kabel k desce akcelerometru a připevněte tištěné kryty. Akcelerometr se připojuje přímo do vyhrazeného portu na desce xBuddy.
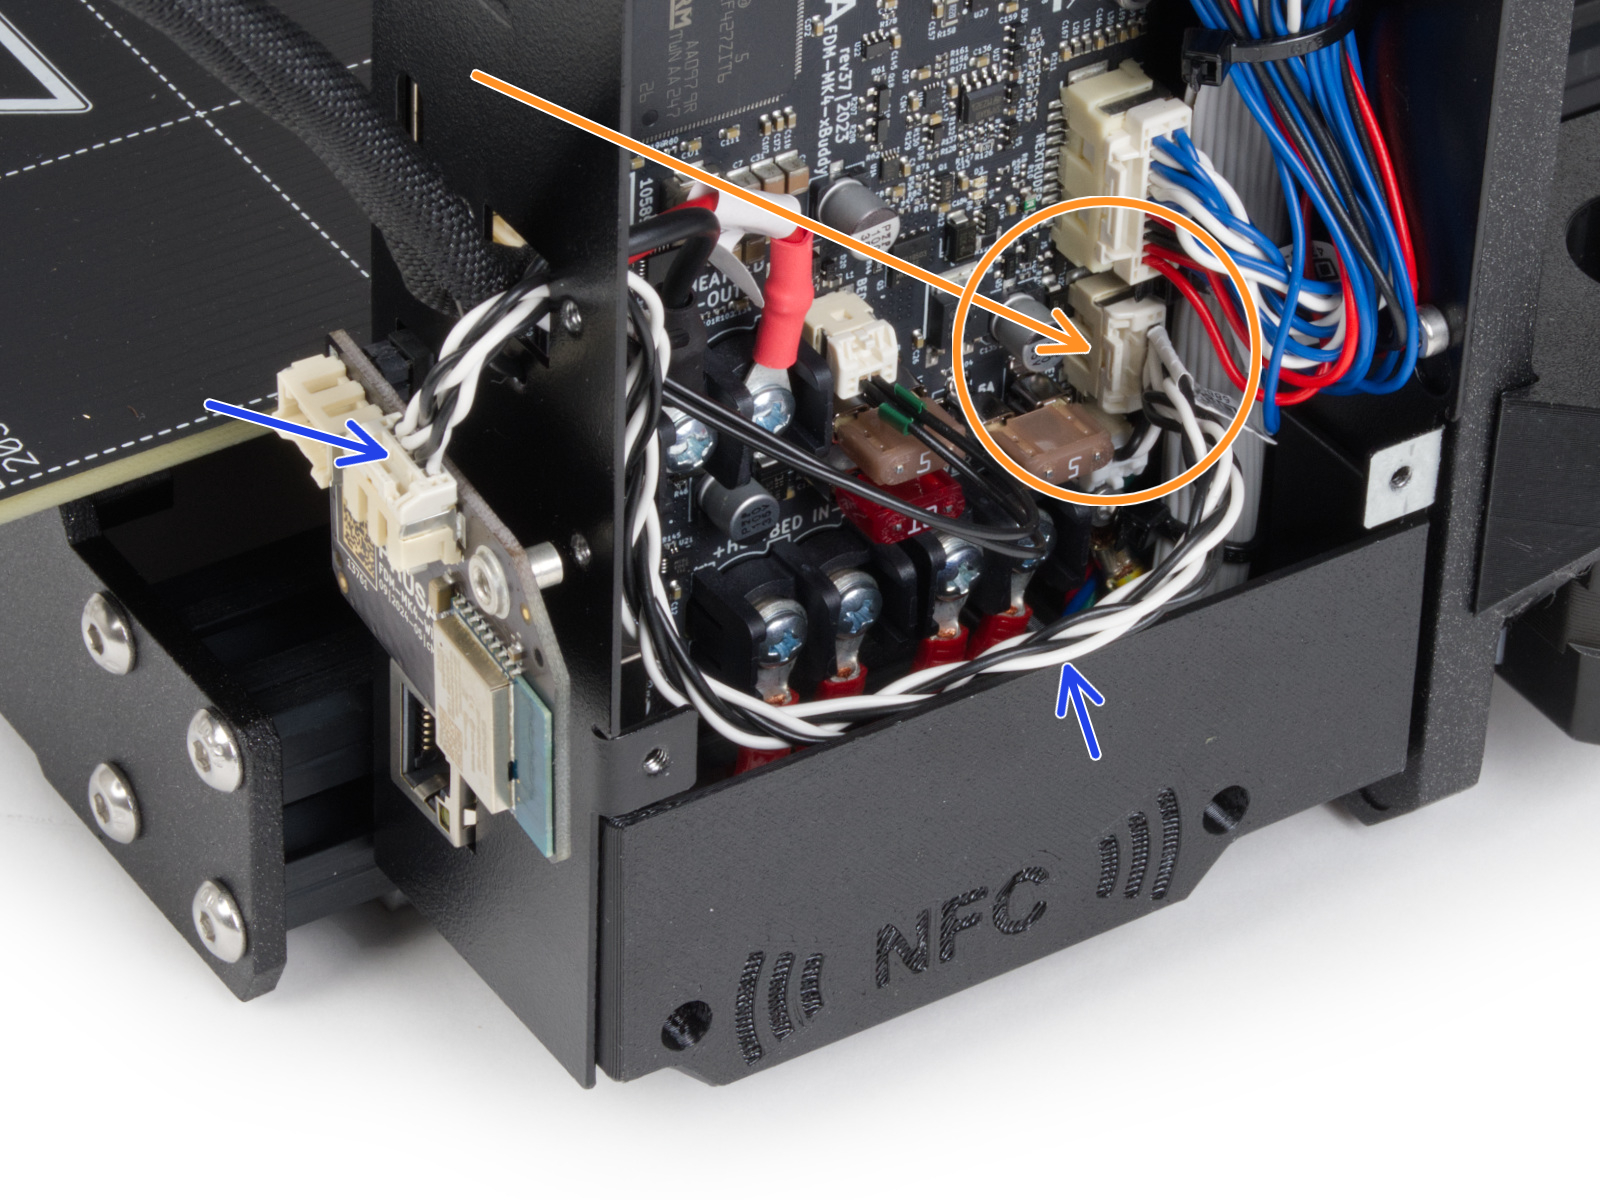 |  |
Připojení akcelerometru u MK4S a MK3.9S
Original Prusa MK3.5/S
Pro tiskárny MK3.5 nebo MK3.5S prosím navštivte dedikovaný návod.
Kalibrace
Akcelerometr se používá ke kalibraci parametrů input shaperu. Kalibraci lze spustit z nabídky LCD -> Nastavení -> Input Shaper -> Kalibrace Input Shaper. .
Osa X
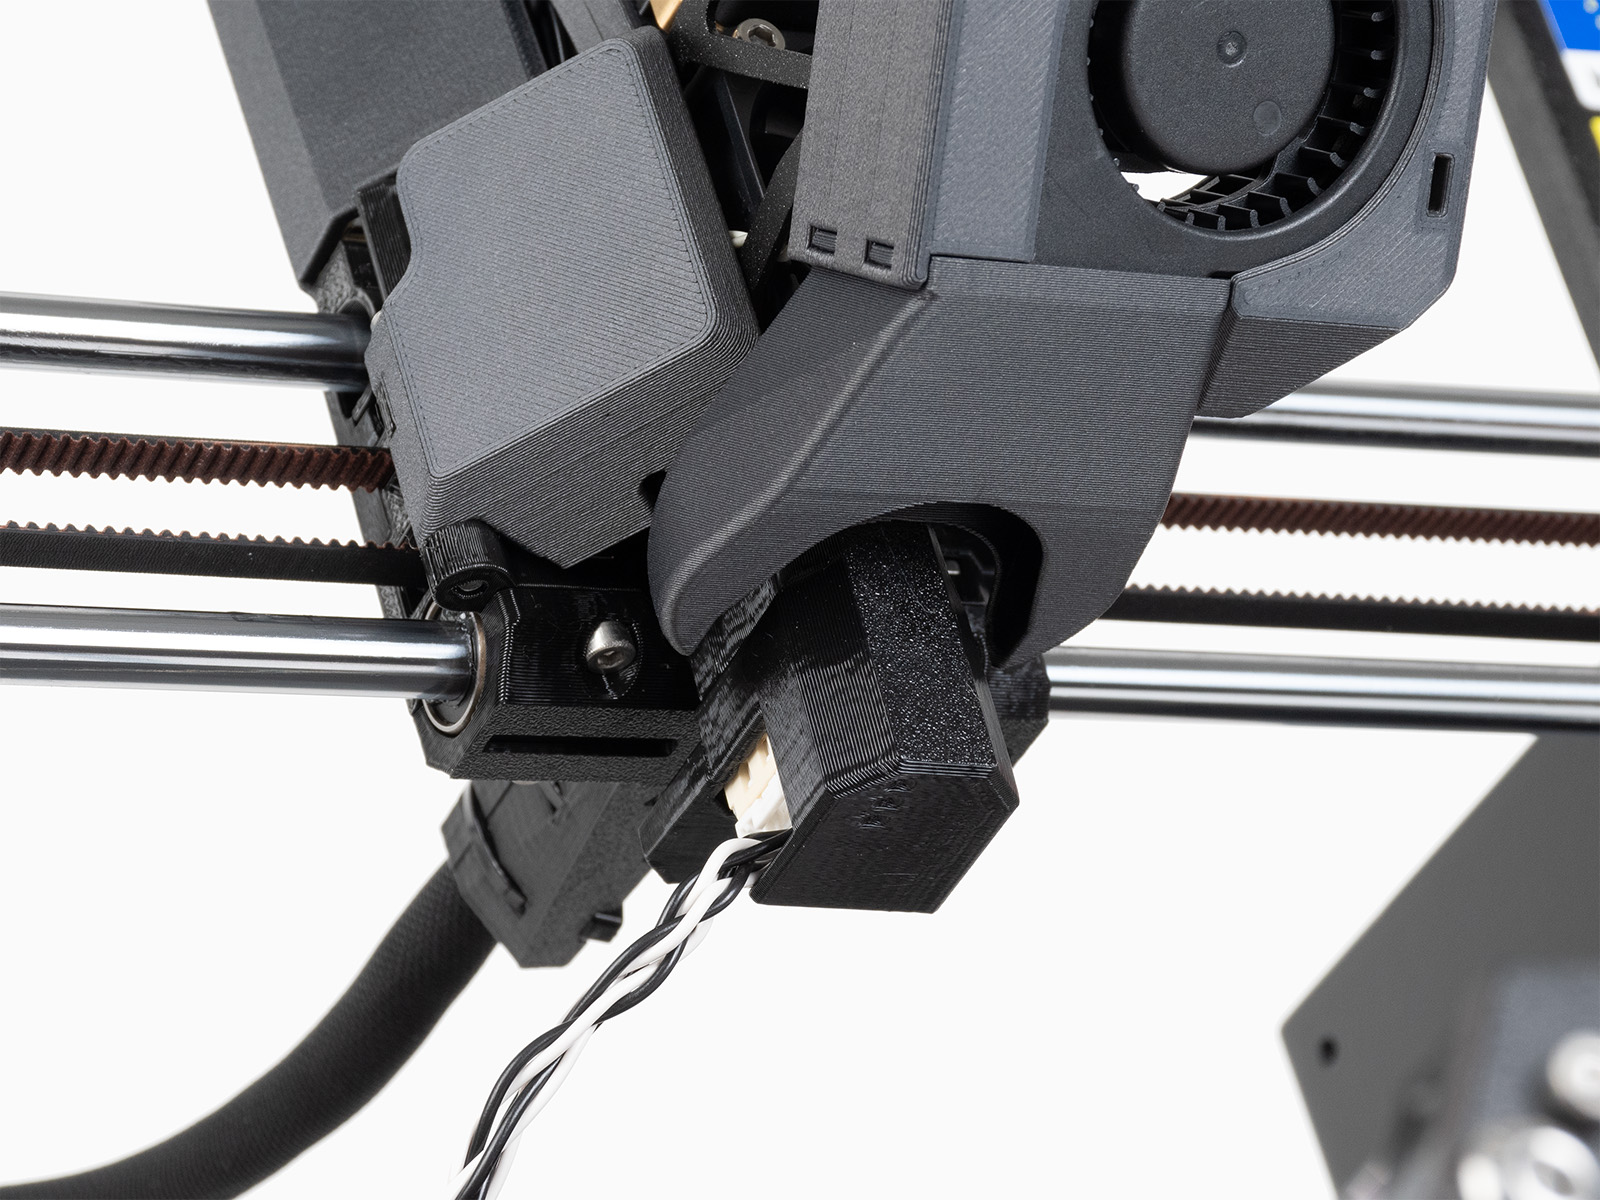
U tiskárny MK3.9 nebo MK4 před zahájením kalibrace zcela otevřete díl fan-door (dvířka ventilátoru). Odstraňte silikonový návlek, pokud je nasazen. Vyhledejte část akcelerometru ve tvaru topného bloku.
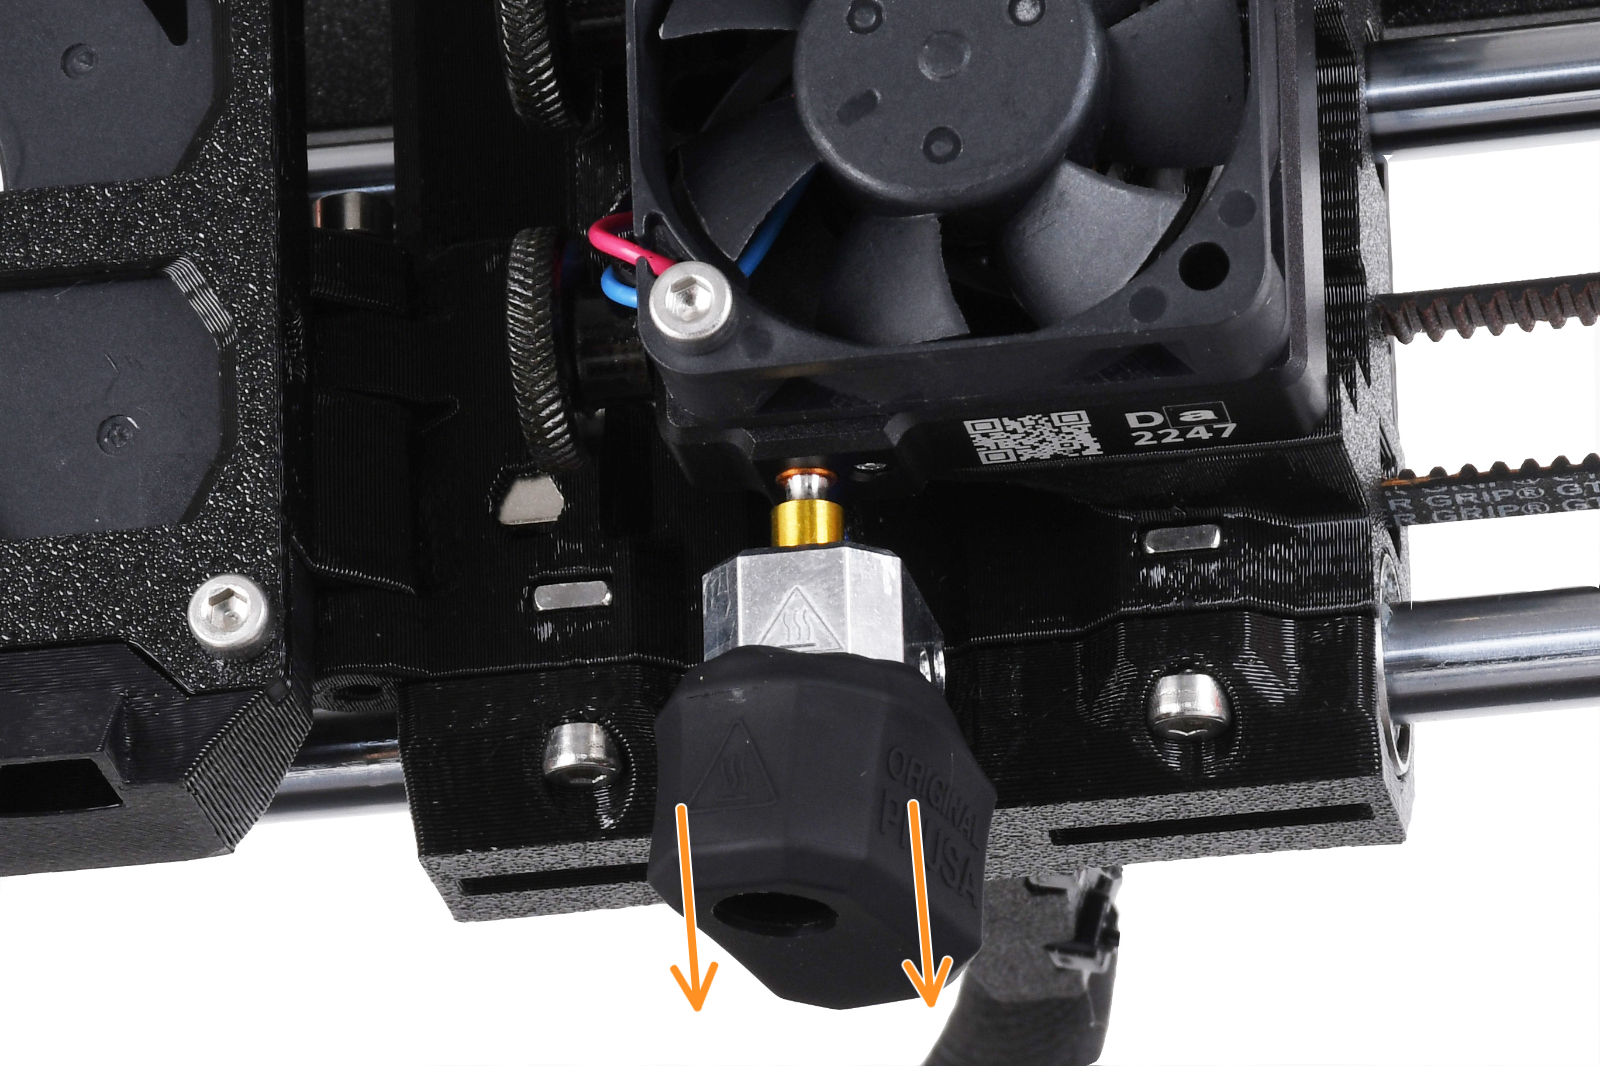 | 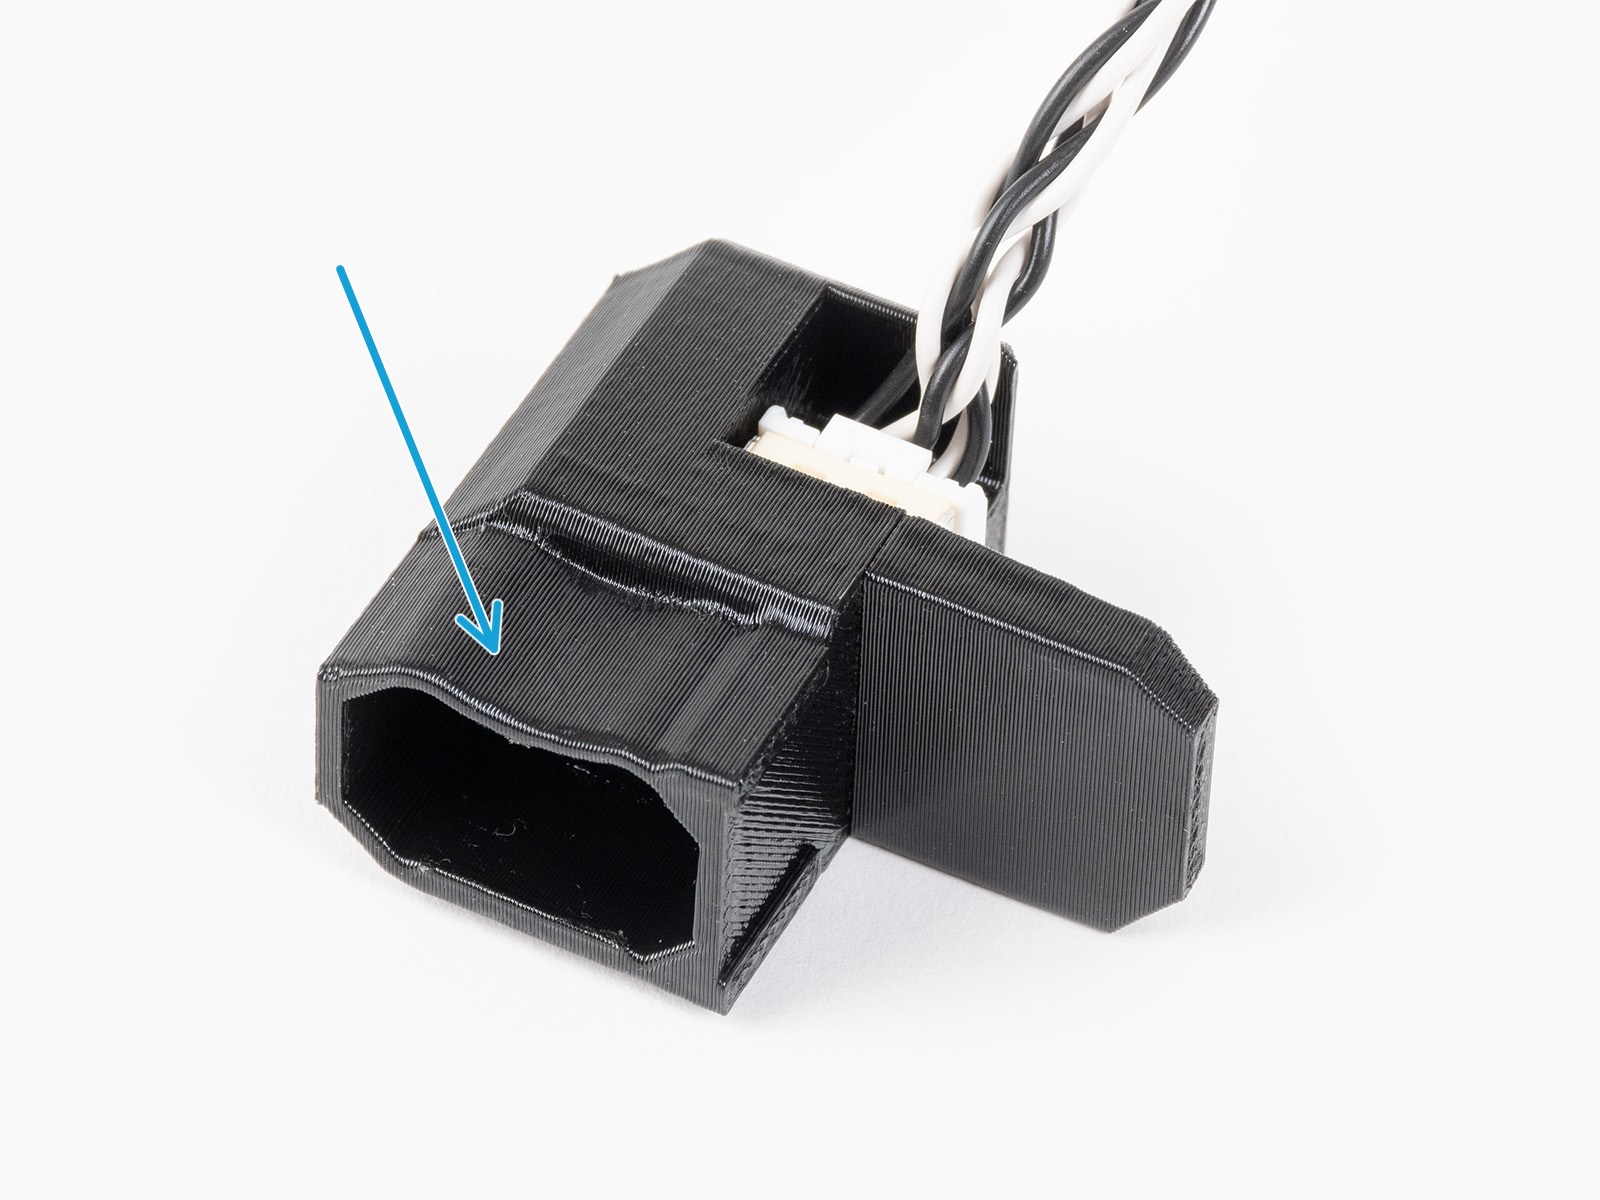 |
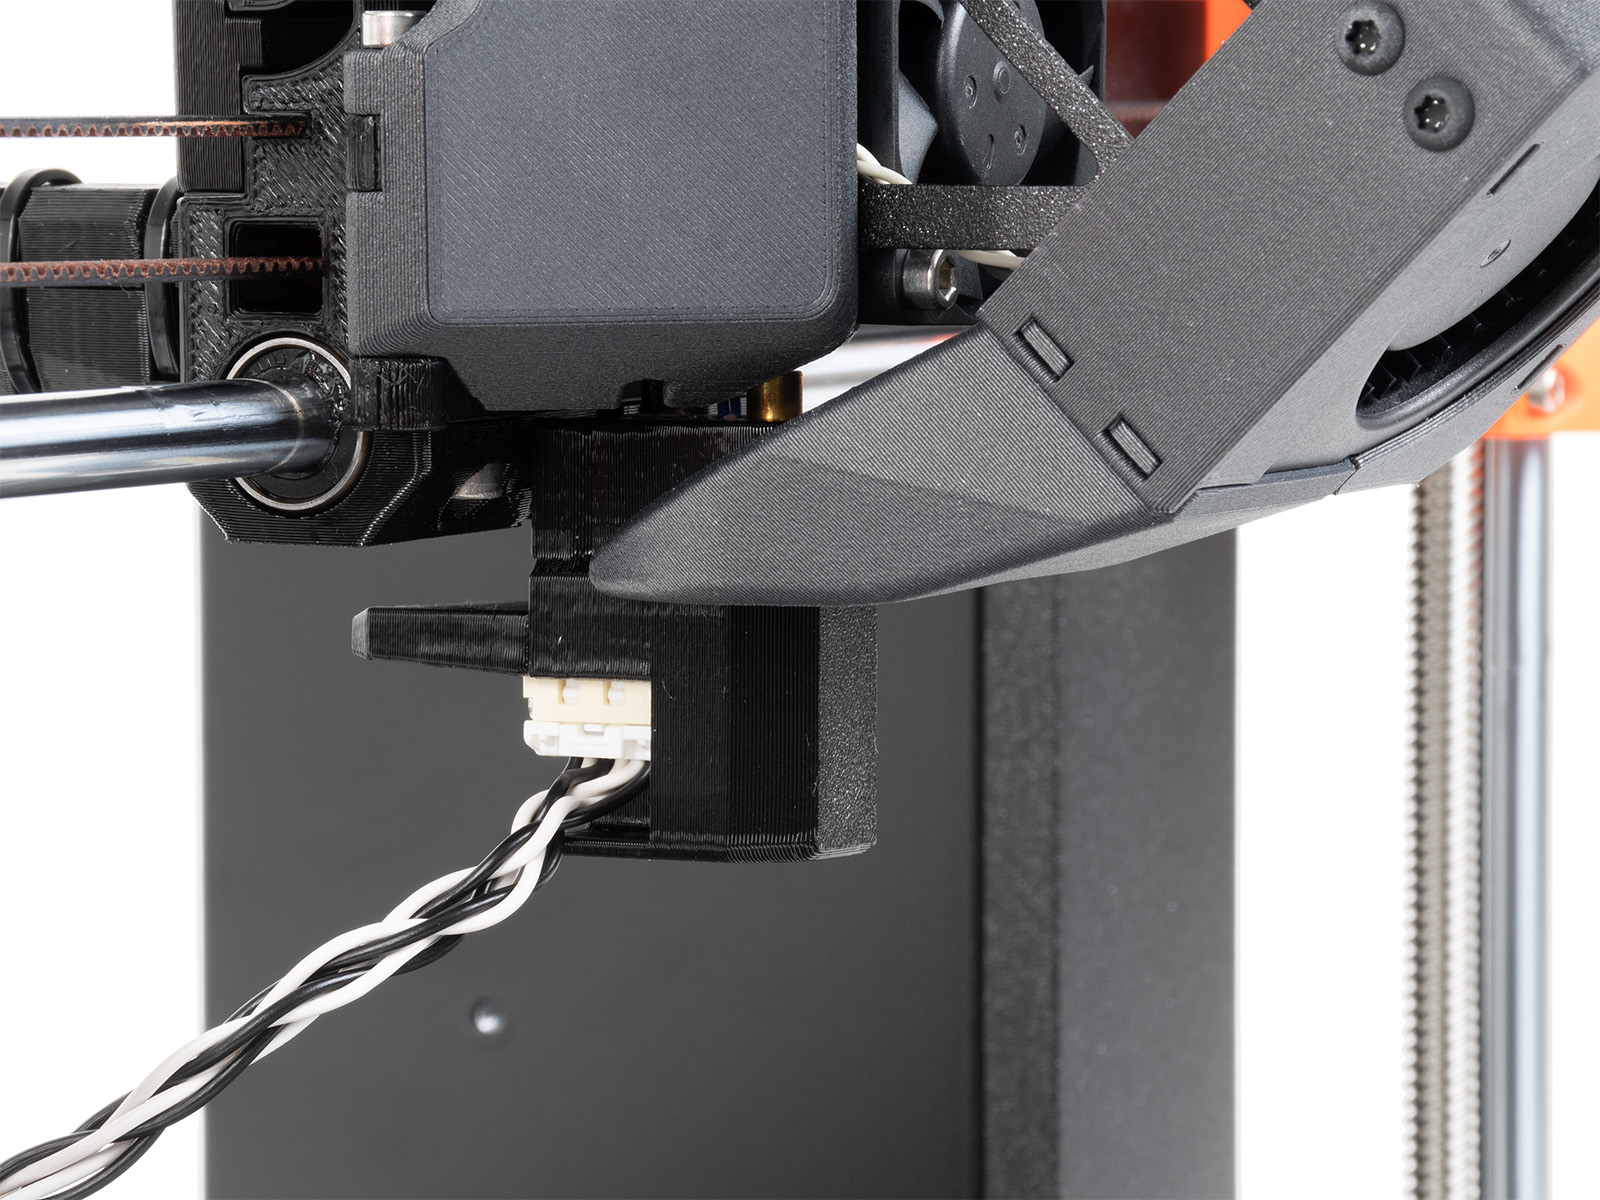
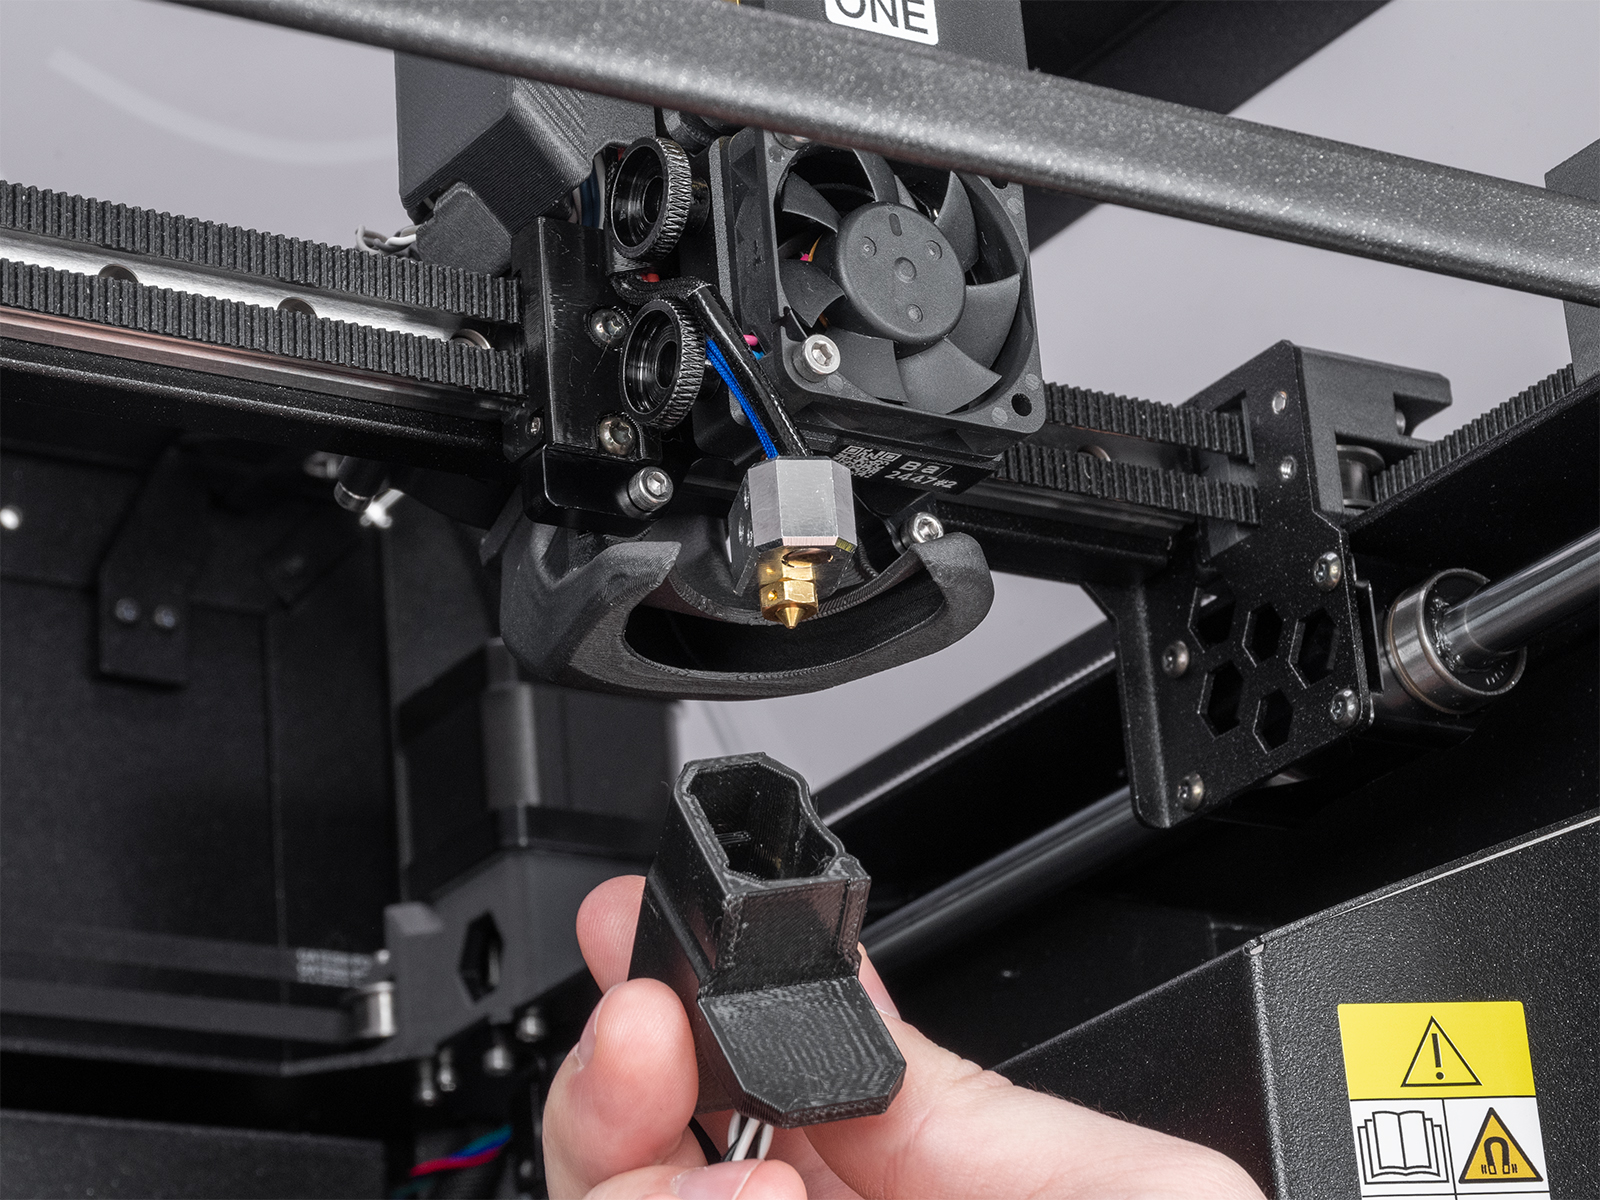
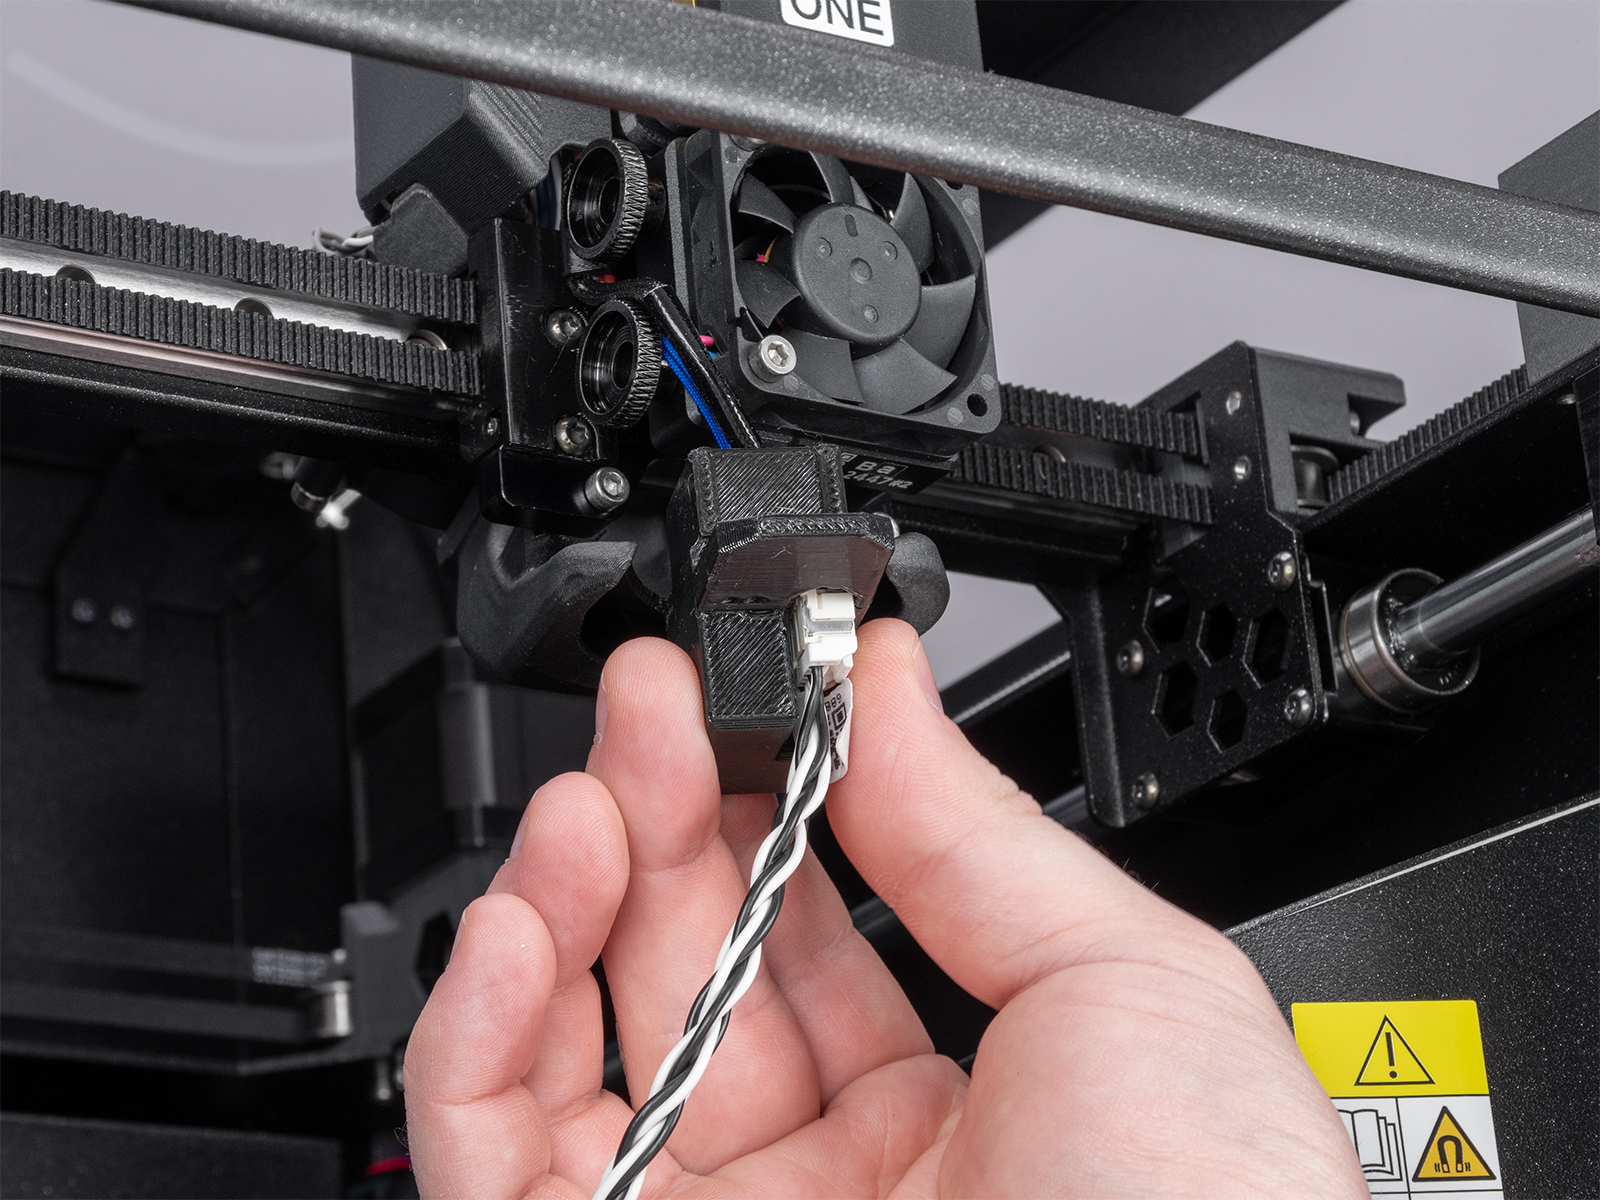
Zasuňte akcelerometr na topný blok tak, že na něj zatlačíte zespodu hotendu. Pokud začne klást odpor, nesnažte se akcelerometr zatlačit silněji, protože nadměrná síla by mohla ohnout heatbreak.
 |  |
 |  |
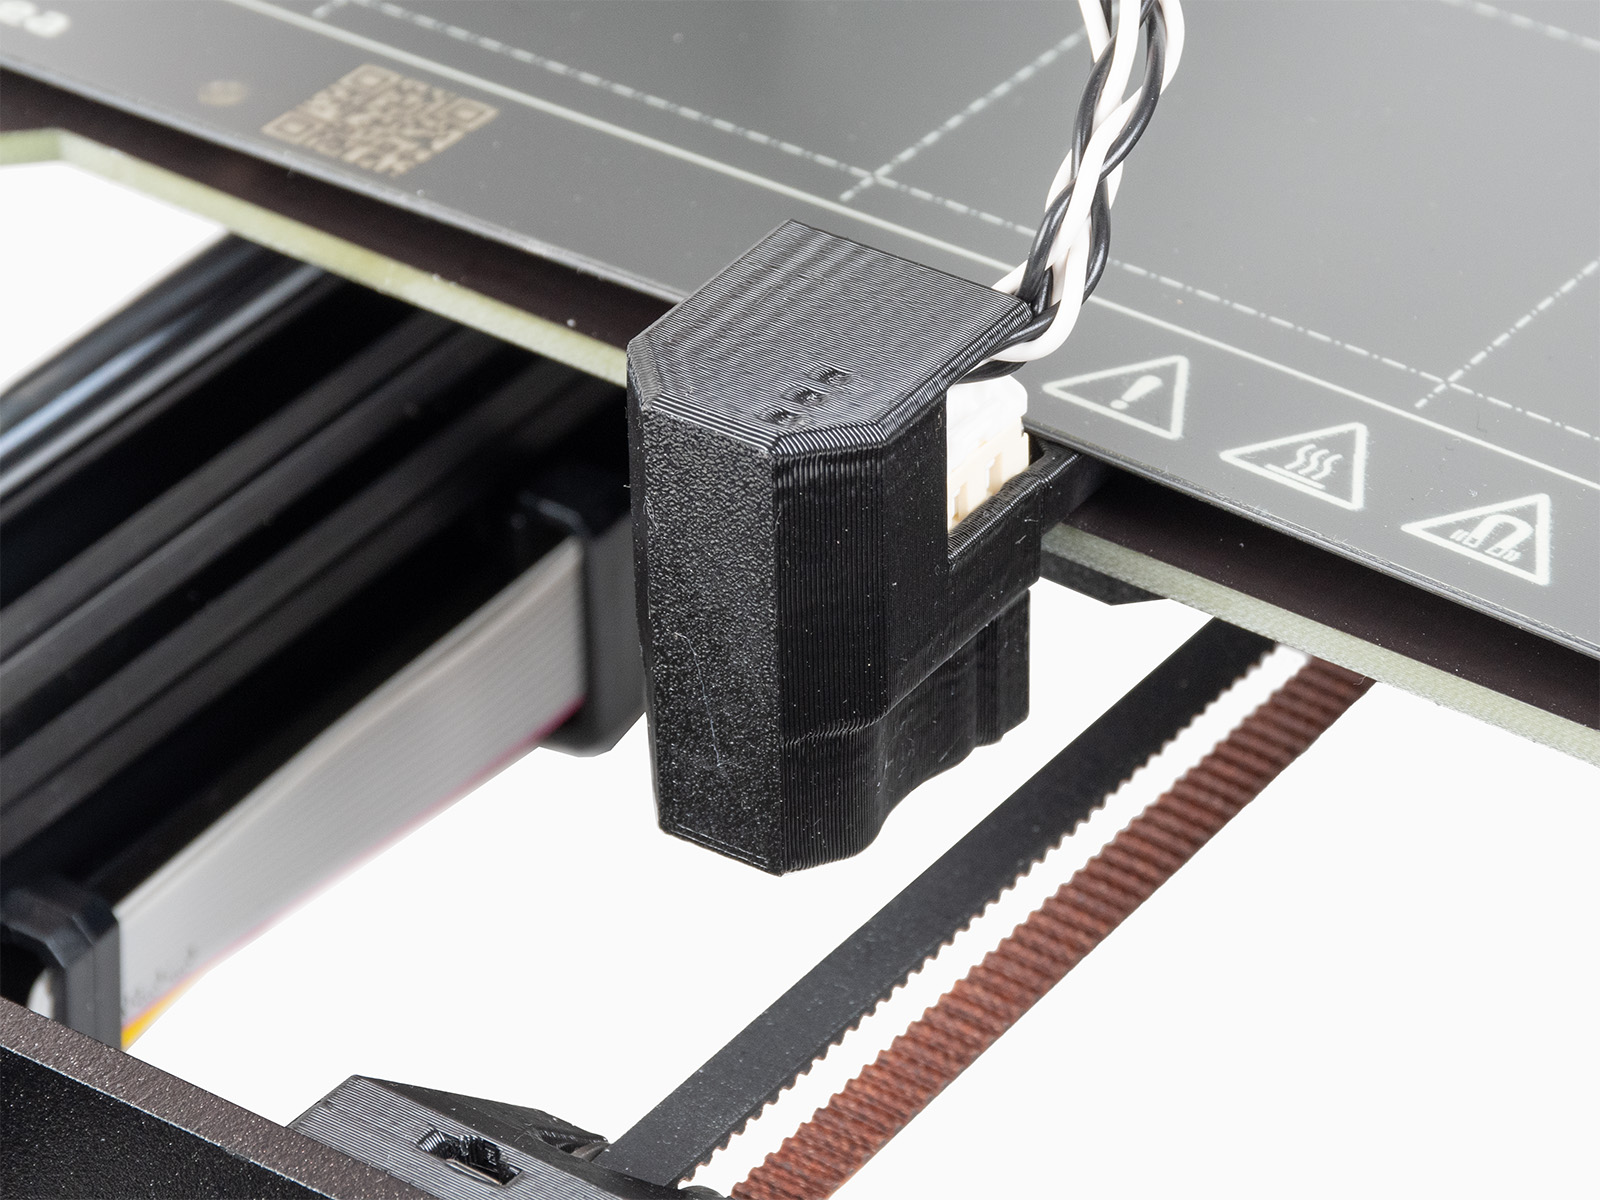
Osa Y (MK4/S, MK3.9/S, MK3.5/S)
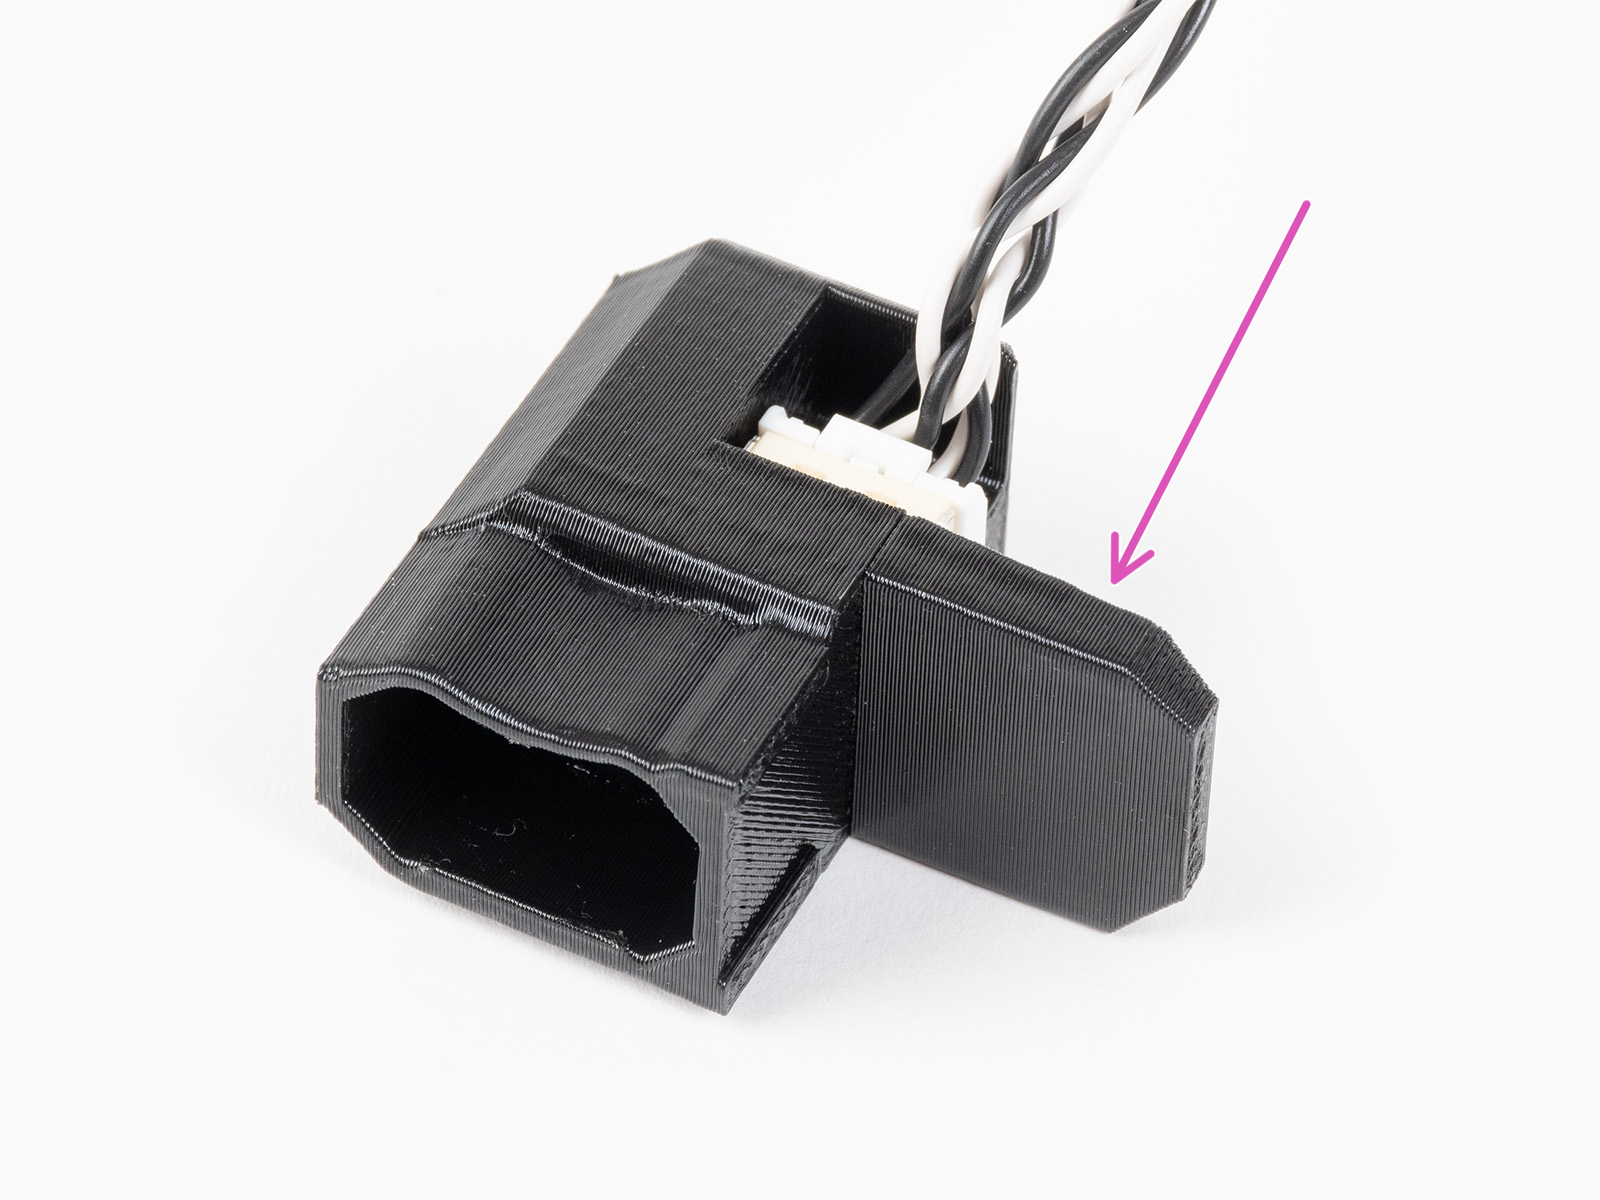
Najděte výstupek na akcelerometru. Z přední strany osy Y umístěte výstupek mezi ocelový plát a vyhřívanou podložku.
 |  |
Výsledky
Výsledky zobrazené na displeji tiskárny po kalibraci udávají optimální Input Shaping typ a frekvenci získanou během kalibrace.
2 komentáře