On the Original Prusa XL multi-tool, it is possible to combine different materials within the same print. The following aspects and considerations have to be kept in mind for a successful print.
Preliminary info
When an extruder is parked, the nozzle installed on that extruder cools down.
High temperatures without printing can cause a loaded filament to degrade and can cause the pressure in the melt zone to raise. While an extruder is idle, cooling down the nozzle helps counteract this process, especially for an extended docked time.
At any time the nozzle temperature is high, any moisture absorbed by the filament will have to escape somewhere. This generally leads to increased pressure in the nozzle, typically leading to oozing. The oozed filament is deposed on the prime tower, possibly creating a blob.
To limit these negative effects, it is crucial to keep the filament dry. Some filament settings might need to be fine-tuned, and it is fundamental that the Nozzle Seal is set to the correct position for all tools. The scale of these effects also depends on the specific filament material.
If you decide to use flexible filament check out our video guide on how to load flexible filament into the Original Prusa XL.
Prime tower settings
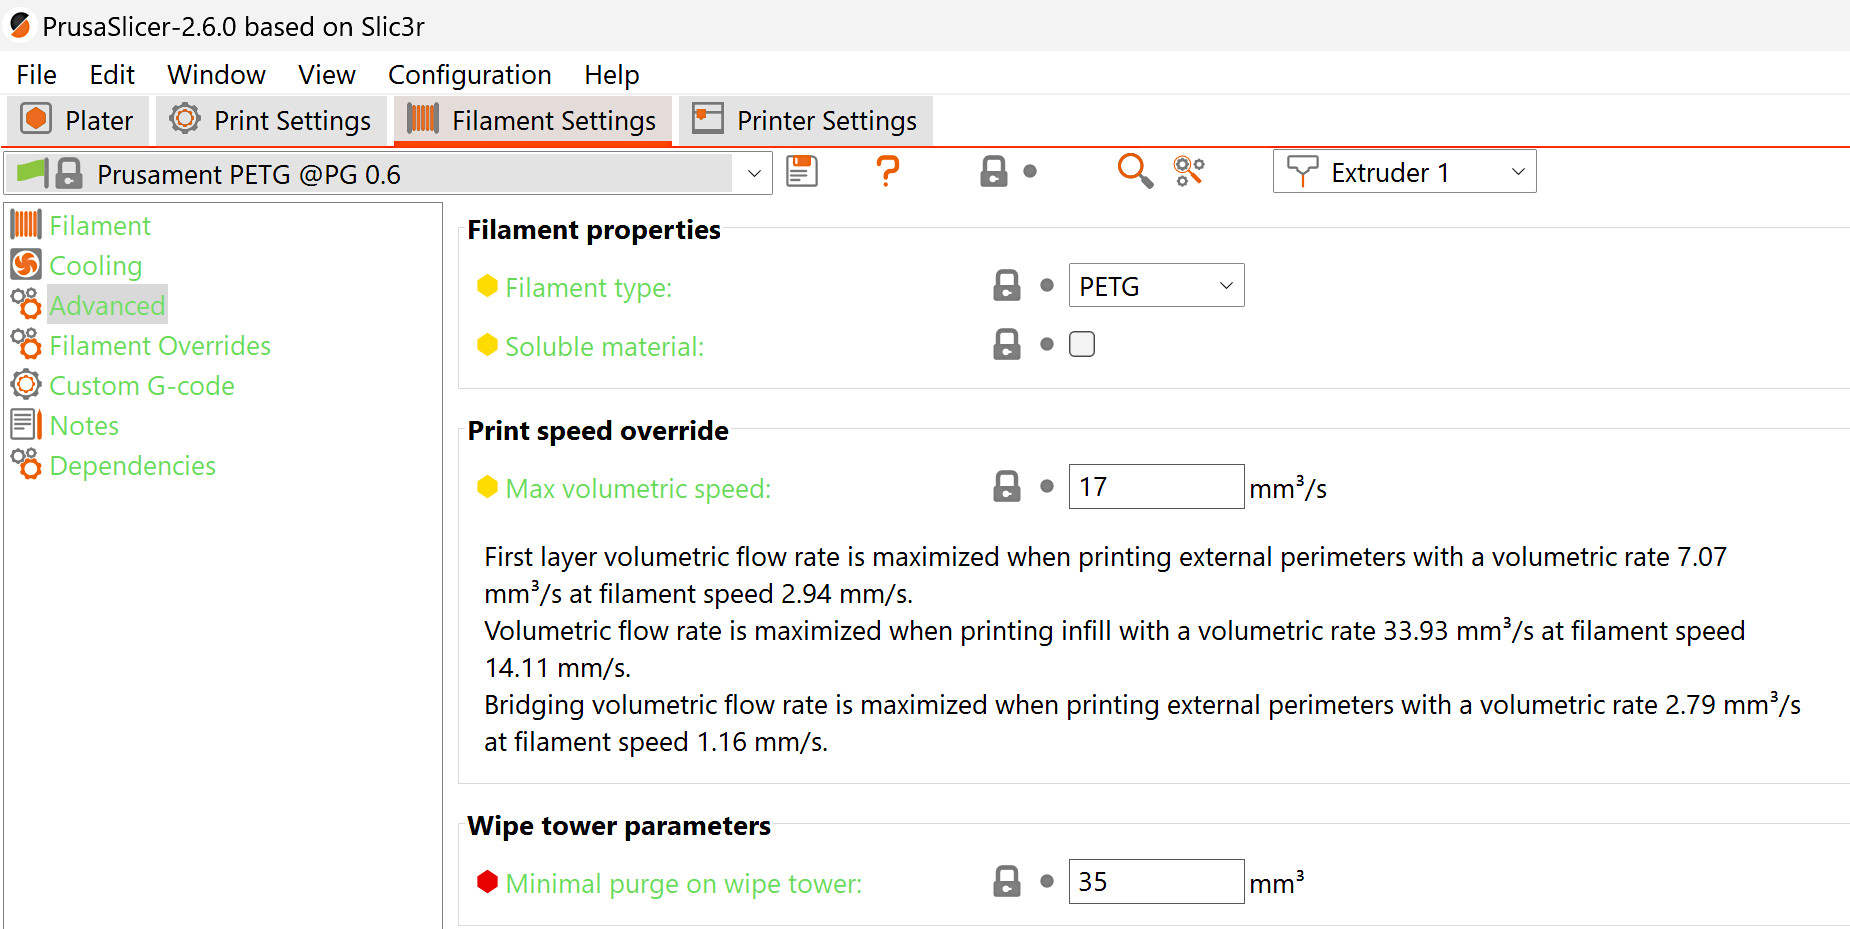
Minimal purge on wipe tower
The minimal purge on wipe tower sets the minimum amount of material to prime into the prime tower. Its value can be adjusted in Filament settings -> Advanced. The oozing that happens when the tool is picked causes material loss. Increasing this volume will decrease the chance this causing under-extrusion at the start of the print.
For PLA prints, the default and recommended value for this setting is 15mm³. For any other material, the default value is 35mm³. We also recommend setting the value at 35mm³ for each extruder for a print with a combination of PLA and another material.
TPU is very prone to stringing due to it absorbing a high amount of moisture. While it has been tested with the minimal purge on wipe tower at 35mm³, in case of issues with stringing and oozing, we recommend further increasing this value, even up to 70mm³. TPE is a good alternative flexible material, as it generally absorbs less moisture than TPU, but note that TPE has a poor bed adhesion.
When printing rigid filaments on top of TPE or TPU, the lower TPE or TPU layers can be moved around by the rigid filament printing on top of them. This can also be counteracted by increasing the minimal purge on wipe tower.
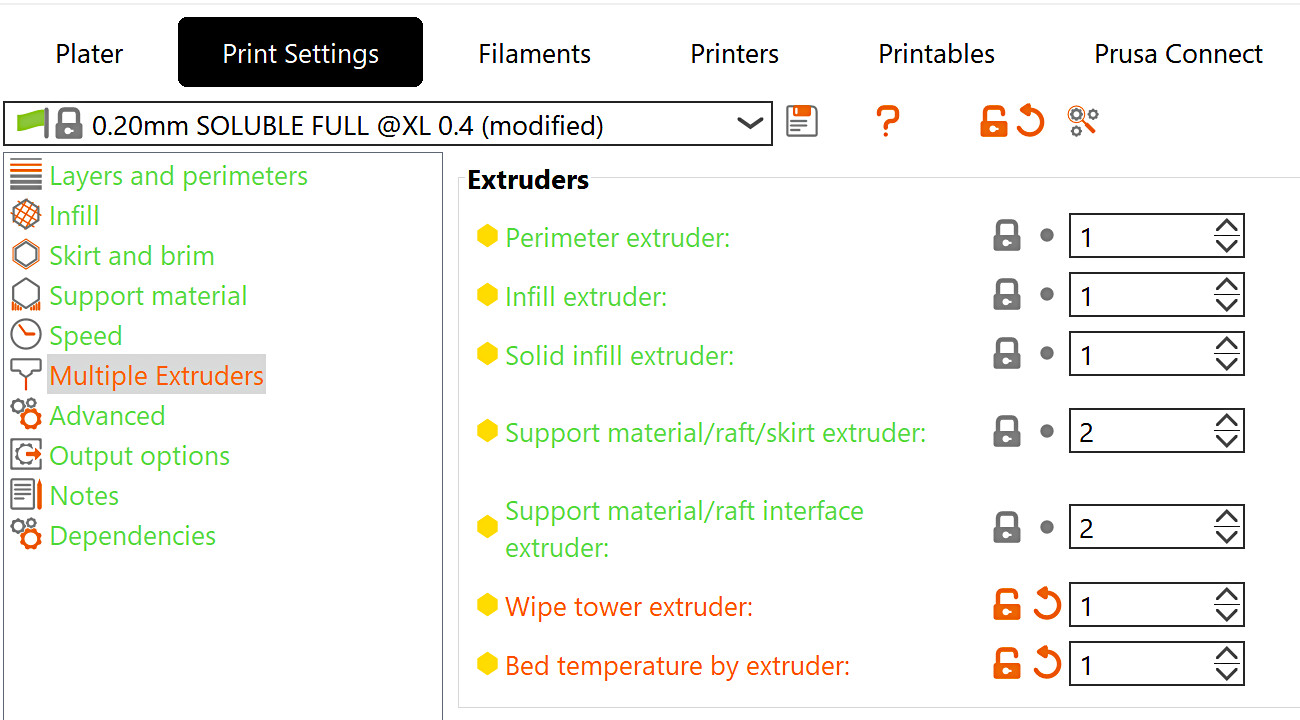
Wipe tower extruder
On the prime tower, the filaments might not stick to each other. This can cause the tower to break and cause crashes on the print. To prevent that, go to Print settings -> Multiple Extruders -> Wipe tower extruder, and select an extruder for the prime tower. This will cause one of the extruders with a specific filament to act on all tower layers, even if it is not used in the print, making the tower more stable. Leaving the value at 0 will use the tool that is available, which is the last one used in that layer. This saves time but, when printing with more than one type of material, makes the prime tower less reliable.
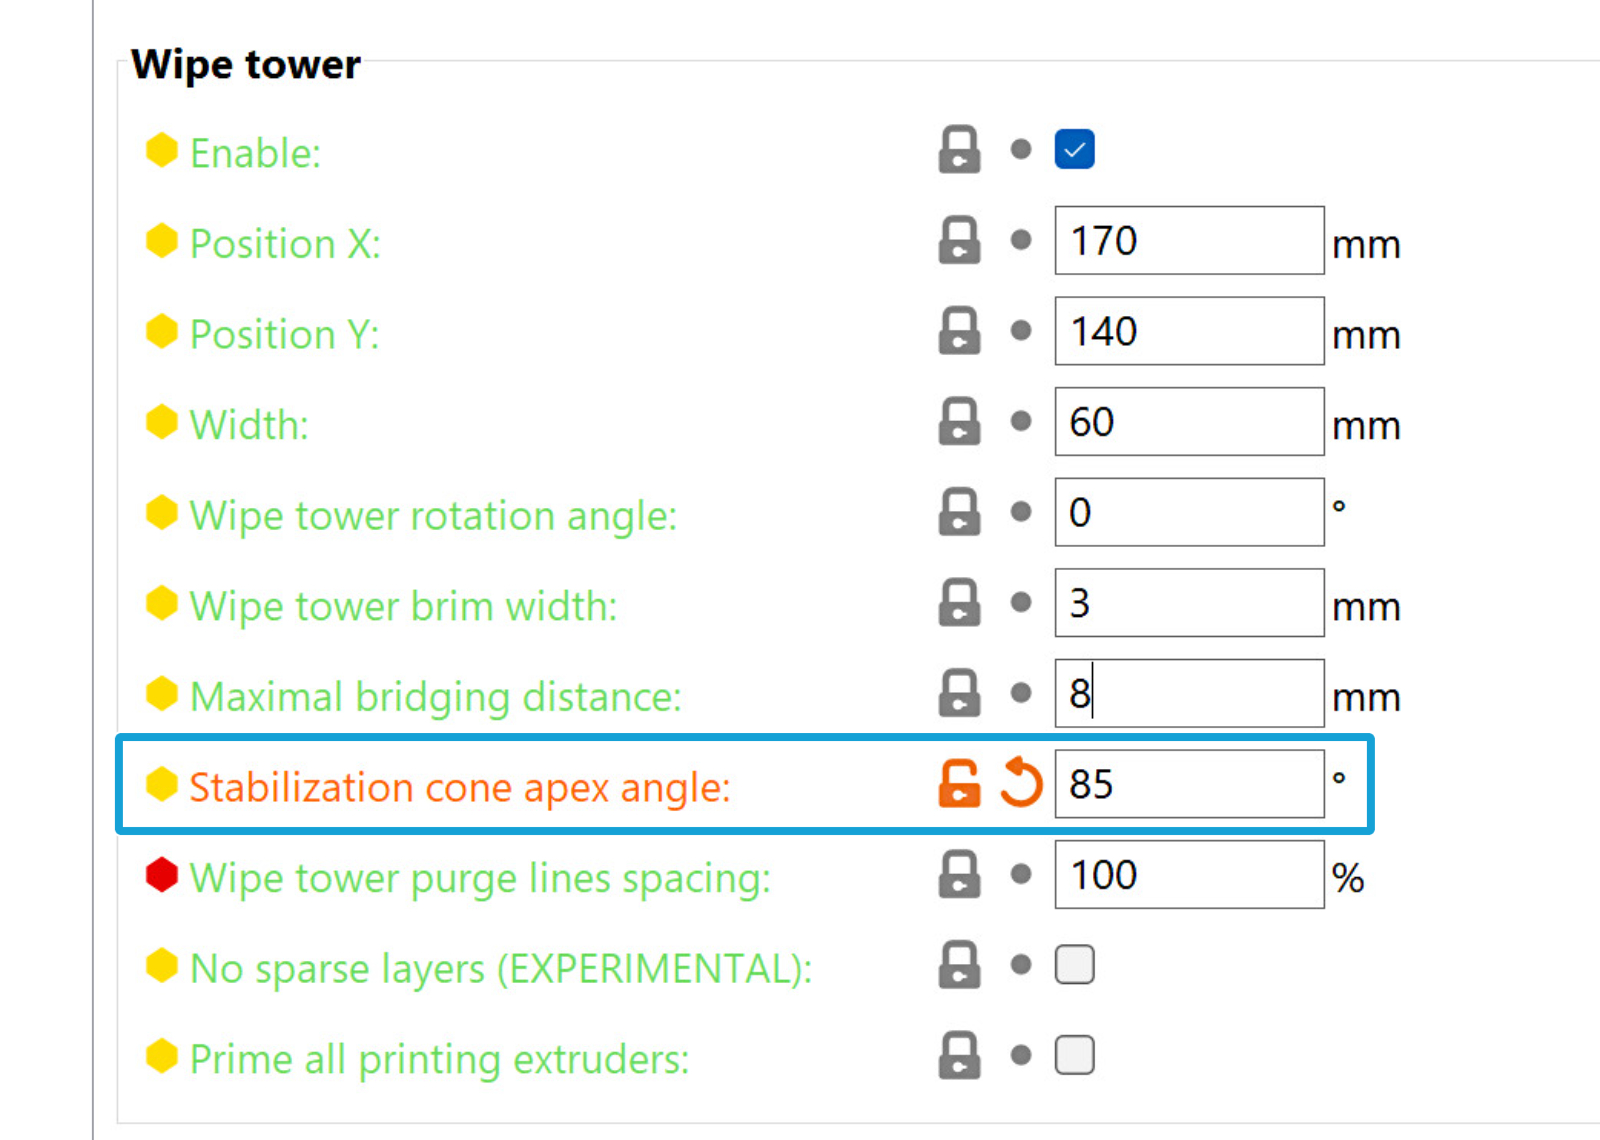
Stabilization cone apex angle
To increase the stability and bottom area of the prime tower, it is possible to add a conical shape that would combine with the prime tower shape. The apex angle of this cone can be set between 0 and 90 degrees, in Print settings -> Multiple Extruders, with a larger angle meaning that the cone base is larger and the prime tower more stable.
PLA + PETG
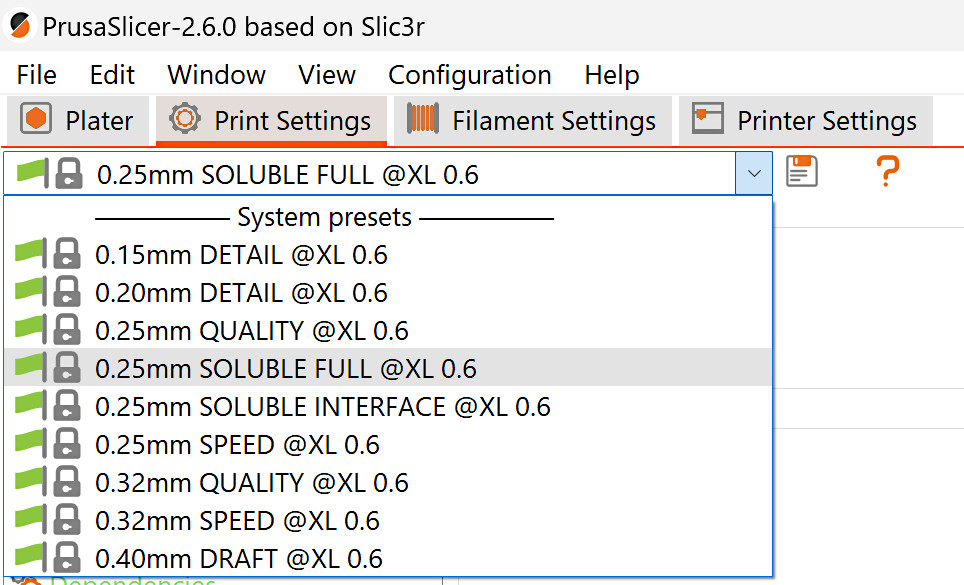
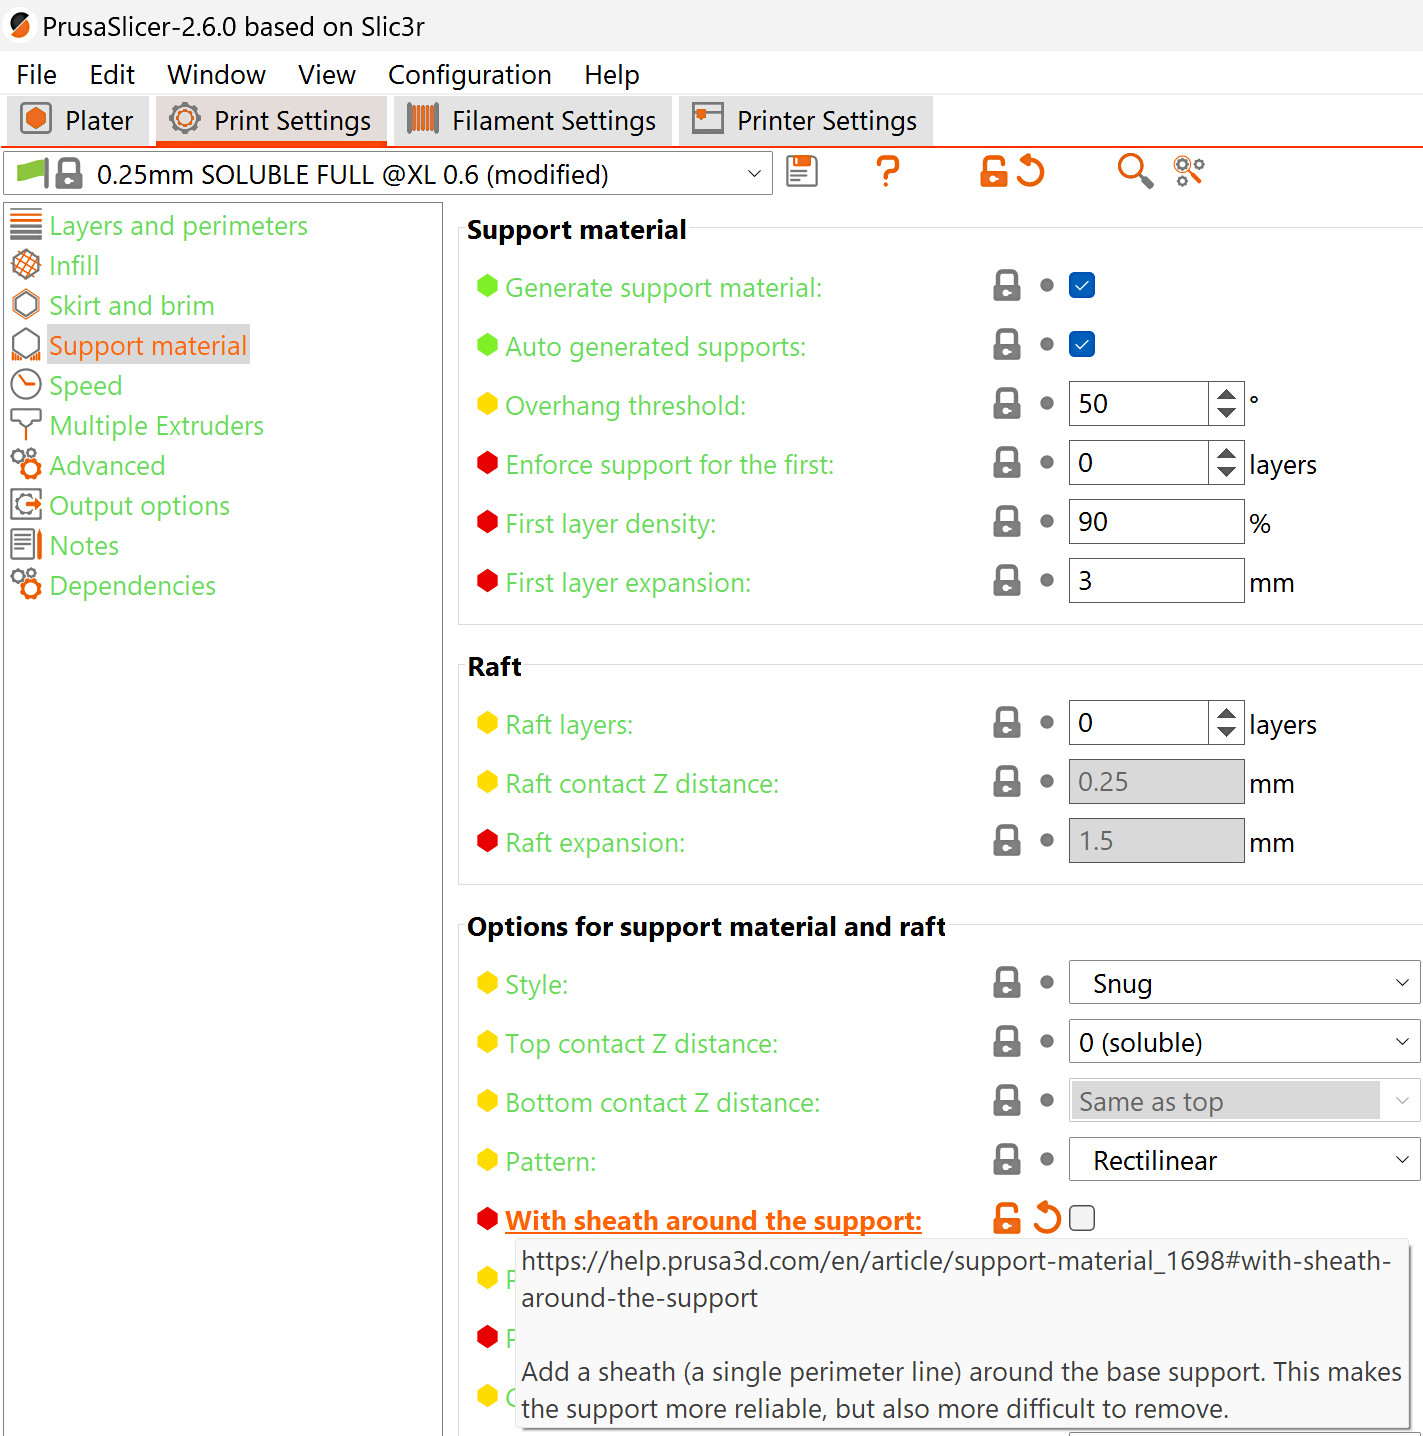
PETG has been tested with PLA supports with success, as well as PLA with PETG supports. For that, the PrusaSlicer print setting needs to be soluble full.
By default, a solid sheath (one perimeter wall) will be generated around the supports set as soluble, making it very difficult to remove them. We recommend unselecting this setting, in Print Settings -> Support Material.
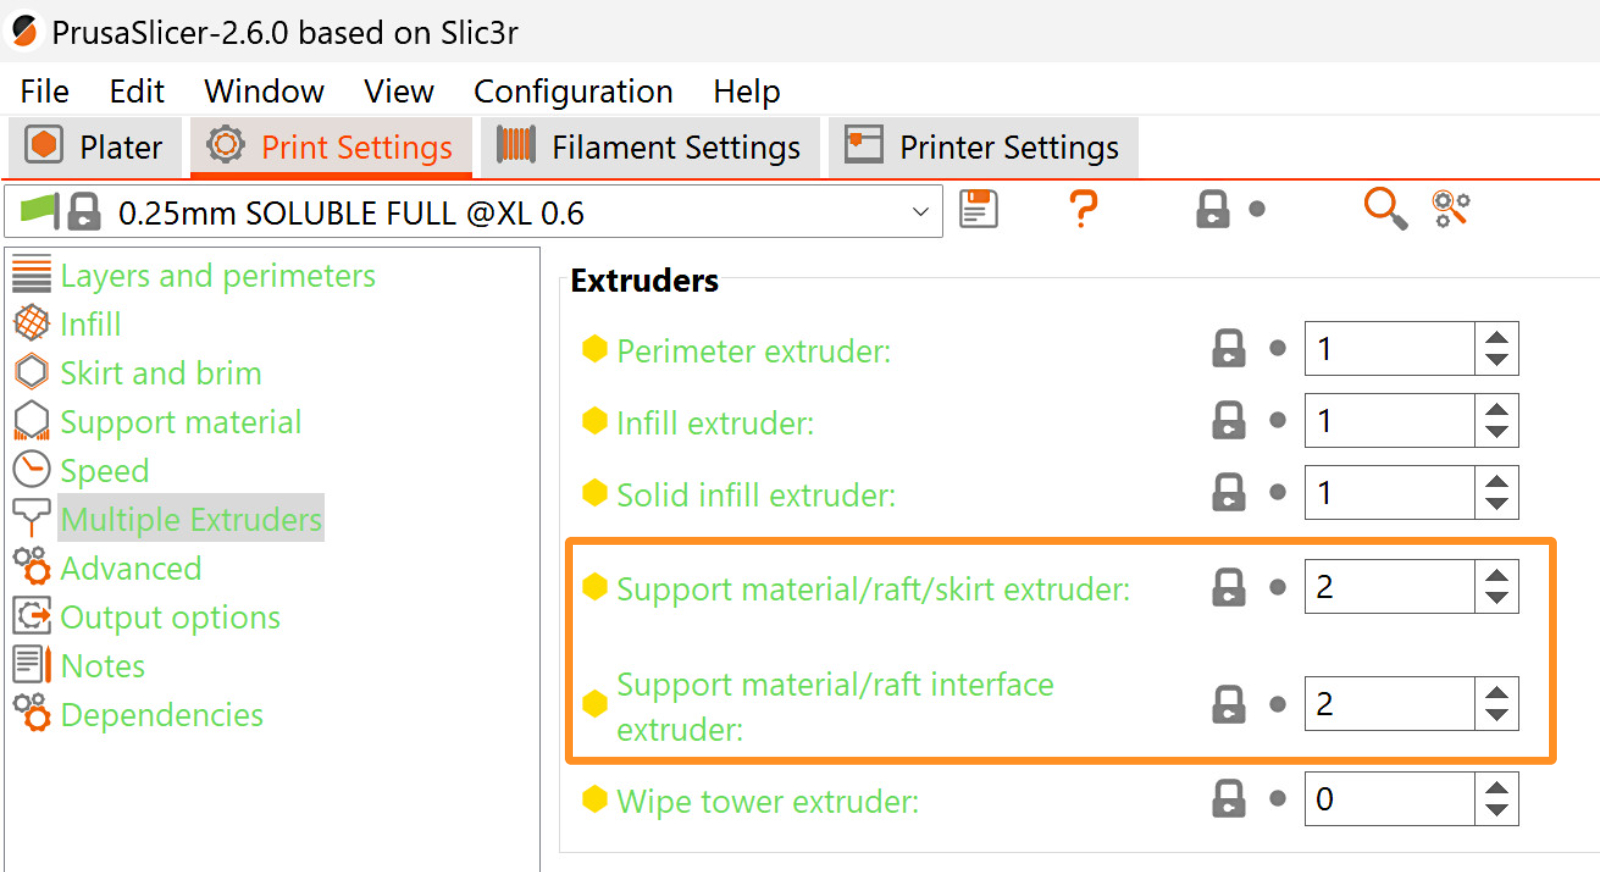
By default, the support material is set to be on Extruder 2. If needed, you can change this by selecting the support material/raft/skirt extruder and the support material/raft/interface extruder in Print Settings -> Multiple Extruders.
This feature can only be used with Organic Supports when using a Wipe tower. Changing the support extruder with any other support style than Organic will disable the wipe tower.
Flexible filament
Due to its softness, Flexible filaments need special attention when being loaded. If you decide to use a flexible filament, follow the instructions in the video below:
Other PrusaSlicer settings
Heatbed temperature
By default, on the first layer, the heatbed temperature is based on the first material loaded in the print; from the second layer onwards, it is based on the first filament that is loaded on the second layer. Depending on the filament combination, this can generate issues, such as a lack of adhesion.
PrusaSlicer shows a warning in case the heatbed temperatures significantly differ.

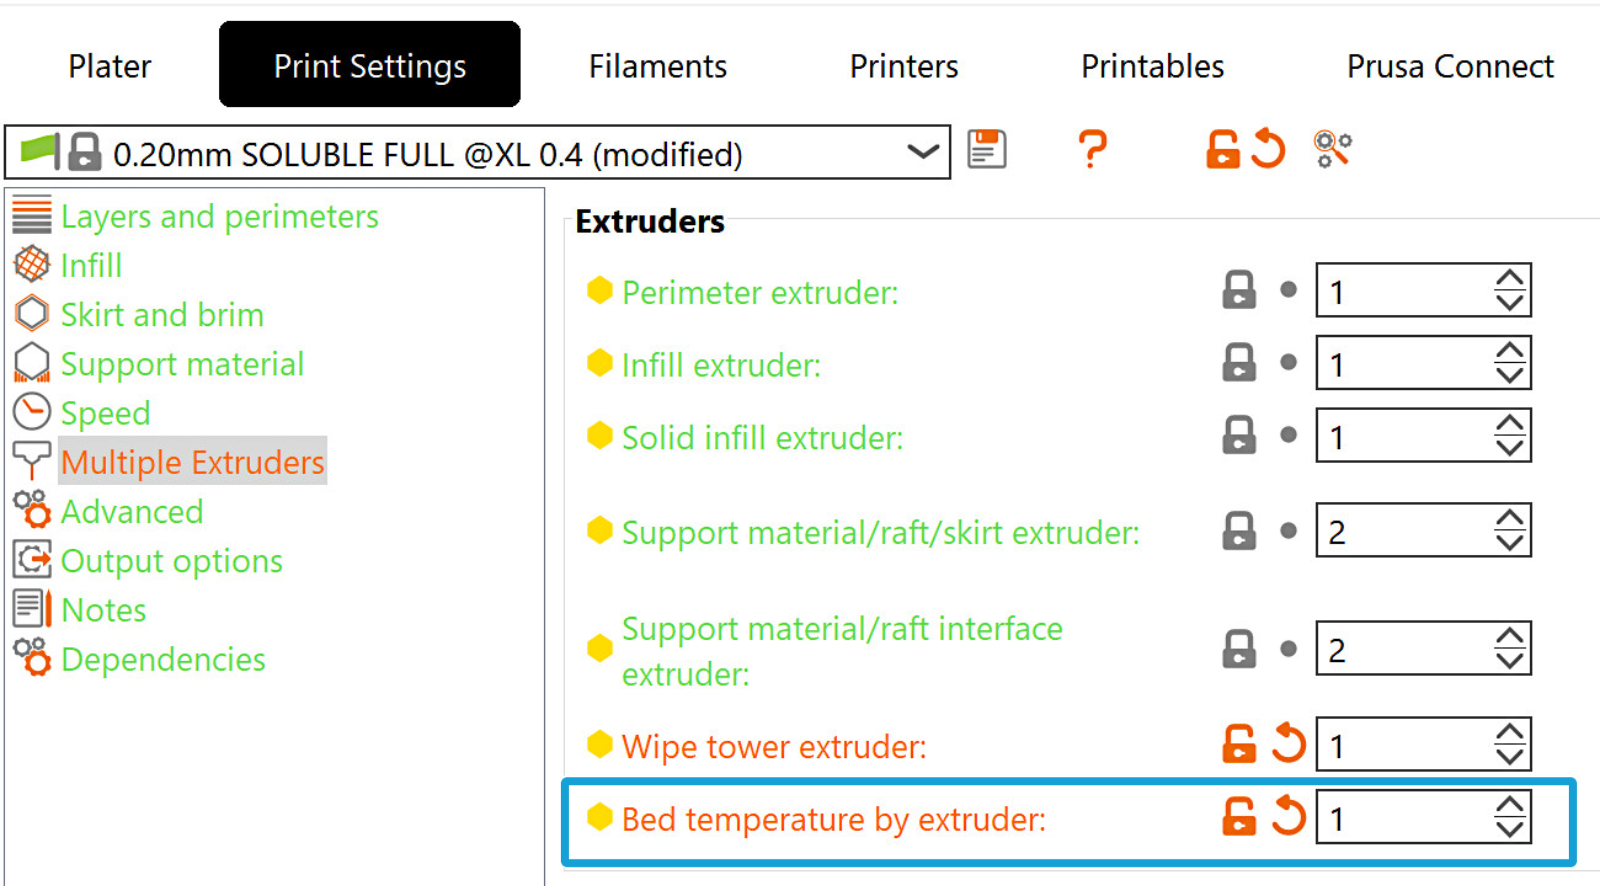
To modify this setting, navigate to the option in Print Settings -> Multiple Extruders -> Extruders -> Bed temperature by extruder.
The setting specifies the extruder to take the bed temperature from. Setting it to zero uses the default logic that the first layer temperature is always taken from the first printing extruder, and all other layers' bed temperature is taken from the first extruder that prints the second layer.
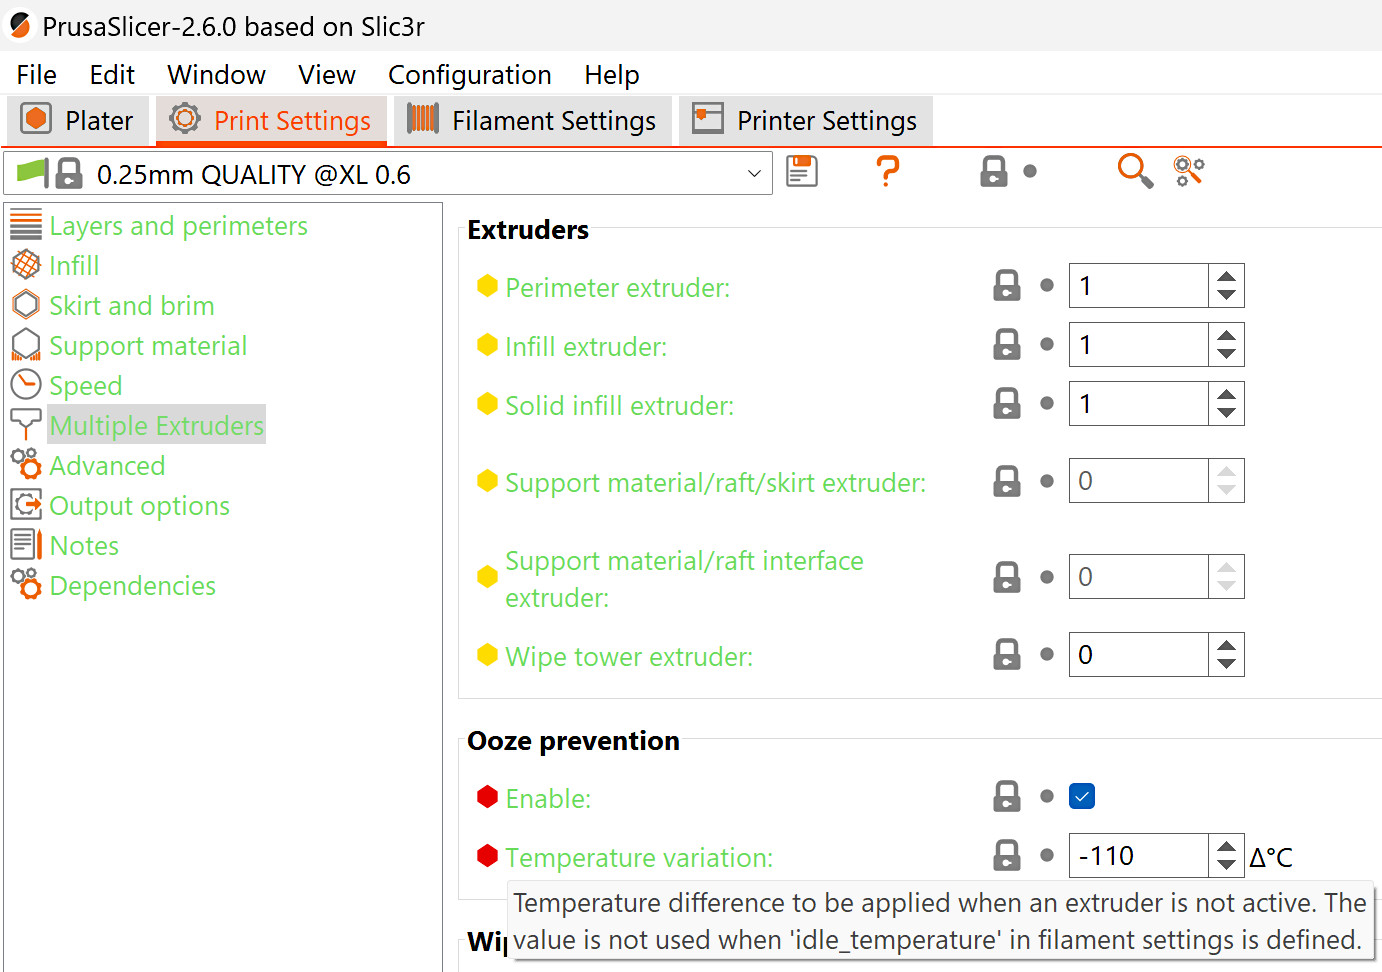
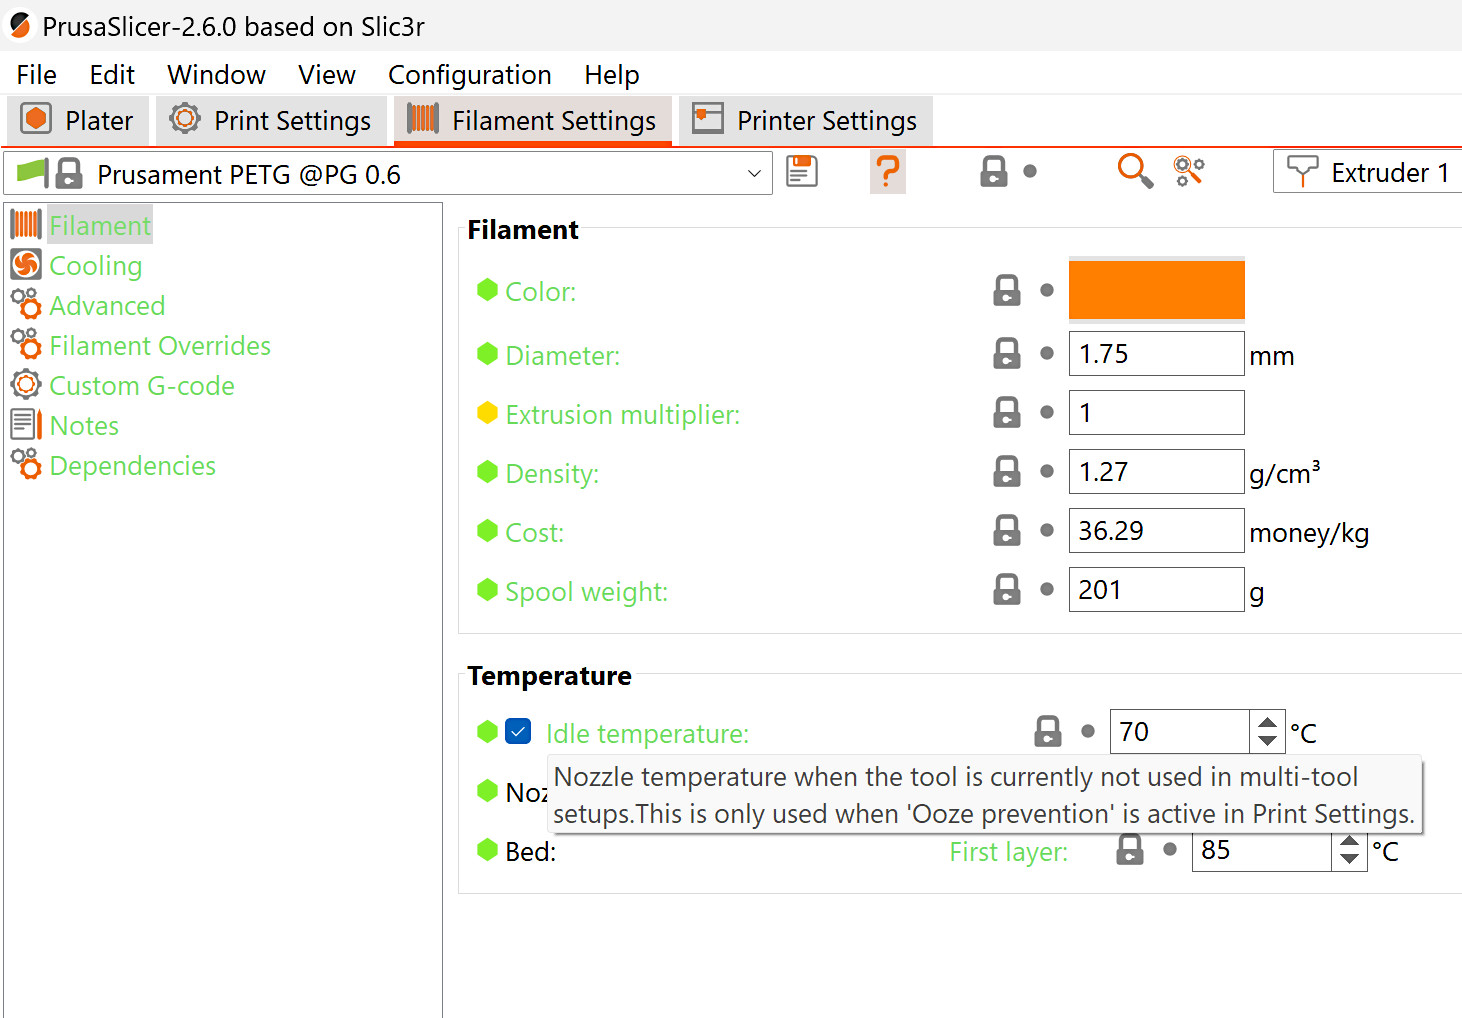
Ooze prevention
In PrusaSlicer, in Print Settings -> Multiple extruders, leave ooze prevention enabled. This will allow the idle temperature in Filament settings -> Filament -> Idle temperature to stay at the best idle temperature for the specific filament. The temperature in the idle temperature setting has priority over the temperature variation in the ooze prevention setting.
If ooze prevention is disabled, all the extruders will stay at their print temperature during the whole print. This leads to significant oozing, material degradation in the melt zone, and possibly nozzle clogging.
 |  |
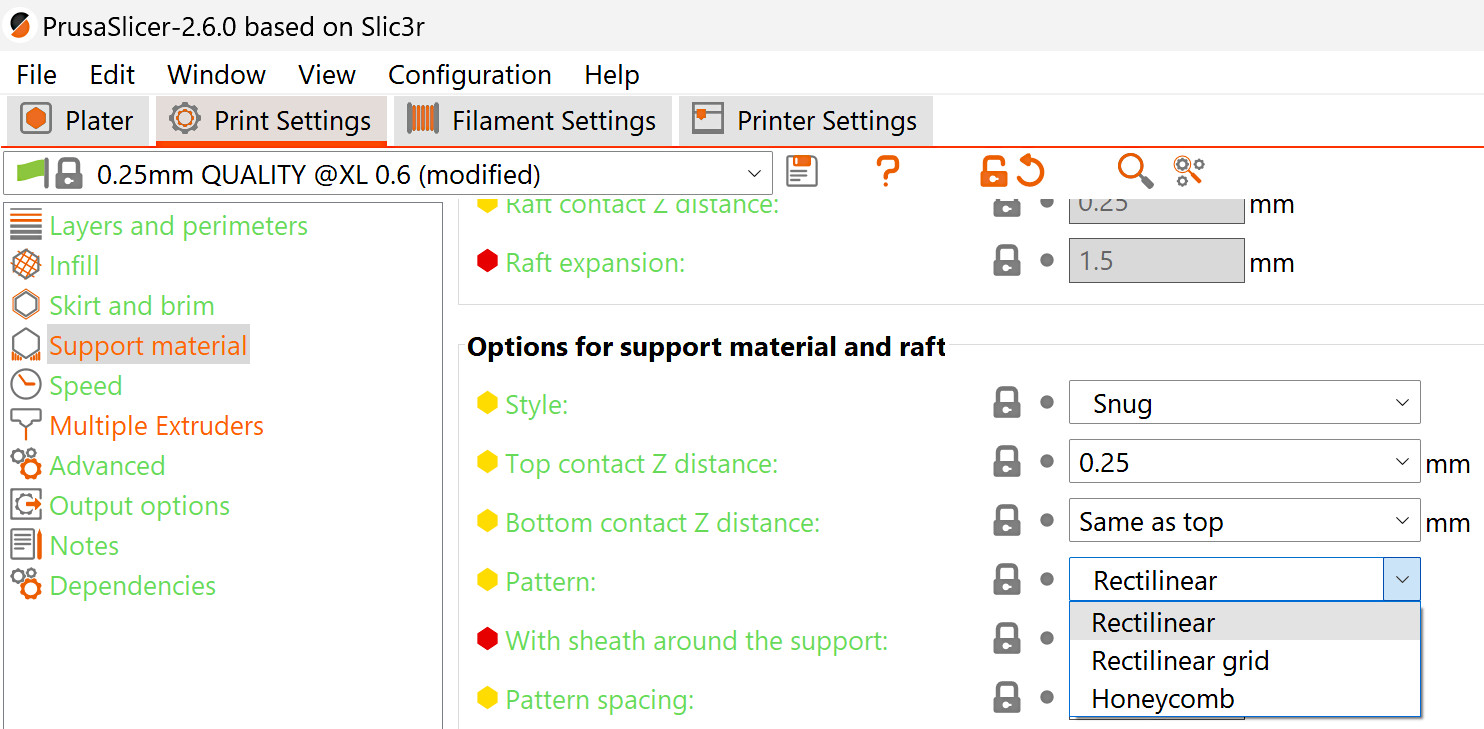
Considerations on support styles
When using snug supports, check in the sliced object for parts of the support material that might be very tall and thin, as these might fall or break in the middle of the print. If you notice them in your sliced object, we recommend changing the support pattern, and/or changing the support style to grid.
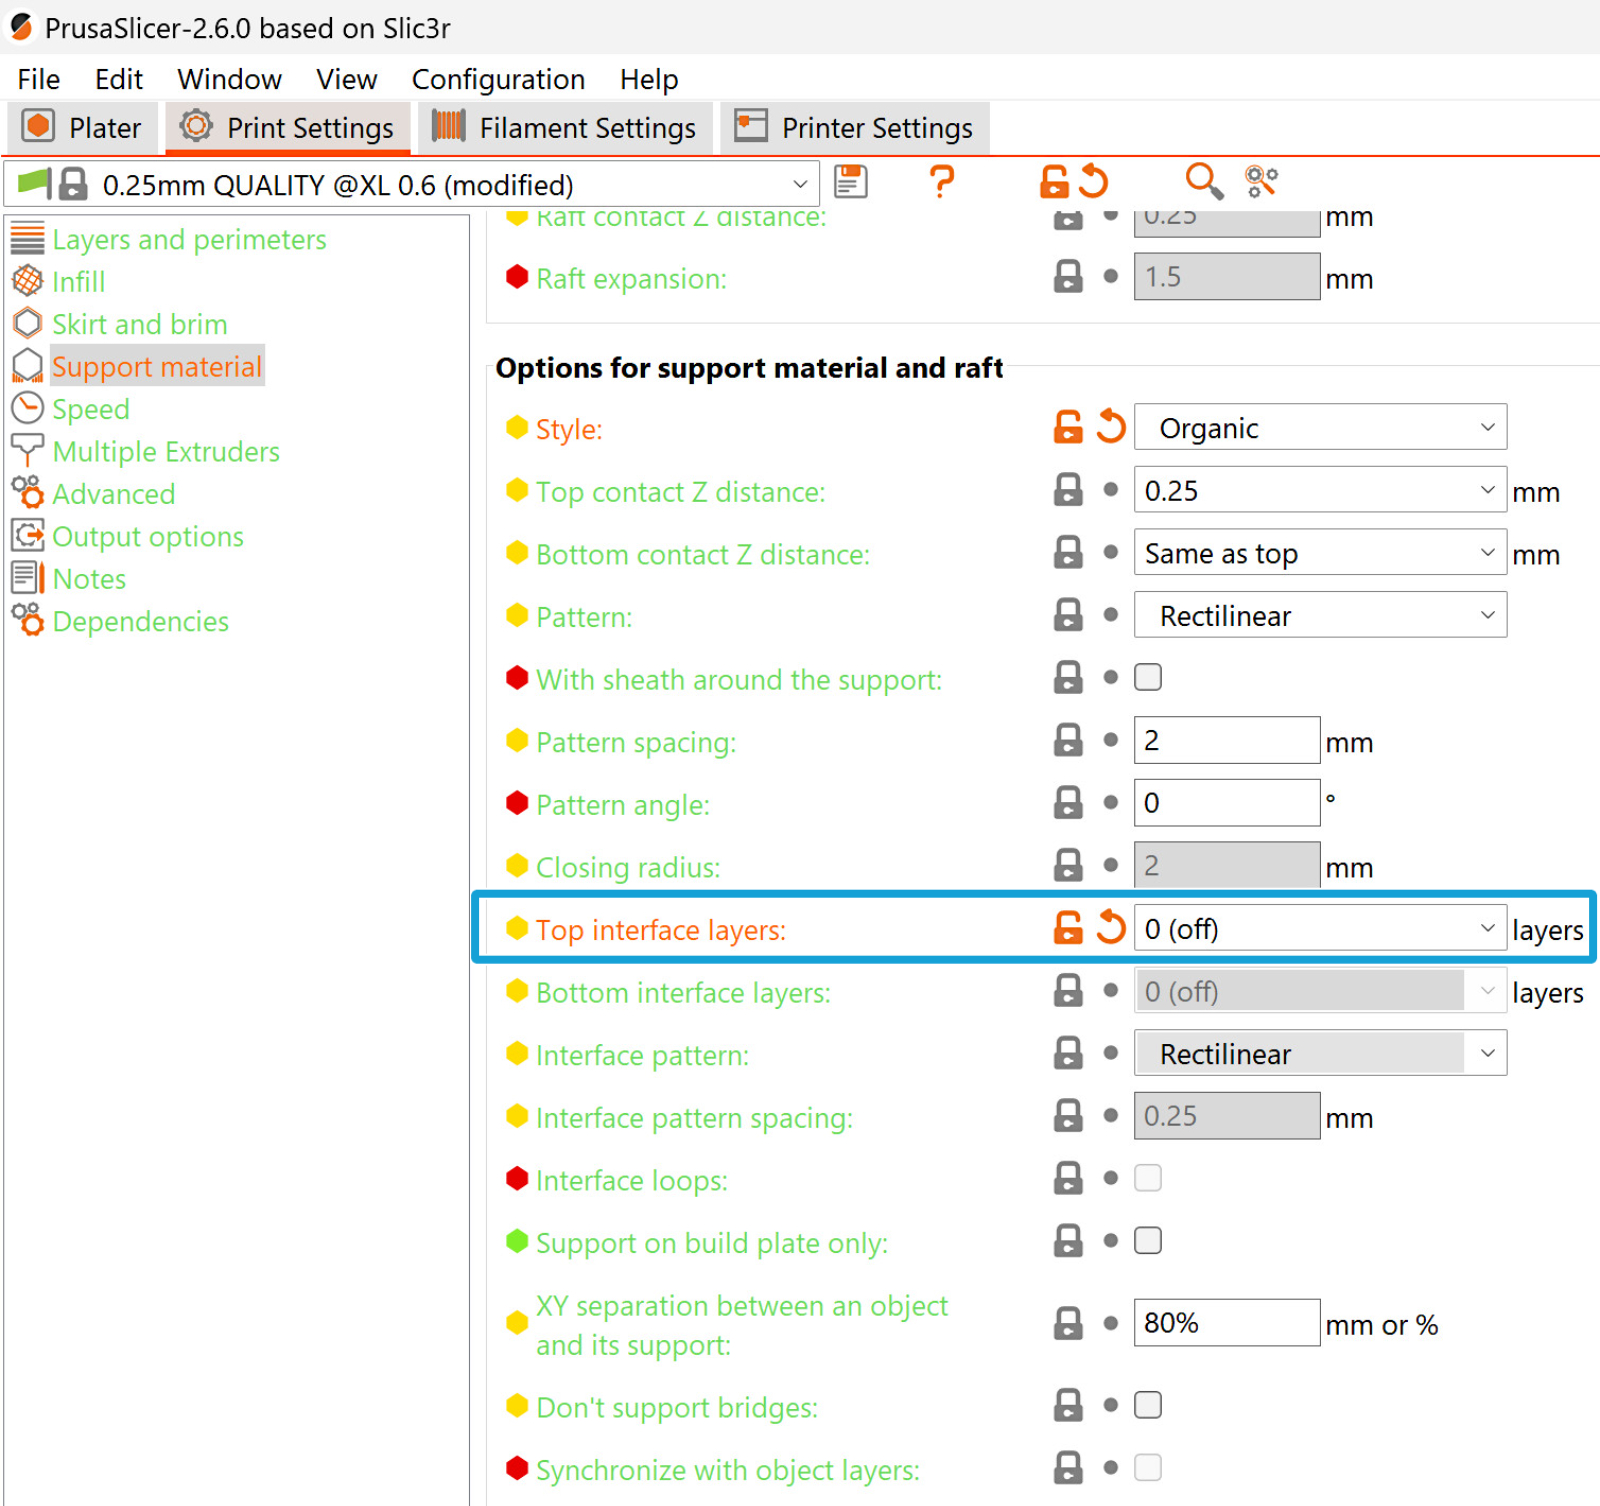
When using organic supports, don't use interface layers, or they will create unprintable artifacts.
12 comments
Did you get any leads?
Then in the next paragraph it goes on to repeat the first. :/
Questions
1) What I really want to know is if I am using PETG support material for PLA print, should I then set the bed temp to that of PETG?
2) What is the consequence for the PLA material? Does that mean the model may not adhere to the bed properly?
You can probably replace the 2nd section (which is a repeat of the first paragraph) with answer to the above questions.
Comments and complaints aside, you guys do a great job overall with support. I hope my comments and replies above help others, as well. Thanks!