Pertinent pour


Before printing your 3D file, it needs to be converted into a file type called .gcode or .bgcode. That is done by a program called a slicer. The best one for your Prusa or even non-Prusa printers is PrusaSlicer. This guide will lead you through using PrusaSlicer for the first time.
Before starting to use PrusaSlicer, make sure you know your Printer model (including the name and nozzle size) and the filament material you will print with.
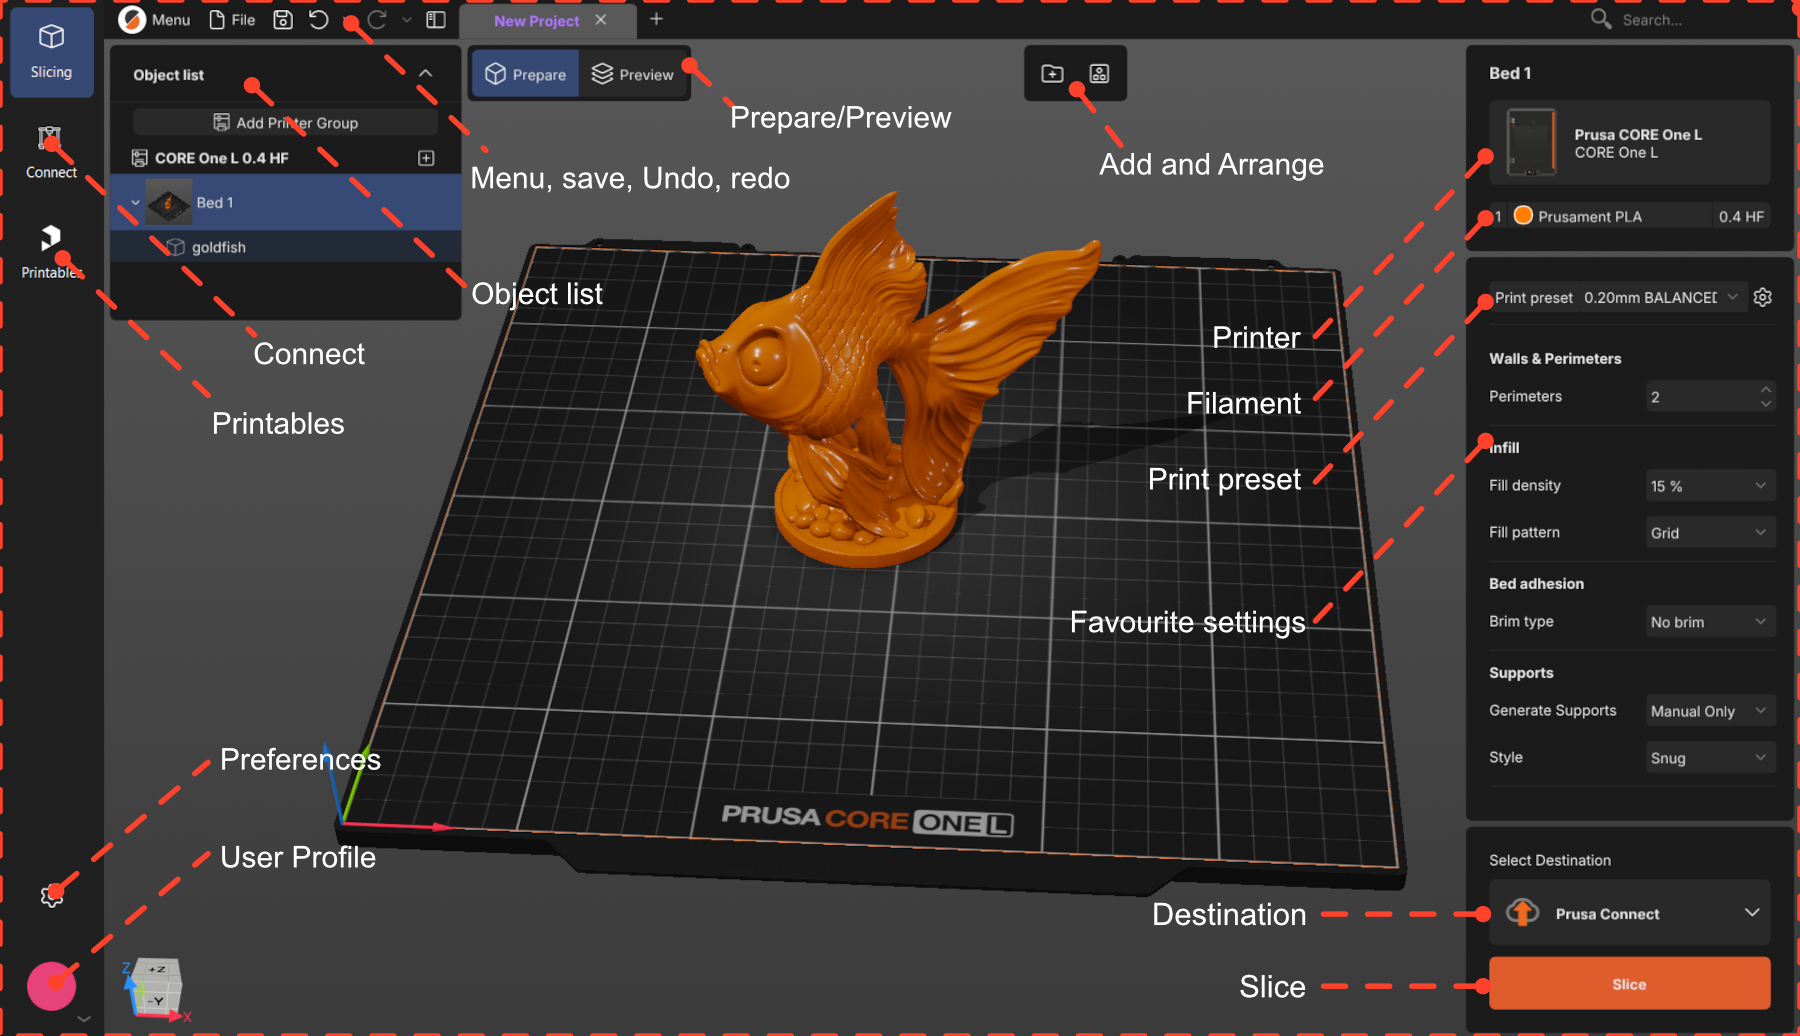
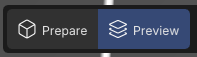
PrusaSlicer has two work modes: Prepare and Preview. Most of the model preparation will be done in the Prepare mode.
In both modes, you can see the Object list at the top right of the workspace. That will contain all the items of your project, organized as Printer -> Bed -> Object.
The Prepare mode is where you will arrange your model and choose your settings. There, you have the 3D scene, where you will add your model.
If no objects are selected, you will see the options Add and Arrange on the top menu, and the selected printer, filament, and print profile on the right-side menu.
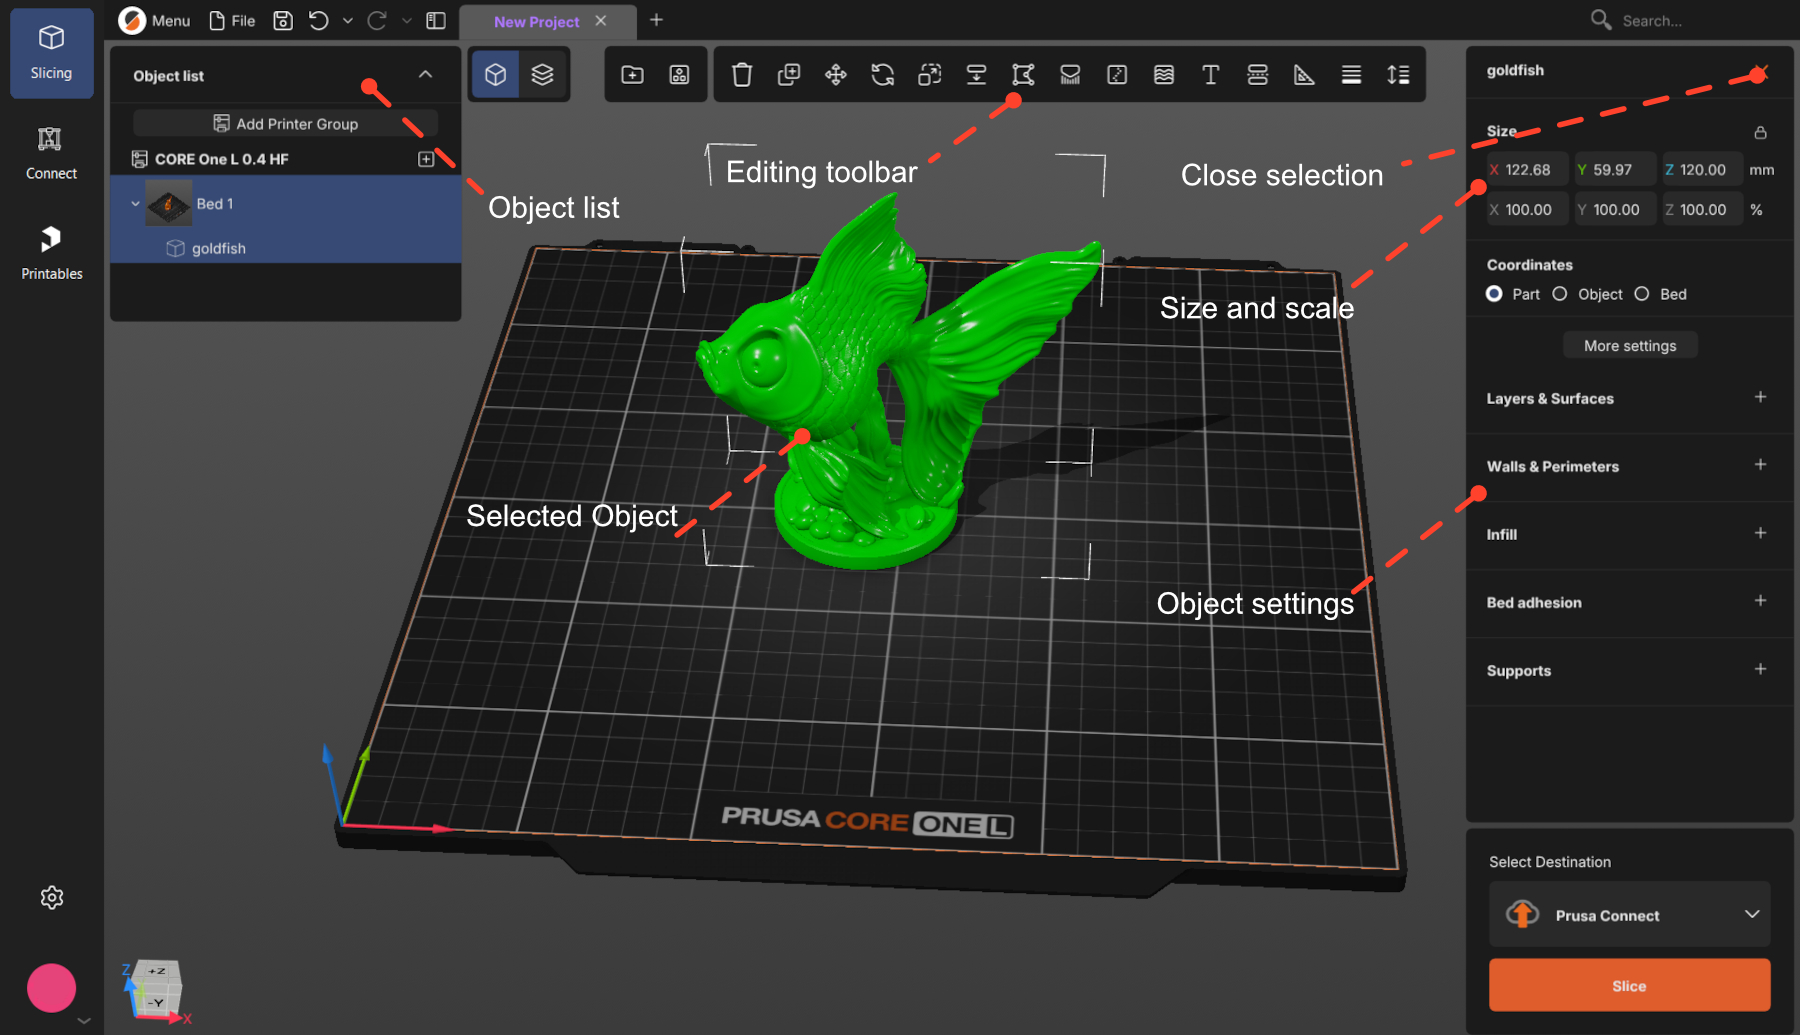
After an object is selected, you will see the full set of editing tools at the top menu, and the object's size and settings on the right-side menu.
To cancel selection, press Esc or click the close button.
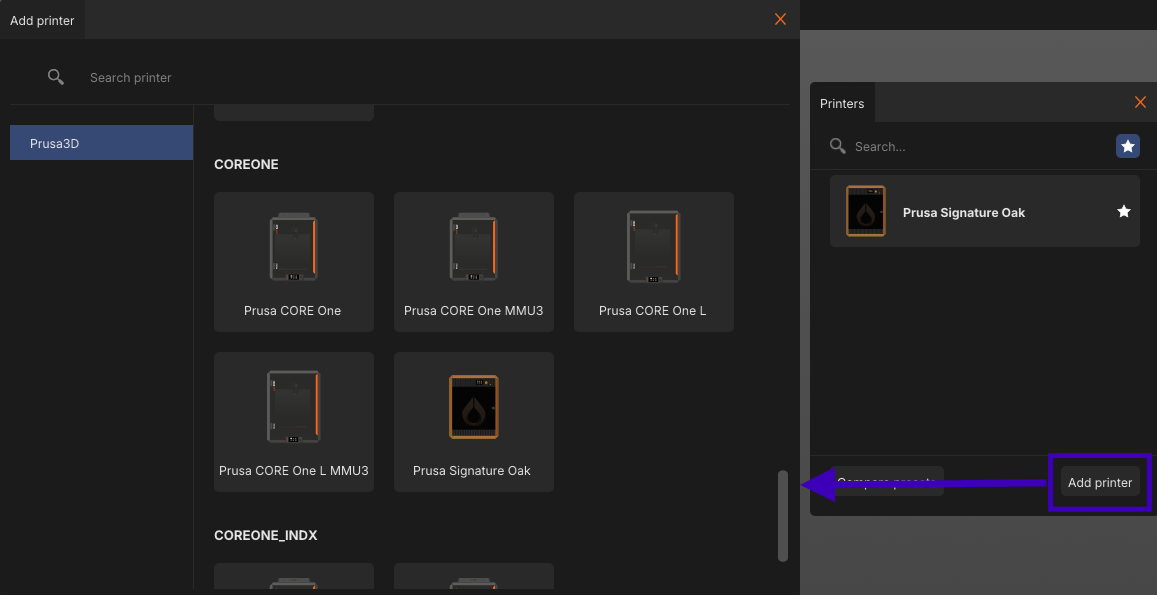
Click to select the printer you will use. If your printer is not on the list, click Add printer at the bottom of that dialog and find your model in the catalog - there is a search box.
Set up the hardware. Always check the nozzle diameter and type, and the print sheet. The gear next to the printer name opens a menu with hardware setup
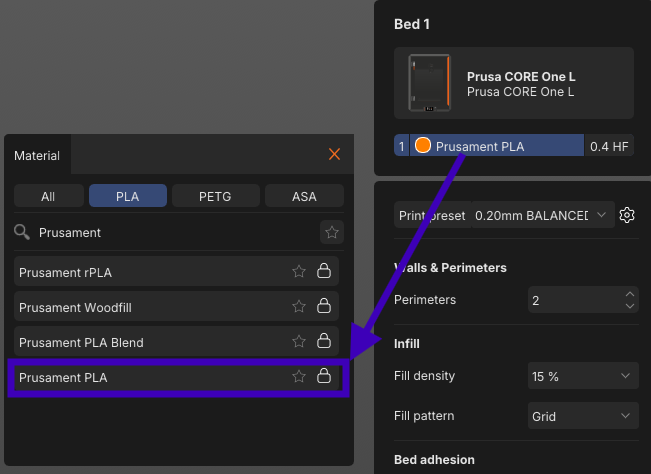
Click the material name to see the list of available materials and brands. You can filter by
material type — (the All / PLA / PETG / ASA) tabs — or search for the filament.
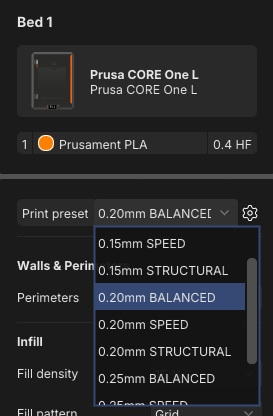
Each print profile comes with a predefined layer height — the main trade-off between quality and
time. Thinner layers mean more detail and a longer print.
To start, use 0.15 or 0.20 mm. Both give very good quality at a reasonable print time.
Most layer heights also come in versions tuned for a purpose, like SPEED or STRUCTURAL.
BALANCED is the neutral one you can start with.
Any of these options work:
Supported 3D formats are: .3mf, .stl, .obj, .step / .stp, and SVG.
Your model may be oriented incorrectly after import. Four tools are very useful:
Printers build prints upward layer by layer, so anything that overhangs with nothing beneath it has nothing to print onto. It sags or falls, ruining the print. Supports are scaffolding that holds it up, and you break them off afterwards.
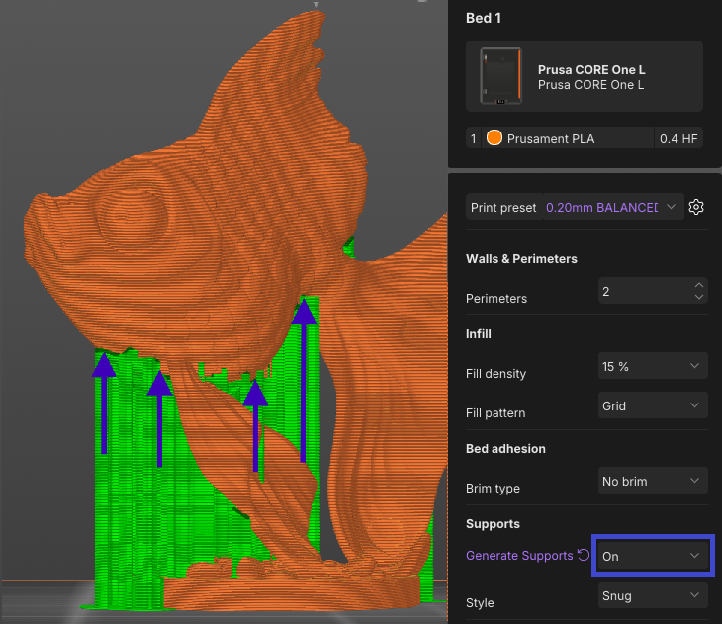
Perimeters and infill are the two basic settings that control the structure of the finished print.
Both can be easily found in the right panel: (1) Perimeters, (2) Infill density.
Increasing either adds strength and rigidity and increases the print time. For a first print, the
profile's defaults are fine.

The Slice button is the most important in PrusaSlicer. Slicing takes the model geometry and all
your settings, and generates the instructions your printer follows.
Clicking to Slice will bring you into Preview mode. To go back, use the < (back) button beside
Export.
or the Prepare / Preview switch above the plate.
You can see the Used material and the Printing time on the left panel.
Look at the print. The vertical slicer on the side allows you to check the print layer by layer by sliding it down. The three things to check are:
If something looks wrong, switch back to Prepare, fix it, and slice again.
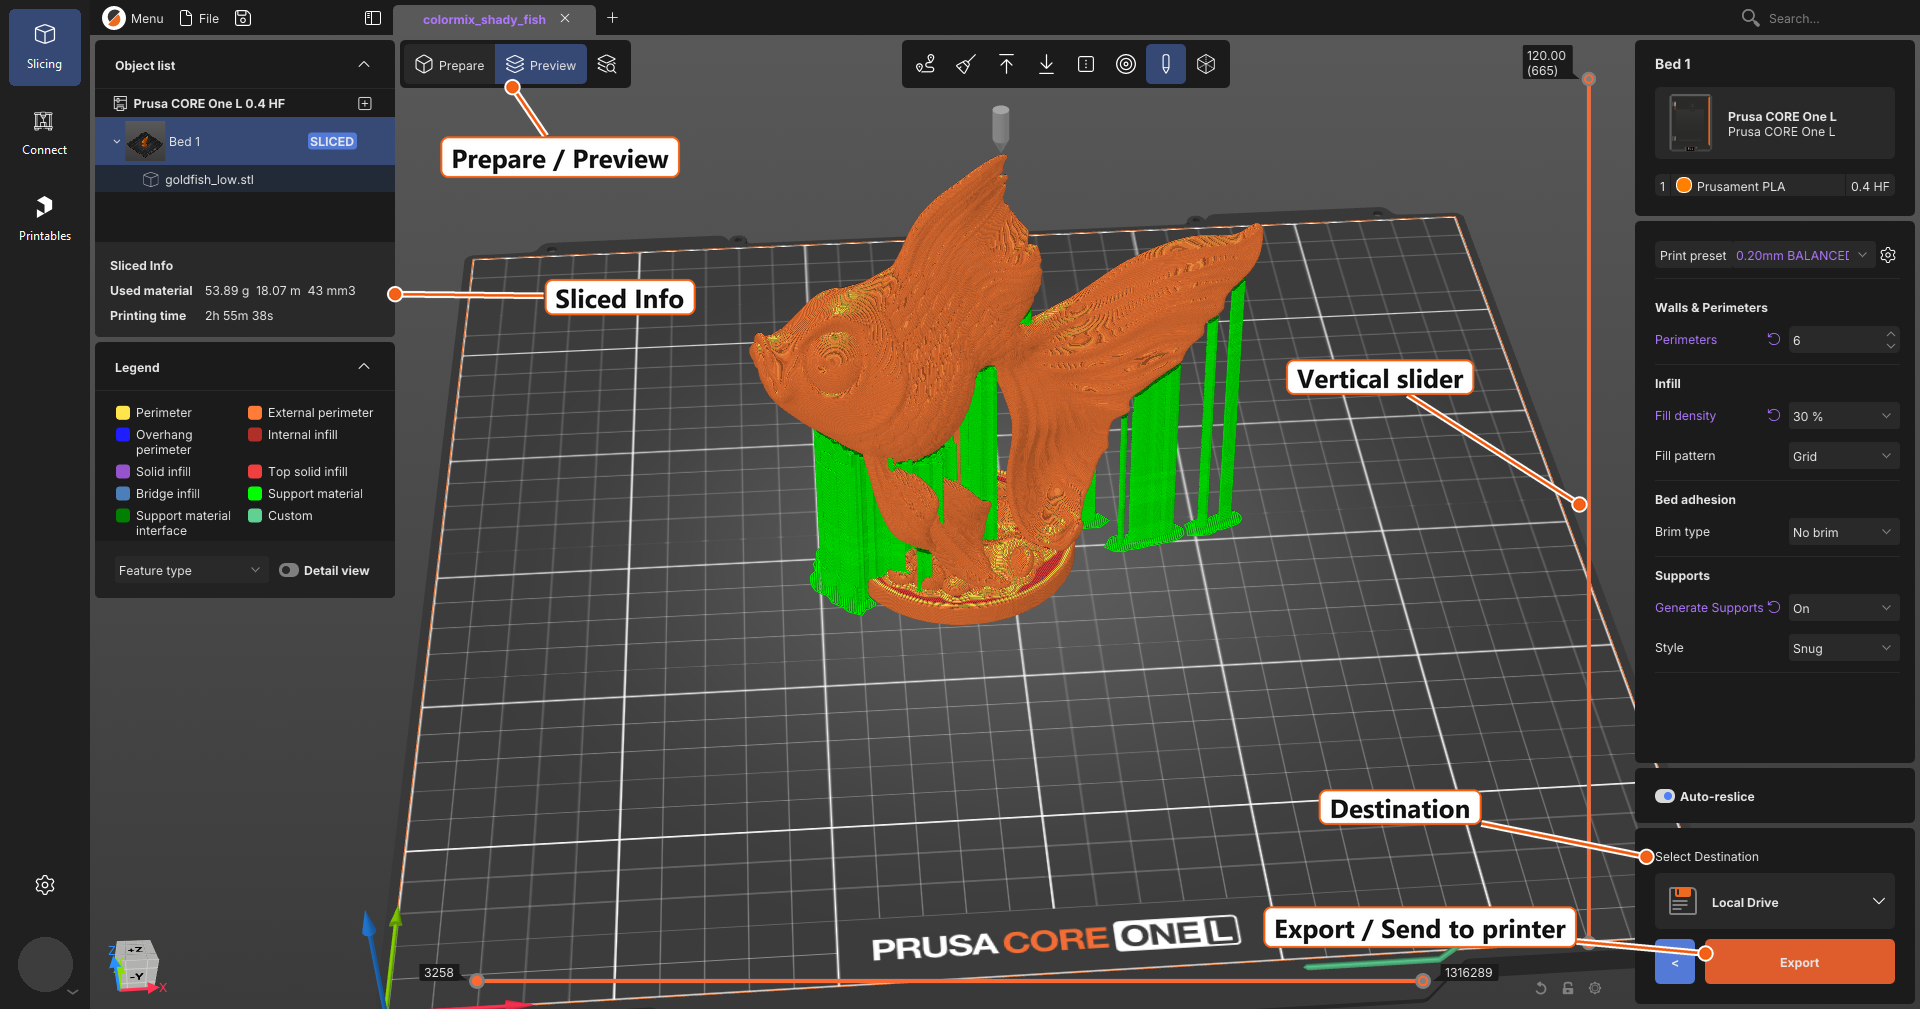
The select destination block above the orange button controls where the file goes. Click it to choose.
Most first prints go out on removable media. If a USB stick or SD card is plugged in, PrusaSlicer offers it as the destination, and once the file is written, a notification appears with an Eject button — use it rather than pulling the card out.
Then start the print from the printer's own menu. Watch the first layer go down. If it sticks, the rest usually follows.
Can't find a setting? Press Ctrl + F and type its name. It works across every settings page.