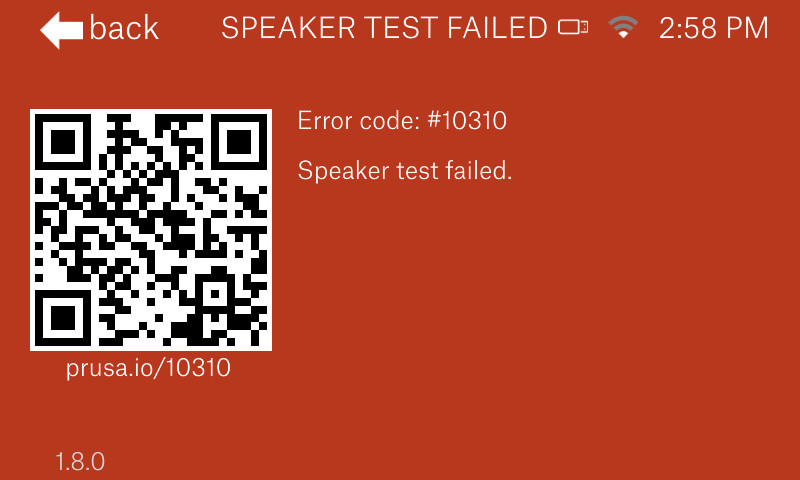
This is an advanced system for displaying error screens, providing more useful information to the user. In case of an issue, the printer will display the name of the error followed by a brief description and a QR code. Take your phone, scan the code, and you will be immediately redirected to an article that will explain in detail what happened to your printer and how to fix the problem.
You can see the printers that show the QR code in our GitHub page. Note that older firmware versions may have different looks.
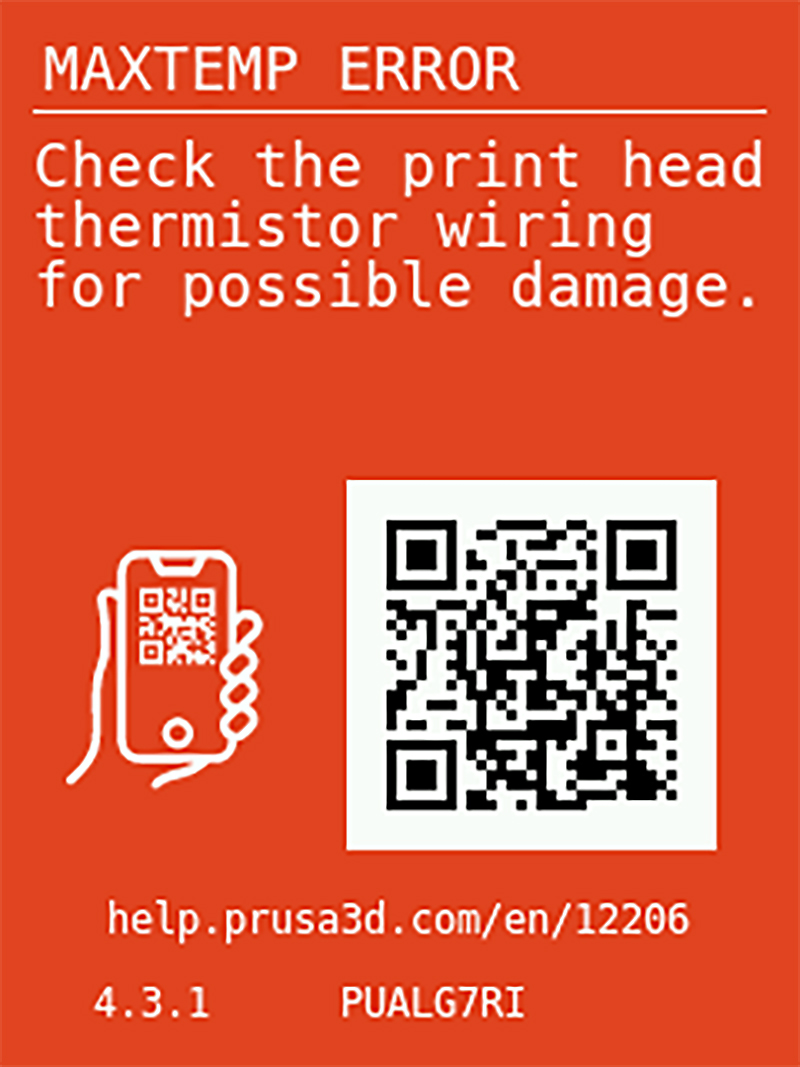 |  |
How to use the error code
In case your printer displays the error screen, there are multiple ways to access the article:
- Scan the QR code from the printer screen using a phone or tablet
- Use the link displayed on the screen (e.g. help.prusa3d.com/en/12201)
- Open help.prusa3d.com and search for the error (e.g. 12201)
Follow the article explaining what went wrong and how to fix the issue. Note that some errors might require you to replace broken part(s) of the printer. If a replacement is necessary, there will be a link to the service guide at the bottom of the article.
Error code explained
How is each code created? Let's use error #12201 again as an example. The code consists of five numbers with the following pattern: XXYZZ
| # XXYZZ | Heating failed bed #12201 (MINI) |
|
XX - ID number of the printer, according to USB PID Y - Error category (common for all printers) ZZ - ID number for the specific error |
12 - Printer number 12: Original Prusa MINI 2 - Error category: Temperature error 01 - Specific error code: Heatbed heating failed |
Device hash
The URL link embedded in the QR code may contain an optional “device hash”. On the CORE One, MK4/S, MK3.9/S, MK3.5/S, XL, MINI/+, this can be disabled in Settings -> System, and on the SL1/S in Settings -> Settings and Sensors.
Including this information enables us to check whether you are running the latest version of firmware, and if not, we will inform you at the top of the article. The information provided in the URL is stored in our database to help us better understand which errors are the most common and how many errors each printer experienced.
The device hash cannot be used to recover anything sensitive like a serial number and isn’t used for anything else than the QR codes feature therefore there are absolutely no security concerns. This feature is turned ON by default. In case you don't want to use this enhanced feature, you can switch it off in the printer's menu by setting the “Device hash in QR” to OFF.
Once you turn it off, the QR code URL will contain only the following: https://help.prusa3d.com/en/12201/
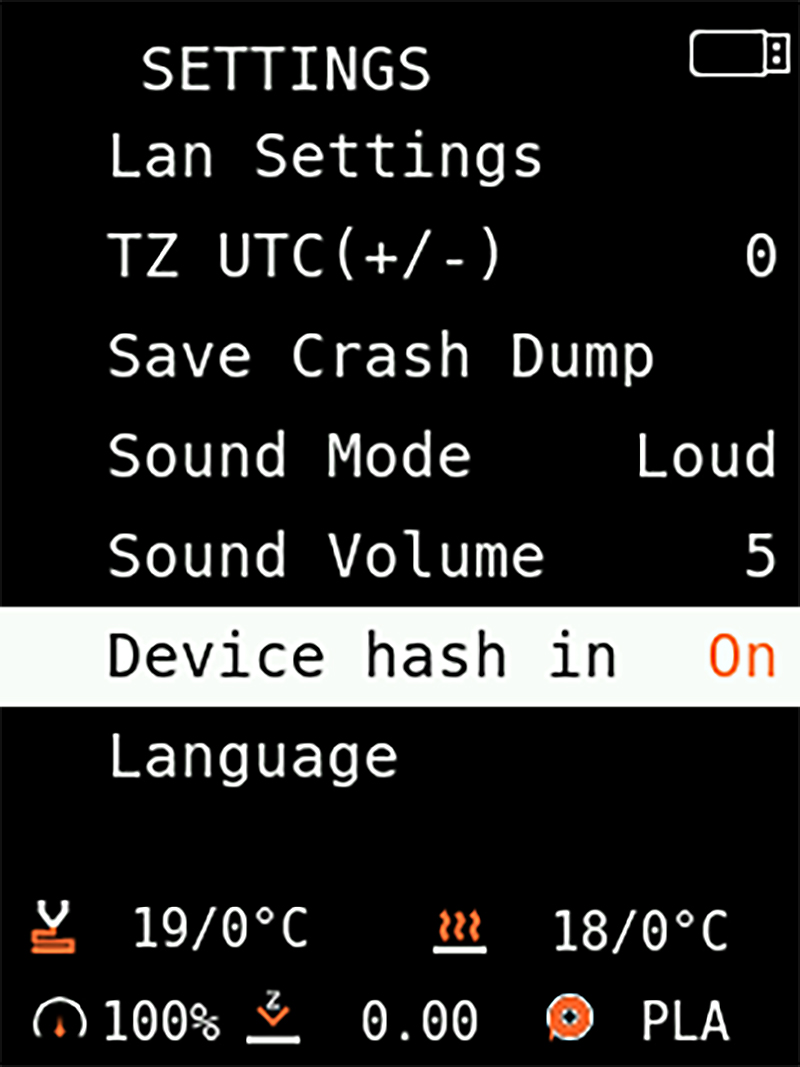 | 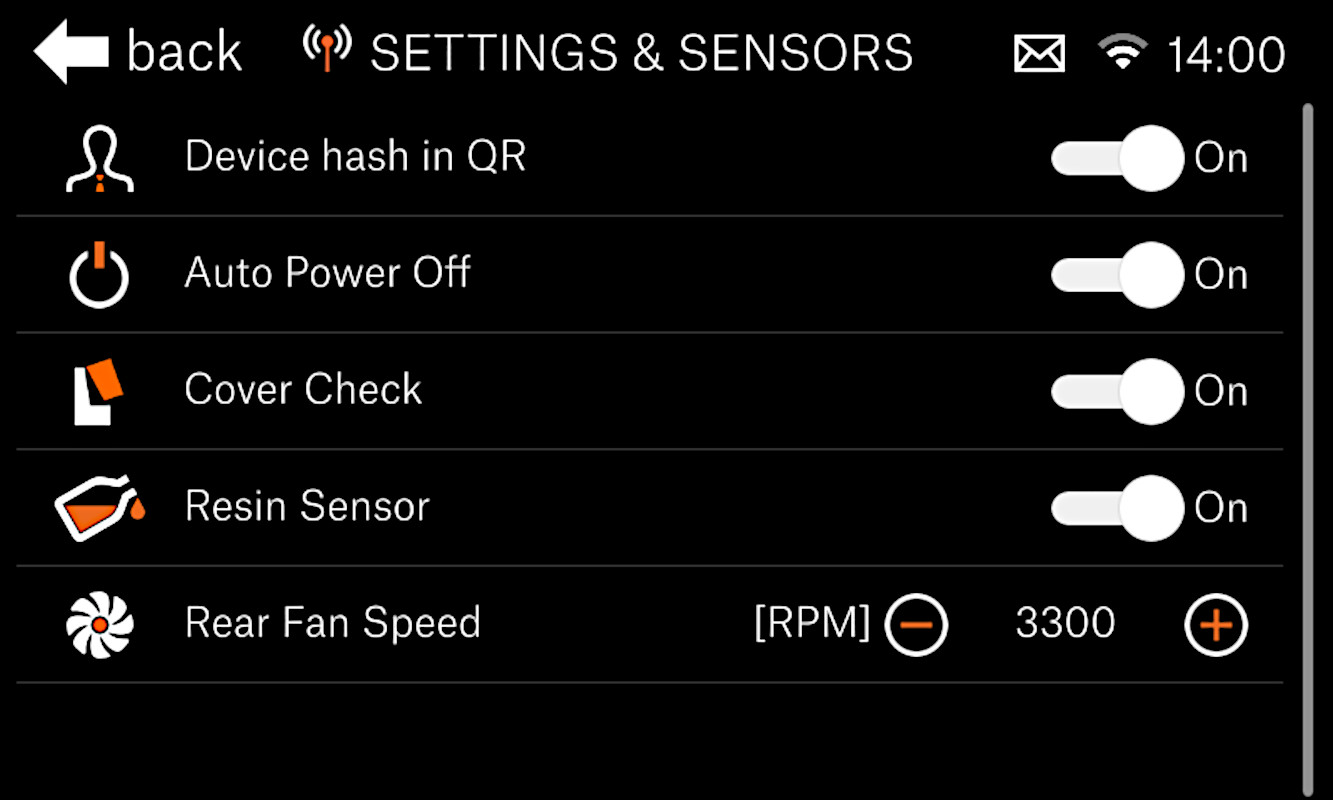 |
Device hash toggle for MINI on the left and SL1 on the right.
4 comments