This is by far the most common 3D printing problem, and probably the first one you may encounter. The first layer is the essential one because it is the base of the printed object. Therefore, if it isn’t perfect, the chance of print failure increases. Many common 3D printing problems stem from a poor first layer. There are a couple of things that can go wrong when printing your first layer, so let’s take a look at what can be done to avoid these problems.
The print surface should be regularly maintained to achieve optimal printing quality and minimize the chance of failed prints. It's an easy procedure, so let's take a look at our tips and recommendations.
How to prepare your print surface
If you don't touch the print surface with your hands or dirty tools, then you don't have to clean it before every print. Clean your tools the same way you would the bed, and you will be able to start your next print right away.
Isopropyl alcohol - smooth, satin, textured sheets
To achieve the best adhesion of the print surface, it is vital to keep it clean. The best option when printing with ABS, PLA, and many other materials is 90% Isopropyl alcohol, which can usually be sourced locally at drugstores or hardware stores. Denatured alcohol is also an option. We recommend always using 90% IPA. Solutions with lower percentages may contain unsuitable chemicals and oils.
PETG, ABS, ASA, XT, and CPH filaments are an exception - the adhesion may be too strong, and you can damage your Smooth PEI sheet. We recommend using a separating agent (e.g. a glue stick). For more information on how to print with these materials, check out our Material guides.
Dish soap and water
If the adhesion seems to decrease over time even when using IPA, you can clean the steel sheet with a few drops of dish soap and warm water (not hot!). This should not be done often, and do not submerge the sheet completely in hot water, but it will dissolve some oils and sugars that gather over time and that IPA does not remove. Make sure to use only dish soap and dry the sheet well before using it.
Acetone
PEI can lose its adhesive powers after a couple of hundred hours. When you see models coming loose regularly, wipe the surface thoroughly with acetone to restore the adhesion. This should only be used in the smooth PEI sheet and only around once per month. Do not overuse acetone. Extended use makes PEI surface brittle. Also, do not use acetone before printing with PETG.
Glue
Glue is a great, easy-to-use tool to increase adhesion. It also creates a protective separation layer. No need for glue specially made for 3D printing. You can use a basic (PVA-based) glue stick. From our experience, it is not needed when printing PLA, but may it be advisable when printing:
- Polyamide (Nylon)
- PETG
- Polycarbonate (PC)
- PET-based materials
- ABS
- ASA
- Other more exotic materials
- Flexible materials
Resurface it
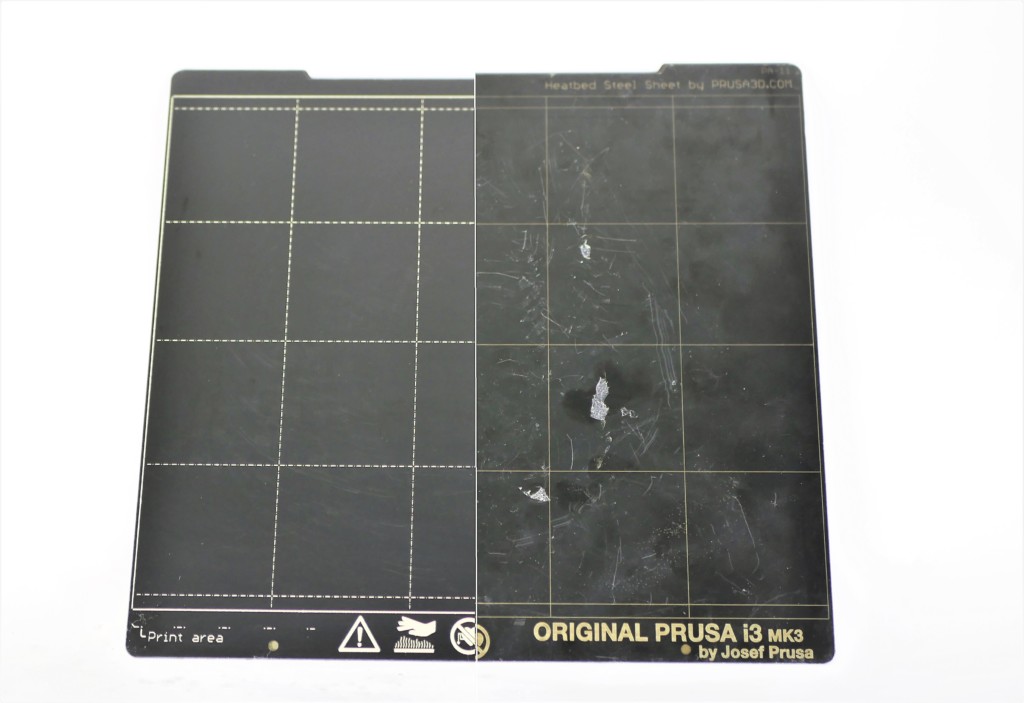
It can happen that you will leave some small marks on the print surface with your nozzle or tools. Typically, they will be shinier than the rest of the pad. It does not affect functionality or adhesion. However, if you want to have the same surface look on the whole print bed, you can resurface it.
The easiest way is to take the hard side of a dry kitchen sponge and gently wipe the affected area in a circular motion a few times. Another option is to use fine-grit sandpaper (400-600) and lightly give the sheet a rub. Wipe over with IPA after doing so.
| Smooth PEI sheet |
| Use glue stick when printing FLEX, PETG, and other PET-based materials, as well as ABS and ASA. IPA + PETG will cause the print to adhere very strongly to the sheet. Removing it could be extremely difficult. |
| Textured powder-coated sheet |
| Never use acetone! |
| Satin powder-coated sheet |
| Never use acetone! |
Special print sheets
For print sheets that are NOT smooth, satin, or textured, the surface preparation procedure can differ from sheet to sheet. Follow the procedures outlined in their dedicated articles.
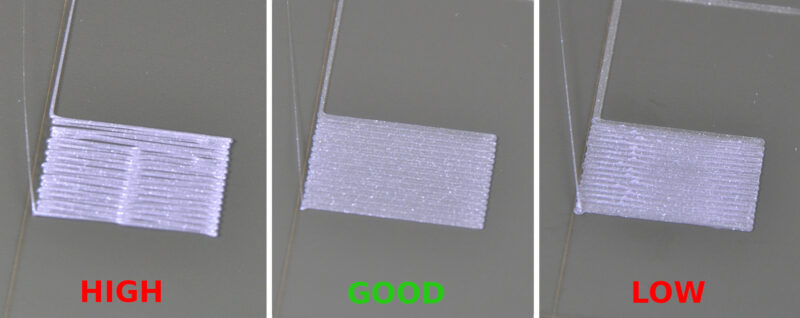
The nozzle is too close/far from the sheet (MK2/S, MK2.5/S, MK3/S/+, MK3.5/S)
If the nozzle is too close to the printing bed, there won’t be enough room for the plastic to come out of the extruder. By having the nozzle too close to the print surface, you will essentially block its opening, so that no plastic can be extruded. You can easily recognize this issue when the printer does not extrude plastic for the first layer or two. Use the Live Adjust Z function and First Layer Calibration (i3) options to tweak the height of the nozzle. You perform the calibration from LCD Menu –> Calibration –> First layer calibration. For more information on this procedure, please see the dedicated article First Layer Calibration (i3).
Speed and temperature
Decrease the printing speed
If the steps described above didn’t help, then try decreasing the printing speed. The easiest way how to do it is by rotating the knob during the printing process, lowering the percentage. Counterclockwise = decrease speed, Clockwise = increase speed. We suggest decreasing the speed to about 75% for the first three layers, and then returning it to normal.
Use recommended printing temperatures
Make sure to use the recommended nozzle and heatbed temperatures. PrusaSlicer will configure them correctly based on the selected material, so you don’t need to adjust the temperatures manually on the printer itself. If you are experimenting with new materials that don’t adhere well, you can try to increase the heatbed temperature by 5-10 °C. This way the plastic will stick a bit better.
A full or partial clog
The extruder could be clogged. This can happen either when excessive debris gets stuck inside the nozzle, when hot plastic is kept inside the extruder for too long, or when the thermal cooling for the extruder is not sufficient and the filament begins to soften outside of the desired melt zone. Please see our dedicated article Clogged nozzle/hotend (MK3.5/S, MK3S+, MK2.5S).
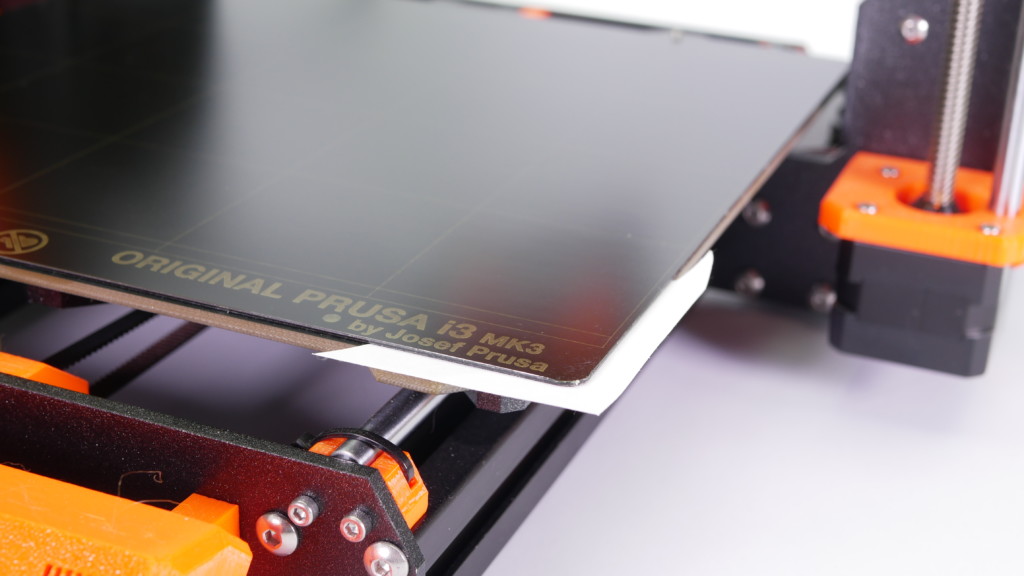
Uneven surface
If your print surface is not flat and the alignment of the mesh does not help, to achieve a flat print surface, a temporary solution is to add a piece of paper under the uneven area of the steel sheet. A more permanent solution would be to perform the firmware Bed Level Correction.
Correctly placed sheet
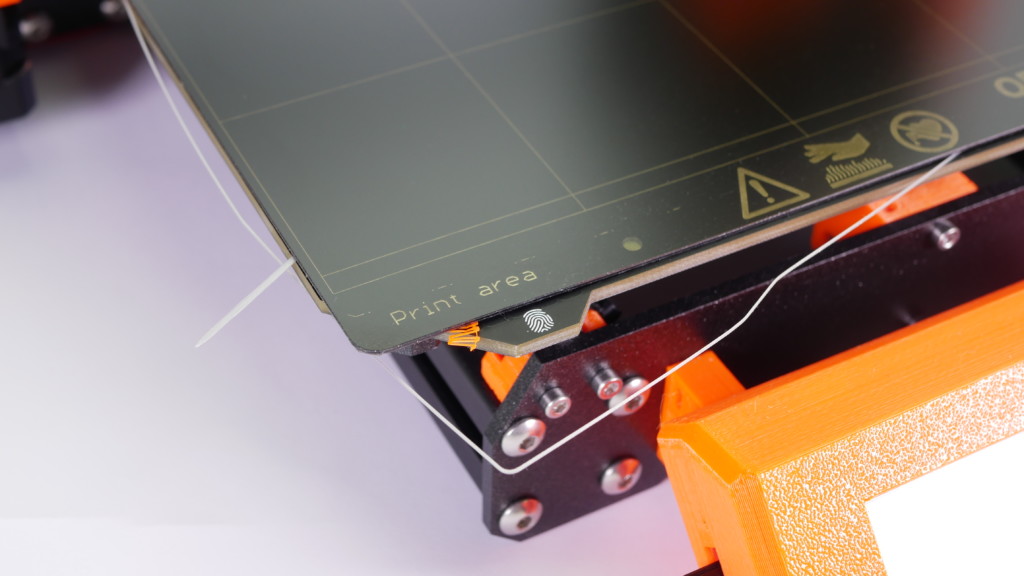
Before printing, make sure that you have the print plate properly installed, and that there are no leftovers from the previous print or a piece of loose filament that could affect the sheet position. Also, make sure that the sheet is straight and not bent or damaged.
Brim
Before you consider applying extra adhesion materials onto the bed, consider using the Brim option in PrusaSlicer, which increases the surface area of the first layer. See our dedicated article Skirt and Brim.
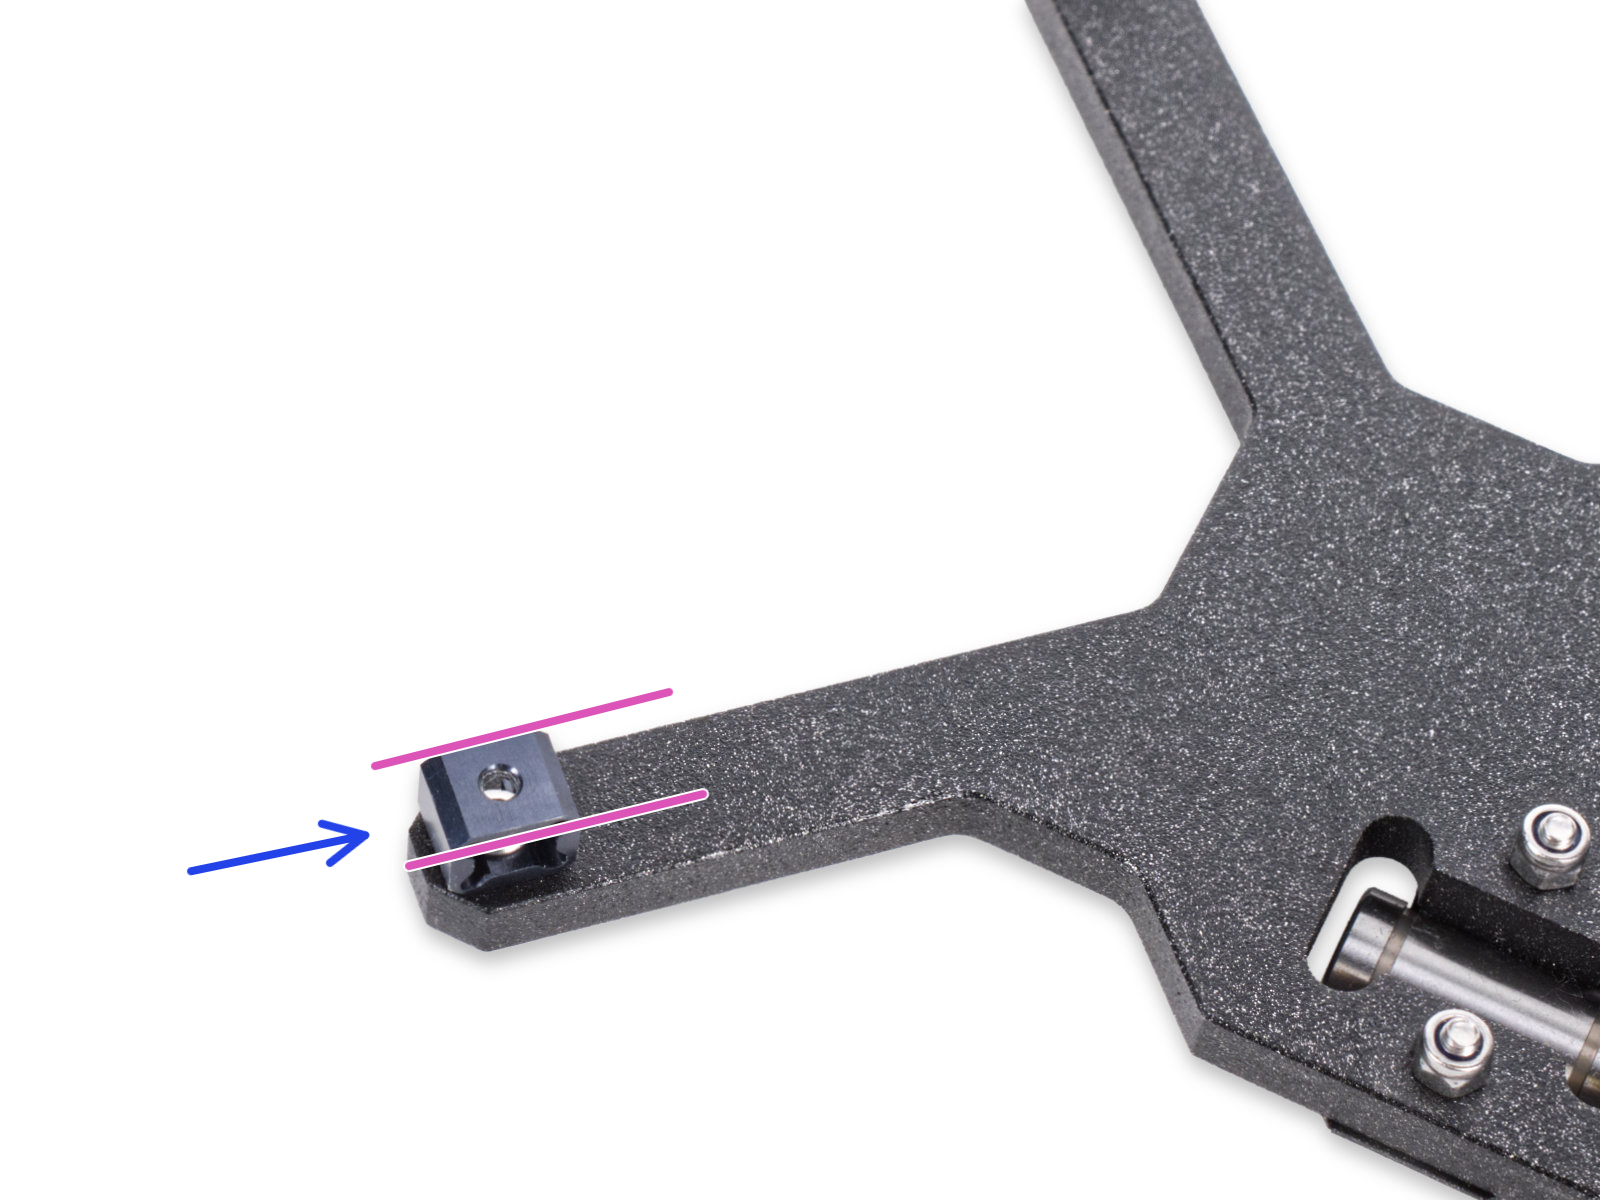
Expansion joints (CORE One, MK4/S, MK3.9/S, MK3.5/S)
Having the expansion joints in the wrong orientation can cause an uneven first layer. Make sure that all of them have the full side facing the center of the carriage.
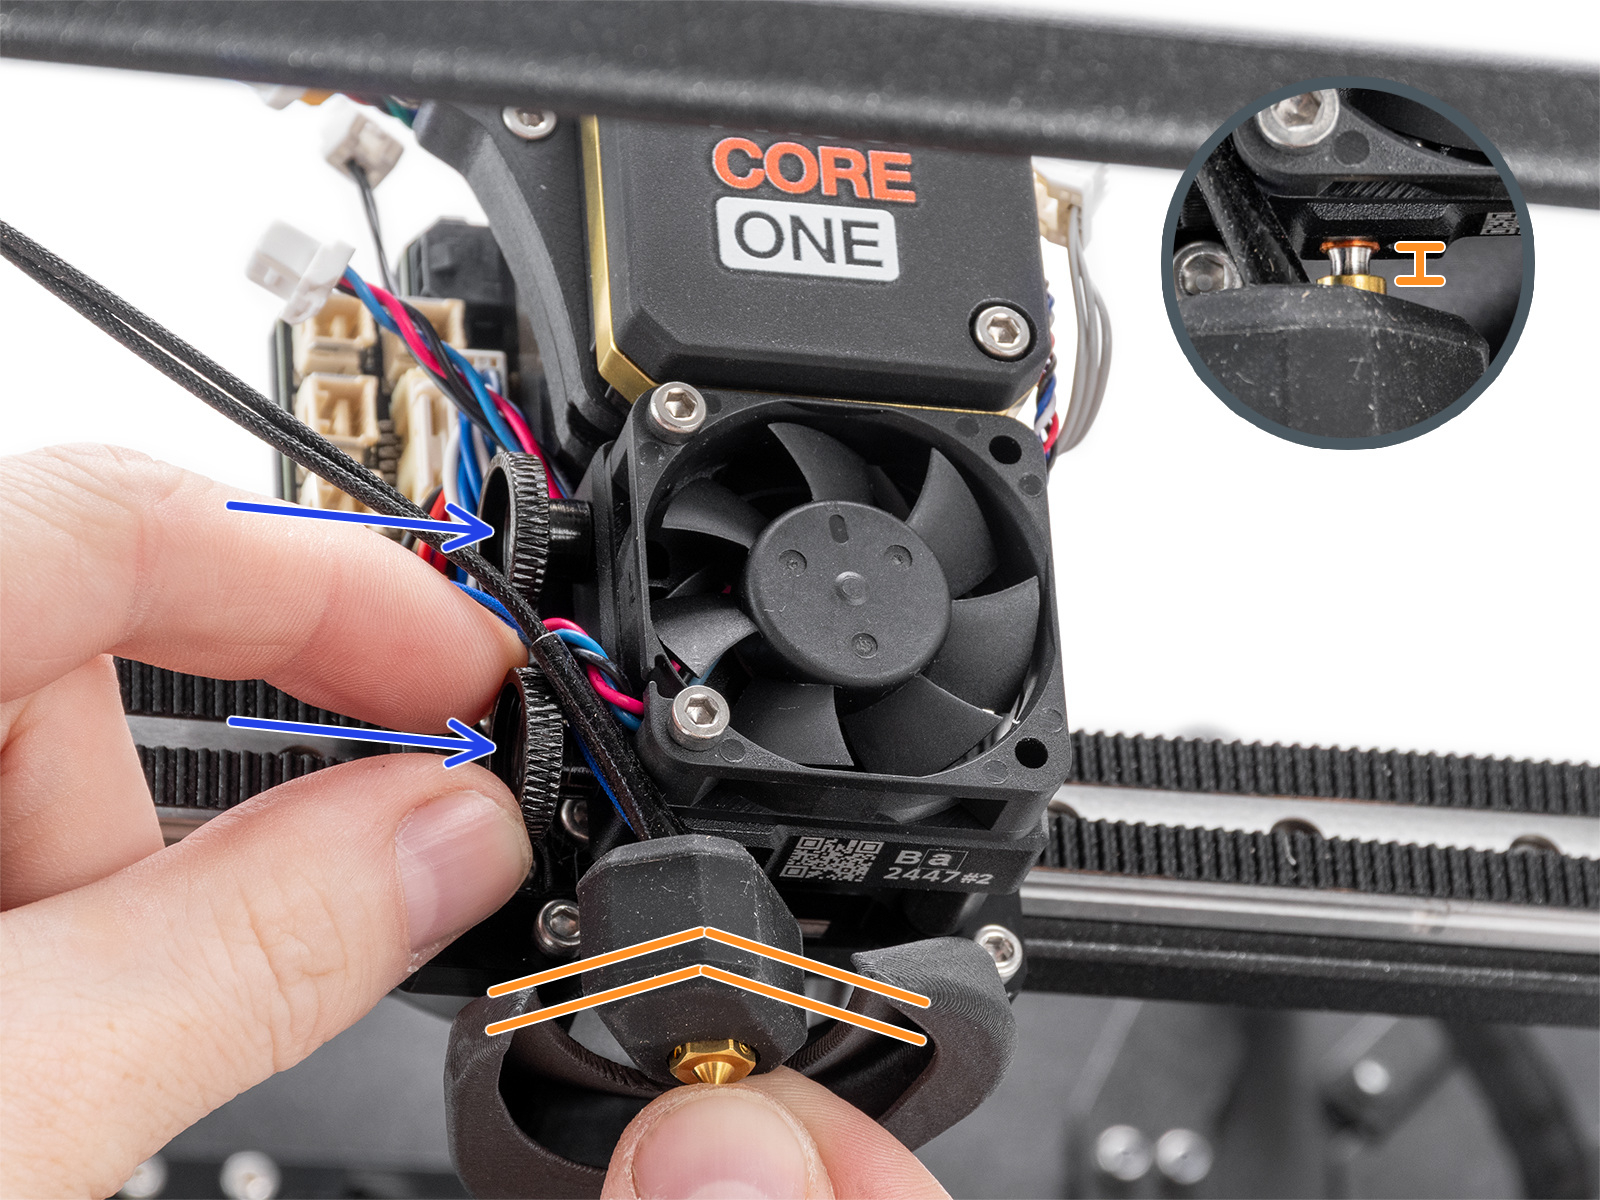
Nozzle conditions (CORE One, MK4/S, MK3.9/S)
The nozzle on the Nextruder has to be at the correct height. If you are not sure if the height is correct, open the thumb screws on the side of the heatbreak, and push the nozzle up. Tighten the thumb screws just by hand, do not use any tools.
If you have a Nozzle Adapter, check the installation again to make sure that the nozzle has not been lowered with the installation of the adapter.
 Prusa CORE One
 |  |
| Original Prusa MK4S, MK3.9S | Original Prusa MK4, MK3.9 |
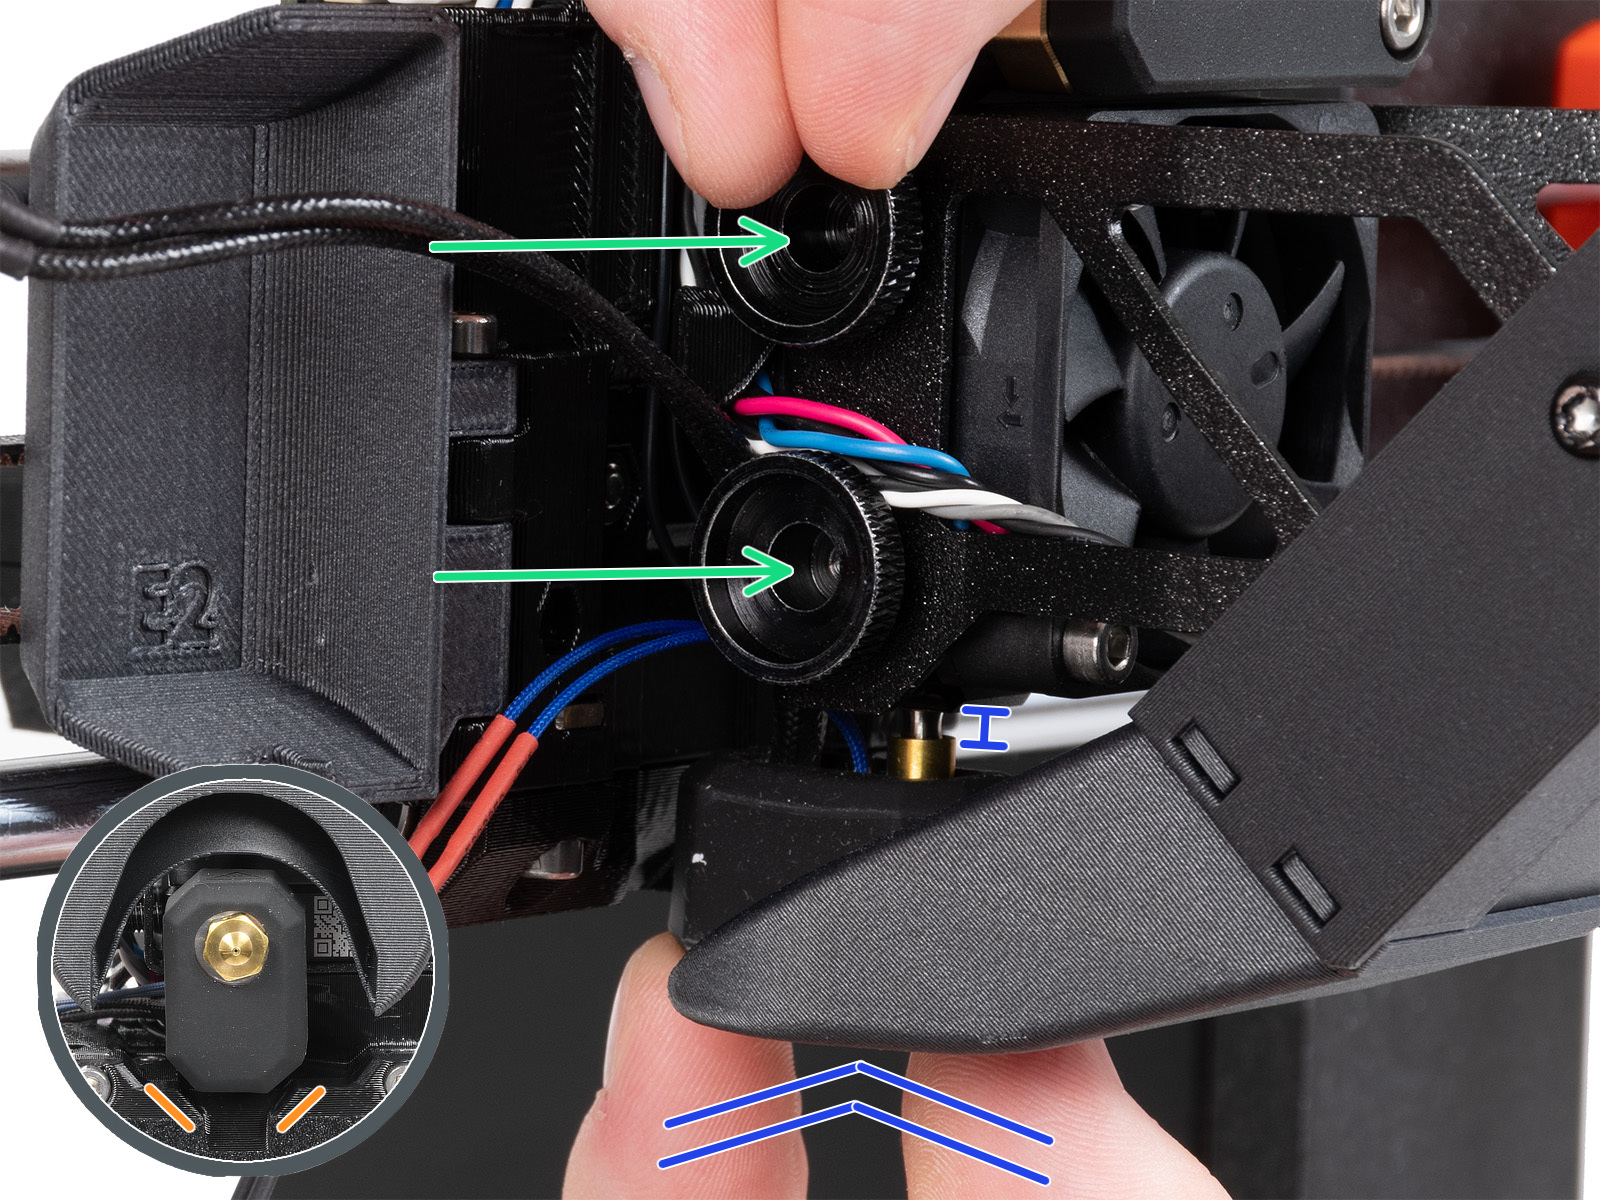
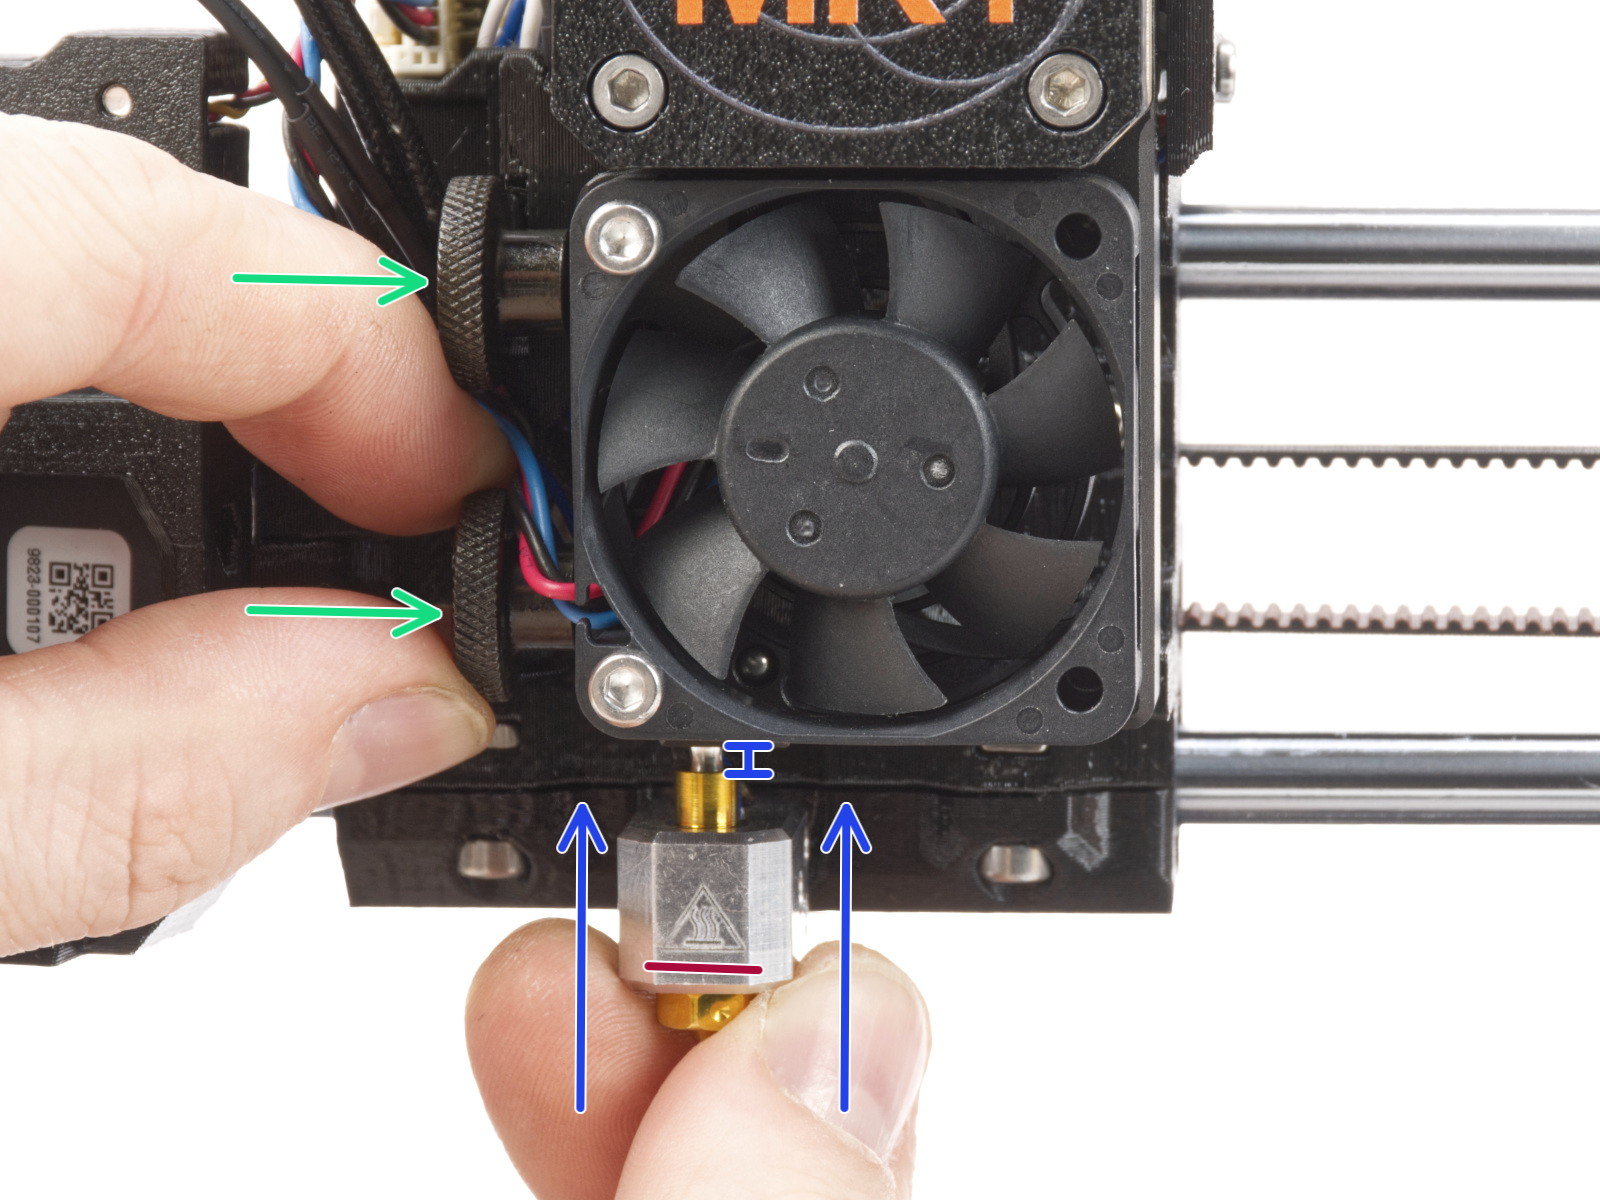
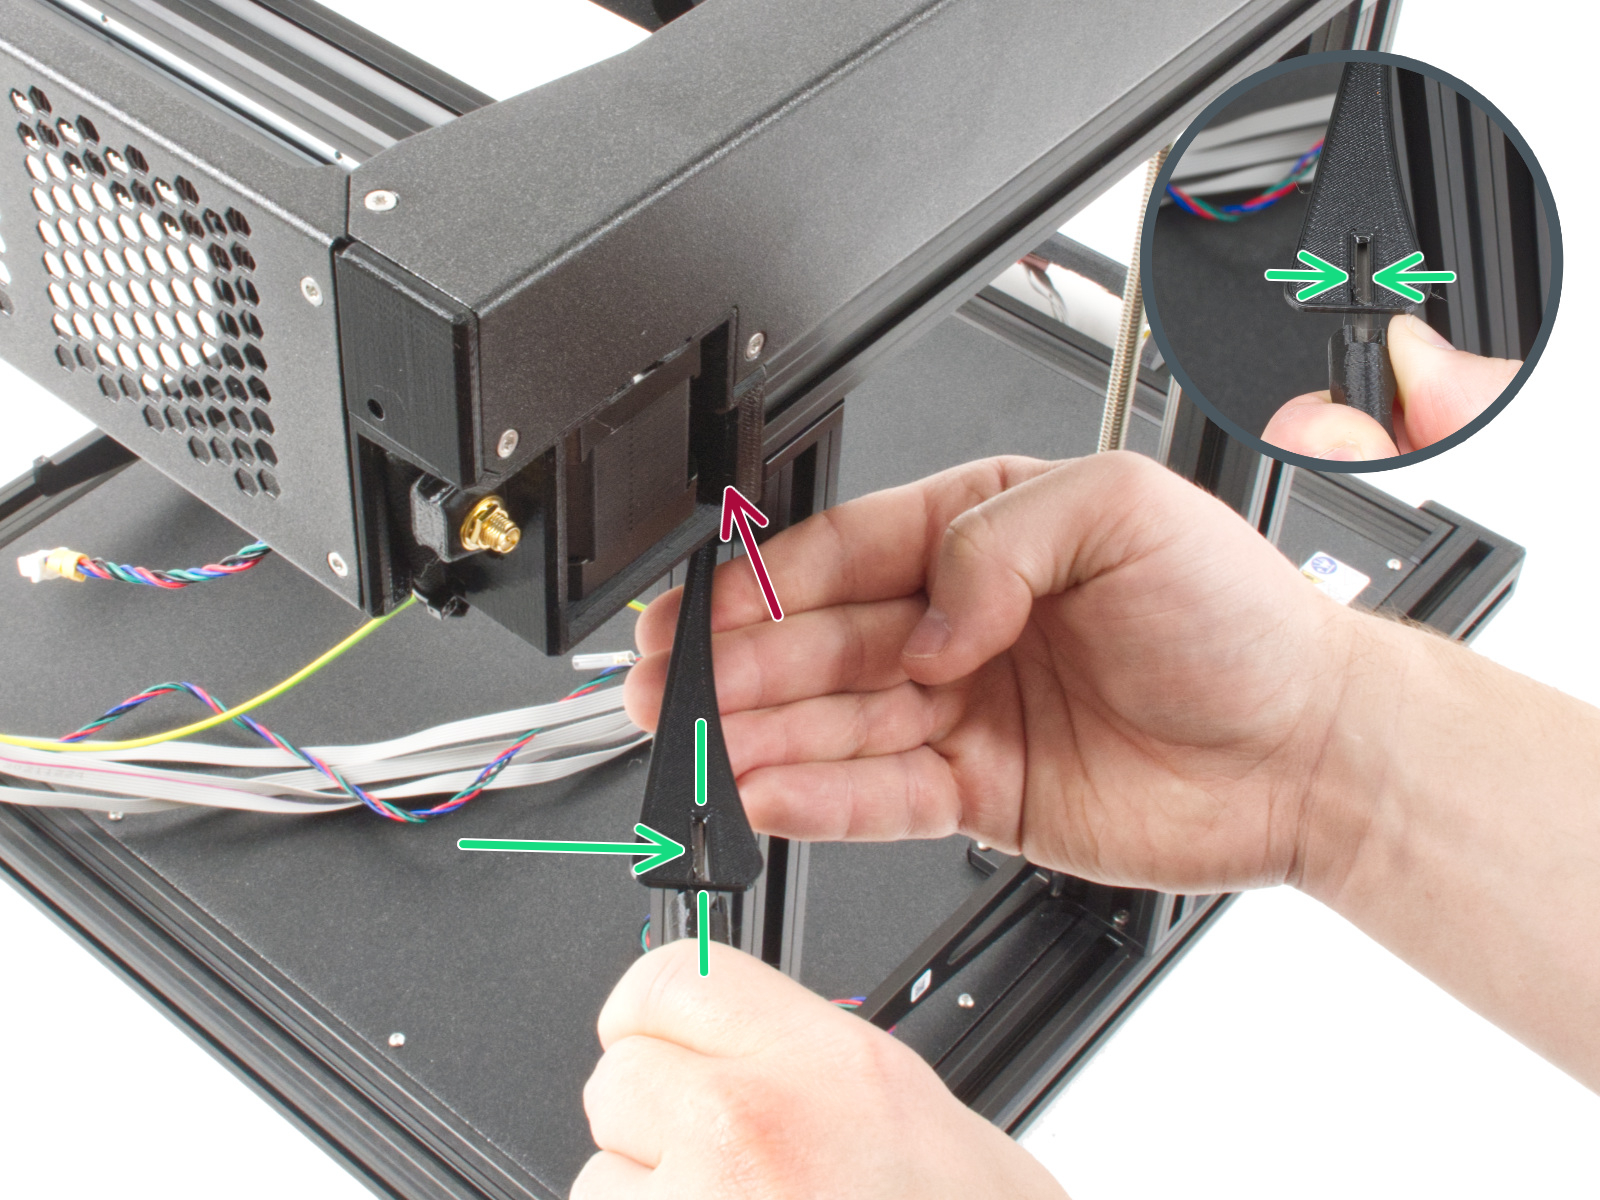
Nozzle conditions (XL)
On single-tool XL, after removing the x-carriage cover, hold the heater block (make sure that the nozzle is not heated!), and use the Torx TX8 key as shown in the picture to tighten the set screw. Do not use extra force while tightening, it may damage the hotend tube. The nozzle must be approximately at a 35°-40° angle to avoid damaging the hotend cables.
 |  |
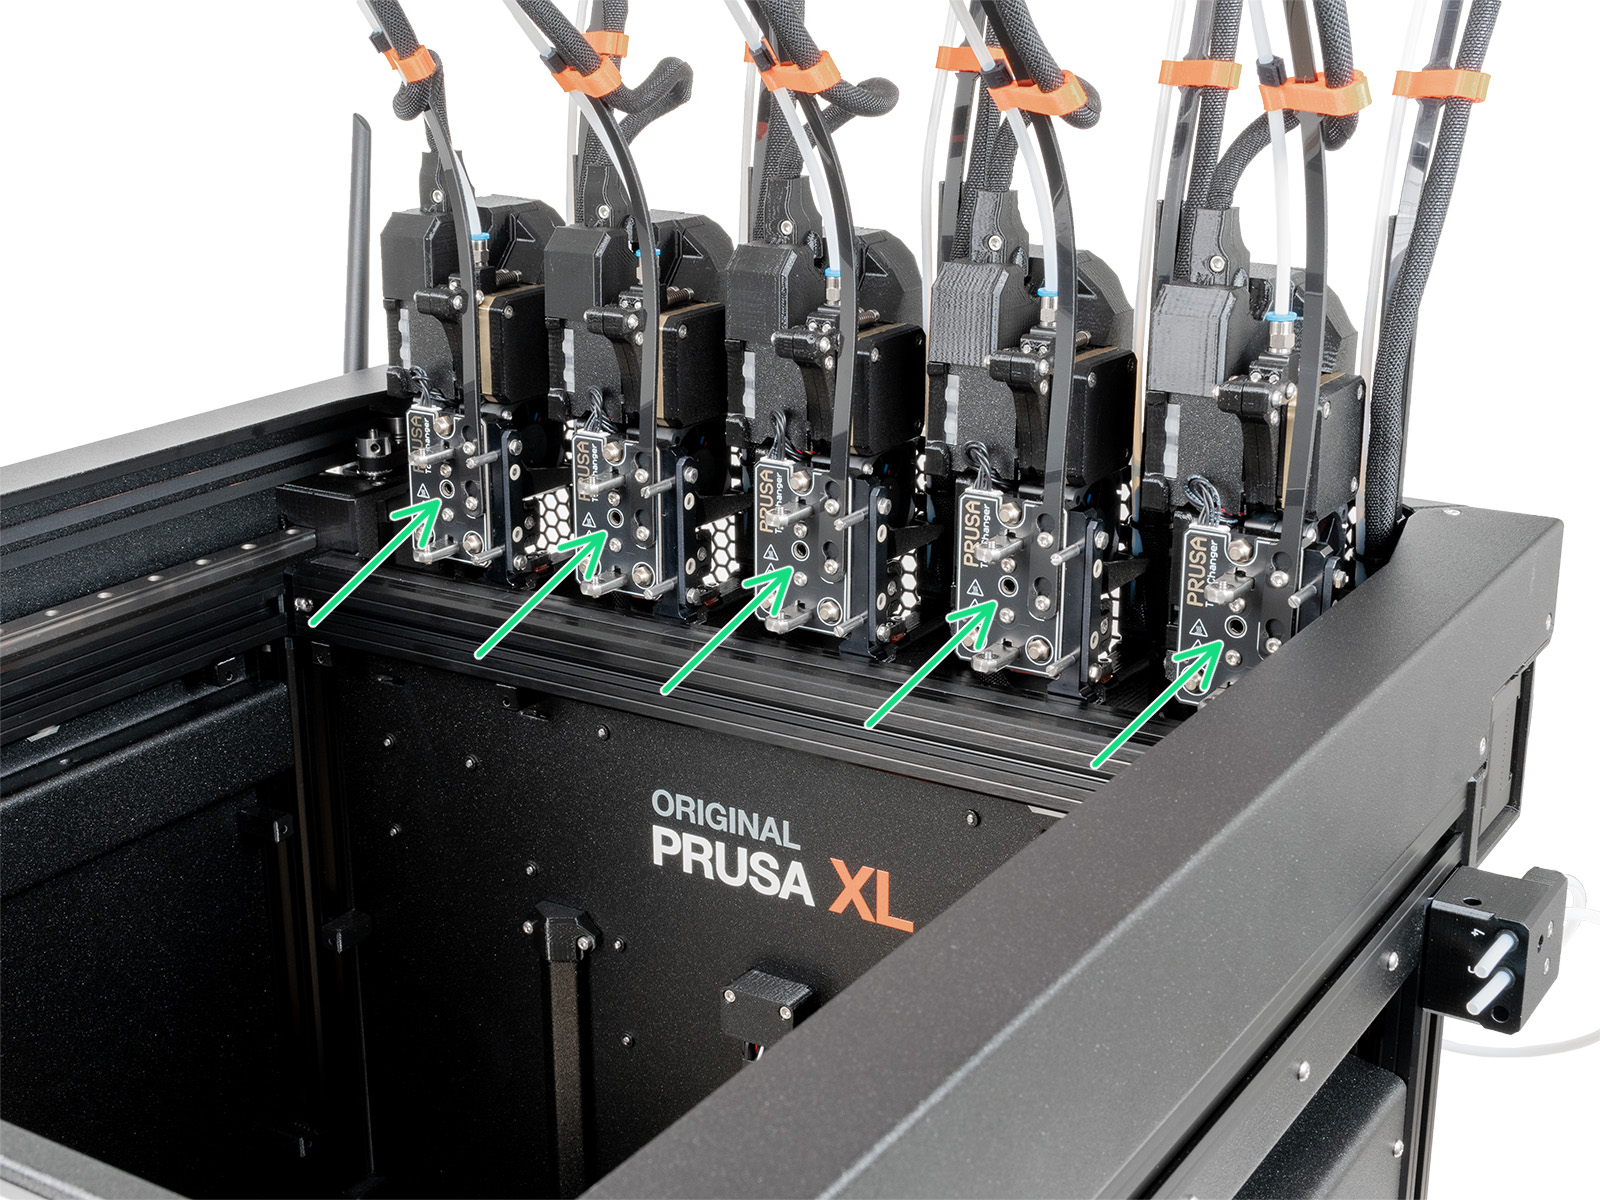
On multi-tool XL, identify the tool that has the nozzle to be checked, and park it. Hold the heater block (make sure that the nozzle is not heated!), and use the Torx TX8 key in the part shown in the picture to tighten the set screw. Do not use extra force while tightening, it may damage the hotend tube. The nozzle must be approximately at a 35°-40° angle to avoid damaging the hotend cables.
LoadCell check (CORE One, MK4/S, MK3.9, XL)
If the filament is loaded while the printer is doing the leveling at the start of a print, check if the extruder is not pulling the filament down by loosening the filament spool a little. If you have the filament being fed by a PTFE tube, make sure that the tube is not short.
After the previous checks, go into the printer menu to Control -> Calibrations & tests -> Loadcell test, and make the LoadCell test per screen instructions.
Mechanical checks (XL)
Core XY
If your first layer is showing one side higher than the others on the Original Prusa XL, check the assembly of the Core for any loose screws which hold the Core to the four extrusions. Also, use the torque indicator, available for printing in the XL printable parts page, in the Others folder, to make sure the screws are tightened correctly.
 |  |
Heatbed Tiles
Check if any of the screws under each heatbed tiles are loose. You can refer to the heatbed tile replacement guide to access the parts and check them.
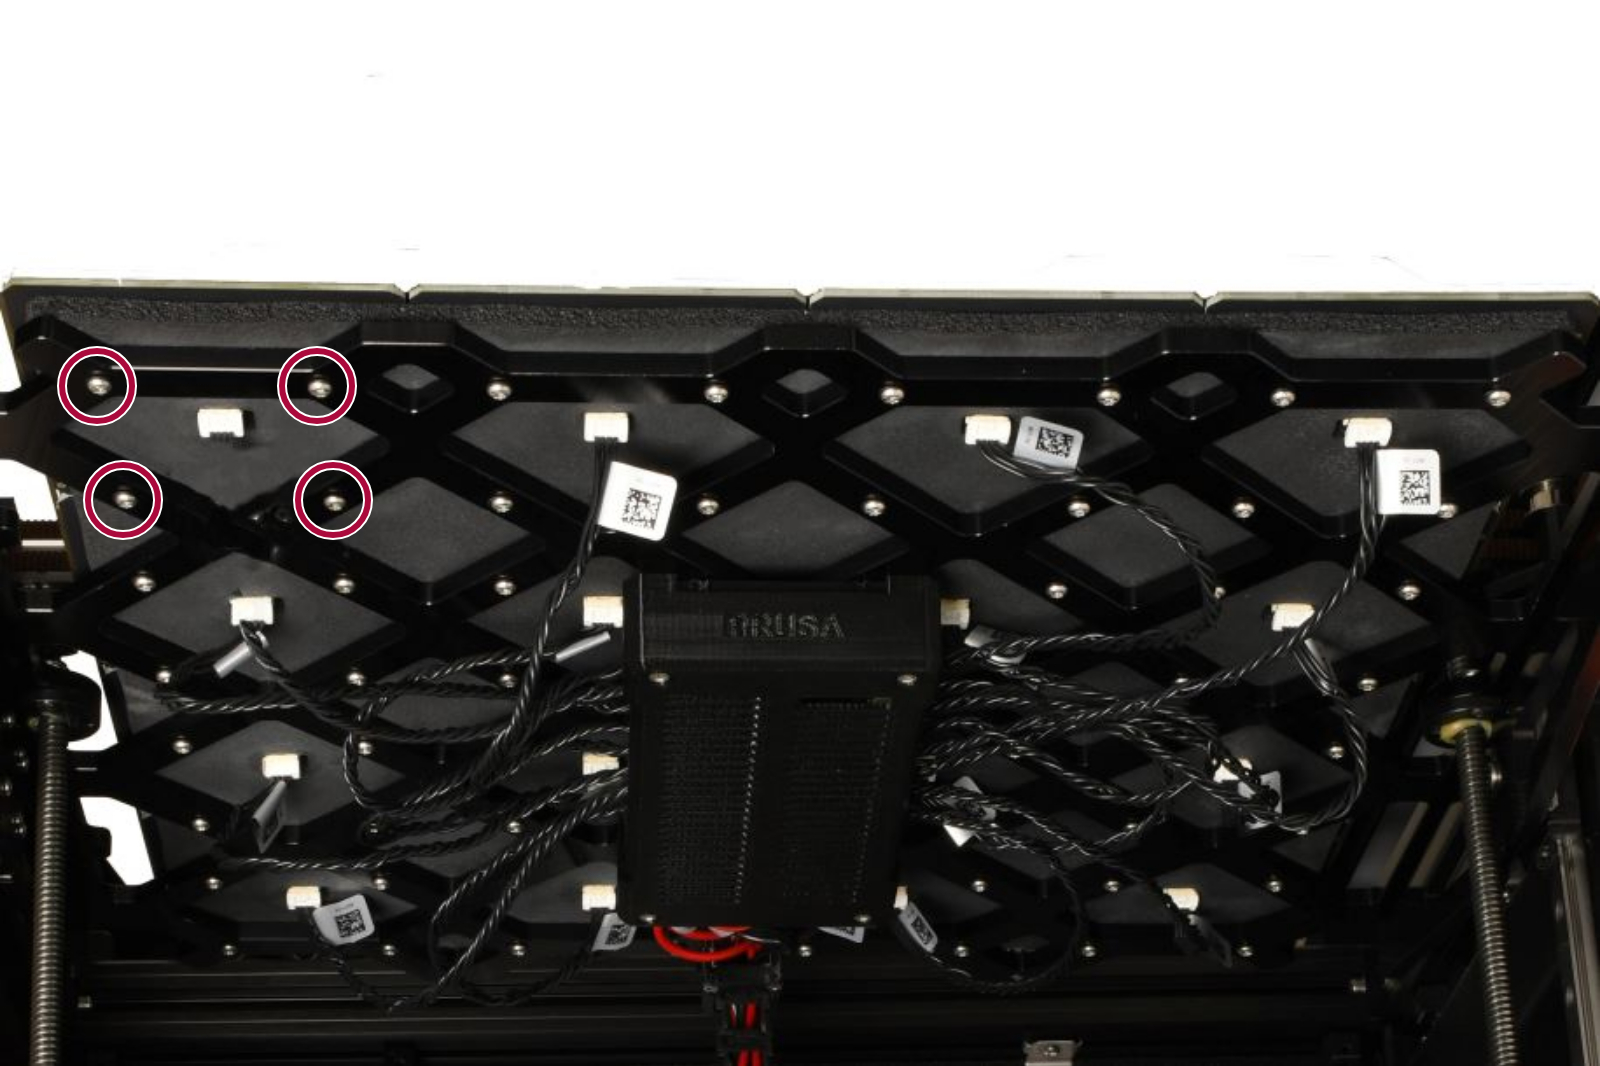 |  |
| Tiles excluding 4, 5, 12, and 13 can be checked without disassembly. | Tiles 4, 5, 12, and 13 require removal of the modular bed board or its cover to access its bolts. |
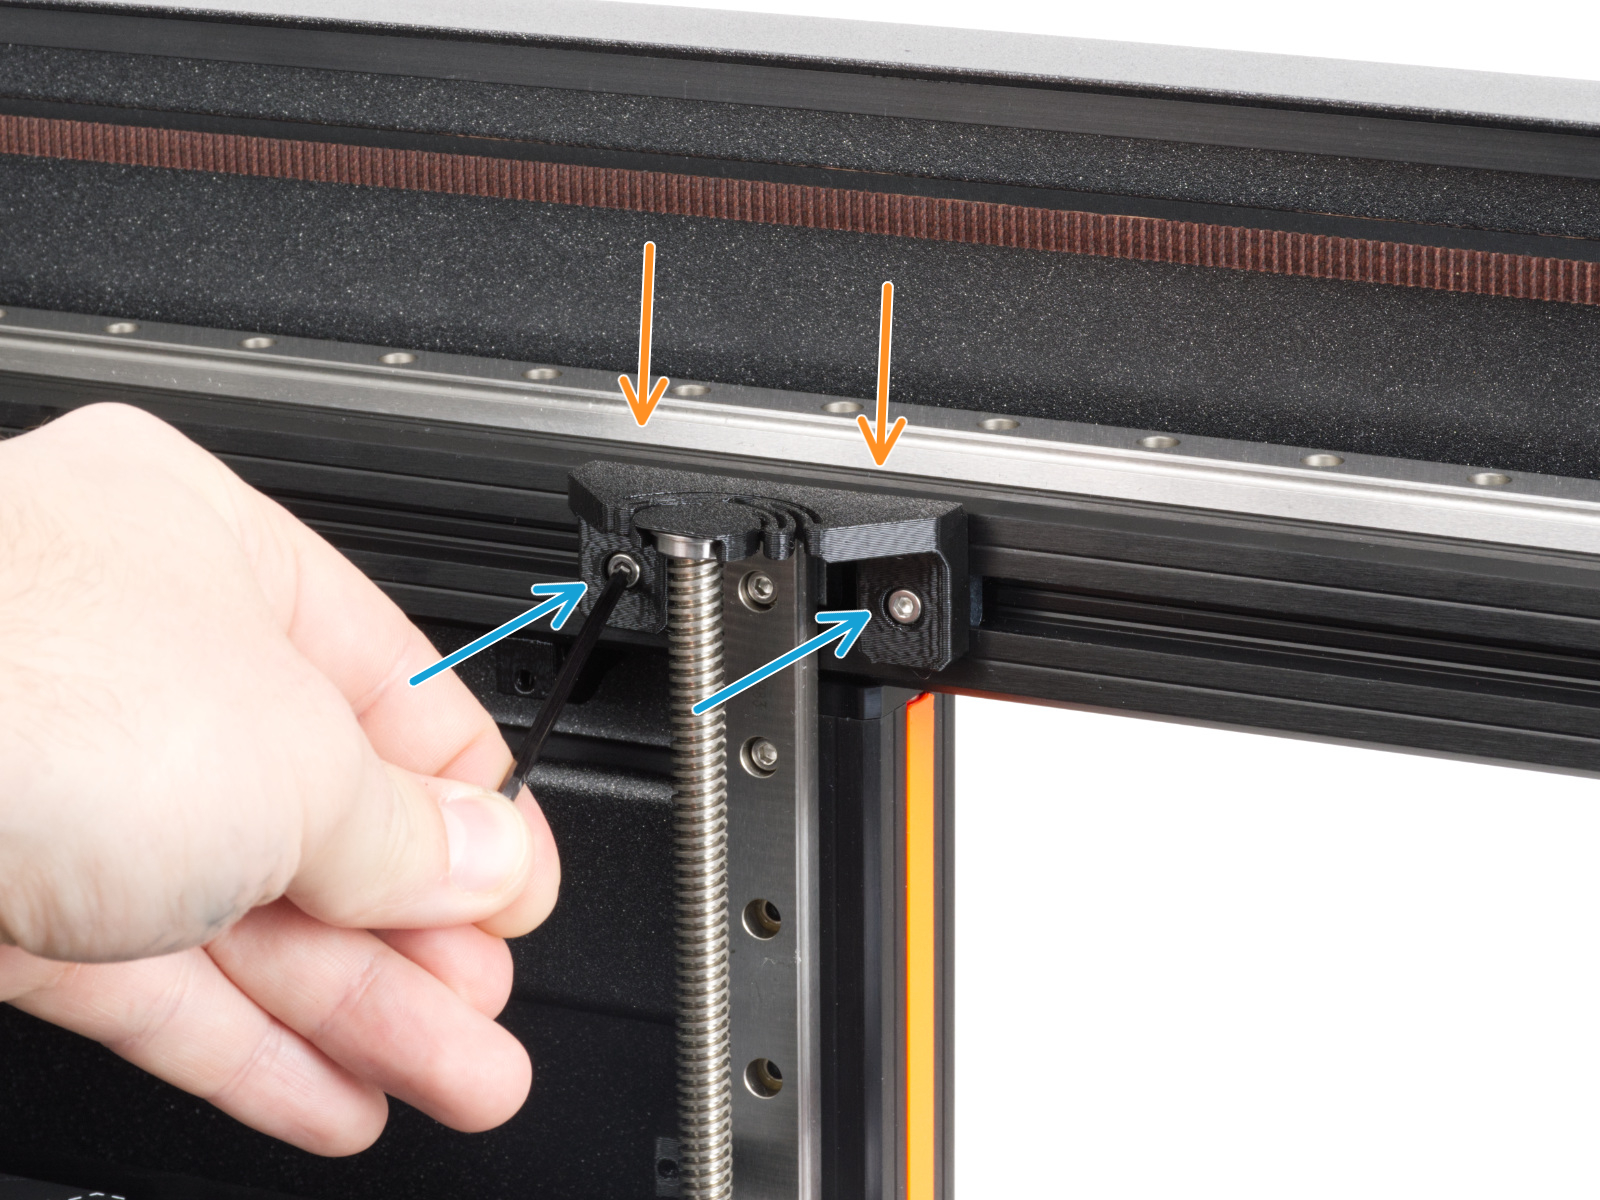
Z-axis bearing housing
The Z-axis bearing housings are the end-stop for the Z-axis. It is important to have a small clearance between the Z-axis bearing housings and the heatbed frame when the printer is at the top position.
This way, during the mesh bed leveling and the autohome procedures, there can be an ideal amount of small contact between the nozzle and the print surface.
Too small of a clearance can cause the Nozzle Cleaning Failed warning message to appear. In this case, in order to achieve the ideal clearance, slightly loosen the bolts holding the bearing housings in place.
If the warning message still appears, slightly loosen the mentioned bolts once again, keeping in mind to still have the Z-axis bearing housings reasonably tight and held in place.
Once you find an ideal tightness for the bolts that works and holds the Z-axis bearing housings in place, keep the change permanent.
40 comments
merci pour votre réponse .
veuillez s'il vous plait contacter notre service de support si vous avez toujours des difficultés avec ce problème.
https://help.prusa3d.com/fr/article/support-client_2287
Building and self testing the MK4S was flawless, no issues at all.
trying the first print I was not able to get the layer to stick.
Following closely while it printed I noticed it looked like the hot end was dragging. I ensured everything was in place and tried again, same result.
Watcinng extremely close I noticed and then heard something drag accross the hot newly printed PLA layer.The cooling fan shroud would just catch it enough to knock everything off track.
I loosened the fan, repositioned it holding it "up" as far as it would go and retightened.
3 prints in now with absolutely no issues.
Hello. MK3.9 and MK4 should have automatic first layer calibration, therefore no user interaction is needed. If you are having issues on your MK 3.9, please contact our support team.