Stable releases The latest stable release of PrusaSlicer can be always found in the DRIVERS & APPS package and it’s available for Windows, Mac OS X, and Linux. The package also…
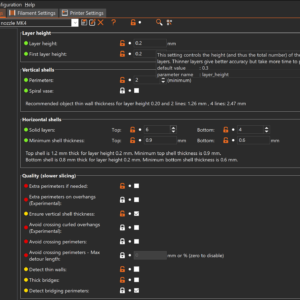
Some options will only appear when Expert mode is selected. Layer height Height of the individual slices/thickness of each layer. Layer height is the main factor affecting both: print…
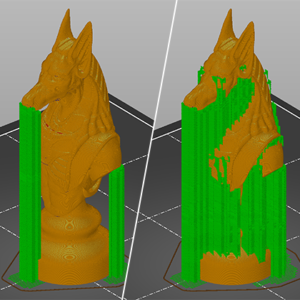
3D printers work by laying layer over layer of plastic to create a 3D object. Each new layer must be supported by the one beneath it. If part of your model starts in mid-air and…
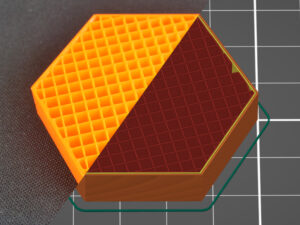
PrusaSlicer offers many infill patterns to choose from. When choosing an infill pattern, these are the main things to consider: Print speed Density per material used (better support…
The main purpose of infill is to provide internal support for top layers, which would otherwise have to bridge over empty space. Infill also affects the speed of printing, structural…
Windows A stand-alone EXE installer of the latest stable release can be downloaded from PrusaSlicer introduction & download or our Github. When downloading from Github, make sure…
Some options will only appear when Expert mode is selected. Skirt The skirt is a printed outline of all of the models on the print bed. It's printed before any of the models and…
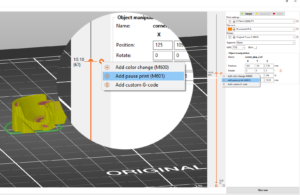
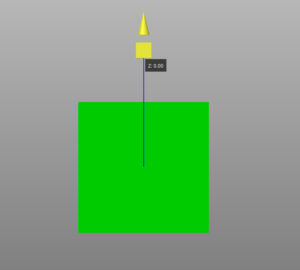
PrusaSlicer lets you schedule a filament change at a certain layer. This can be used to print basic multicolored models. The printer automatically pauses the print as soon as it…
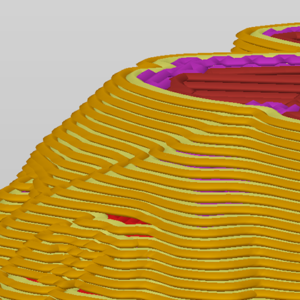
What is Ironing and how does it work? It is possible to use the Ironing tool starting from version 2.3.0 of Prusa Slicer. Ironing smooths flat top surfaces by running a special…
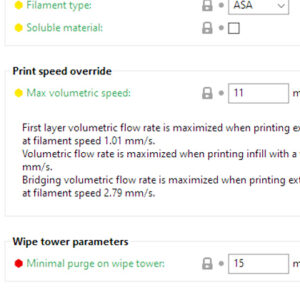
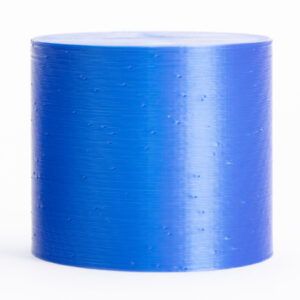
The Maximum volumetric speed setting (MVS), sometimes referred to as AutoSpeed, is one of the most powerful features in PrusaSlicer. MVS is the maximum amount of plastic (mm³/s)…
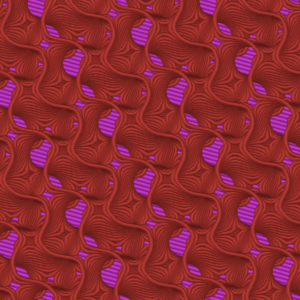
Some options will not appear when PrusaSlicer is in Simple mode. The Fuzzy skin feature lets you create a rough fiber-like texture on the sides of your models. If enabled, the…
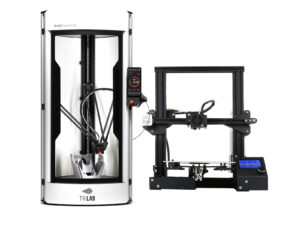
To start printing, you need to convert your model to layer-by-layer instructions for the printer with a slicer. We recommend using the PrusaSlicer, especially if you have an Original…
This is a list of currently implemented G-Codes in Prusa firmware for i3 series printers. The description is only for Prusa Research-specific G-codes. The rest can be found on…
Unless you're printing in the Spiral vase mode, each perimeter loop has to start and end somewhere. This start/endpoint creates a potentially visible vertical seam on the side…
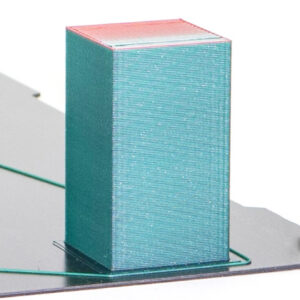
PrusaSlicer lets you define different regions of your model to be printed with a different layer height and automatically smooth the transition between them. This can result in…
This option is unavailable when PrusaSlicer is in Simple mode. When printing multiple objects at once, you can finish them sequentially, one at a time. This differs from standard…
In some cases, you might want to cut a model into multiple pieces before printing: The model is too big to be printed in one piece. You only want to print a part of a model. A…
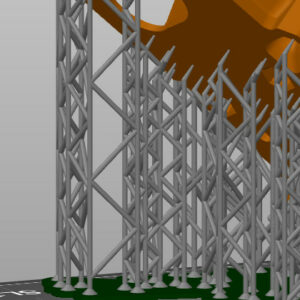
Unlike FDM supports, which are usually lattice or grid-like, SLA supports are scaffolding tree-like structures with thin tips. When removed, they’re easy to remove and leave little…
Standalone PrusaSlicer G-code Viewer is a lightweight application, which you can use to quickly preview G-codes from all popular slicers. Its behavior is identical to the preview…
If you are using PrusaSlicer for the first time to generate a gcode or bgcode for printing, you can follow the steps below. Click on the links to get more information about the…
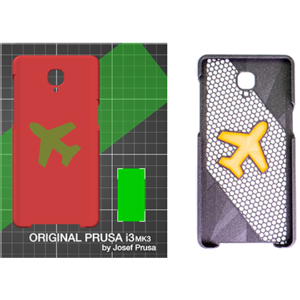
The Text tool lets you easily add labels, notes, signs, serial or version numbers to your models directly in PrusaSlicer. You can add text to any type of surface, not just planar…
As soon as the melted plastic leaves the nozzle, it's no longer under the precise control of the extrusion system. There are two problems to consider: Printing must always be…
This is a list of variables available in custom G-Code macro language in PrusaSlicer. The macro language is described in detail in a separate page. Placeholders for configuration…
Organic supports are a type of support structure available in PrusaSlicer. PrusaSlicer previously always used a 2D grid-based approach to generate supports. Although this method…
In this guide, we'll cover how to import profiles in PrusaSlicer that are not included with the software, and how to export your custom PrusaSlicer profiles. Some 3rd party vendor…
This option is not available when PrusaSlicer is in Simple mode. When printing the first layer is squished against the heated print bed and as a result, it’s usually a bit wider…
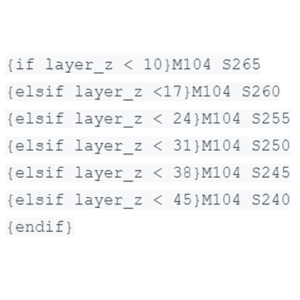
Macros allow you to create conditions and evaluate math equations in the Custom G-code fields. PrusaSlicer macro language is not compatible with Slic3r conditional expressions. Constructs Conditional…
In some cases, you might want to change some settings just for a specific section of your model. For example, you might want part of your model to have denser infill or more perimeters…
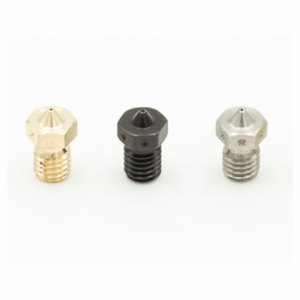
The default nozzle diameter for most of today’s printers is 0.4 mm. If you decide to use a different diameter nozzle (you can read all about the benefits in our article) and there…
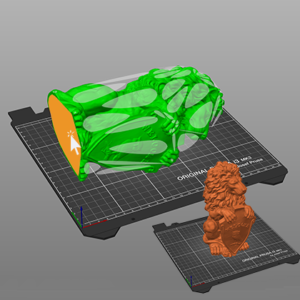
By default, PrusaSlicer places the bottom-most point of each object on the build plate. In the vast majority of cases, this saves the user time and prevents possible failed prints,…
Smart wipe tower The smart wipe tower ensures sharp color transitions and stable filament flow after a color change while aiming to waste as little filament as possible. There…
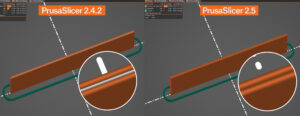
Starting from Prusa Slicer version 2.5.0, the standard perimeter generator is Arachne. The Arachne generator produces perimeter loops and gap fills with varying extrusion widths.…
PrusaSlicer includes profiles for 3rd party vendors (e.g. Lulzbot or Creality printers). You can select which vendor profiles you wish to enable in the Configuration Wizard. We’re…
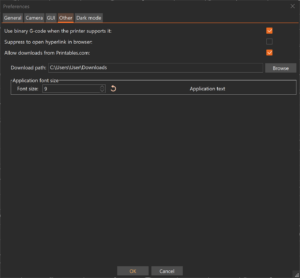
Binary G-code is a new standard for encoding and compressing ASCII G-code files. G-code files are easy to read and interpret, but their downside is that the data is not saved efficiently,…
In 3D printing (and modeling, animation and more), objects are represented by their outer shell. This shell is represented as a triangle mesh. It’s possible to have several meshes…
The negative volume lets you subtract one mesh from another. That way you can, for example, create easily resizable holes directly in PrusaSlicer. Right-click on a model and pick…
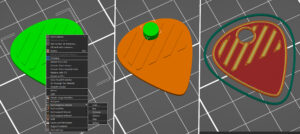
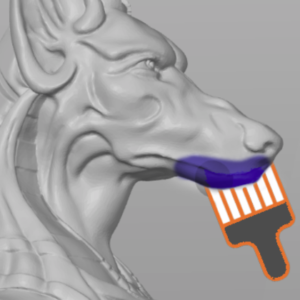
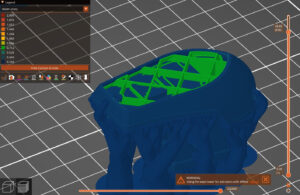
PrusaSlicer provides a tool, which lets you paint directly on the object and select areas, where supports should be enforced or blocked. The tool is available from the left toolbar…
If you’re using Octoprint or Duet, you can send G-codes to your printer directly from PrusaSlicer. Upload list will be visible at Printer Settings - General - Print Host upload. API…
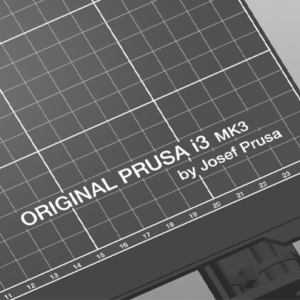
PrusaSlicer supports custom print bed textures and models in both PNG and SVG formats. You can assign a custom model or texture by selecting Printers tab -> General -> Bed shape…
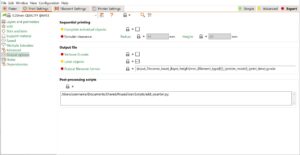
There are some things that PrusaSlicer simply doesn’t do. However, using post-processing scripts you can automatically modify the generated G-code to do (almost) anything you want. You…
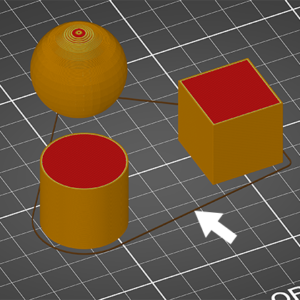
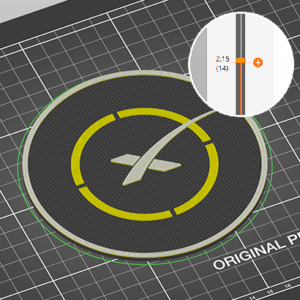
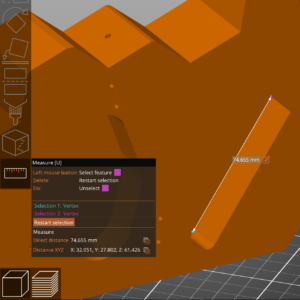
The measurement tool is a feature long demanded by our community. It's available starting with PrusaSlicer 2.6 alpha. The measurement tool utilizes a geometry detection algorithm…
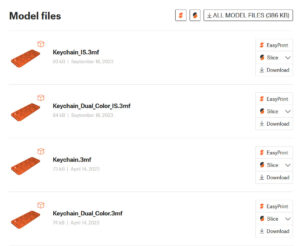
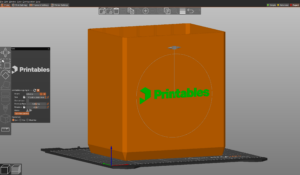
Starting from version 2.6.0, the built-in PrusaSlicer downloader provides a seamless one-click method to send 3D models from supported model websites directly to the build plate.…
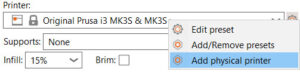
PrusaSlicer separates the printer connection settings from the Printer profile into a Physical printer profile. Using PrusaConnect through the Physical Printer settings is supported,…
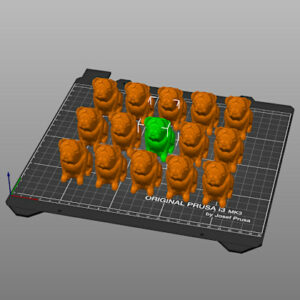
When you import multiple models or create many instances of the same model, arranging them on the print bed could be very time-consuming. PrusaSlicer features an auto-arrange tool…
This feature is only available in PrusaSlicer 2.5 and newer. 3D printer extruders love to extrude at a constant rate for the best extrusion consistency. However, during a print,…
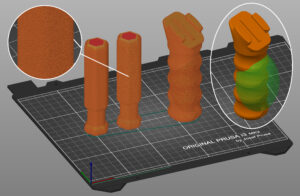
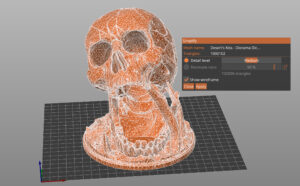
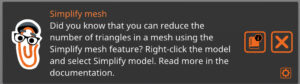
3D scans and sculpted models often have a huge number of triangles, making them difficult to work with. These files can slow PrusaSlicer down, take a very long time to slice and…
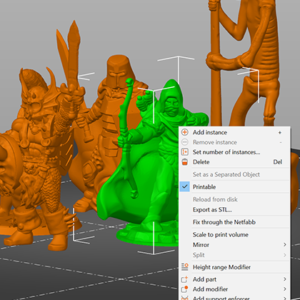
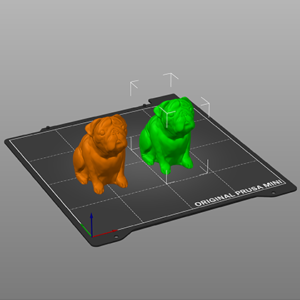
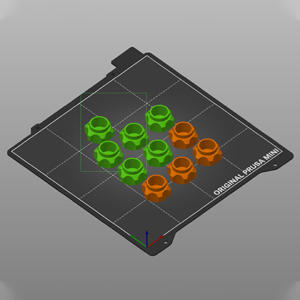
With PrusaSlicer, you can print multiple models at once, each with slightly different settings. For example, with different infill or layer height. Right-click (Advanced mode)…
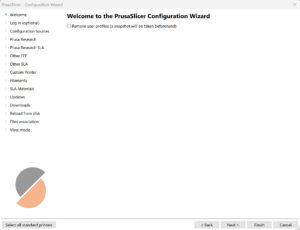
When you launch PrusaSlicer for the first time, a Configuration Wizard window opens automatically. Configuration Wizard can also be launched manually from the top menu by selecting…
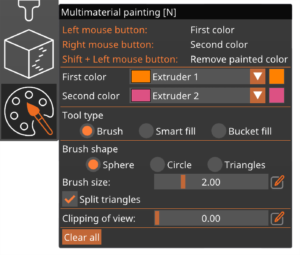
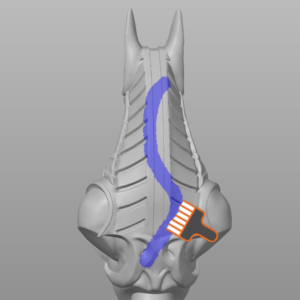
Preparing models for multi-material FDM prints used to be a fairly complicated and time-consuming process. Starting with PrusaSlicer 2.4, coloring an object for multi-material…
Starting from PrusaSlicer version 2.3, it is possible to paint on seams on your model. The seam painting tool provides more detailed control over the seam placement. The tool…
Q: Is PrusaSlicer free? A: Yes. It’s also open-source, so anyone can contribute to the development. Check our GitHub. Q: Can I use it with other printers (not Original Prusa)? A:…
Move Left-mouse drag can move objects even when the move tool is inactive. Enabling the Move tool M displays a 3D widget, which lets the user adjust the object’s position in the…
As an alternative to online sources, profiles can also be updated by manually loading files containing the update. This is mostly useful on computers that are not connected to…
3MF The preferred file format also used to save Project files. STL Both binary an ASCII format is supported. STEP The STEP file is triangulated during import. OBJ Information such…
Speed settings for different print moves You can set different speed limits for each of the print move types. Keep in mind, that during printing, the print speeds are affected…
During a filament change, a small amount of melted plastic remains in the nozzle. As the new filament is loaded, it’s melted as well and starts pushing the nozzle content out.…
All objects sliced for the SLA printers are completely solid by default. There is no infill pattern like in FFF/FDM 3D printing. Solid objects printed from the liquid resin can…
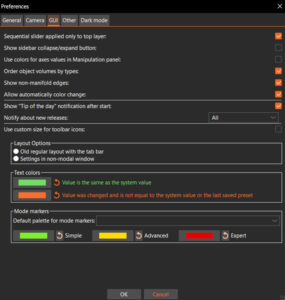
You can open the Preferences window by selecting Menu -> Configuration -> Preferences or pressing Ctrl + P. The preferences are split into multiple tabs for easier discoverability. General Remember…
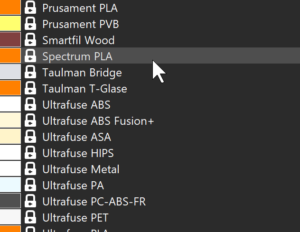
We have added an additional profile that defines most of the commonly used filament materials and brands. It is possible to use these with any 3D printer. However, these universal…
PrusaSlicer supports the following scenarios: Single material printer (or MMU2 in Single extruder mode). In this case, color-changes (manual filament swaps) can be added, but…
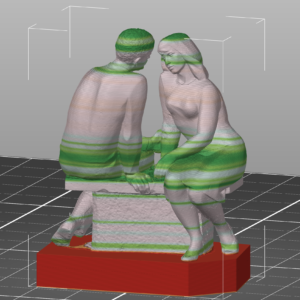
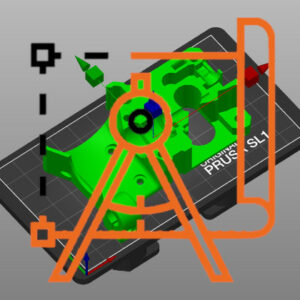
Object orientation is crucial with (M)SLA printing. It greatly influences the resulting print quality and in the case of the SL1, which cures the whole layer at once, it directly…
PrusaSlicer lets you choose a custom STL and use it as the bed model. You can assign it by selecting Prints tab -> General -> Bed shape -> Set and using Load... in the Model section. If…
Almost every function of PusaSlicer can be accessed via a keyboard shortcut. In addition to that, many functions have an alternative mode that can be accessed with a modifier key.…
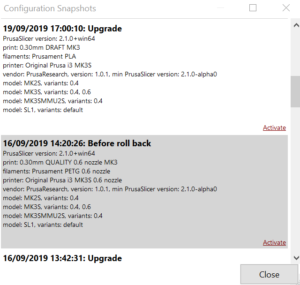
A snapshot contains complete configuration, most importantly all system and user profiles, from the point when the snapshot was taken. You can view and move back and forth between…
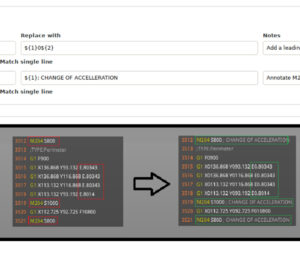
This feature will be available in PrusaSlicer 2.4.1 PrusaSlicer offers simple G-Code post-processing by specifying find and replace pairs, with optional regex matching, case sensitivity…
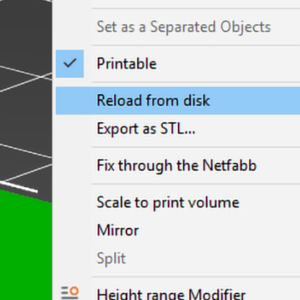
This feature is great for cases, where you created a newer version of your model and you wish to replace the old version in PrusaSlicer without having to set up things like custom…
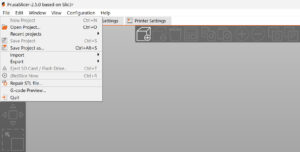
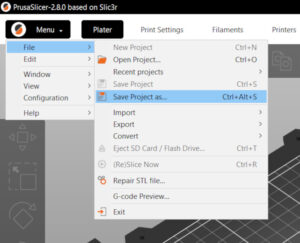
Menu -> File -> Save Project as saves a 3MF file containing all objects, settings, modifiers, and their parameters. It’s essentially a complete snapshot of PrusaSlicer. When you…
This is a list of currently implemented G-Codes in Prusa Buddy firmware for MINI/MINI+/XL/MK4/MK3.5 printers. The description is available only for Prusa Research-specific G-codes…
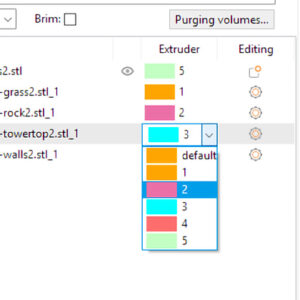
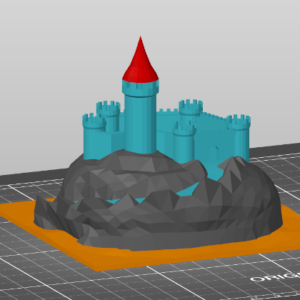
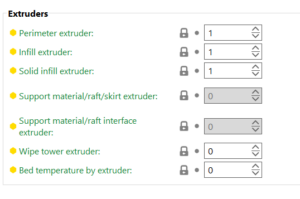
Assigning tool heads/colors/extruders to different features You can assign different print features to be printed with a different tool in the Print Settings - Multiple Extruders…
Importing multiple STL files as a single multi-material model First of all, switch the printer preset to a Multi Material printer (such as the MMU2S), otherwise, the following…
Hardware configuration CPU: Many computations in PrusaSlicer are multi-threaded and will benefit from a processor with multiple cores and threads. Memory: Minimum 4 GB RAM, recommended…
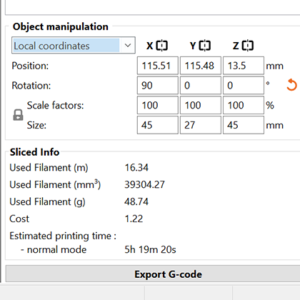
Whenever you have one or more objects selected, the Object manipulation panel appears in the right panel. Using the text inputs, you can modify: Position Rotation Scale factor Size Three…
All models on the print bed and PrusaSlicer settings can be saved as a single 3MF Project file via the File -> Save Project as. Make sure to have the latest version of PrusaSlicer. Alternatively,…
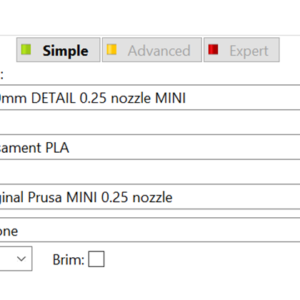
The user interface changes in appearance depending on the mode you’re in. You can switch to a different mode using the drop menu on the top right. The reasoning behind the Simple…
Some options will not appear when PrusaSlicer is in Simple mode. It is possible to change the slicing mode in the PrusaSlicer by going to the printer menu in Print Settings ->…
It’s possible that a model will be oriented incorrectly after import. This happens especially when the model was exported from a 3D modeling software that uses a different axis…
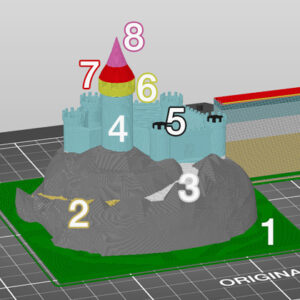
PrusaSlicer has a fairly simple user interface. Most of the screen is dedicated to the 3D view, which is used to manipulate 3D models. The top toolbar (1, 2) adds and removes objects.…
Copy & paste You can select one or more models and copy/paste them using the buttons in the top toolbar or with the familiar shortcuts: Ctrl + C Copy Ctrl + V Paste Object copies…
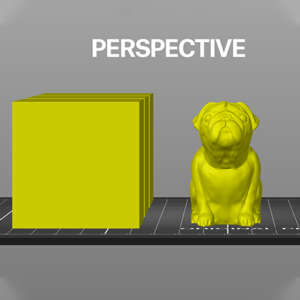
You can quickly switch between the perspective and orthographic camera using the K or in the top toolbar by ticking Configuration - Preferences - Use perspective camera. Both cameras…
Thanks to the advanced operating system available on the Original Prusa SL1/SL1S SPEED printer, the user is able to transfer the sliced .sl1 or .sl1s files directly from the PrusaSlicer.…
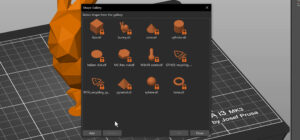
The built-in shape gallery provides a quick and easy way to access your most used models, whether you use them as modifiers or to be placed on the platter and printed. The default…
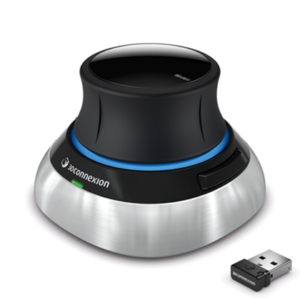
It seems that the latest 3DConnexion driver delivers a configuration file, which is no longer compatible with the 3DConnexion driver binary. We have reported this bug to 3DConnexion. If…
The search bar on top of this site searches the entire PrusaSlicer documentation as well as assembly guides and related printer hardware troubleshooting guides. If neither has…
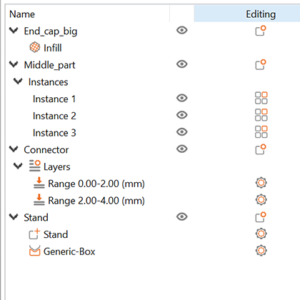
The Object list is located in the right panel and shows a hierarchy of: Objects (models) Instances Custom parameters for each object Modifiers - Height range modifiers and Modifier…
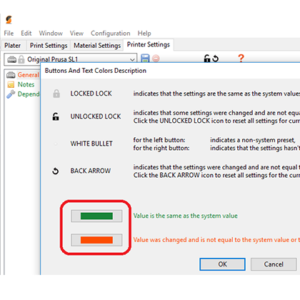
On the Print Settings, Filaments, or Printers tab, there is a menu on the top left side of the screen. This allows you to perform actions concerning the settings on that specific…
OSX and Linux PrusaSlicer supports dark mode on OSX and Linux natively. If you have dark mode enabled in your system settings, PrusaSlicer should automatically start in dark mode…
Left mouse button Rotate Right mouse button Pan Scrollwheel, I to zoom in, Oto zoom out Zoom B Zoom on the entire print bed Z Zoom on selected objects or on all objects if none…
You can easily compare the differences between 2 profiles with a special view. Enable it by selecting Window-Compare presets. You can also enable this view by clicking on a button…
PrusaSlicer automatically detects if you insert an SD card, USB flash drive, or other removable media. When detected, a new Export to SD/USB drive button will appear next to the…
Mechanical parts, objects that should fit together, joints, pegs, and similar things need to be printed precisely. While SLA 3D printers are more suitable for printing organic…
Exporting the sliced model as OBJ can be useful if you’re familiar with a 3D modeling and rendering program. When you slice a model, you can choose File - Export - Export toolpath…
PrusaSlicer lets you define a repeating pattern of color changes. You can access this feature by clicking the gear icon in the bottom right corner of the preview screen. The color…
The SVG emboss tool provides a convinient way to add intricate designs, logos, QR codes and patterns onto 3D printed objects, directly in PrusaSlicer. PrusaSlicer can also wrap…
Basic selection is done with the left mouse button. By holding down the Shift key and clicking on additional models you can add to your current selection. Shift + mouse drag Box…
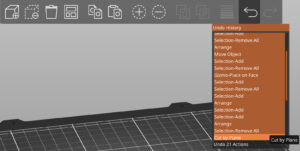
All the actions accessible from the 3D editor view are undoable including object selection, actions at the sidebar (adding modifiers, changing their attributes) with the exception…
Printing with different nozzle diameters is an experimental workflow as it requires tweaking several settings in profiles, and some nozzle combinations may be incompatible, potentially…
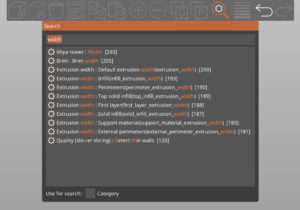
PrusaSlicer lets you search for a parameter to quickly access a particular settings page and parameter field. The search is accessible from both the Plater top toolbar and from…
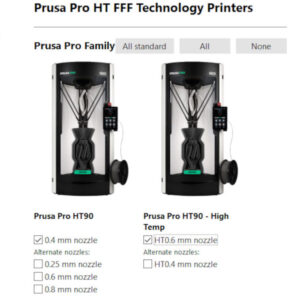
When slicing a project for the Prusa Pro HT90, the PrusaSlicer needs a specific profile that is not pre-installed in the first download of the program. These profiles are only…
PrusaSlicer grows more powerful every day. Offering many unique features not found in other slicers. The downside of adding new features is the ever-increasing complexity of the…
Pressure Advance aims to improve the quality of printed parts by compensating for the pressure changes in the nozzle during printing. It replaces Linear Advance on MK4/S, MK3.9/S,…
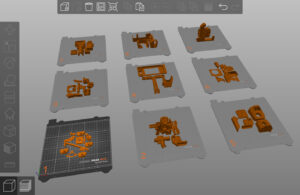
Starting from PrusaSlicer version 2.9.0, you can work on multiple build plates. This functionality allows users to manage many objects efficiently and better organize their projects.…
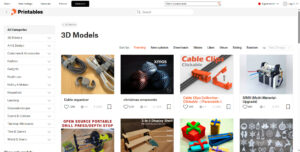
Starting from PrusaSlicer version 2.9.0, you can access printables directly from the slicer. The Printables tab is near the Printers tab at the top right. This integration enhances…
EasyPrint is a cloud-based slicing utility that allows you to quickly prepare a model for 3D printing from your phone, tablet, or computer and send it to your printer via Prusa…
Extruders In this section, it is possible to choose which extruder in your printer to print specific parts. Perimeter extruder Extruder to use when printing perimeters and brim. Infill…
A new guided wizard has been added to the Prusa CORE One L to help users properly tension the X/Y belts. The printer uses controlled belt excitation combined with stroboscopic…