Unless you're printing in the Spiral vase mode, each perimeter loop has to start and end somewhere. This start/endpoint creates a potentially visible vertical seam on the side of the object. It's also commonly called zits, layer seams, or scars.
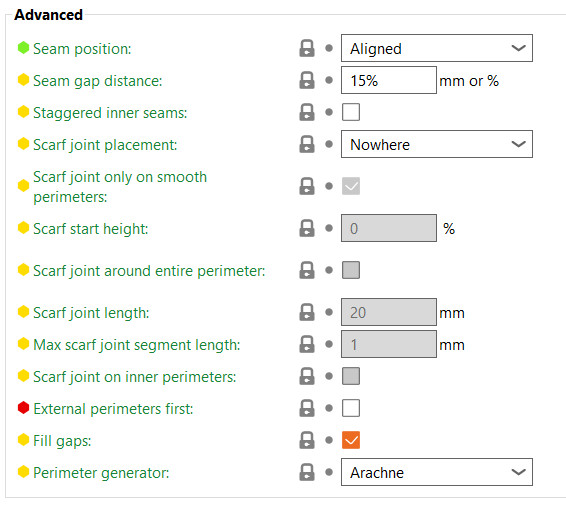
This seam will be obvious if the object's shape is cylindrical, without any sharp corners.
To hide the seam as much as possible, there are several seam placement options available in
Print settings -> Layers and perimeters -> Seam position. Note that some options will only appear when Expert mode is selected.
Seam Position
Nearest
Attempts to place the seam on the nearest edge of the current layer. If your model has sharp corners, this will make the seam effectively invisible.
To be precise, this will try to choose a concave non-overhang vertex so that the seam is hidden inside the concave angle. If no concave non-overhang vertices are available, it will choose a convex non-overhang vertex. If none are available, it will choose a non-overhang vertex. The choice among the candidates is made so that the start point is the nearest to the previous extruder position. So this option is optimized for speed, low travel, and acceptable strength.
Aligned
This will use the same logic as the Nearest for finding the candidates, but it will choose the one that is nearest to the start point of the previous layer. This will ensure the seam is mostly aligned throughout the whole object.
 Random (left) vs Aligned (right) seam position
Random
This will choose a different point for each layer, making the seam less noticeable at the cost of a less smooth surface (small zits scattered across the surface). This option increases the overall strength of the print.
It makes little sense to use Random seam position on models with corners/sharp edges; it's much better to use Nearest or Aligned in such cases. On the other hand, when printing cylindrical shapes without any sharp edges, the Random seam position is a viable option.
Rear
The Rear position works similarly to Aligned, but it will try to position the seam close to max Y (rear of the print bed). It still tries to avoid overhangs and tries to put the seams in the corners. This option is useful for objects that will be displayed with a specific orientation.
Seam gap distance
The distance between the endpoints of a closed loop perimeter. Positive values will shorten and interrupt the loop slightly to reduce the seam. Negative values will extend the loop, causing the endpoints to overlap slightly. When percents are used, the distance is derived from the nozzle diameter. Set to zero to disable this feature.
Staggered inner seams
This option causes the inner seams to be shifted backward based on their depth, forming a zigzag pattern. Having the inner seam not aligned with the perimeter seam makes the part stronger, as the seams are weak spots for the prints.
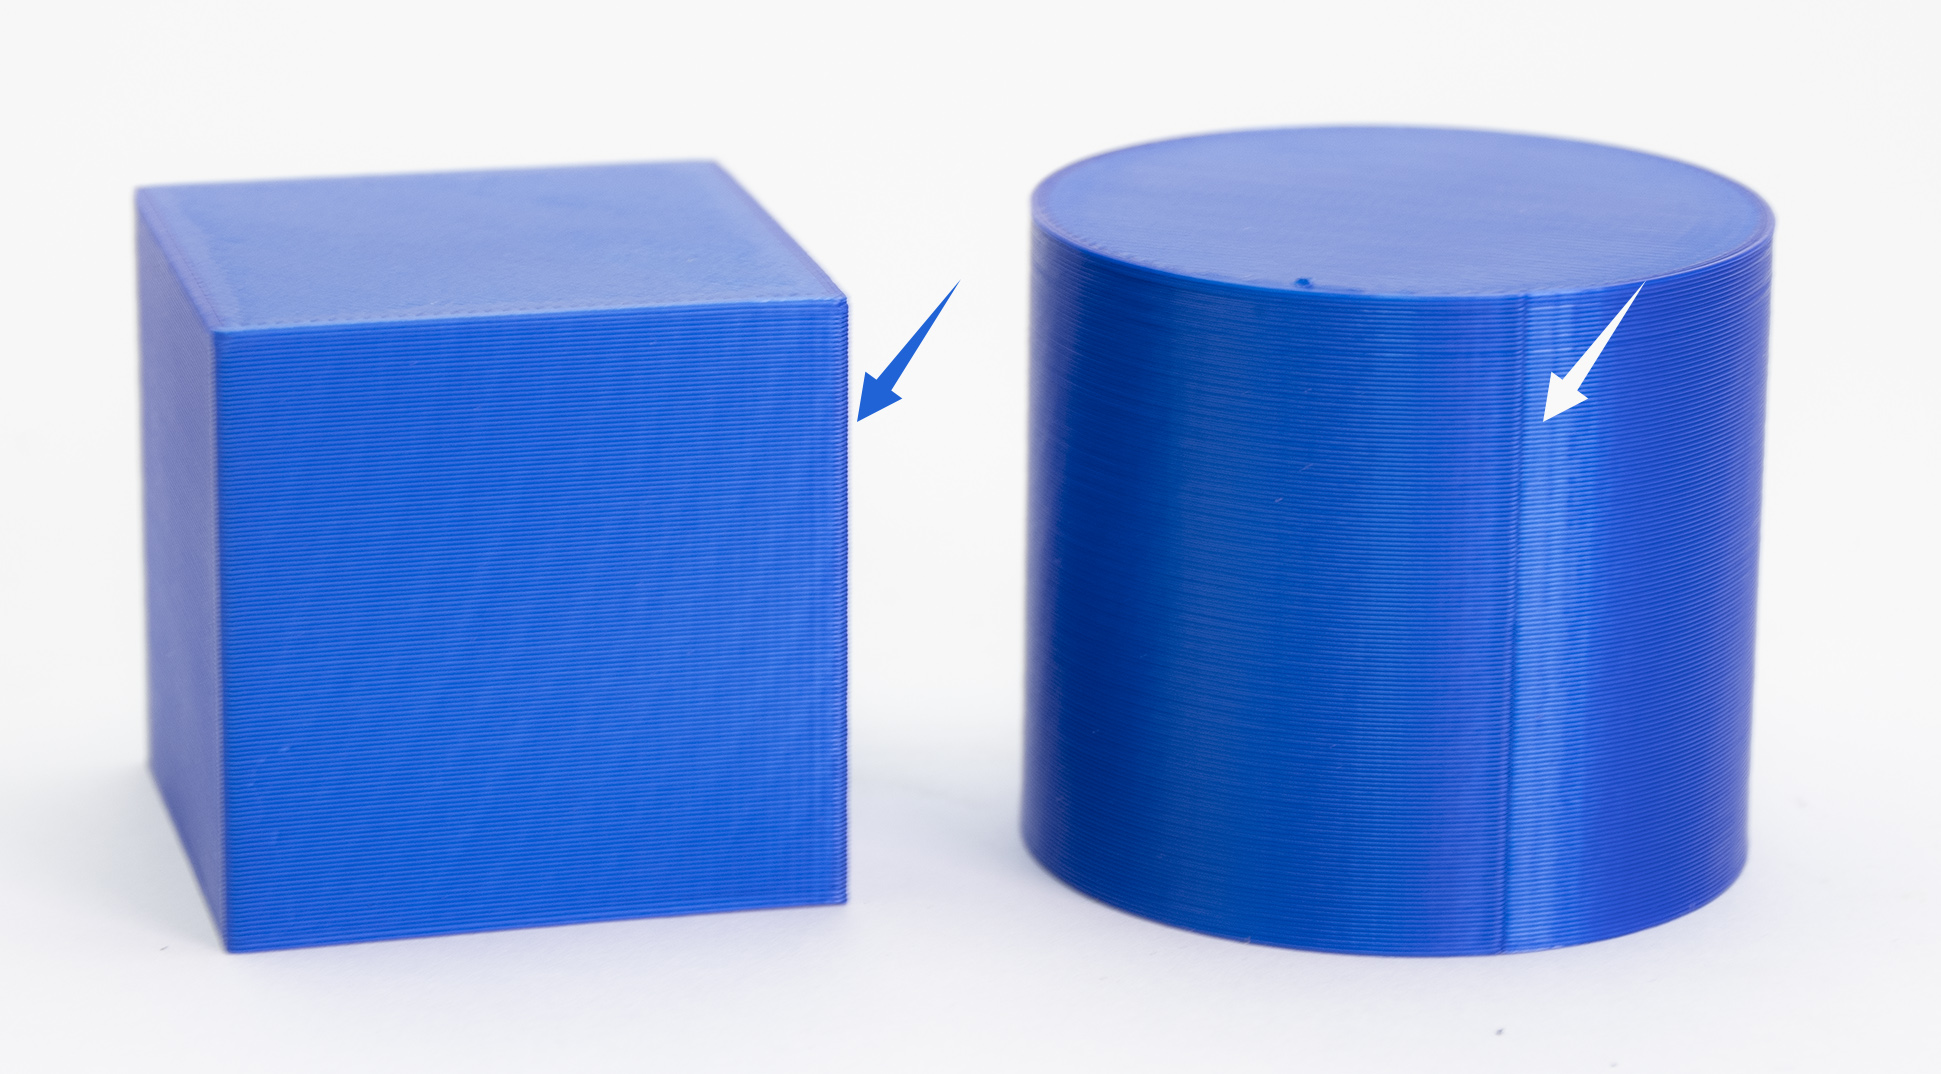
Scarf joint placement
The Scarf seams overlap extrusions at the end and start of the perimeter loop, hiding visible seams on smooth perimeters. You can visualize the seams in the printer preview using the Volumetric flow rate (mm³/s) or Actual volumetric flow rate (mm³/s) options in the preview legend.
This setting reduces visible z seams, which is especially useful in curved surfaces, and improves overall part strength.
Note that using scarf seams increases print time, and is less effective in sharp corners and overhangs.

Nowhere
The function is disabled.
Contour
The scarf seams will only be applied to the contour of the object.
Everywhere
The scarf seams will be applied on the outer perimeter and inner walls surrounding holes within the part.
Scarf joint only on smooth perimeters
This is the standard option in case the Scarf joint is enabled. The scarf joint is not applied on non-smooth surfaces as the seam can be hidden on curves and corners of the object. If this option is unchecked, the scarf joint will also be applied to these non-smooth surfaces.
Scarf start height
Defines the vertical offset for the start of the scarf ramp, specified as a fraction of the current layer. A value of 0 means the scarf begins at the same height as the current layer and ramps up to the full layer height over the scarf length.
Scarf joint around entire perimeter
Extend the scarf around the entire perimeter.
Scarf joint length
Change the horizontal length of the scarf ramp transition. Using 0 in this setting disables the scarf joint.
Max scarf joint segment length
This setting defines how the scarf is divided. The Z-height change is applied every 1 mm by default. If you use a larger value, there will be fewer points where the Z-height changes.
Scarf joint on inner perimeters
The scarf seams are usually only added to external perimeters. Checking this option adds the scarf seam on the inner perimeters.
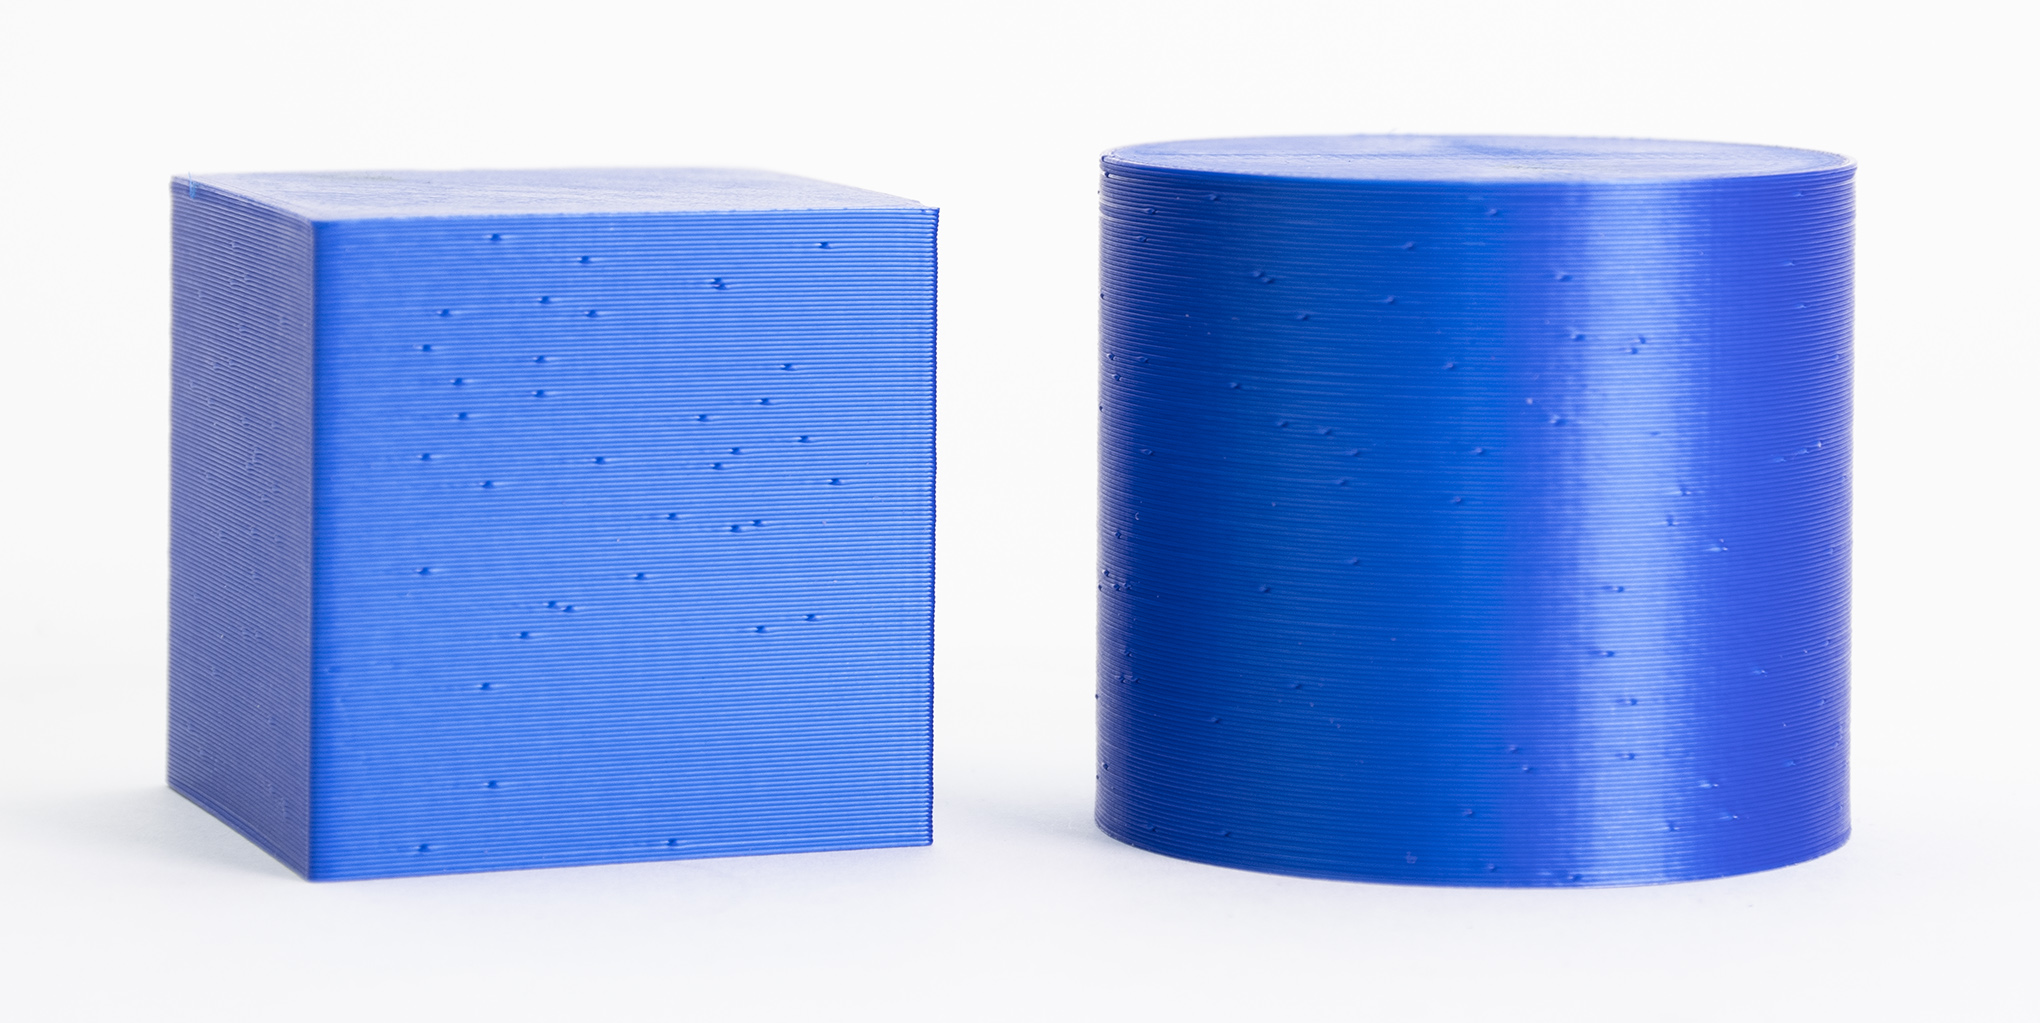
How to reduce the visibility of the seam
With the FFF/FDM technology, it is not possible to eliminate the seam. It will always be somewhat visible. However, with well-tuned settings, it shouldn't be too noticeable.
Settings that affect the visibility of the seam are Linear Advance and Extrusion multiplier calibration. Original Prusa profiles have these settings already tuned, but if you're fine-tuning a custom profile, you can try lowering the extrusion multiplier and calibrating the linear advance value to lower the visibility of the seam.
You can use the Vase mode to avoid the seam, but then you'll be limited to using only one perimeter and no infill.
17 comments
Maximal length of any scarf joint segment."
Thanks for that.
TL;DR: It's resolution.
An individual scarf transition is like two stacked wedges. Imagine creating a rectangular block by stacking two door stops on top of each other. Or whichever right triangular prism is easiest for you to visualize.
Each wedge is made up of small steps where the slicer gradually changes the amount of filament that is extruded in each step. This segment length setting is the maximum length that each line of g-code is allowed to define, or maximum length of each step. The effect is that this setting becomes the resolution of the wedge.
I do not know how necessary it is for you, the reader, because I do not know whether your printer can interpolate extrusion multipliers from one command to the next, either by design or by an inability to change extrusion rate fast enough.
For you CNC-heads out there, the material extrusion rate in a perfect scarf matches the MRR that you would see at the beginning and end of a contour pass with a linear ramp. However, MRR is as continuous as your machine's linear interpolation can achieve in XYZ (discounting the nuance from chip load/vibration/etc), whereas E doesn't seem to have interpolation for continuously changing "MER," so it would be defined it in steps.
Extend the scarf around the entire perimeter.
Scarf joint length
Change the length of the scarf joint
Max scarf joint segment length
Maximal length of any scarf joint segment."
These explanations are not helpful. A helpful explanation would describe what are the pros and cons of using an option, and what are the situations in which an option should or should not be used.
UI checkbox: "Enable feature XYZ"
Docs: "Checking this box enables the XYZ feature"
Well no shit... How about some guidance???