The selftest verifies the most important components of the printer. It is the first part of the wizard, which will start when you turn on the printer for the first time, or you can start it from LCD Menu -> Control -> Calibrations & Tests.
Each test part can be run individually from LCD Menu -> Control -> Calibrations & Tests -> Fan Test / XY axis test / Z axis test / Heater test / First layer calibration. You can always check the results of the previously completed selftest from LCD Menu - Calibration - Calibrations & Tests.
What it tests
- Hotend Fan
- Print fan
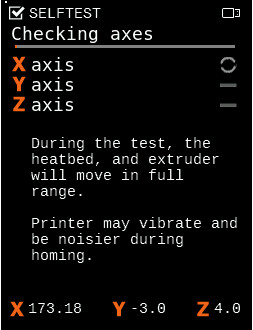
- X-axis
- Y-axis
- Z-axis
- Hotend (nozzle) heater
- Heatbed heater
- First layer calibration
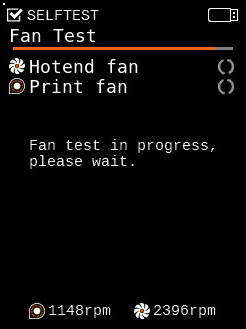 |  | 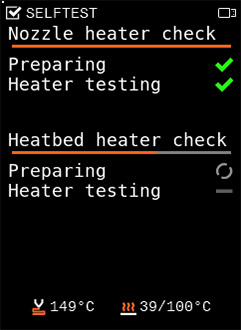 |
Pay close attention to both the printer and the LCD display. A green checkmark (✔) should appear by the part being tested. If all is green you are good to go.
A red X will appear next to the tested component if it fails. Note where it failed and let the self-test complete. If anything does not check out, it will produce the message:
"The self-test failed to finish. Double-check the printer's wiring and axes".
Troubleshoot a failed component
Fans
Verify if nothing is blocking the fan rotation - Debris might get between the blades. Bigger parts can be cleared with tweezers, and dust can be cleaned with a computer cleaner spray.
Axes
- Move the axes by hand to make sure nothing is hindering their path.
- Make sure that the belt pulleys are secured on the Y- and X-motor shaft. One of the set screws must be firmly tightened over the flat part of the motor shaft.
- Check if the belts aren't extremely loose, as they might skip on the teeth of the belt pulley.
- Try to clean, then apply lubricant to the smooth rods.
- If a failure happens on the Z-axis, it could indicate a problem with the M.I.N.D.A./SuperPINDA sensor.
Heaters
- Make sure the flexible steel sheet is on the bed.
- Make sure the ambient temperature is above 18 °C.
- Make sure the printer is not standing in a draft or close to an air-conditioning unit.
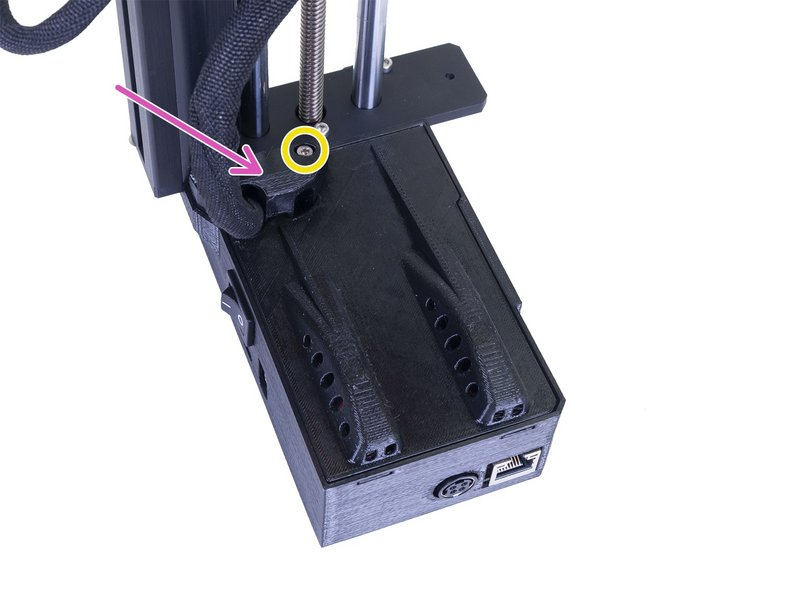
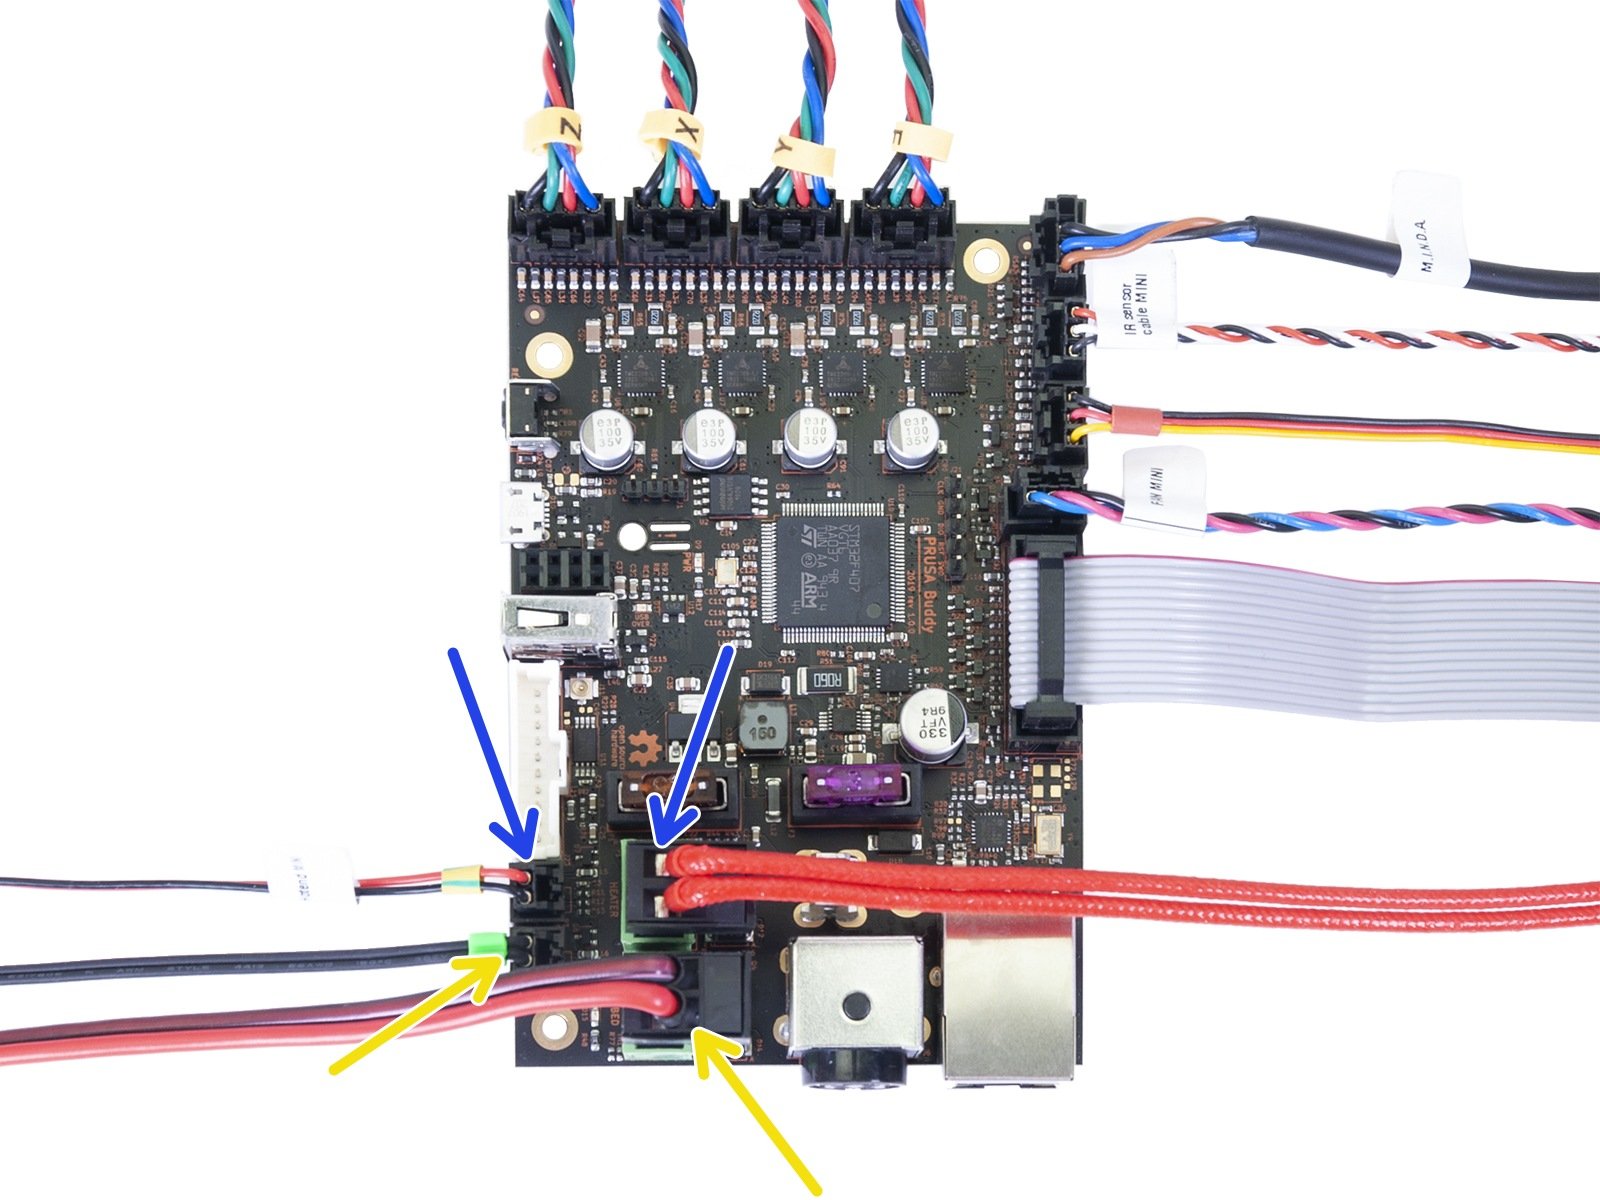
In case of issues with either heater (bed/hotend), a red error screen will fill the LCD, showing the error and a QR-code which will link you to an article for troubleshooting the component. In case this happens, check the wiring on the Buddy board.
Open the electronics box by the screw in the printed cable cover. Check if all of the cables are well connected. In case you find any loose connections, plug it back in and make sure you feel/hear the safety-latch lock into place. After that, close the box, turn the printer back on, and restart the Selftest or Wizard in the Calibration Menu.
First Layer calibration
The First Layer Calibration is used to calibrate the distance between the tip of the nozzle and the print surface. The aim is to adjust the nozzle height until the extruded plastic sticks nicely to the bed and you can see that it is being slightly squished. For more information, check the First Layer Calibration (MINI/MINI+).
Saving the Selftest results
Starting from firmware version 4.3.2, if you have a USB drive (FAT32) connected to the MINI/+ when performing the Selftest, the printer will save three logfiles into the drive as a text file. In the files, you can see the results of the tests on the two fans, the two heaters, and the three axes.
These files might be used for troubleshooting any selftest issues which have not been resolved through normal troubleshooting.
3 comments
Problem with X axis position/homing. everything runs freely, manual movement o.k. now, but was blocked befor. Seems to be the stepper motor.
https://help.prusa3d.com/en/article/m-i-n-d-a-sensor-testing-mini_134021
Si aún no se soluciona, haz un video y contáctanos por LiveChat 24/7 (boton 'Chat Now' en la parte baja de la e-shop), o por email a [email protected].