Every FFF (Fused Filament Fabrication) printer requires a First Layer Calibration, which sets the vertical "Z" distance between the nozzle and the print surface. Sometimes this value needs a slight adjustment and for this situation, there is an option called "Live adjust Z" (as you are mostly tuning it live during the first layers of your print). The reason for adjusting the distance is to provide better adhesion of the extruded filament.
How does it work?
It is important to know the following:
- the default value before the First layer calibration starts at zero (0.000) for all printers
- to get closer to the print surface, turn the knob counter-clockwise and further increase the negative value (e.g. -0.500 => -0.600 => -0.700...)
- to get further from the print surface, turn the knob clockwise and continue lowering the negative value (e.g. -0.700 => -0.600 => -0.500...)
The values of the Live adjust Z are typically in the range of -1.500 to -0.200. Going above zero into the positive values is not possible, this indicates either an issue with the measuring sensor (M.I.N.D.A., P.I.N.D.A., SuperPINDA) or incorrect alignment.
The correctly assembled print head has the sensor always slightly above the nozzle, never at an equal level or below the nozzle (see the picture below). The exact position can slightly vary, use the last chapter of the assembly manual of your printer to set the rough distance.
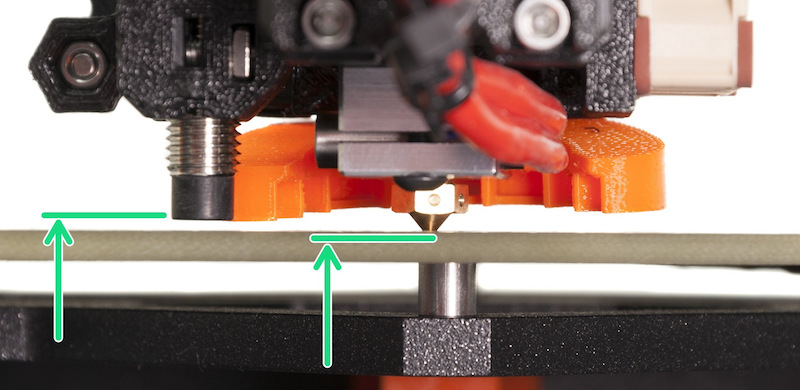
Example of the MK3S extruder
Live Adjust Z (while printing)
The most common approach is to perform the Live Adjust Z during the print. Go to LCD Menu -> Live adjust Z. This will show the Live adjust Z value you have set in the First layer calibration. From here you can adjust it by rotating the knob.

Example of the MK3S menu
Live Adjust Z (before the print)
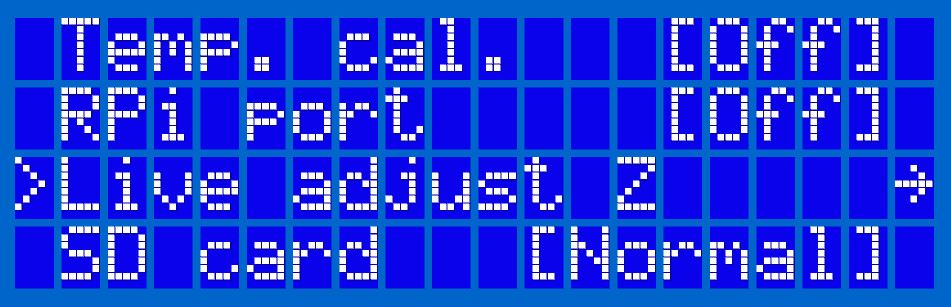
You can also change the value while the printer is at rest from LCDMenu -> Settings -> Live adjust Z. You will see the value set previously during the First layer calibration, and from here you can adjust it by rotating the knob.
Example of the MK3S menu
The Live adjust Z should be used only to fine-tune the distance. For example, PETG and other high-temperature materials require to be squished in the surface slightly more as they tend to warp (lift up), compared to the PLA. If you have replaced the sensor or disassembled the print head (extruder) you should run the First Layer Calibration (i3) instead.
Live Adjust Z (LoadCell)
The Prusa CORE One, and the Original Prusa MK4/S, MK3.9/S, and XL are equipped with a LoadCell, which will calibrate the first layer automatically.
In case you would still like to fine-tune it, you can long-press the LCD knob while the first layer is printed. The Live Adjust Z will not be saved for the next print in this case.
You can also tune this value in PrusaSlicer, under >Printers >General >Z offset, where a negative value means a more squished first layer, and vice versa. This value is specific to the G-Code where this value is set.
If you have constant issues with the first layer on a Prusa printer with the Loadcell, check the dedicated paragraphs from the general first layer issues article.
24 comments
Long-press the knob while priting the first few layers this will allow you to change the Z. Doing it later won't work.