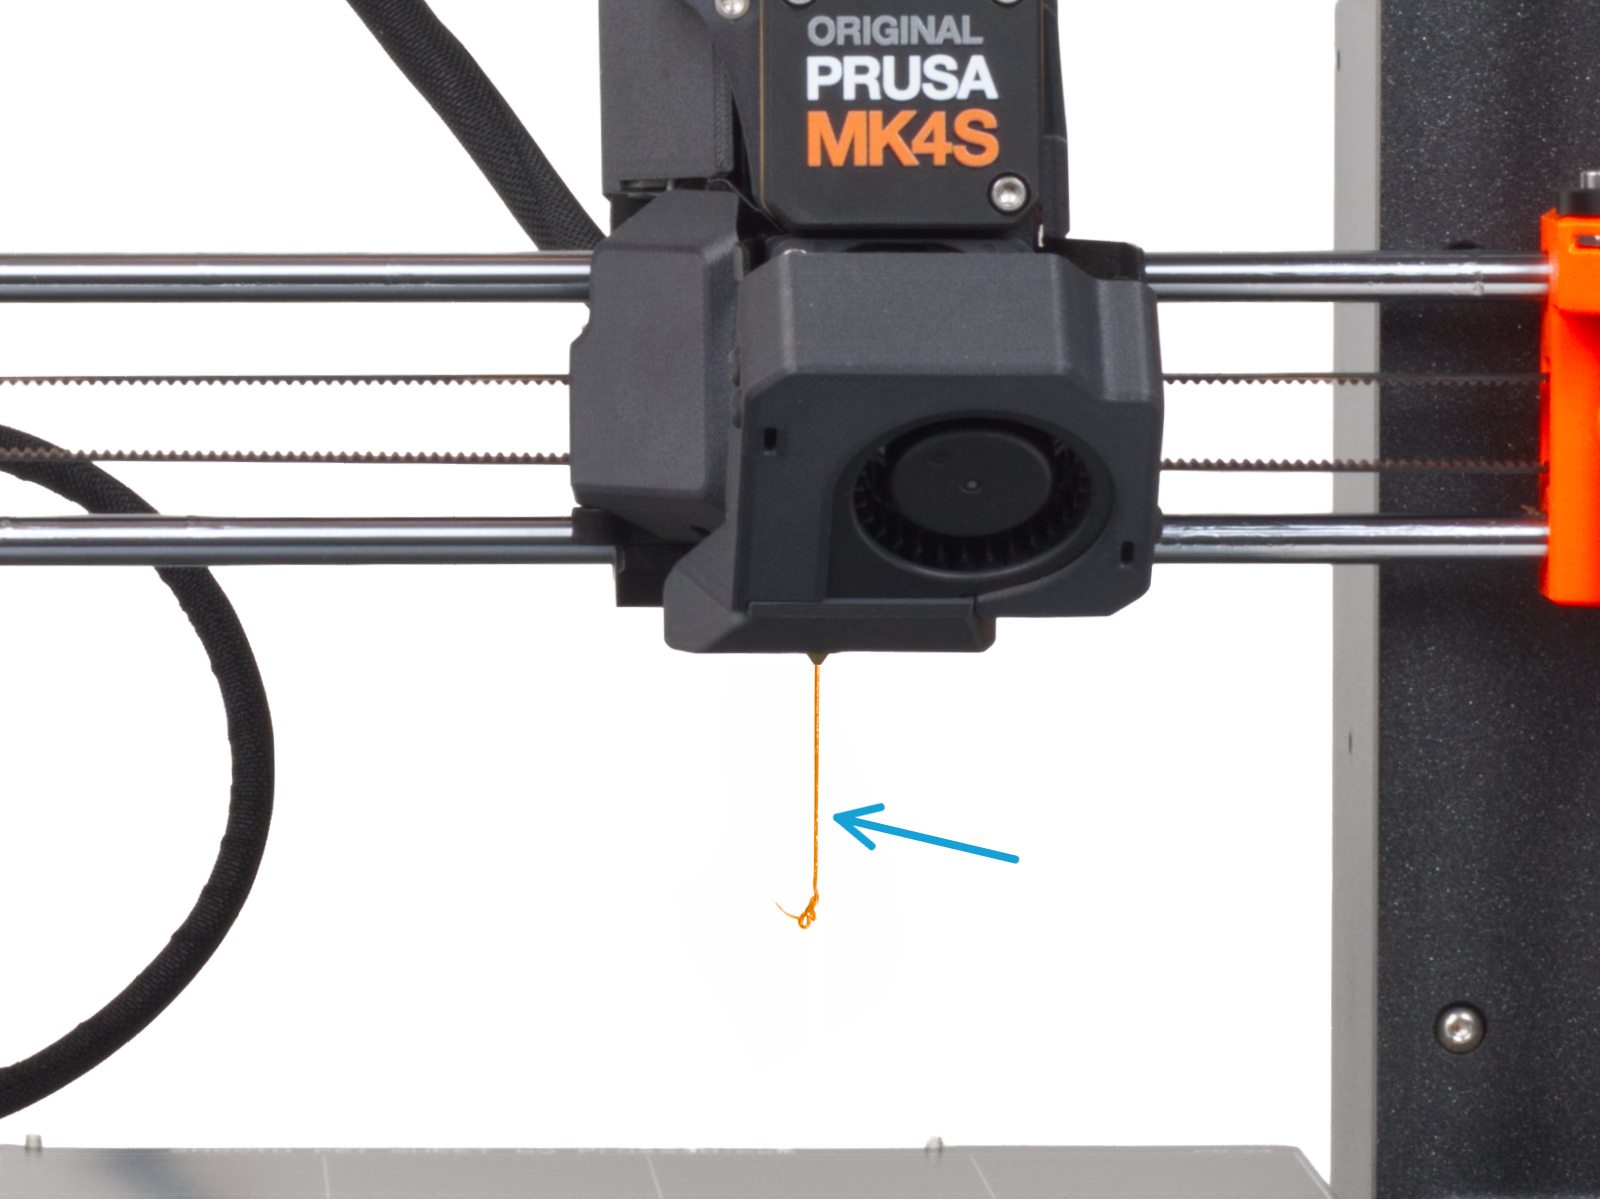
ヒートベッドに何もついていないことを確認します。ヒートベッドは清潔でなければなりません。汚れが付着していると、ヒートベッドとプリントシートの表面が損傷します。
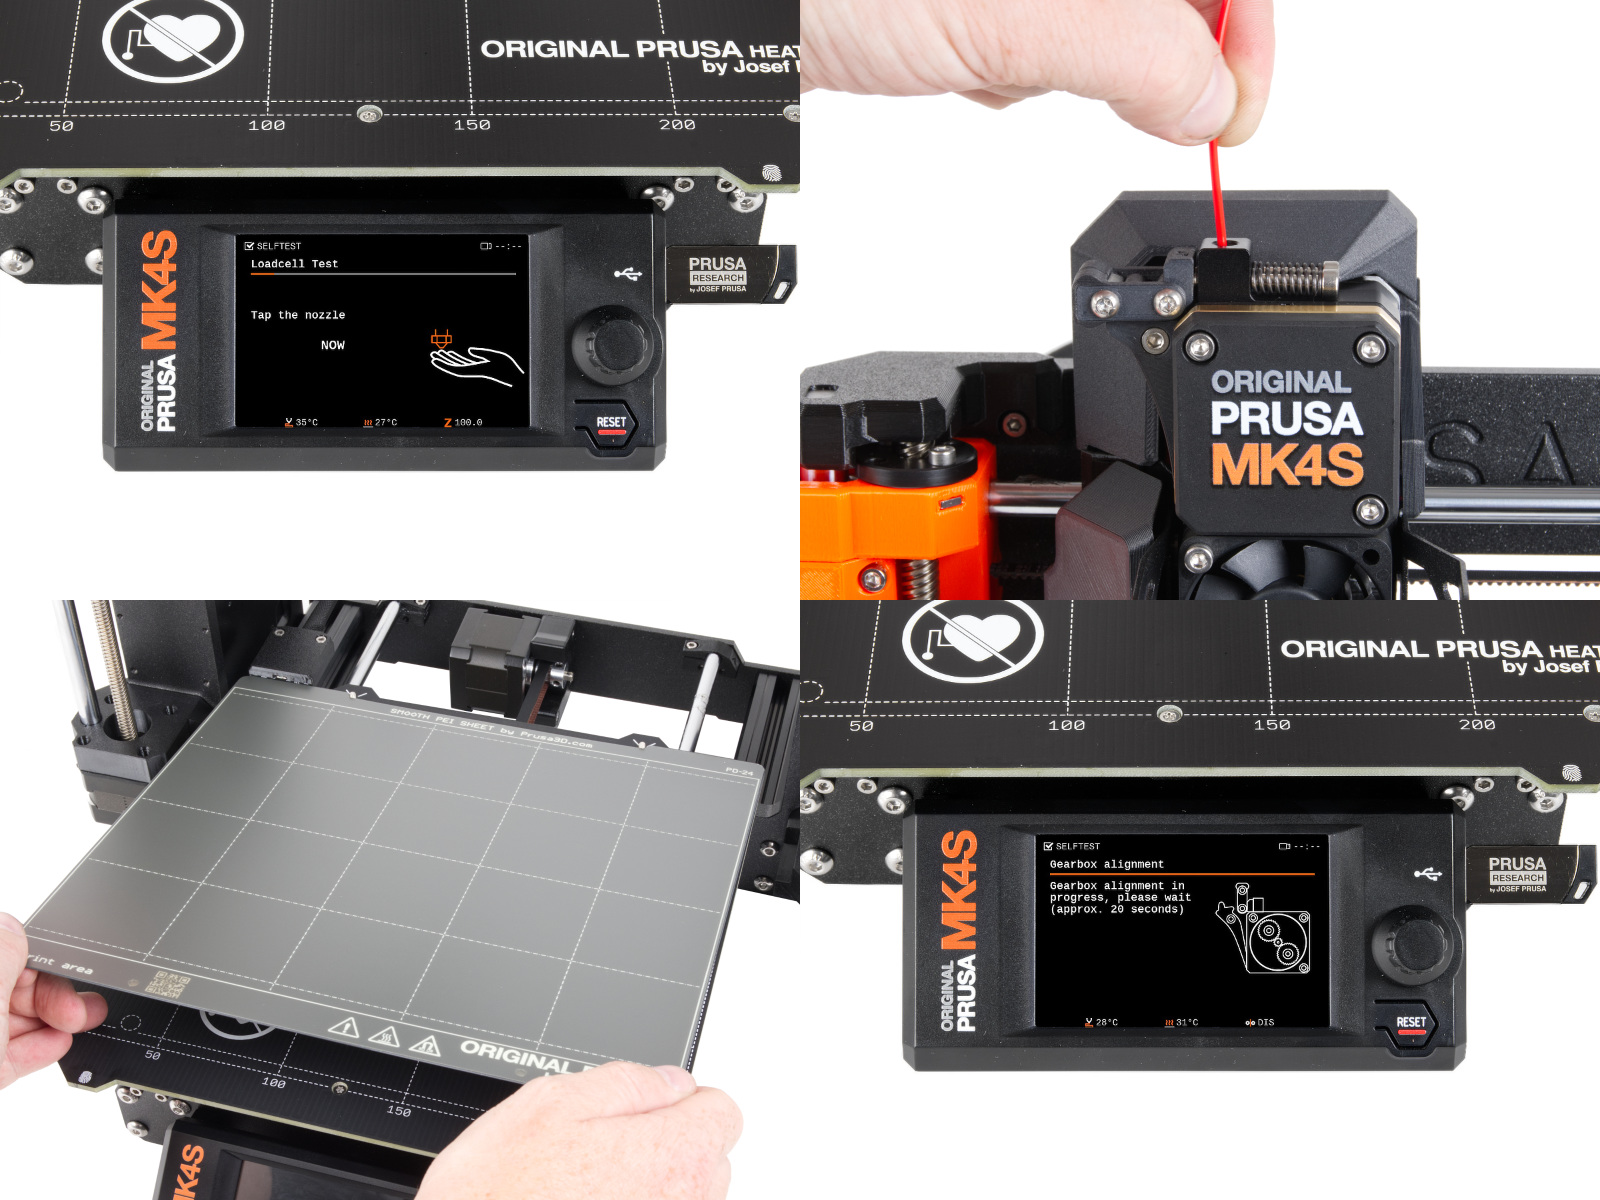
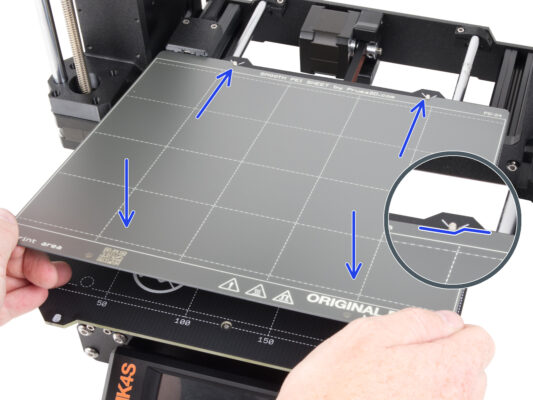
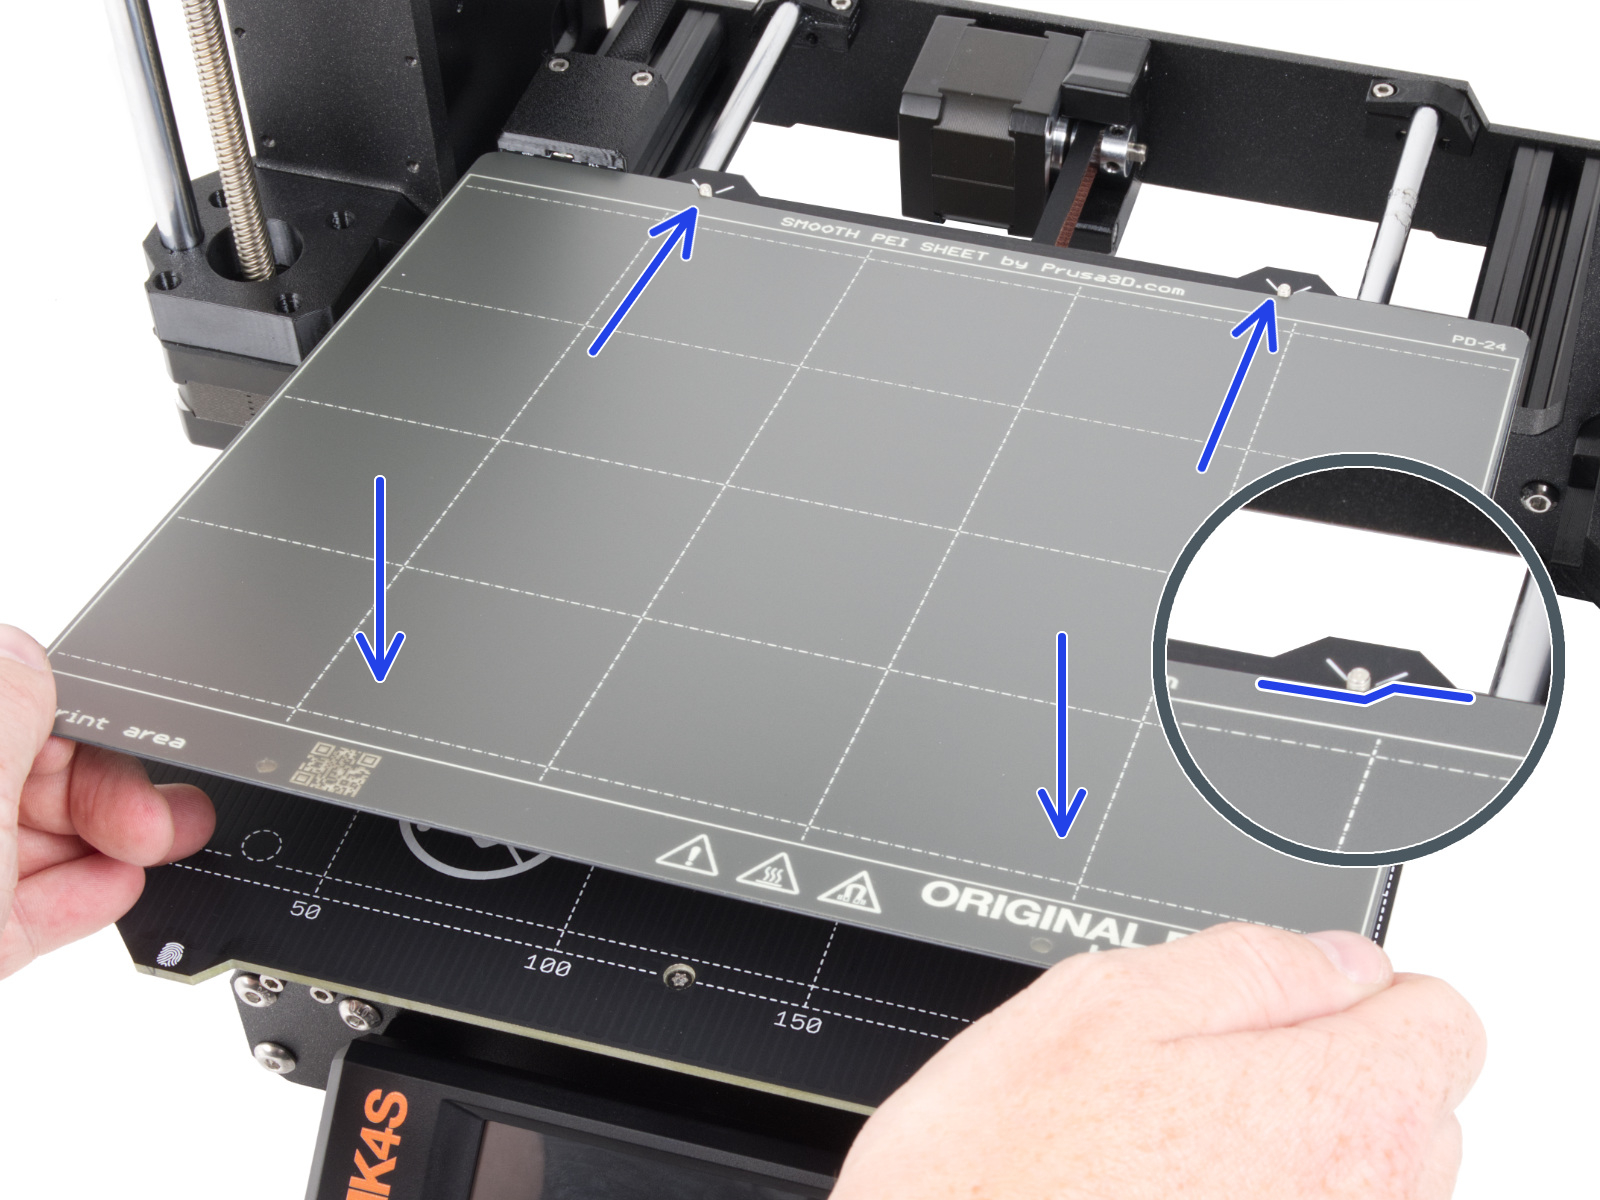
⬢後部の切り込みとヒートベッドの背面にあるロックピン(上の写真でオレンジ色でマーク)を合わせてシートを取り付けます。シートの前面2隅を持ち、指に注意しながらゆっくりとヒートベッドに敷きます。
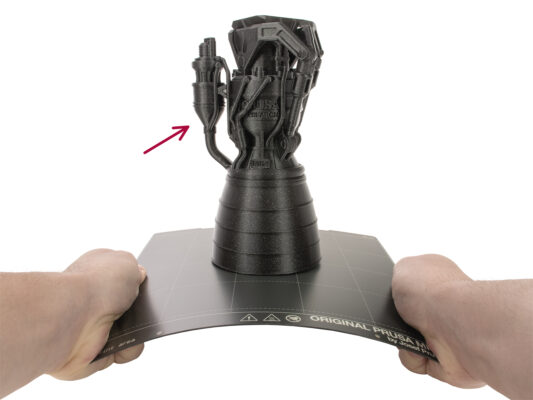
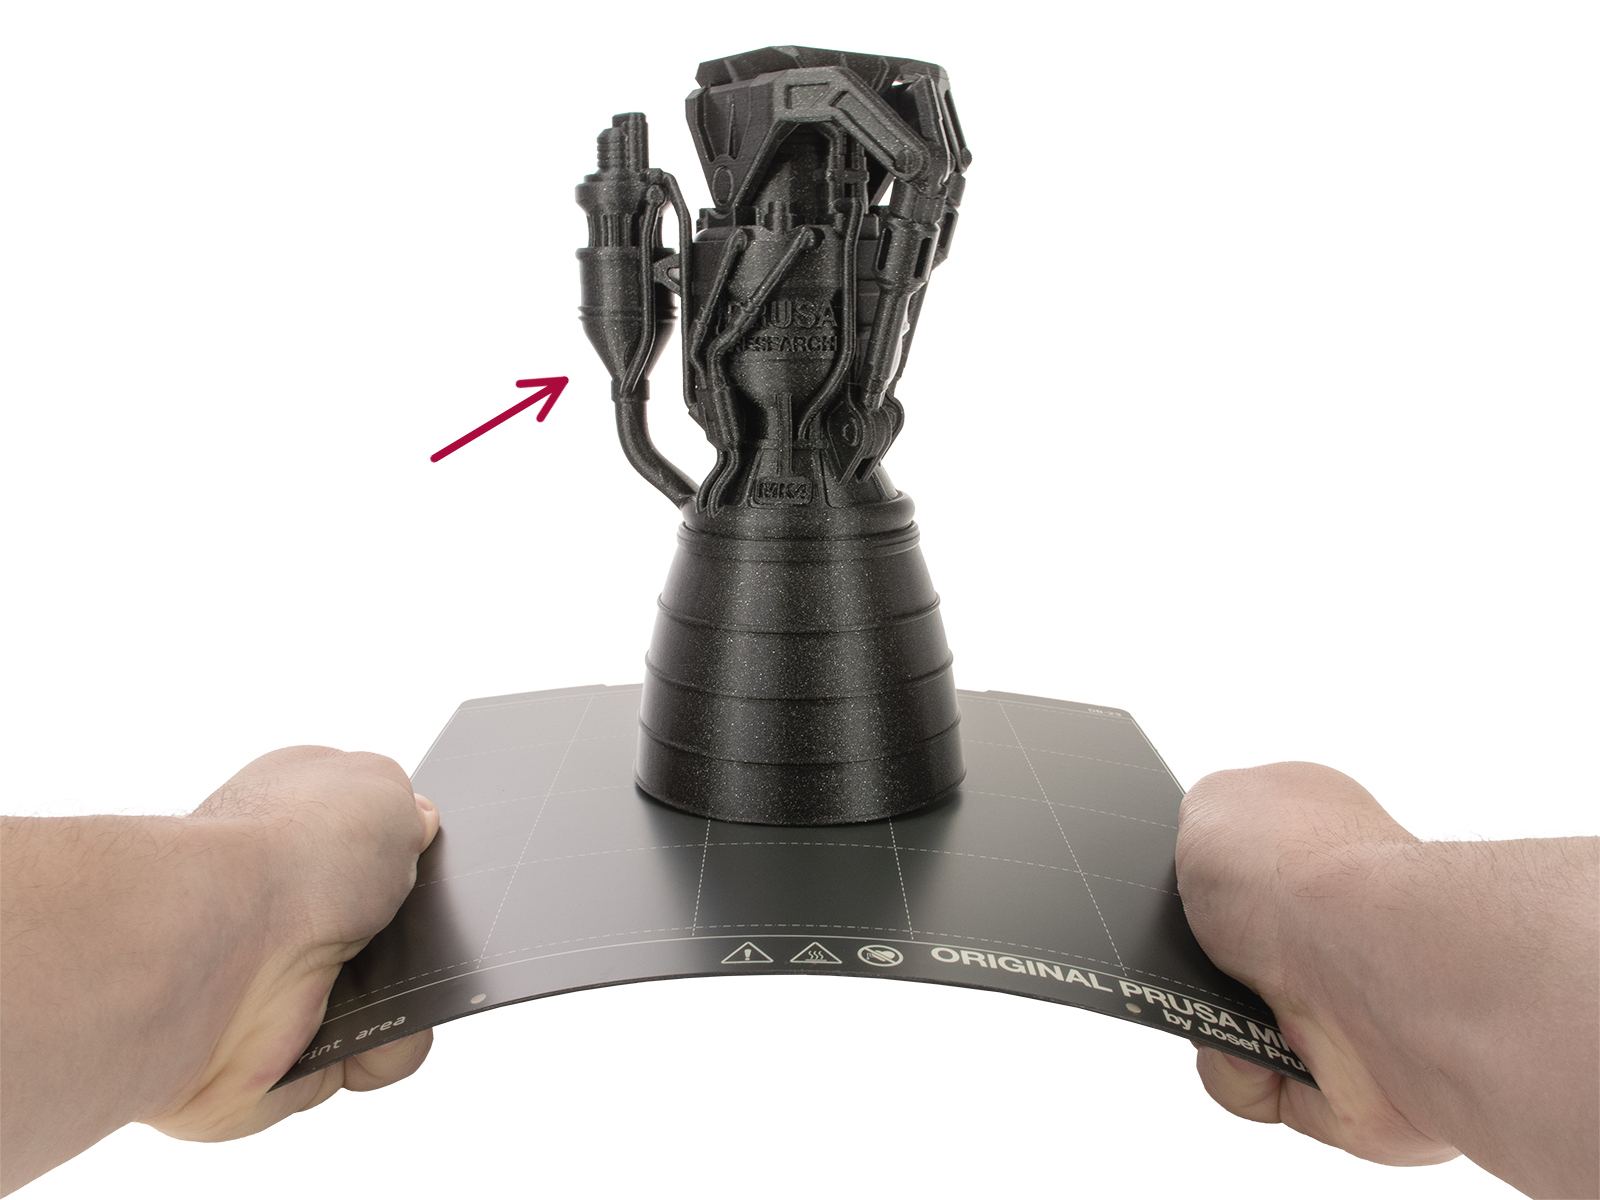
⬢プリントシートは常に清潔に保ち、最高のパフォーマンスを発揮できるようにしてください。
⬢プリントオブジェクトがプリントシートから剥がれてしまう原因の第1位は、油の汚れです。IPA(イソプロピルアルコール)を使って脱脂してください。
ここではスムースPEIシートを使用しています。他のバリエーションのシートでも同様の手順です。