It is recommended to regularly take some time to maintain your Prusa CORE One/+. This should be done even if the printer is working perfectly.
Useful tools
Besides the usual tools, such as Allen keys, needle-nose pliers, and IPA (Isopropyl Alcohol) + paper towels, you might need:
- Compressed air: also known as canned air. Be sure not to hold it upside down while spraying - otherwise, you could damage any electronic components while trying to clean them.
- Brass Nozzle Brush: a small brass brush is useful for cleaning the heaterblock. If you don't have a brass brush, any brush with hard bristles will do the job.
- Prusa Lubricant: a tube of Prusa Lubricant is included with the Prusa CORE One. It is used to lubricate the smooth rods with linear bearings and to lubricate the Z-axis leadscrews. DO NOT use Prusa Lubricant on the linear rail!
- Linear rail lubrication set: a set that includes Microlube GL 261, Dosing needle SSS15 2, Cartridge with manual piston 2/2,5mm, and two nitrile gloves.
- Alcohol-free cleaner: used to clean the printer panels. DO NOT use alcohol products, including IPA, to clean the panels.
Frequent maintenance
The following points should be checked before every print.
Keeping the printer clean
After several hours of printing, various kinds of debris may start to accumulate around the printer parts or under the heatbed - pieces of filament, dust, scraps, broken supports, etc. Always make sure that the parts of the printer are clean. You can use a brush, a small broom, or a vacuum to remove debris.
Hotend cleaning
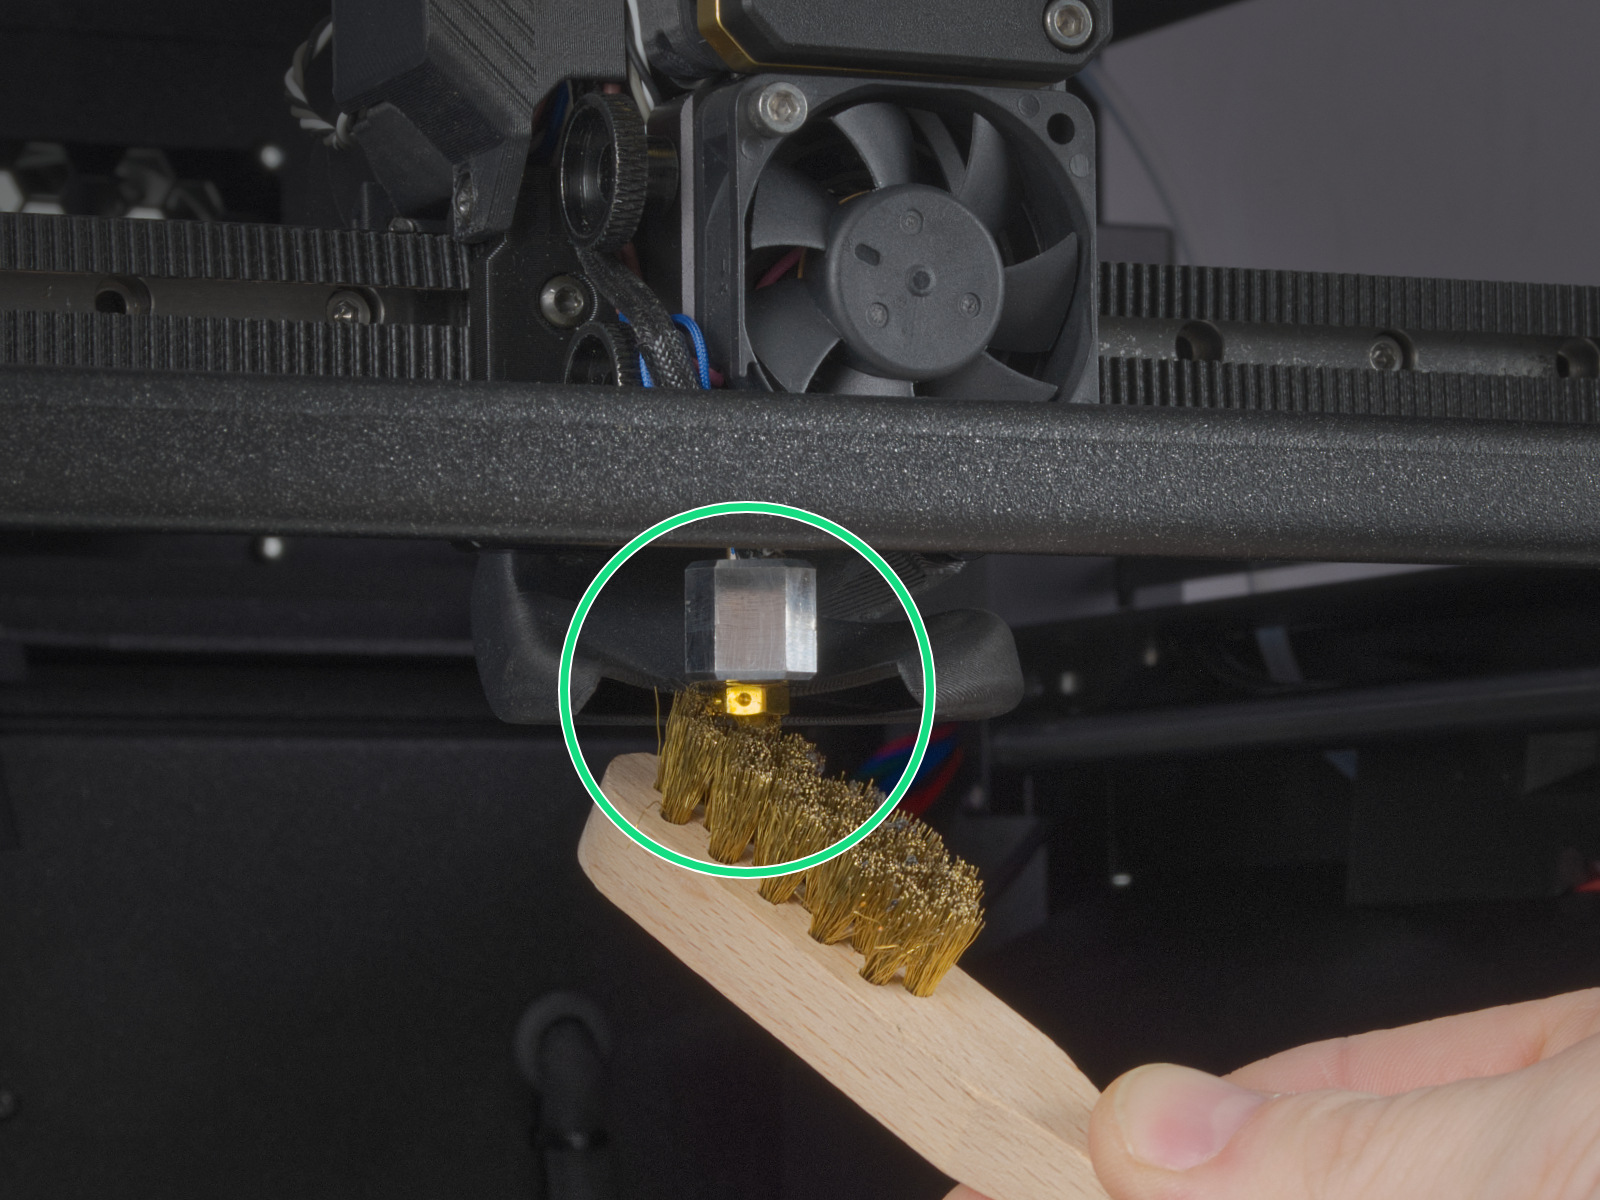
It is fundamental for the hotend to be clean. Debris on the nozzle or heaterblock can cause printer failures, for example, with the residue falling onto the printed model while the print is in progress.
To clean the nozzle and heaterblock, heat the nozzle for three to five minutes at 250 °C, as the remains of the filament must be warmed up slightly so that they can be removed more easily.
Use a small brass brush to clear away any old plastic stuck on the nozzle and heaterblock.
Avoid contact of the brush with the hotend cables, as this could cause a short circuit.
Caution: the printer is still at a high temperature! Wait until the hot parts have cooled down to ambient temperature. It takes approximately 10 minutes. Do not touch it! Always check the values on the display.
Flexible print sheet
Never clean the special PA Nylon sheet with acetone, IPA (isopropyl alcohol), or other alcohol-based solvents (window cleaners, Windex, etc.)! This will damage the surface.
All flexible print sheets should be cleaned regularly to ensure adhesion, but the exact methods and washing solutions can differ depending on your type of sheet.
You can find more information on how to take care of your flexible print sheet in this articlein this article.
Sporadic maintenance
The following checks should be done every 200 hours of printing time.
Axes check - Linear Rail (X-axis)
Ensure that there is no debris or dust on the (X-axis) linear rail. If there is, clean it with a clean tissue or a clean cloth, no degreaser or chemicals, as these might damage the rubber in the carriage.
We recommend lubricating the linear rail every 3-6 months, using the dedicated linear rail lubrication set at the spots shown below.
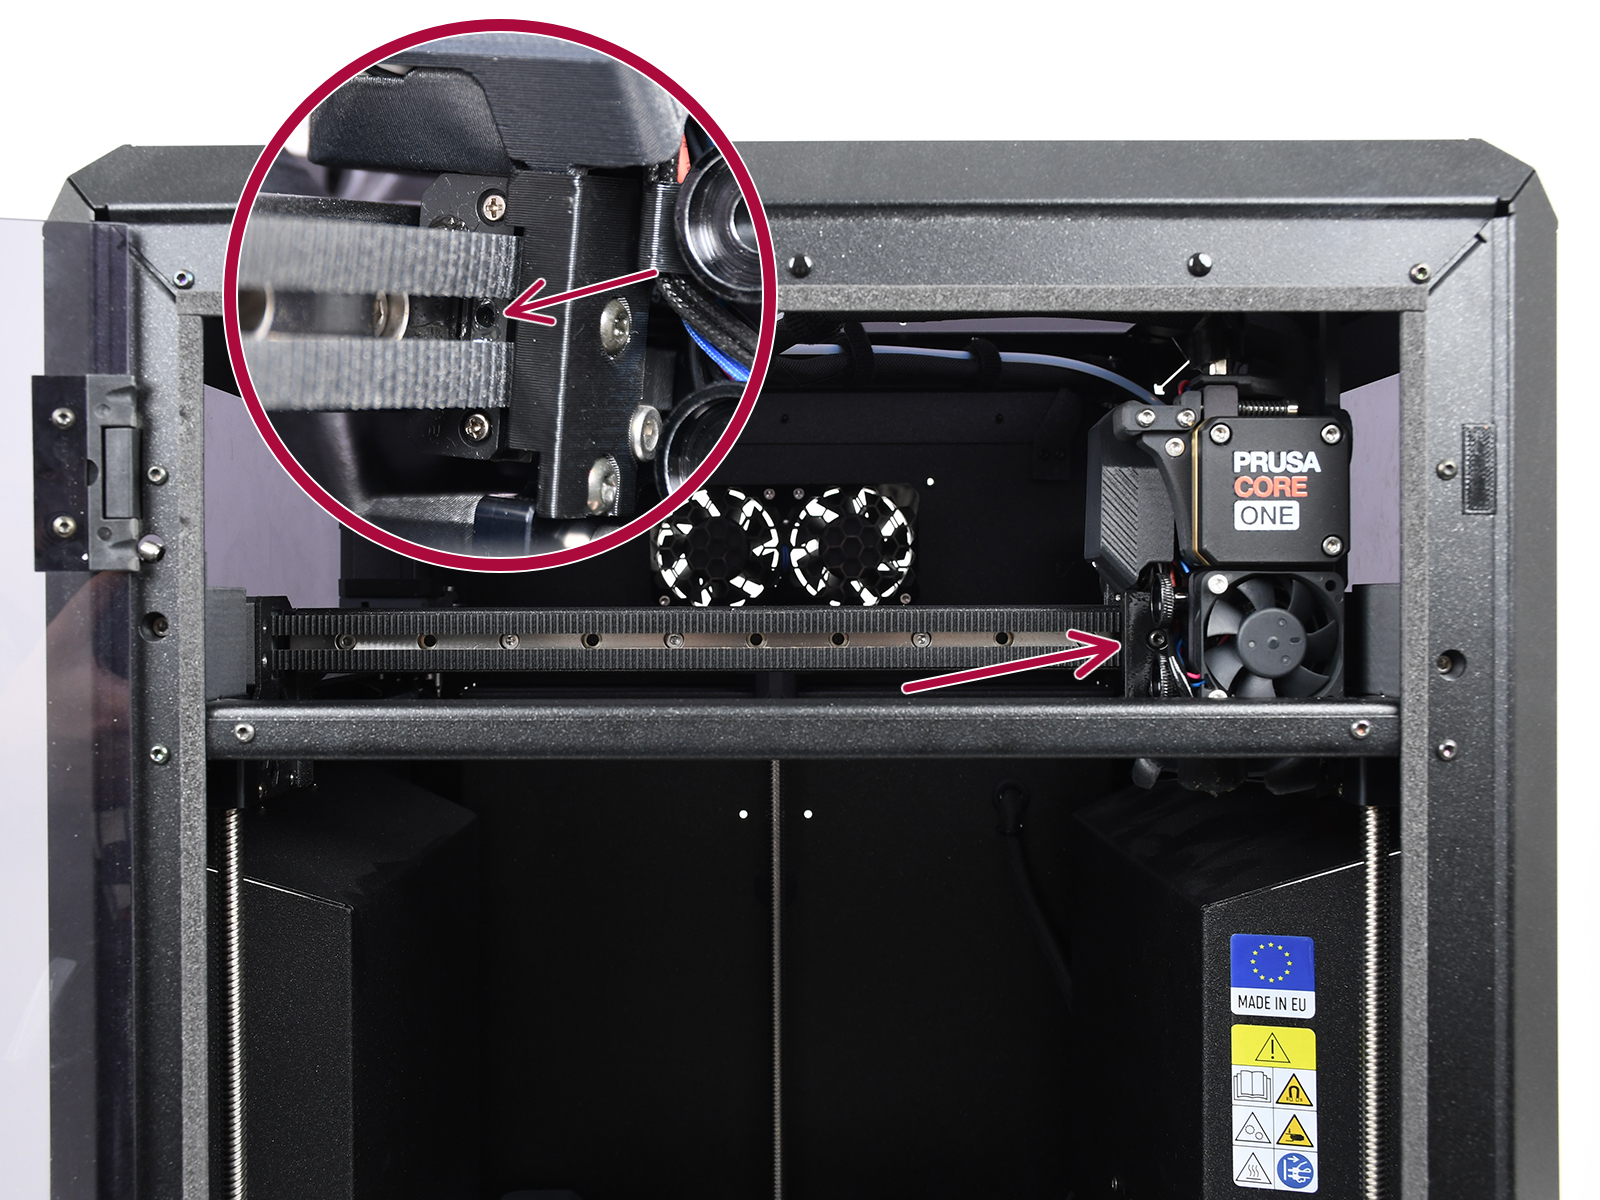 | 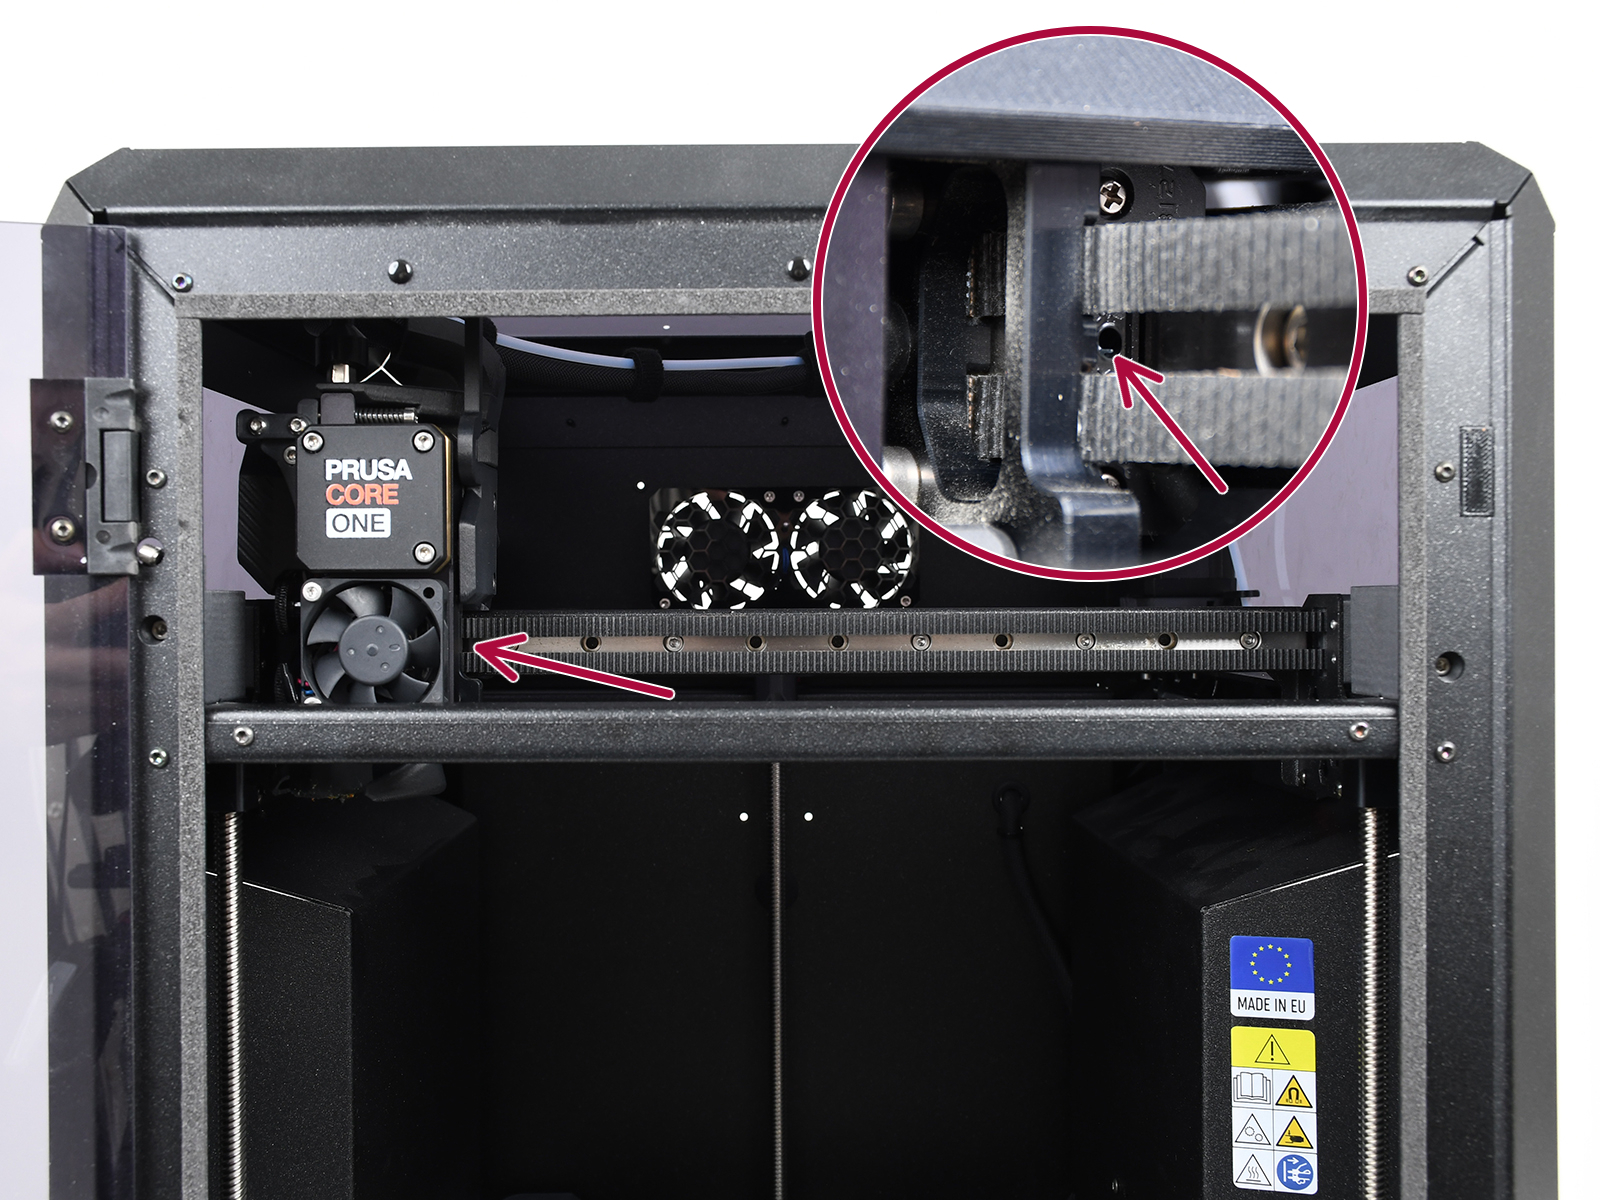 |
On linear rails, DO NOT use Prusa Lubricant or any products not part of the linear rails lubrication set.
Axes check - Smooth Rods and Linear Bearings (Y-axis)
Clean the (Y-axis) smooth rods with a clean paper towel, and lubricate them using a small amount of Prusa Lubricant.
Only in case you feel the axis is not running smoothly anymore, even after recently cleaning and lubricating the smooth rods, the bearings can be taken out, cleaned with alcohol, and greased on the inside, still using a small amount of Prusa Lubricant.
Axes check - Belt
Over a long printing time, the belt can slightly loosen, causing issues such as layer shifting or bad printing quality. The easiest way to check the belt tension is to print a circular object. If the result is not perfectly round, a belt adjustment is needed.
Fans
The RPM (revolutions per minute) of both fans is constantly measured. This means that the printer will report an error if the fan suddenly slows down, for example, due to a piece of filament stuck in it.
In such a case, check and remove any dirt from the relevant fan. Do not try to bypass the RPM check, as this could damage the printer!
Both fans should be checked and cleaned after every few hundred hours of printing. Dust can be removed with compressed air in a spray can, and small plastic threads can be removed with tweezers.
CAUTION: Do not blow compressed air on the running fan.
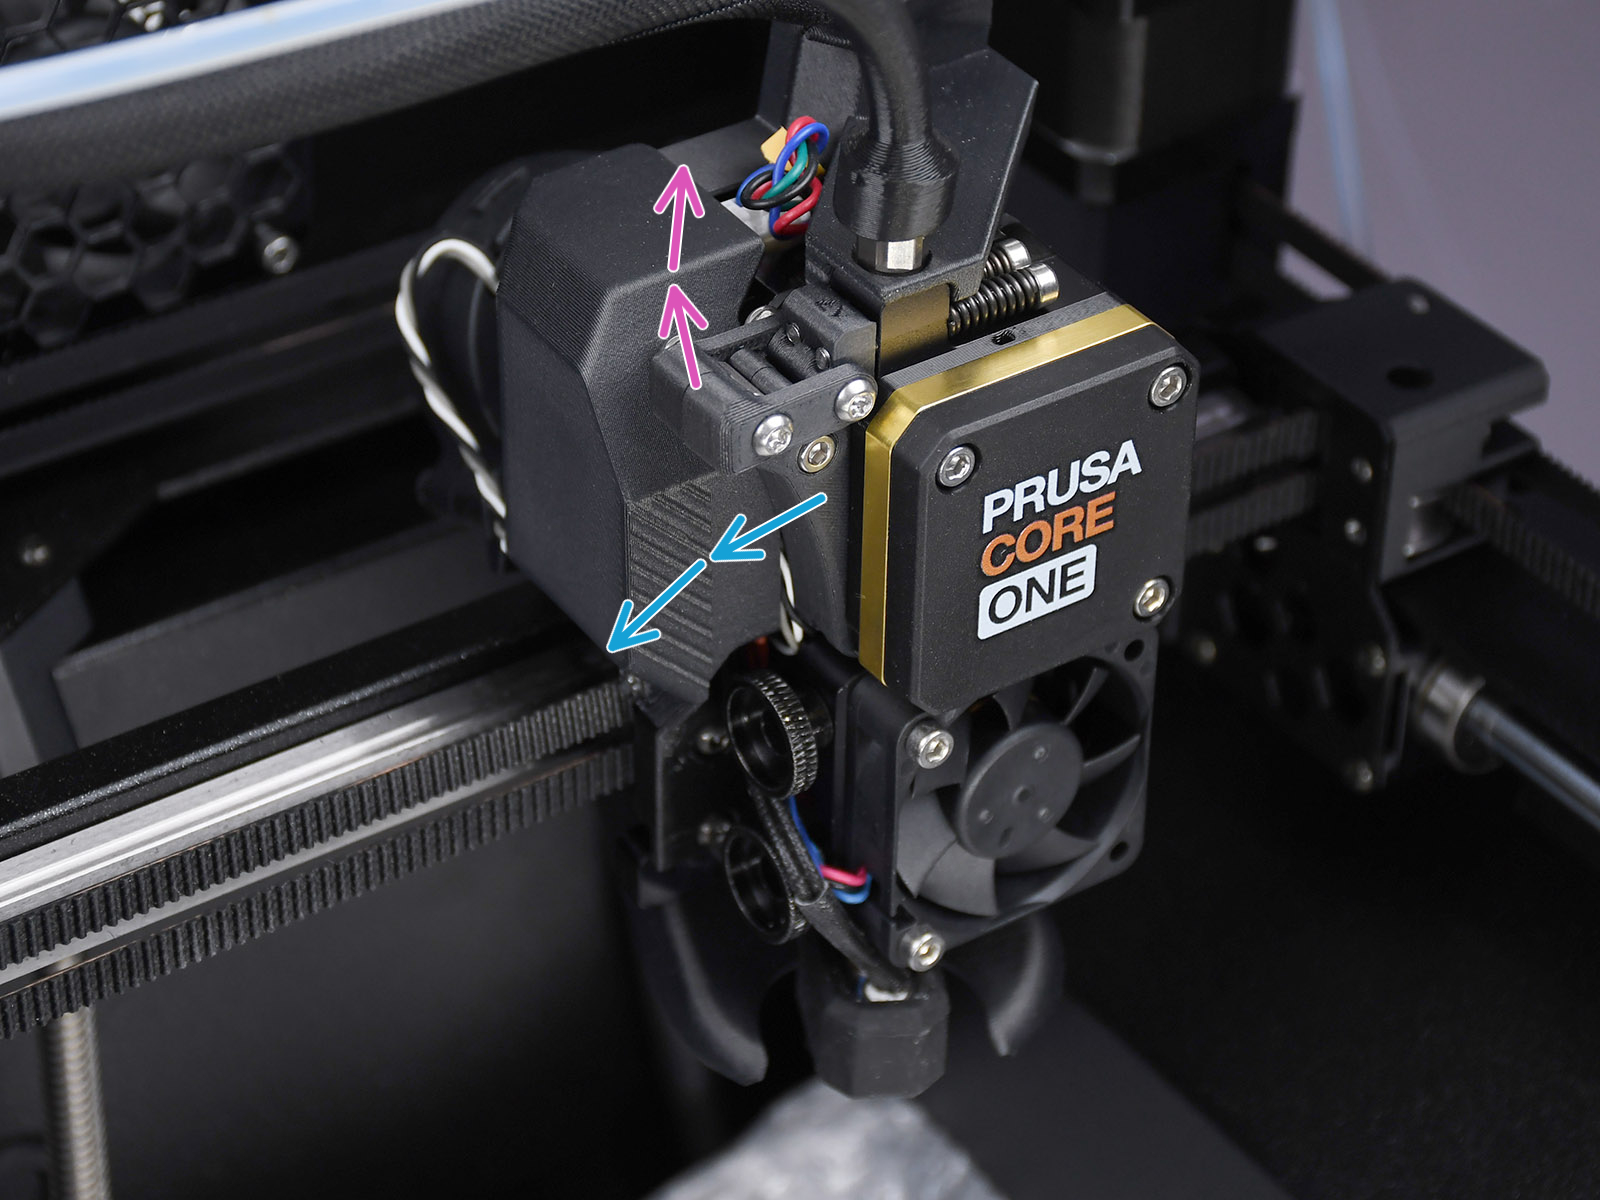
Nextruder
The primary gear and the bearings attached to the Idler Shaft in the extruder do not need any lubricant. Over time, a deposit of filament debris can form in the grooves of the primary gear, which then causes insufficient filament extrusion. Access the extruder by lifting the Idler Nut and then moving the Idler Shaft. You can blow away the dirt with compressed air, or use a brass brush or an ordinary toothpick. Use the access hole on the side of the extruder.
Nextruder filament sensor
If you encounter problems with the Nextruder filament sensor, such as incorrect or random readings, make sure that everything in the Nextruder is correctly wired and that there is no debris in the filament path inside the extruder, either using tweezers or a can of compressed air.
To access the right side of the LoveBoard, loosen two M3x6 bolts and remove the cover.
 |  |
To clean the Nextruder filament sensor, follow the dedicated article.
Panels cleaning
Use an alcohol-free cleaner or soapy water to clean the printer panels.
DO NOT use products that contain alcohol, including IPA. Repeat exposure will weaken the panels, causing them to become brittle over time.
Annual maintenance
Electronics
It is a good practice to check and optionally reconnect the electrical connectors on the xBuddy board, Loveboard, heatbed, PSU, and xLCD every 600-800 hours of printing.
In particular, ensure that the screw-attached connectors are fully tightened, and the Molex-attached connectors are properly connected.
CAUTION: for Molex-attached connectors, it is necessary to press the latch before disconnecting. Otherwise, the connector may get damaged.
11 comments
Thanks to Wiggum Ralph’s comment on the Lubrication Set, I at least have a basic idea of what needs to be done. However, finding the lubrication ports still looks quite challenging.
A proper manual with photos would be very helpful — showing exactly where the ports are, which parts can be disassembled for easier access, and whether lubrication should be done with everything still assembled.
I’m also not sure how we’re supposed to handle the “single-use” lubrication syringe/needle setup after the first use.
The X-axis linear rail block has lubrication ports on either side. Use the Microlube syringe to inject 0.1mL in ONE of the two ports - they both go to the same reservoir. This should last about 6 months of normal, low-dust usage.
Also the lubrication is NOT straightforward, is there a separate guide for it ?
NEEDED:
A. A clear legend showing the linear rails, smooth rails, and belts. Anything used for movement in X, Y, and Z, should be shown , defined, and clearly called out. Are calling smooth and rails and linear rails interchangeably?
A picture showing exactly what the "Prusa Lubricant" (white canister ) can be used on and NOT used..
A picture of what the lubrication set is, and where it is used... would be wise..
A matrix showing what can be used and where would be ideal and relatively easy to create..
Also a listing of what lubricant should be added to the belts. ( I AM ASSUMING NOT to add a lubricant), but that is where this could be extremely beneficial...
This information will decrease issues, escalations, and email churn...
Please address. ( I am happy to show how this can be accomplished... )
Thanks
A clearer guide on the lubrication process covering the main dos and don’ts and possible alternative materials would make it much easier for everyone to understand and follow.
This really is not straightforward and i do not understand how this still is not documented here.