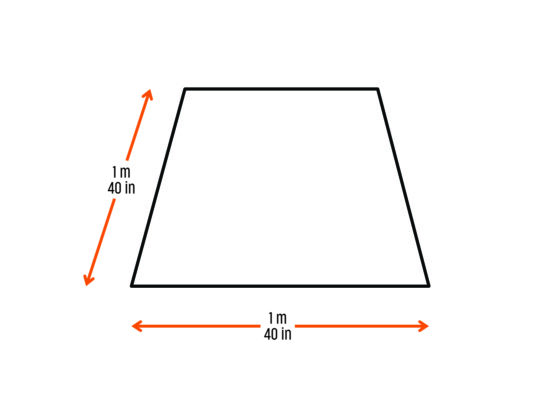
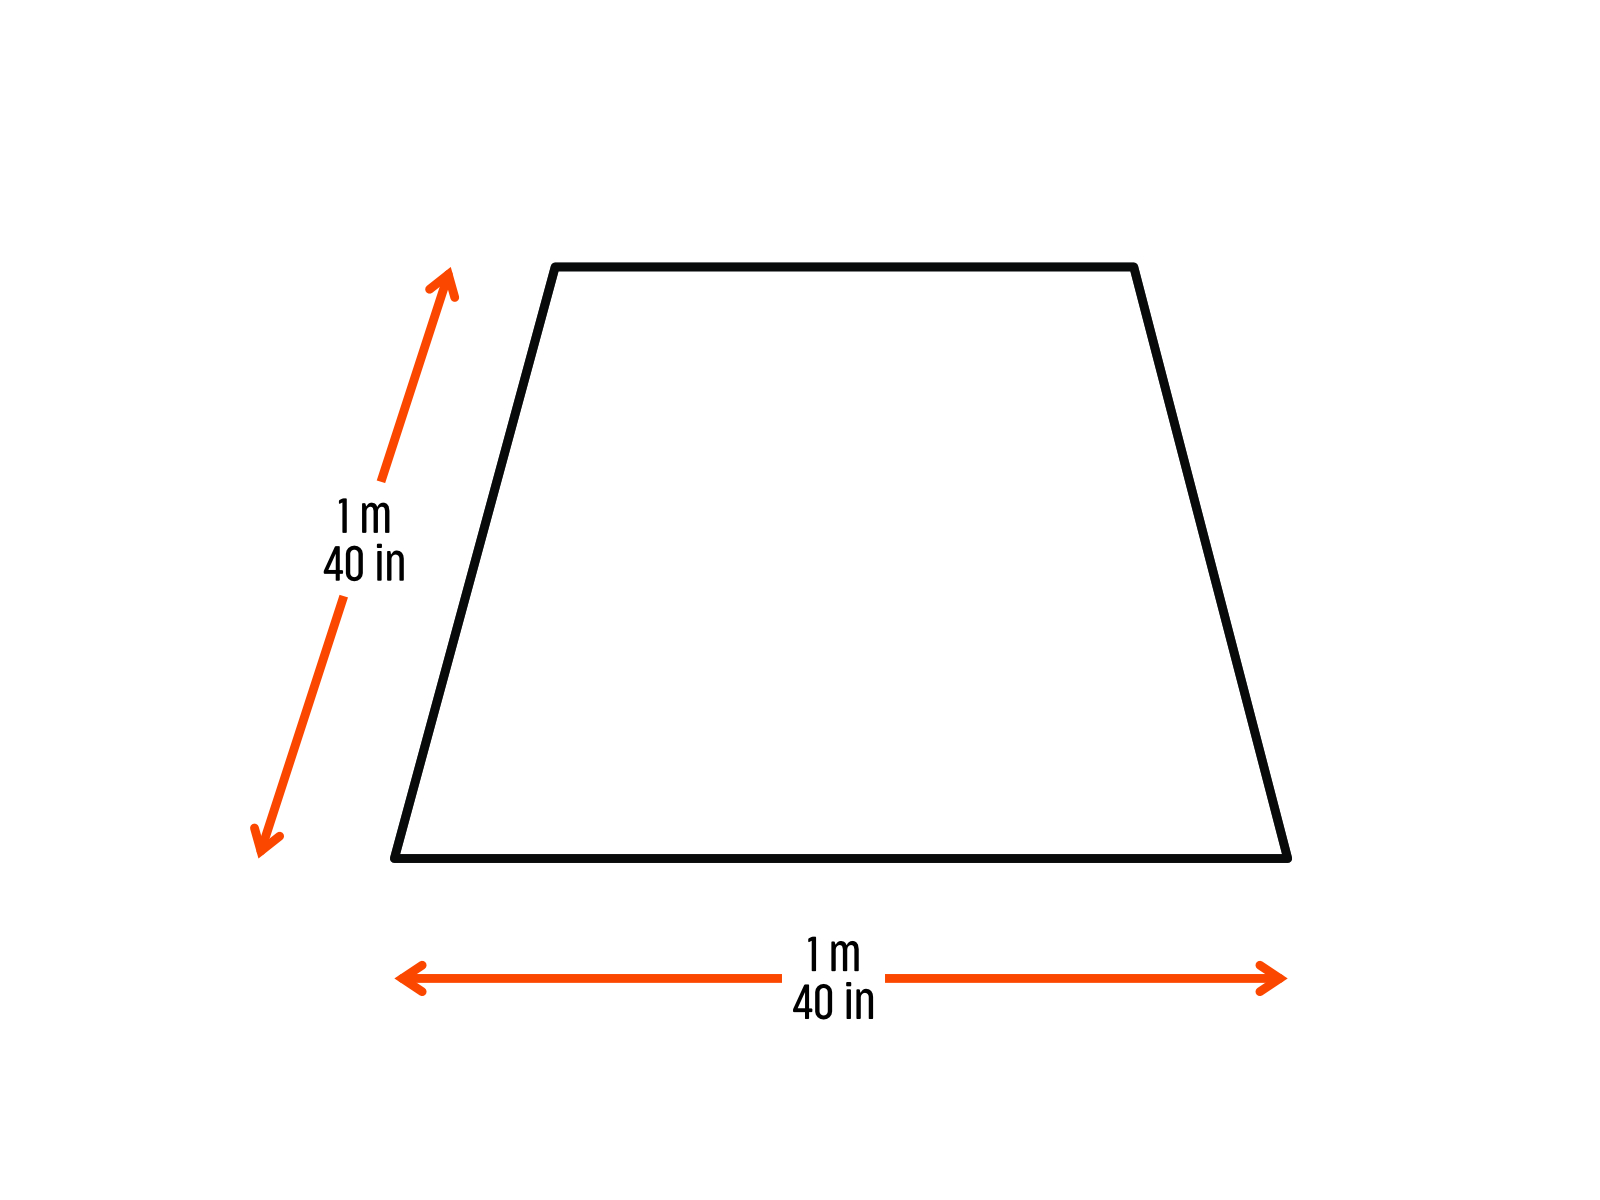
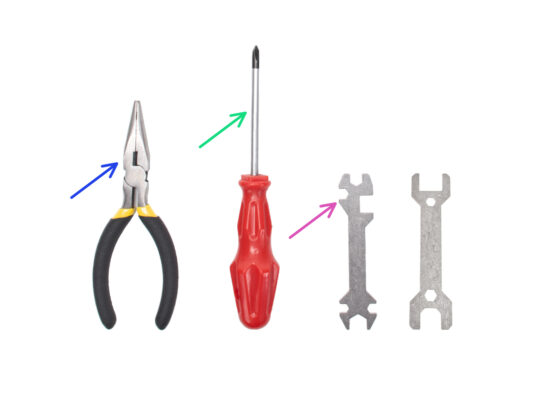
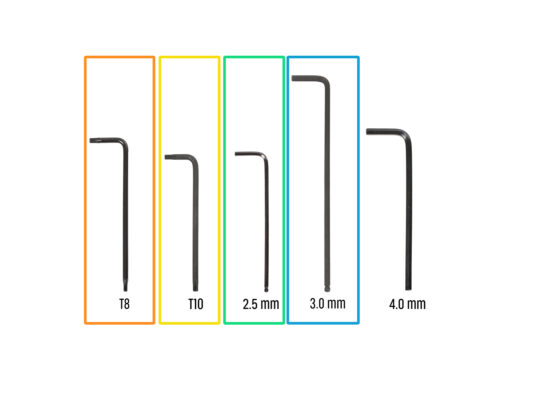
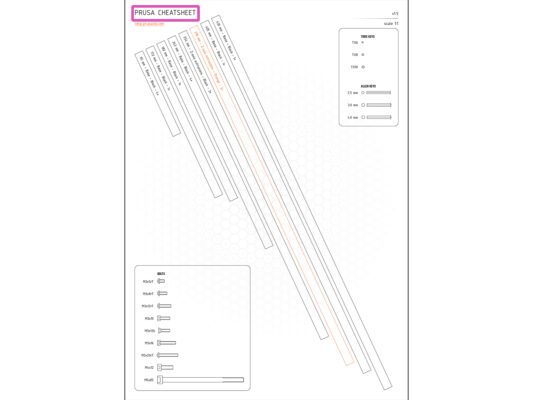
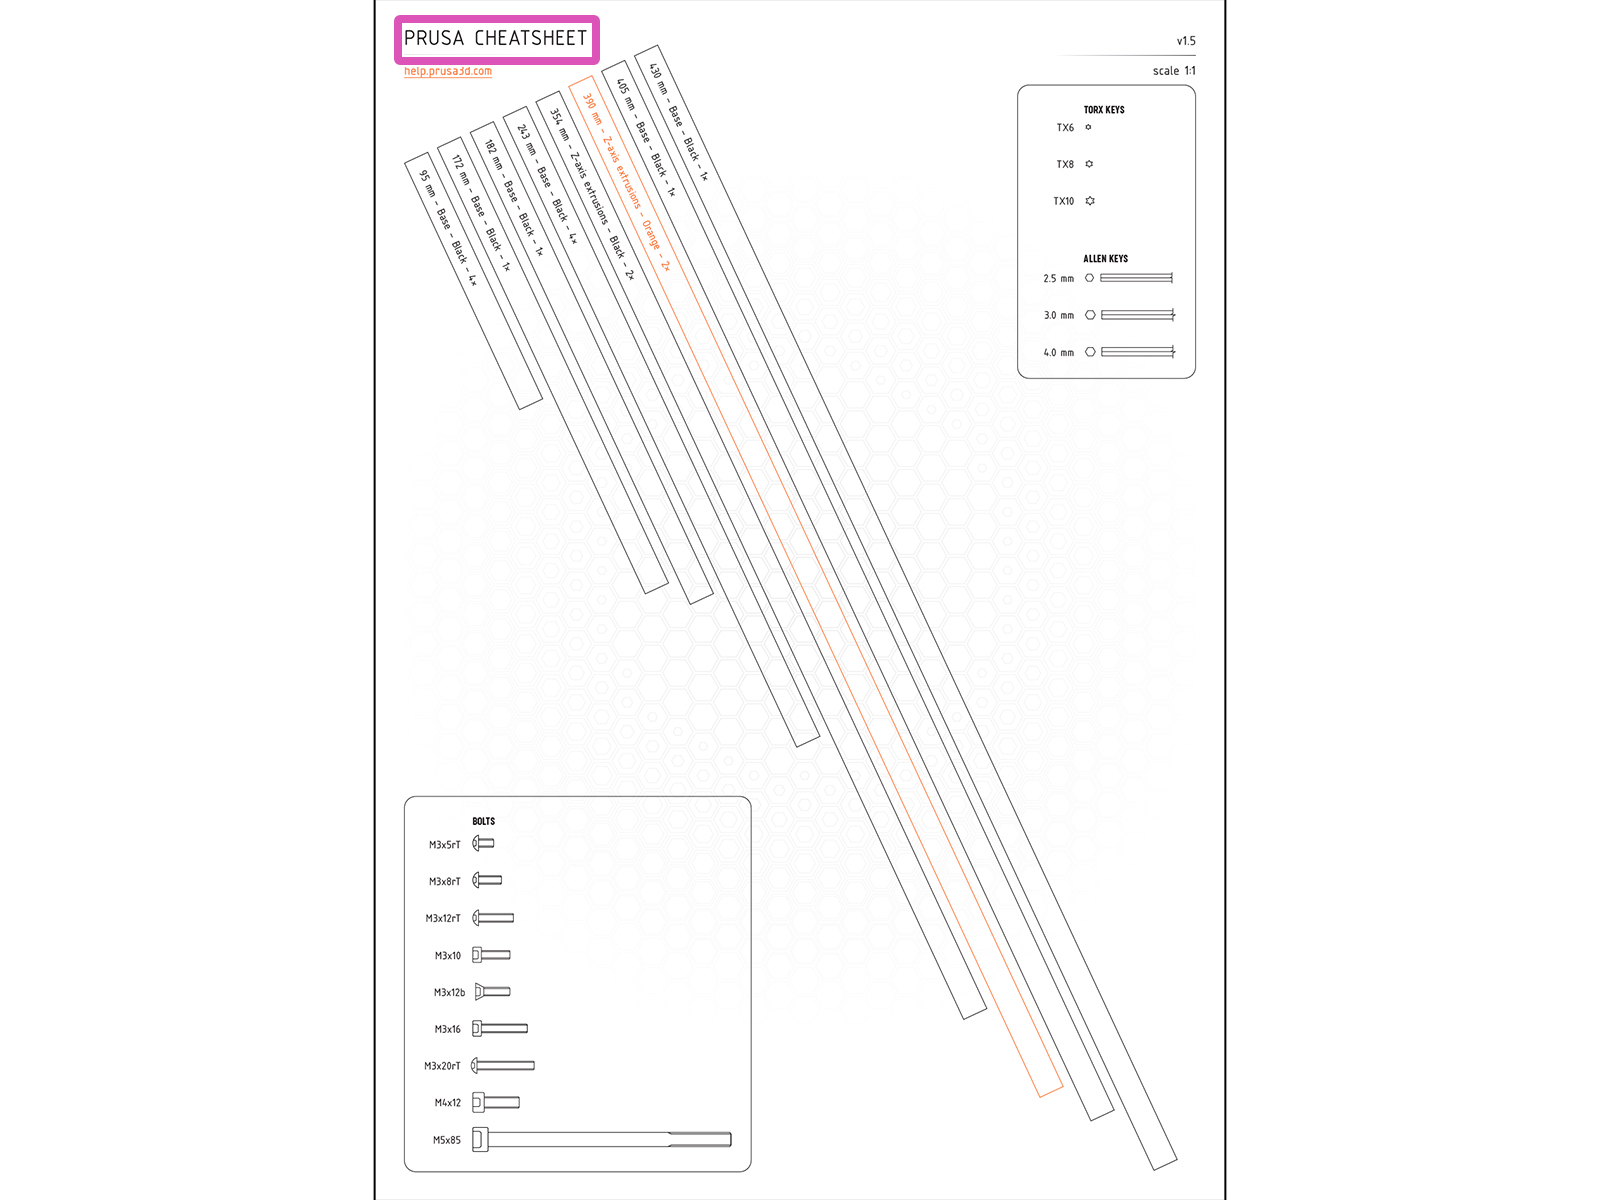
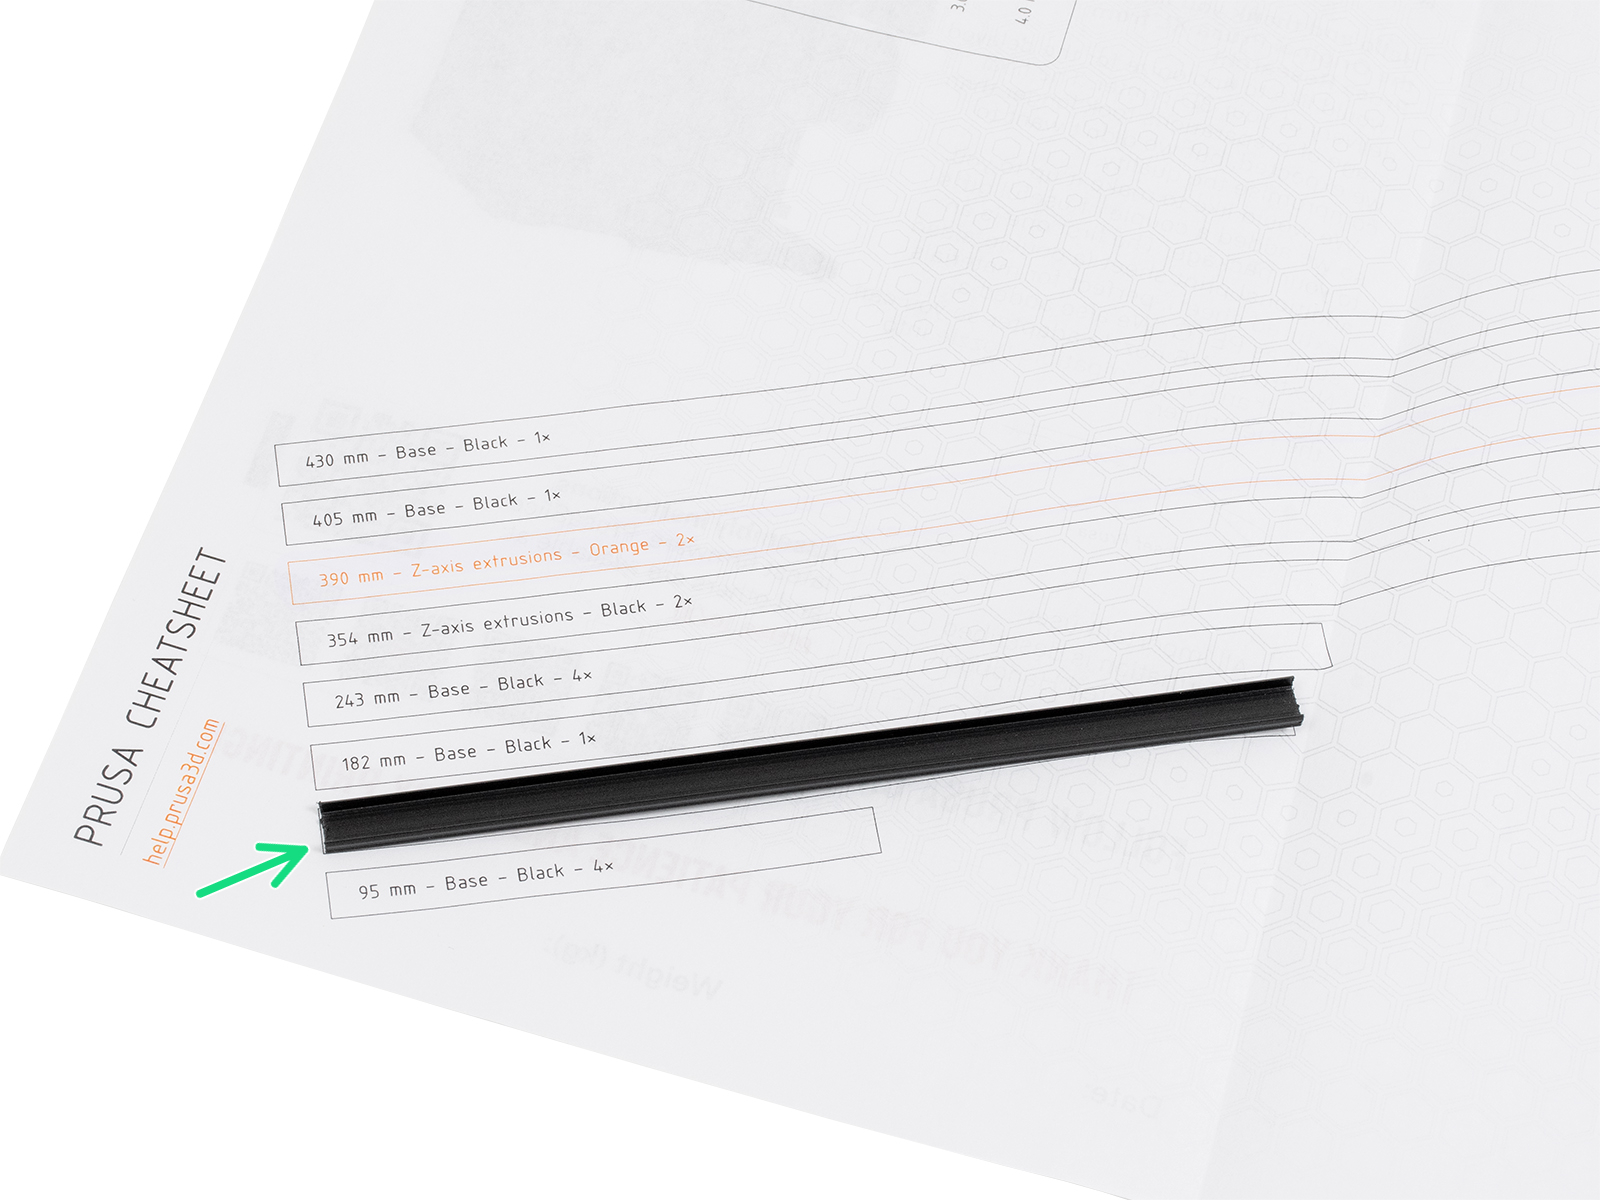
⬢For accurate assembly, it is recommended to use a Cheatsheet that contains 1:1 scale drawings for accurate comparison of fasteners and some other parts.
You can download it from our site prusa.io/cheatsheet-xl. Print it at 100 %, don't rescale it, otherwise, it won't work.
⬢The frame covers are 1:1 scale, so you can compare the size by placing the frame cover on the paper to make sure you are using the correct type.
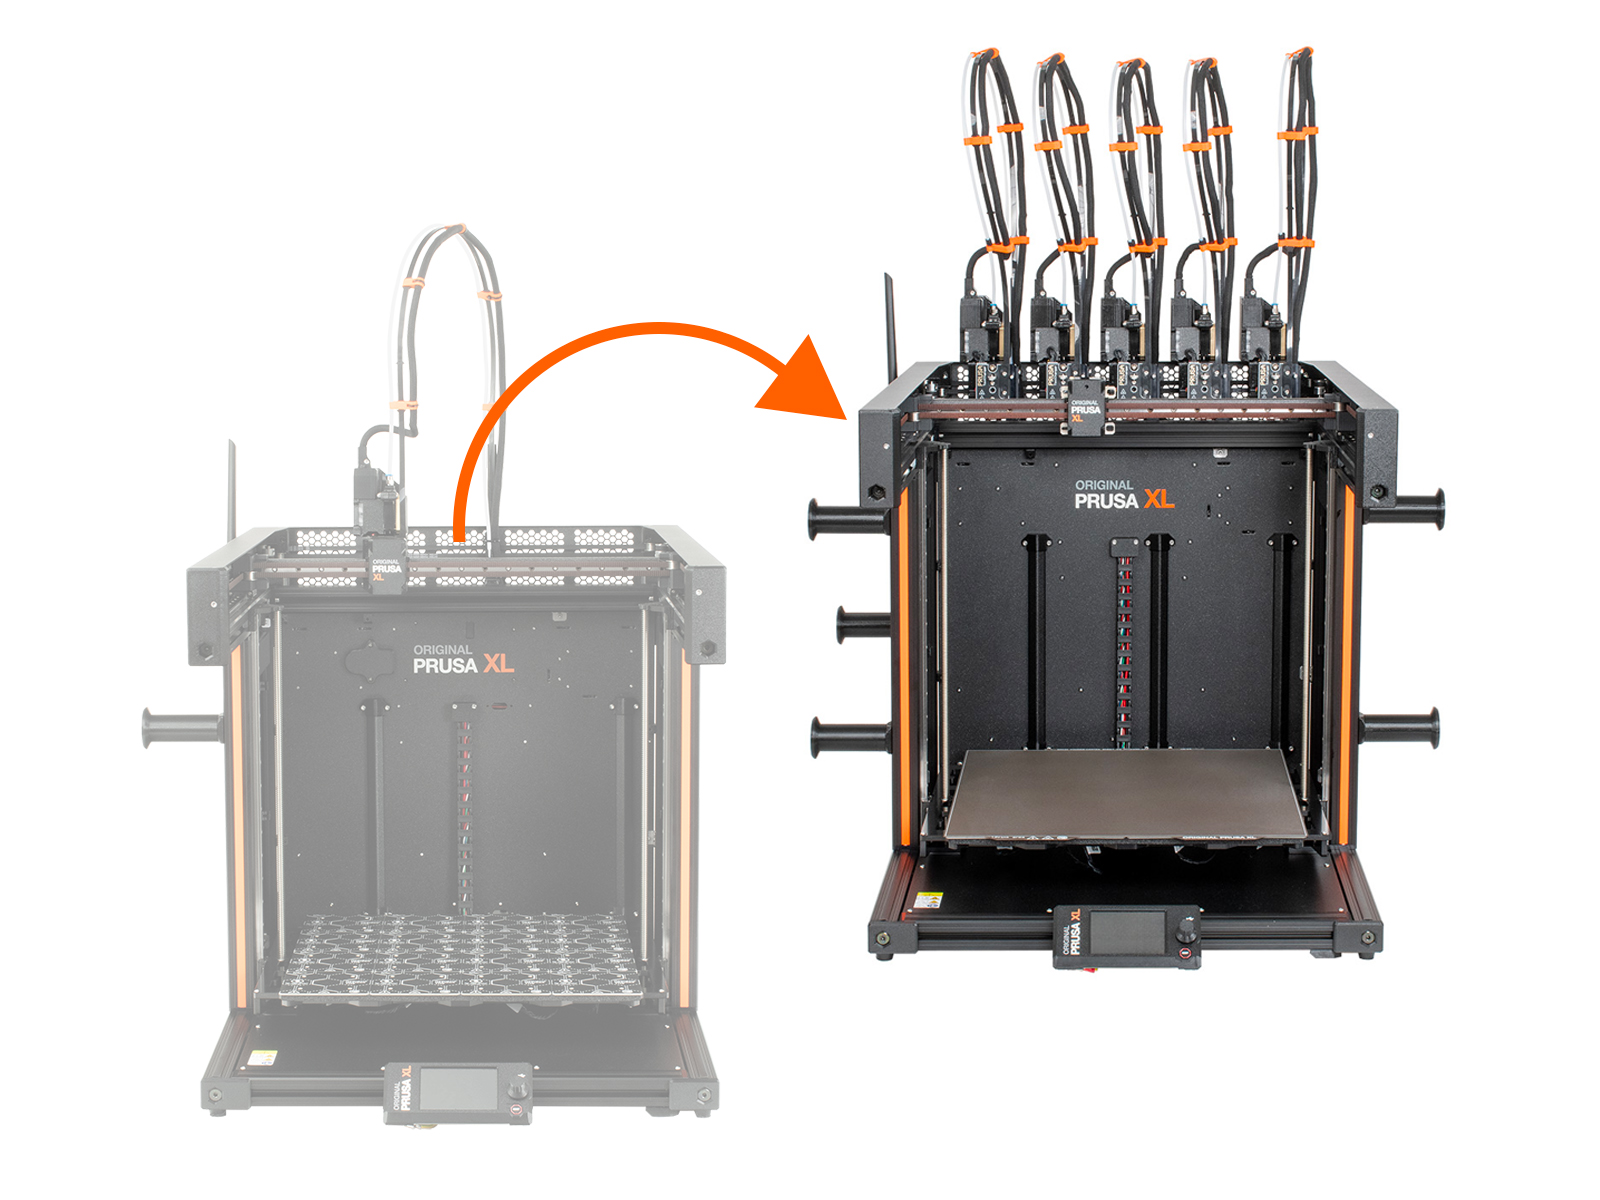
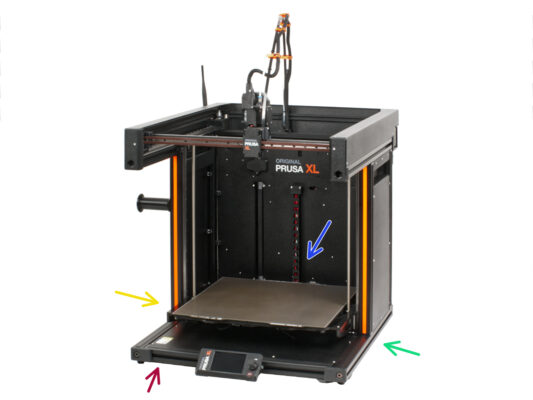
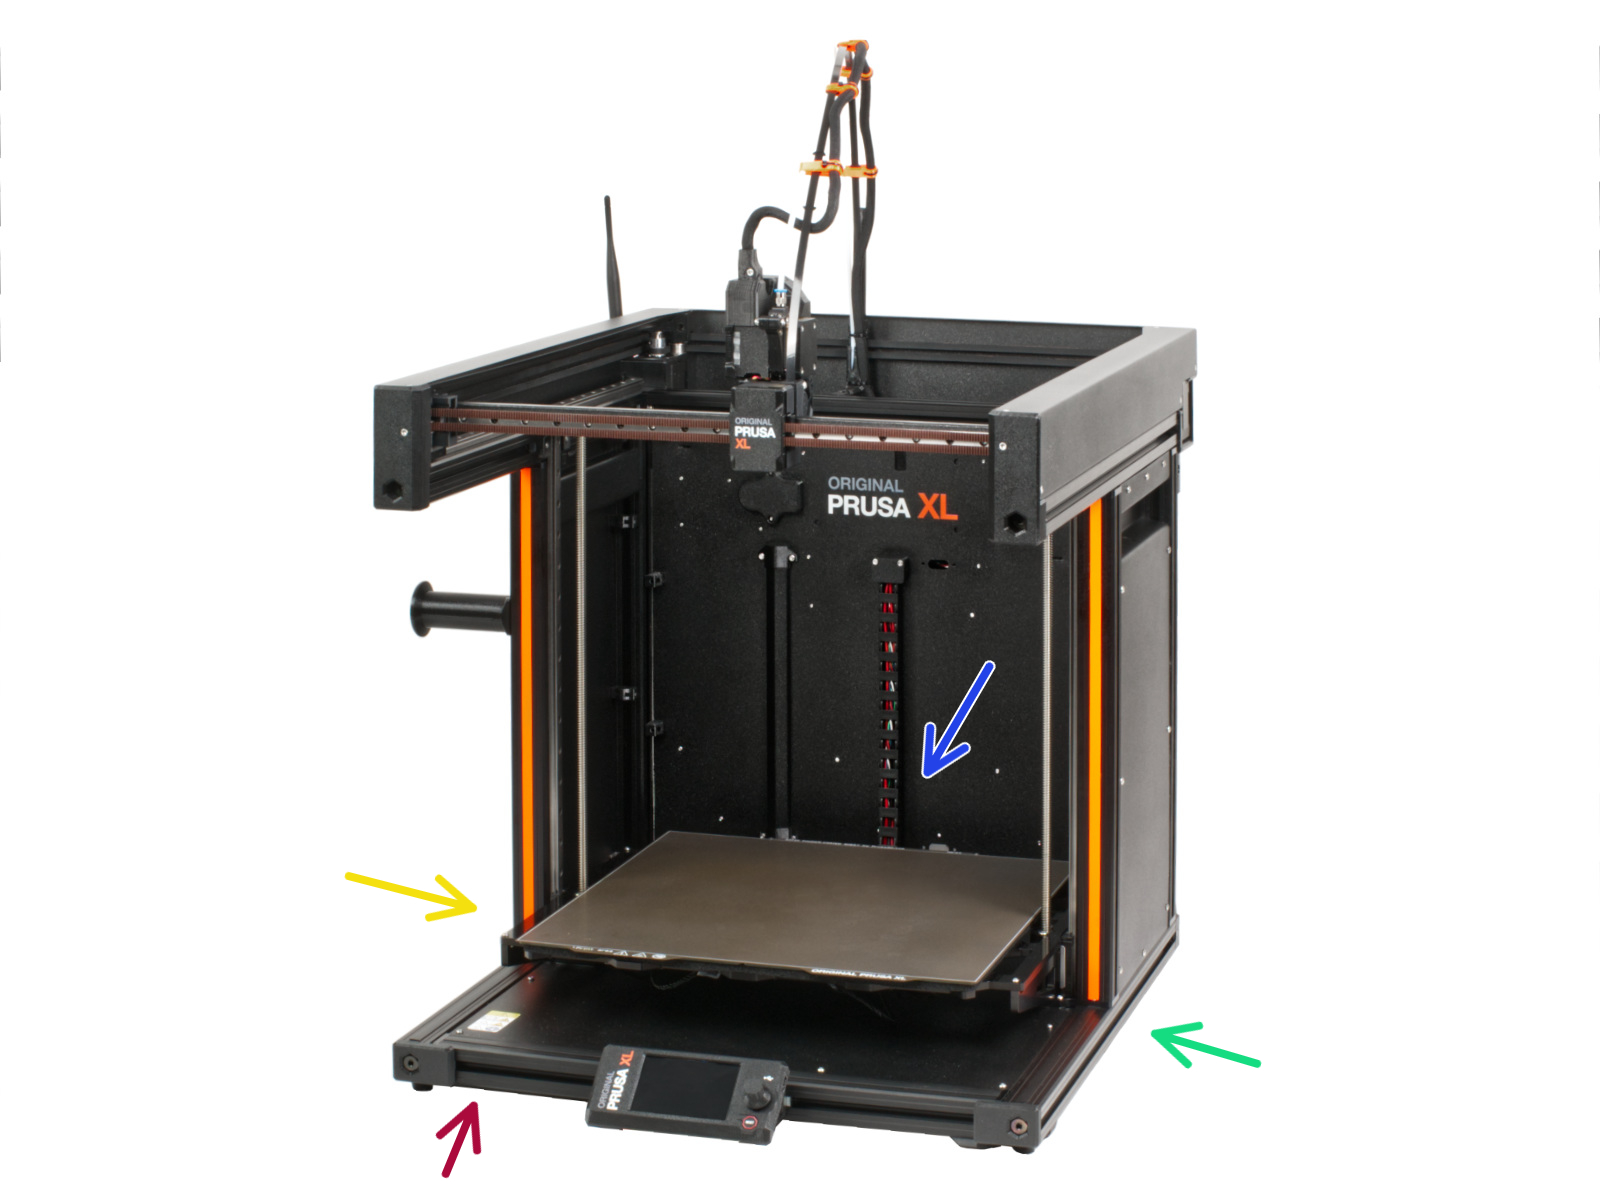
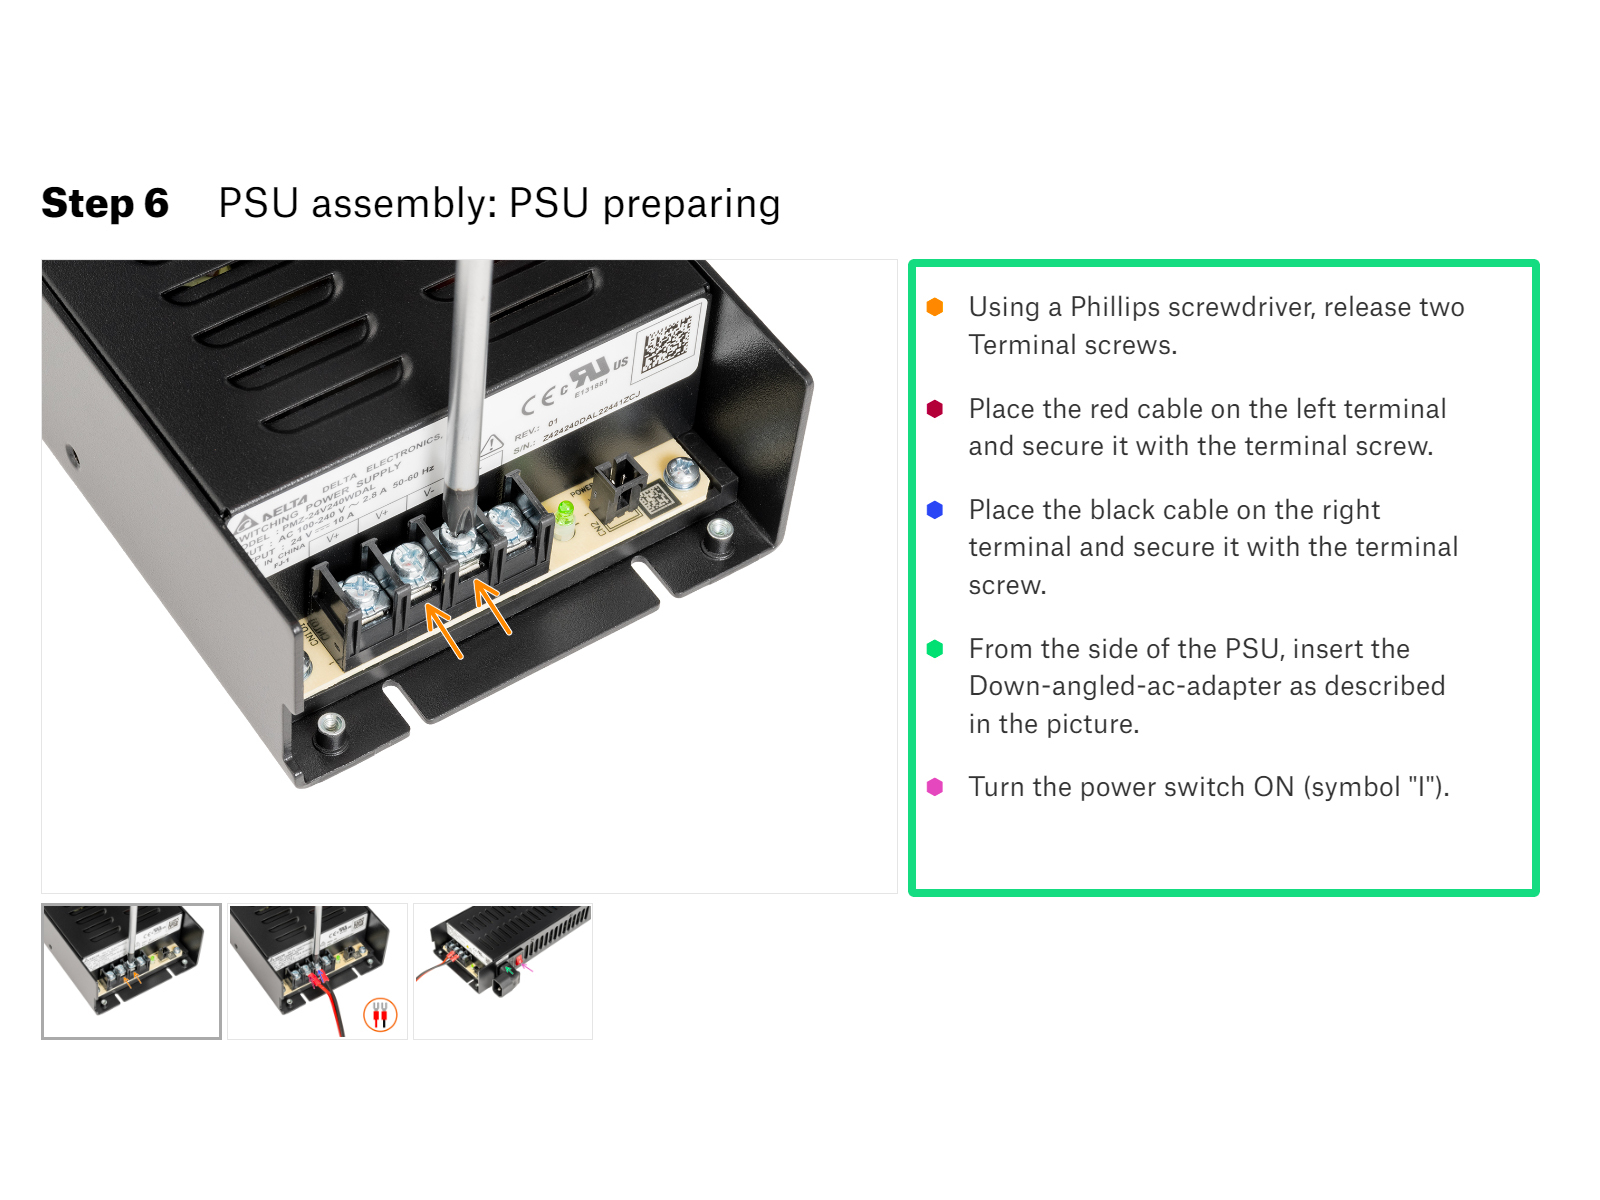
IMPORTANT: The XL printer is large and it is almost impossible to have the entire body in every single picture. Throughout the manual, there will used terms to describe the side you will be working on:
⬢Front side - a place where is xLCD screen.
⬢Left side - can be recognized thanks to the safety sticker near its edge.
⬢Right side - opposite to the left side, there is no safety sticker on this side.
To successfully finish the upgrade please follow all these:
⬢Always read all the instructions at the current step first, it will help you to understand what you need to do. Don't cut or trim unless you are told to!!!
⬢Don't follow pictures only! It is not enough, the written instructions are as brief as they could be. Read them!
⬢Read the comments from the other users, they are a great source of ideas. We read them too and based on your feedback improve the manual and the entire assembly.
⬢Use a reasonable force, the printed parts are tough, but not unbreakable. If it doesn't fit, check your approach twice.
⬢Most important: Enjoy the build, have fun. Cooperate with your kids, friends or partners.
⬢After years of thorough scientific research, we came to a solution => At the end of each chapter, you will be told a specific amount of bears to consume.
⬢Eating incorrect amount than prescribed in the manual might lead to sudden boost of energy. Please consult a professional in the closest candy store.
Hide the Haribo for now! From our experience an unattended bag with sweets will suddenly disappear. Confirmed by multiple cases all around the World.
⬢Tidy up your desk! Tidying up decreases the probability of losing small parts.
⬢Clear your workspace. Make sure you have enough room. A nice clear flat workbench will get you the results you are aiming for.
⬢Let there be light! Make sure you are in a well-lit environment. Another lamp or even an extra flashlight will probably come in handy.
⬢Prepare something to contain the plastic bags and the removed packing materials so you can recycle them afterwards. Make sure there are no important parts being discarded.
⬢OK, we are ready. Let's start! Let's go the next chapter: 2. Printer preparing
Was this guide helpful?
Comments
Still have questions?
If you have a question about something that isn't covered here, check out our additional resources. And if that doesn't do the trick, you can send an inquiry to [email protected] or through the button below.