English
Login
3D printers
Materials
Parts & Accessories
For Business
Software
3D Models
Community
Help
Courses
Blog
Company
Support
Original Prusa XL
Original Prusa XL Single-Tool to Five-Head Upgrade (1.01)
3. Detaching the Nextruder | Tools necessary for this chapter
1. Tools necessary for this chapter
Step 1 of 9 (Chapter 3 of 9)
Contents
Comments
⬢
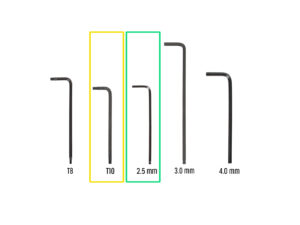
For this chapter, please prepare:
⬢
T10 Torx key (T10 Torx screwdriver)
⬢
2.5mm Allen key
Loading...
Next
Contents
Original Prusa XL Single-Tool to Five-Head Upgrade
1. Introduction
2. Printer preparing
3. Detaching the Nextruder
Tools necessary for this chapter
Wi-Fi antenna detaching
PTFE unpluging
Disconnecting the Nextruder cable
Detaching the dock
Detaching the Nextruder
Detaching the Nextruder
Still no sweets?
Good job!
4. ToolChanger assembly
5. Nextruder upgrade
6. PSU & electronics assembly
7. Nextruder & accessories assembly
8. First run
Manual changelog XL (Single-head to Five-head upgrade)
Comments
Log in
to post a comment
No comments