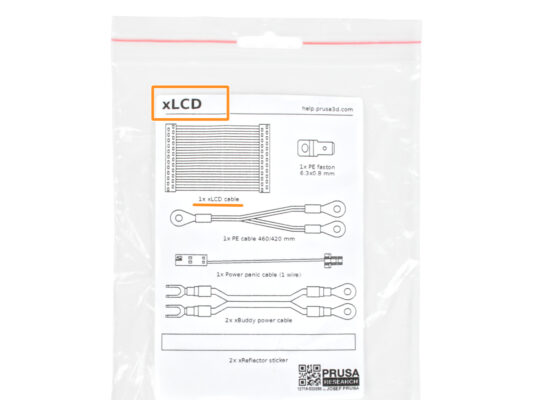
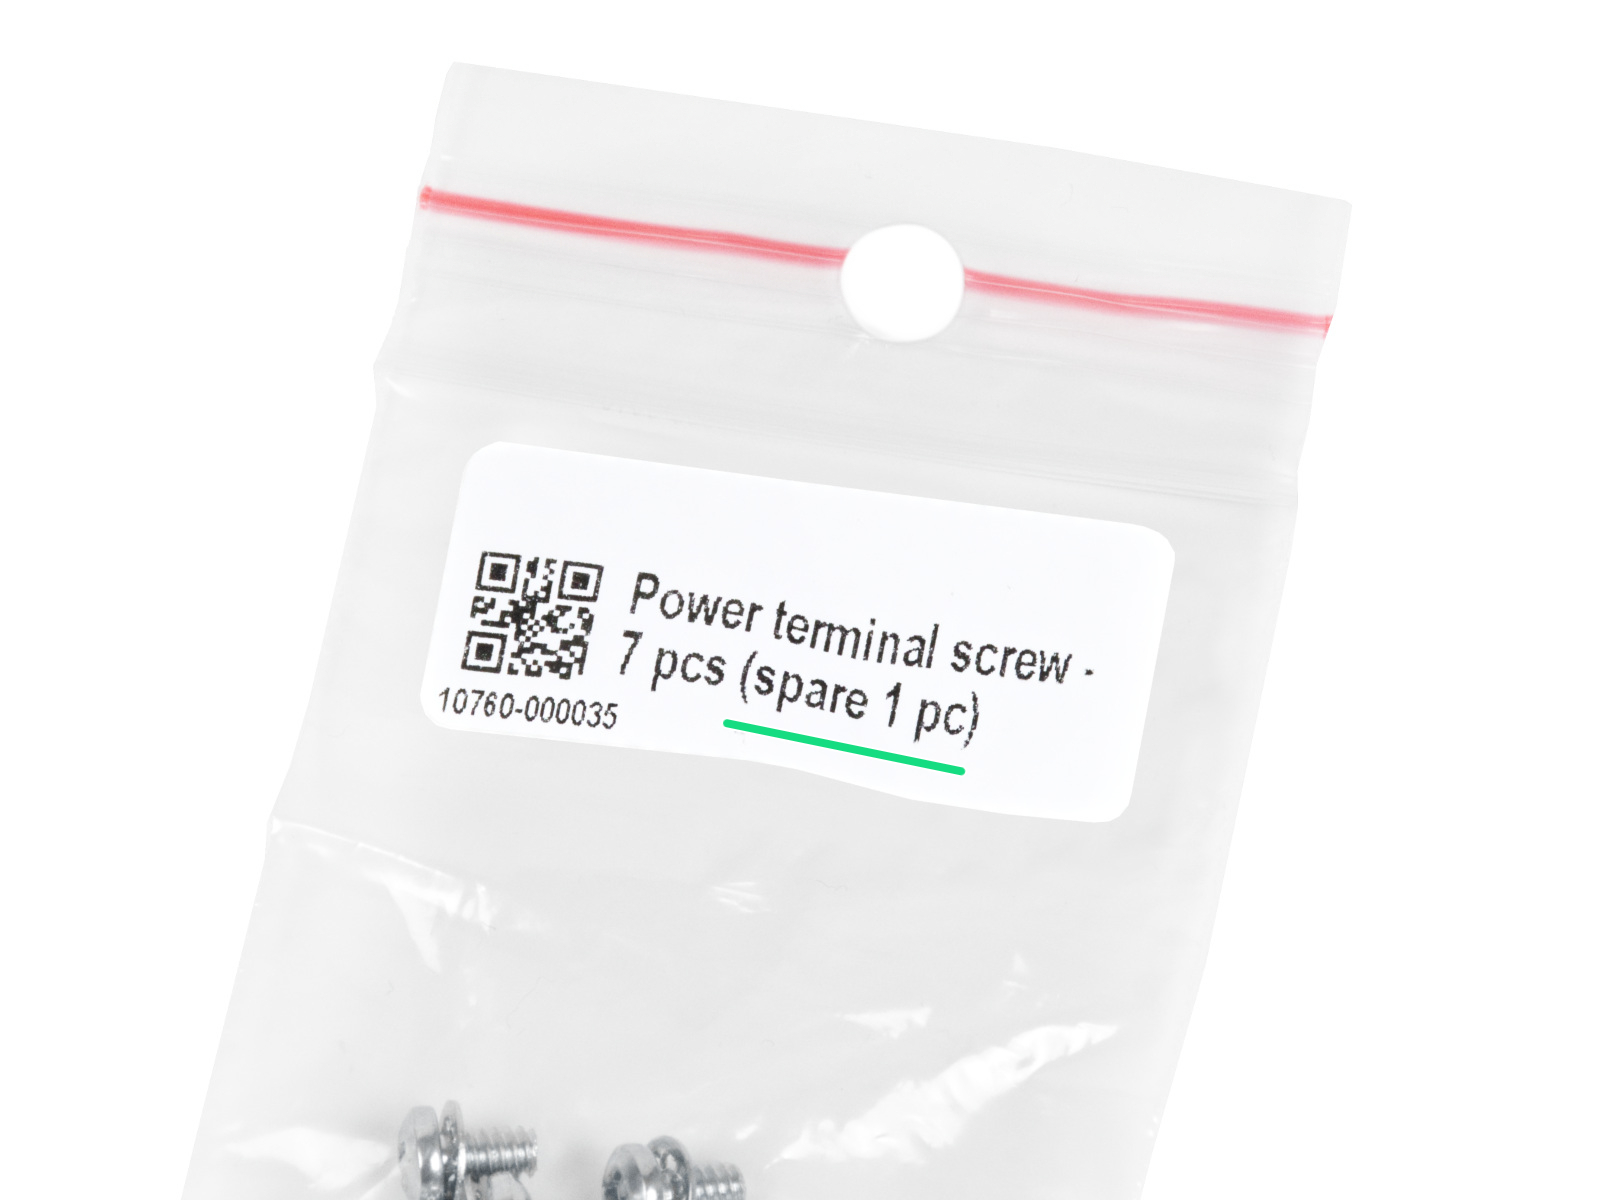
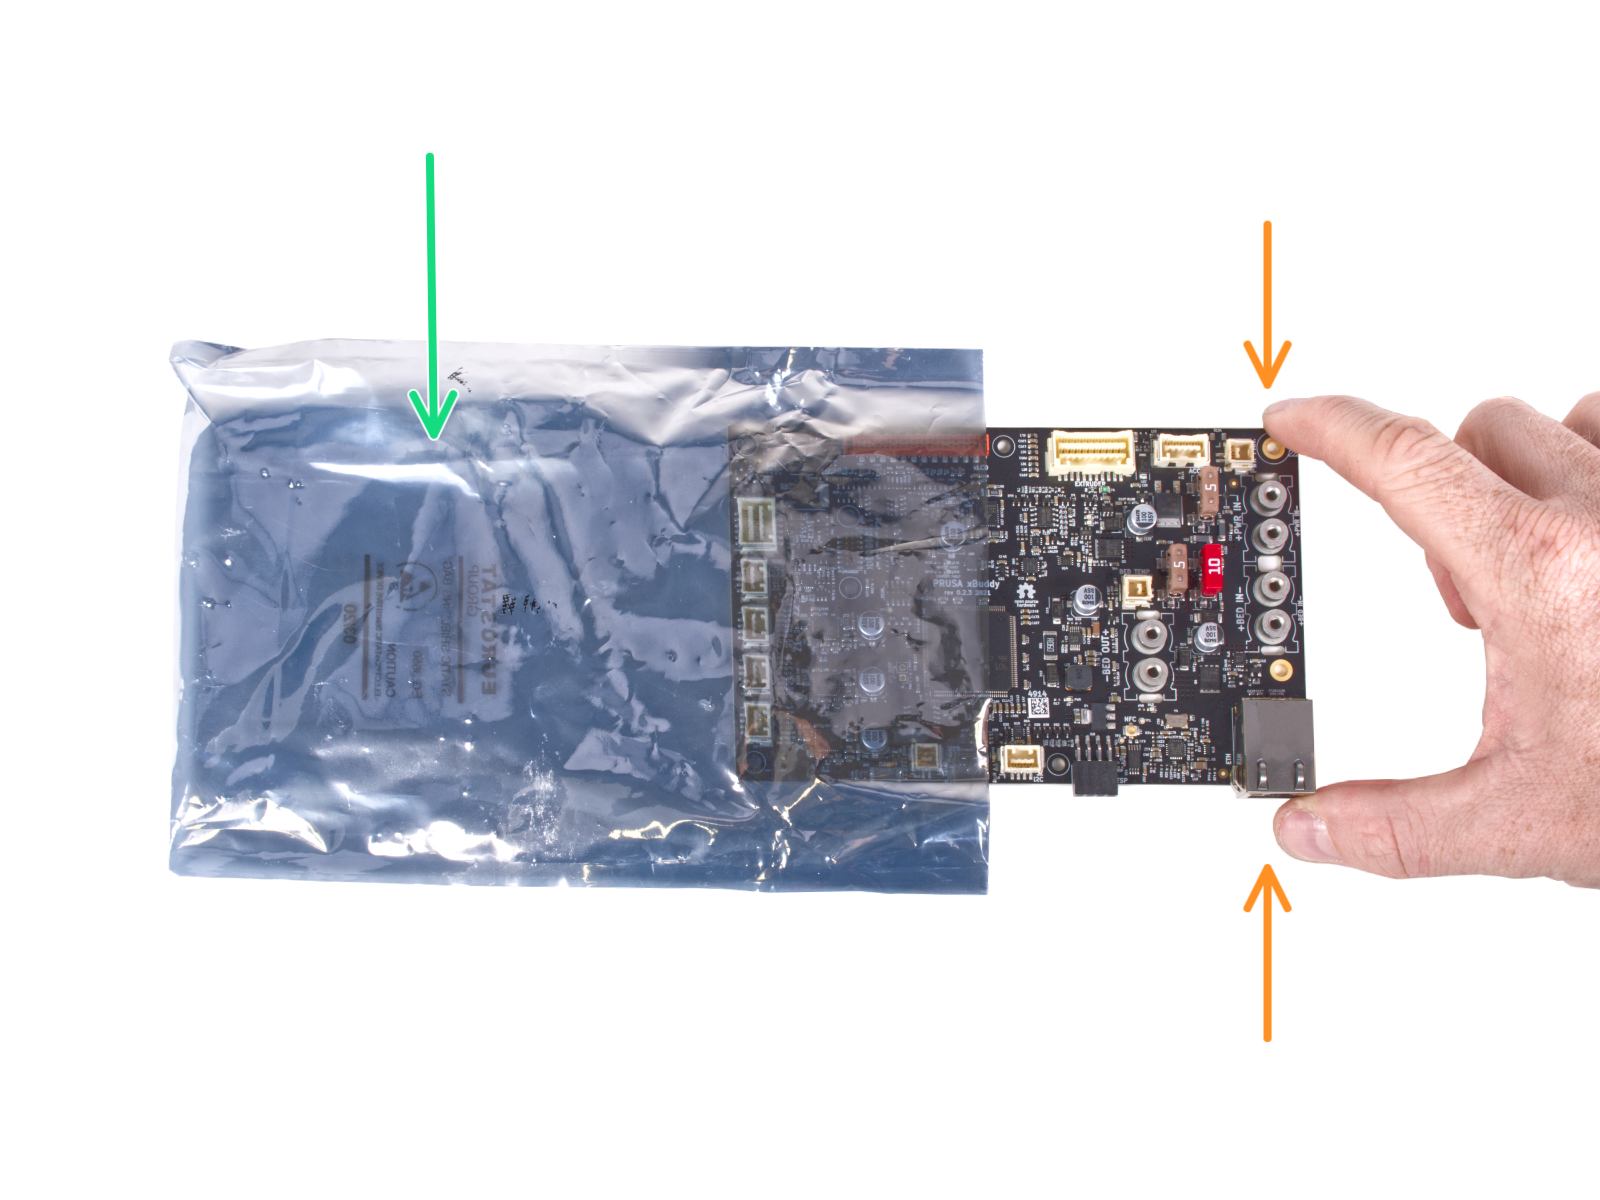
⬢All the boxes and bags including parts for the build are labeled.
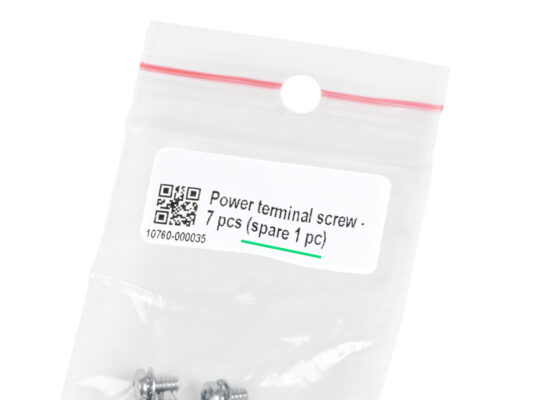
⬢The labels include the list of contents and part count.
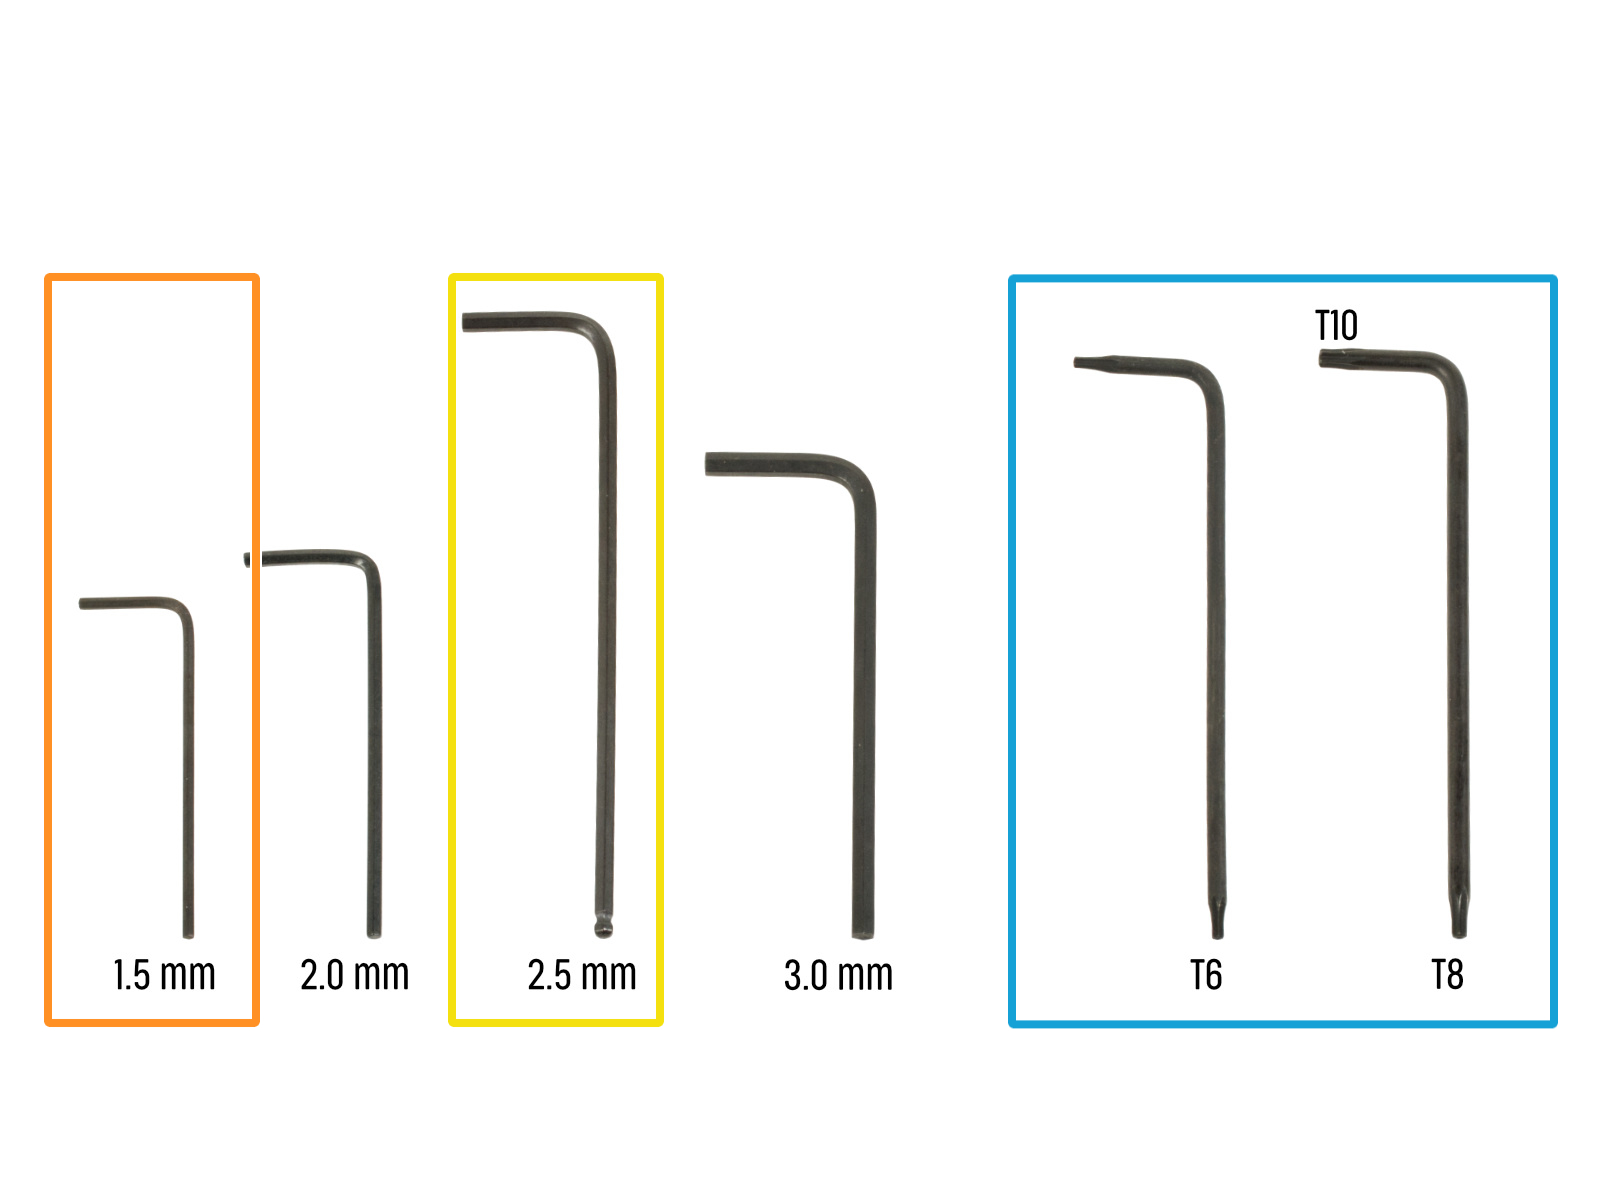
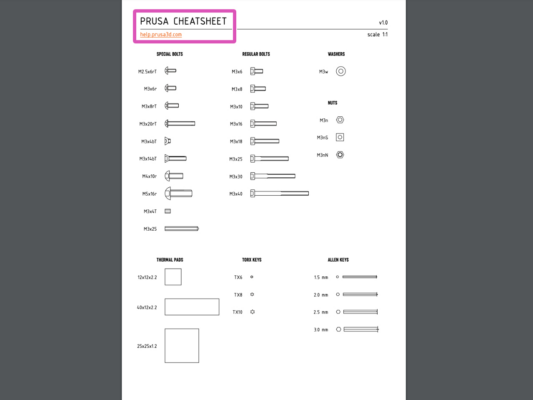
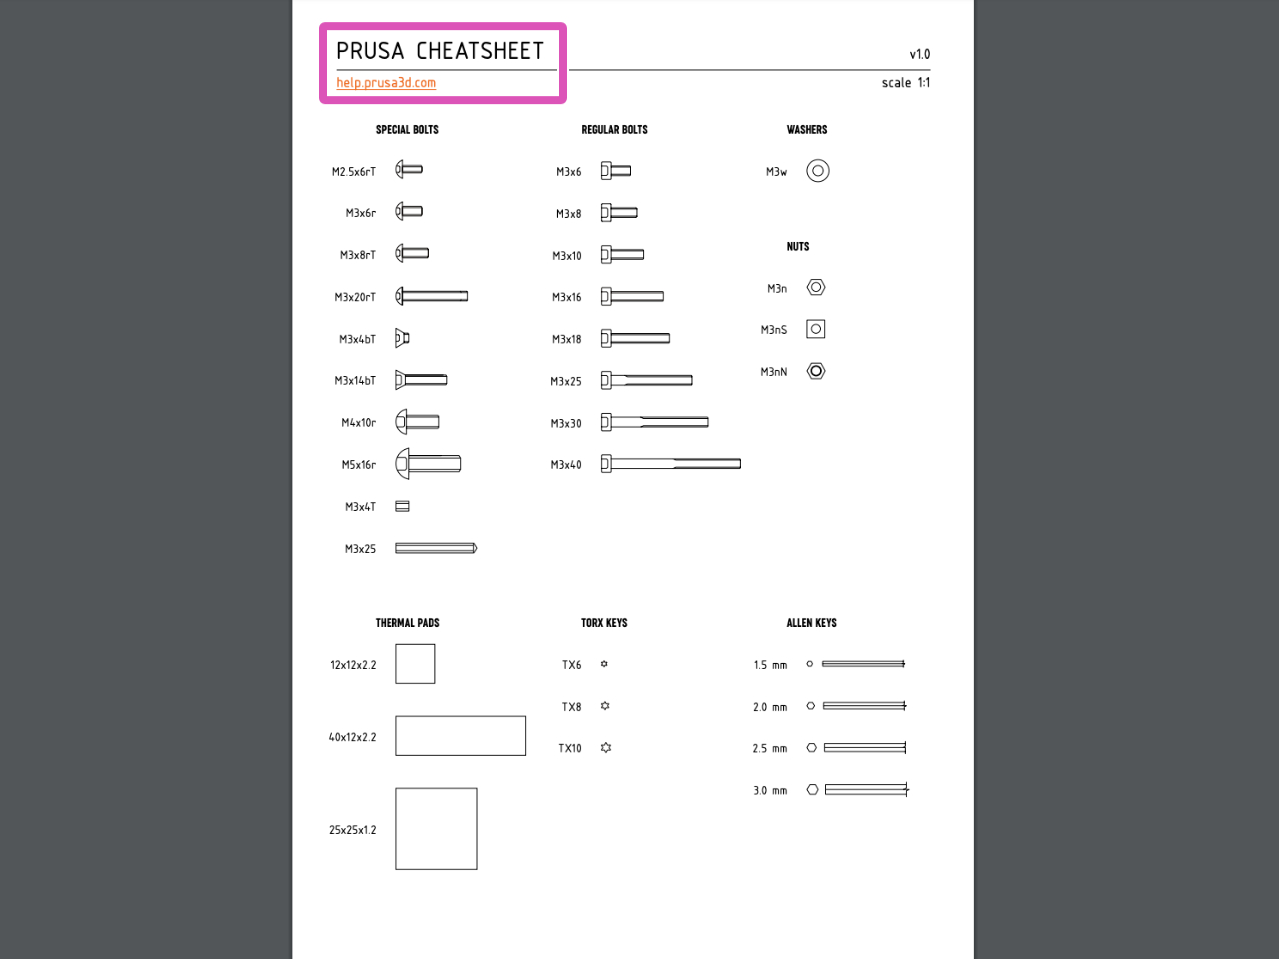
⬢You can download a Cheatsheet with 1:1 fastener drawings from our site prusa.io/cheatsheet-mk4. Print it at 100 %, don't rescale it, otherwise, it won't work.
For PRUSA veterans: Fasteners are divided into individual bags according to its type. Not into packages for individual chapters, as it was with previous printers.
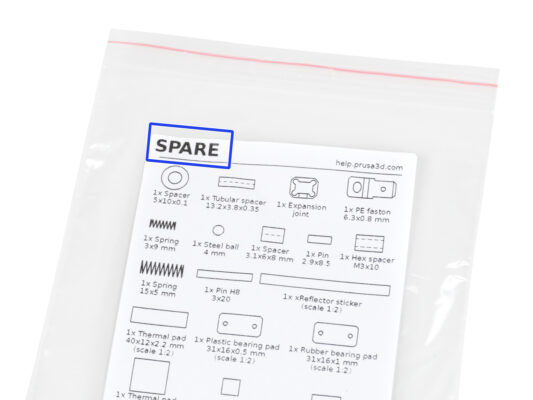
⬢There is a bag with spare parts like thermal pads, springs, etc.
⬢Spare fasteners are included in each bag of fasteners. The numbers in parentheses below the fastener picture indicate the number of extra pieces added to the SPARE package.
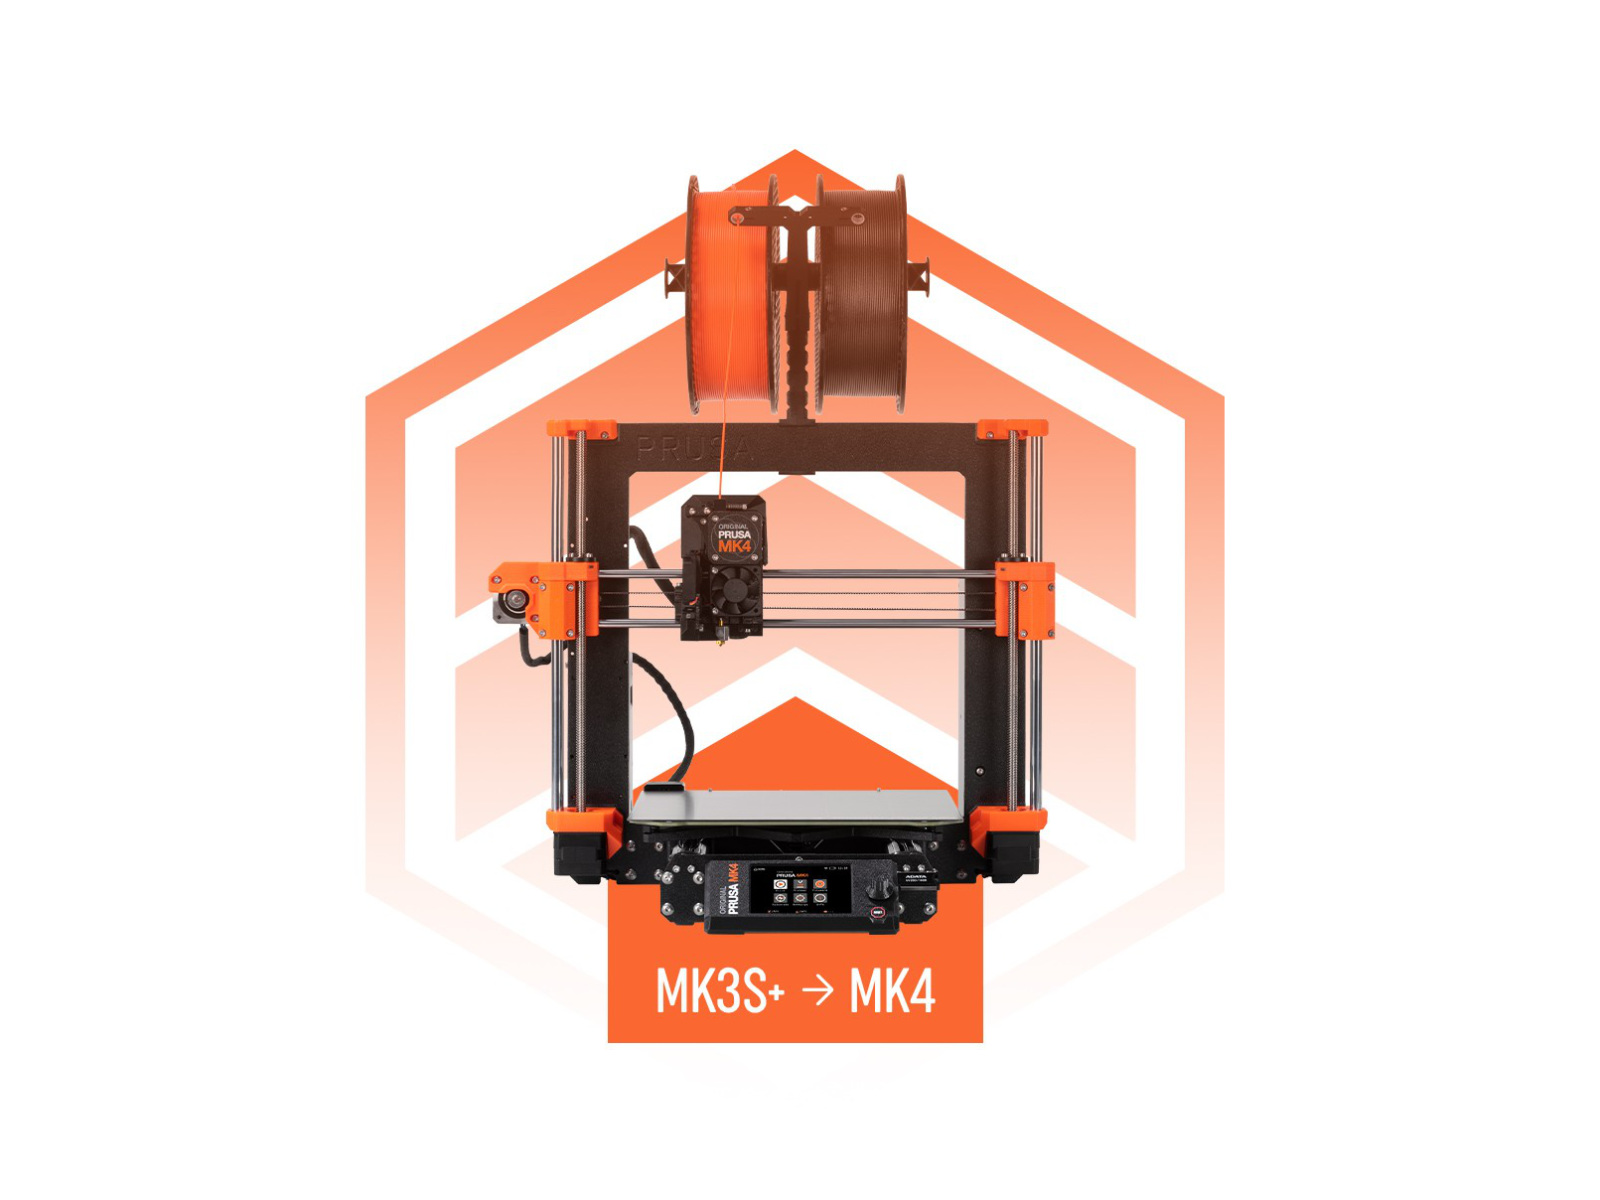
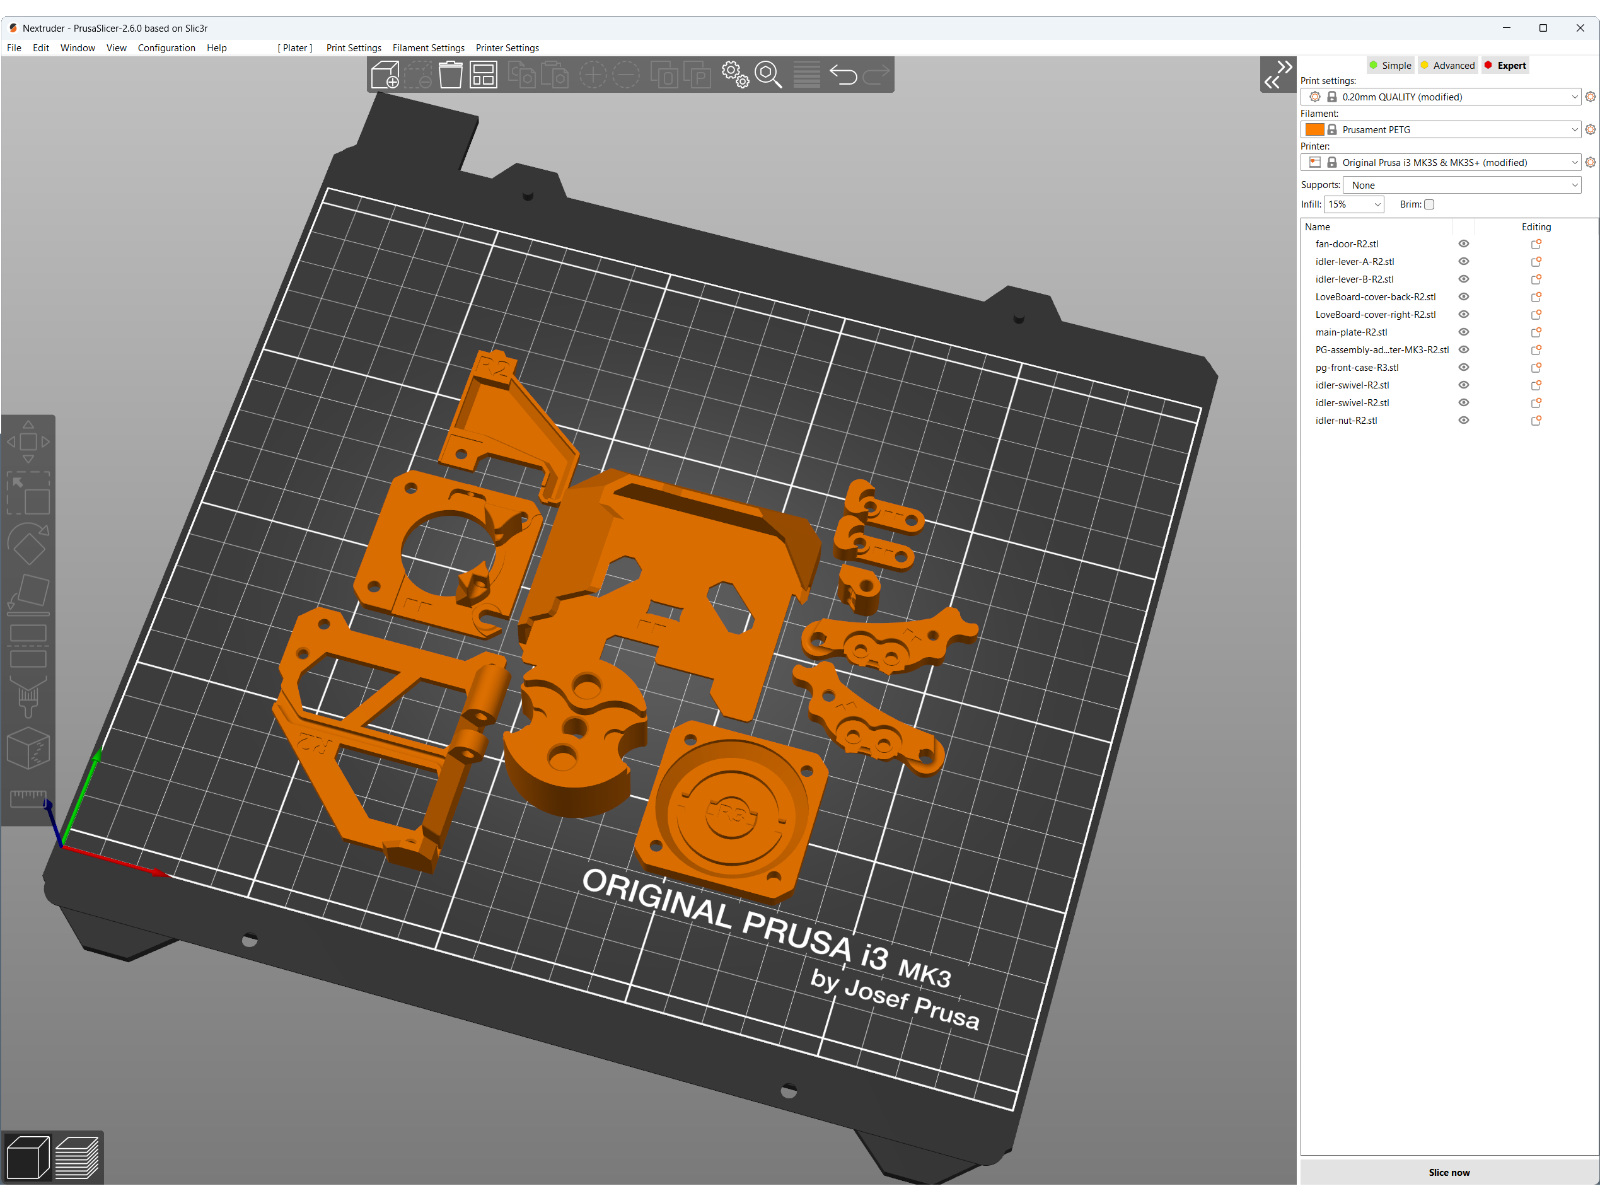
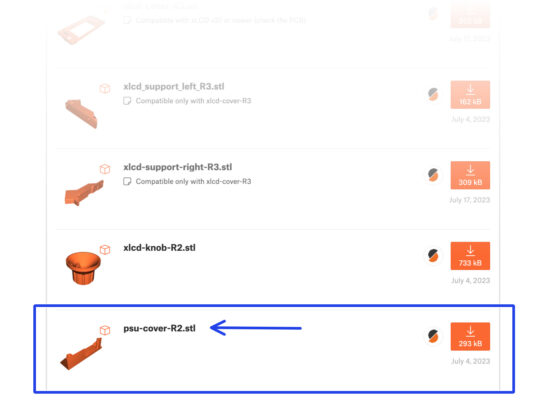
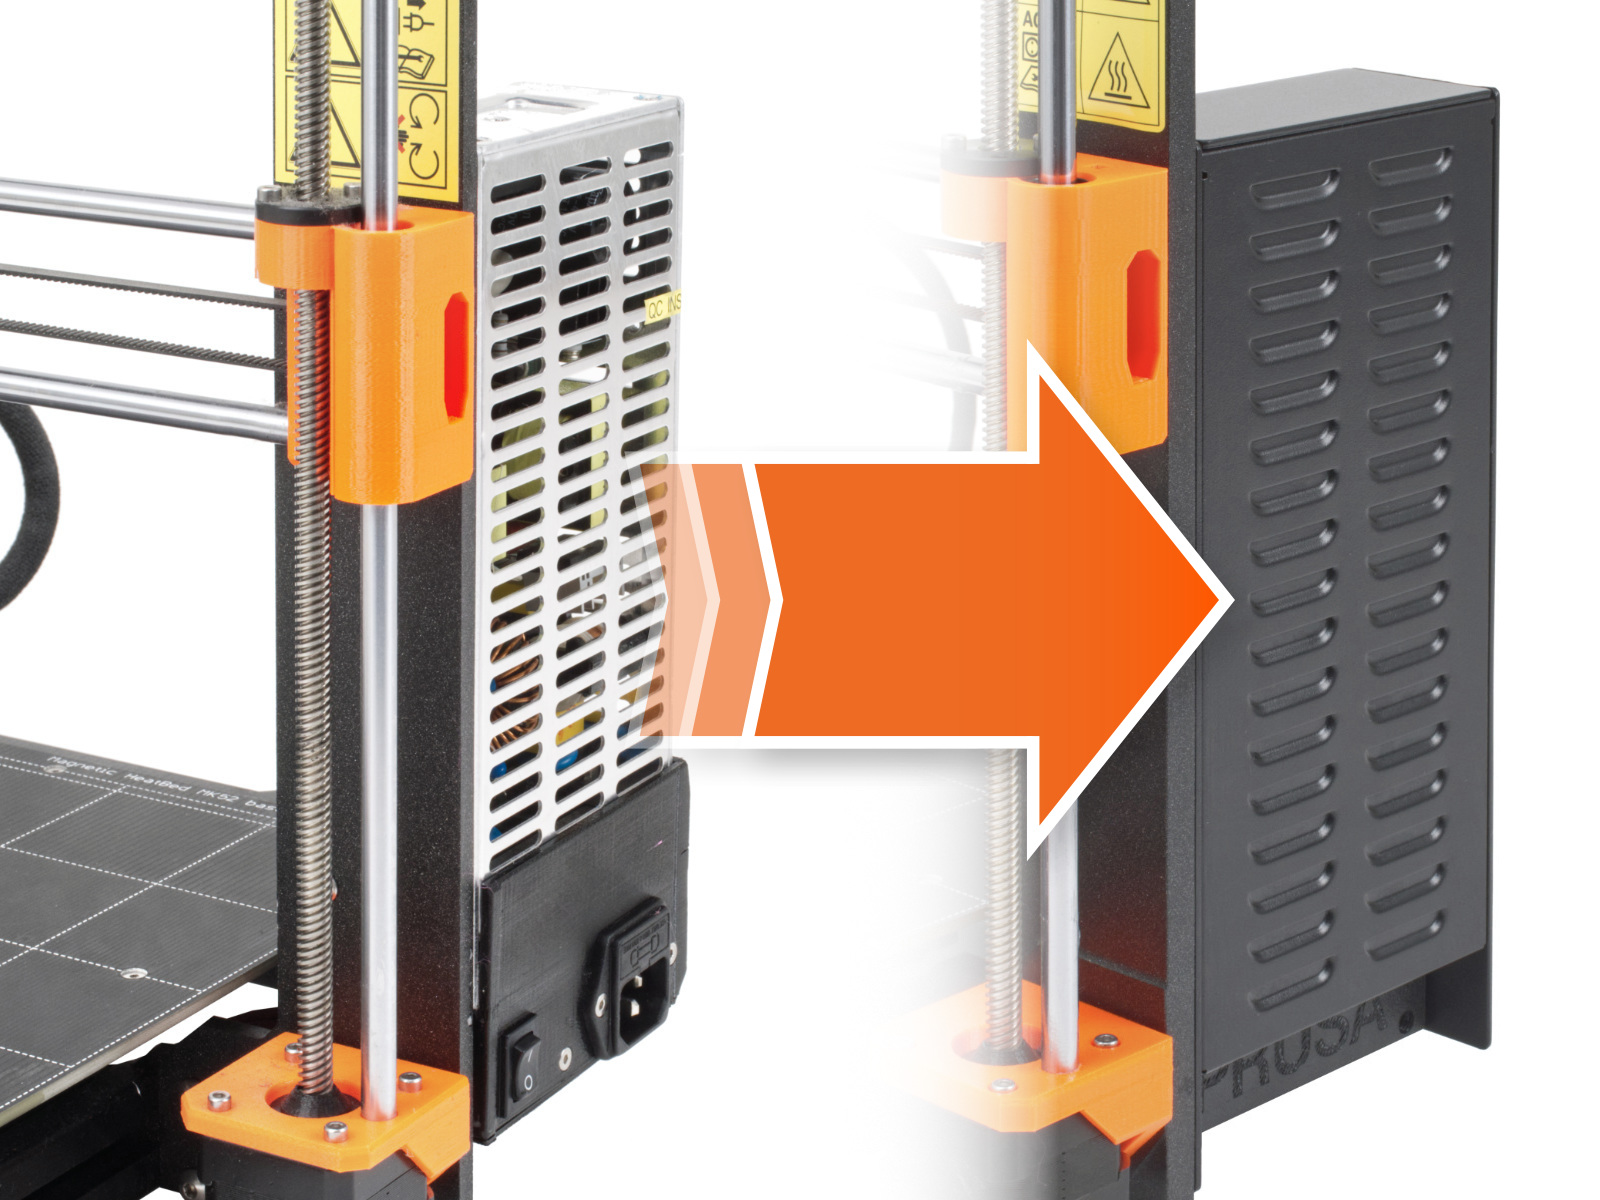
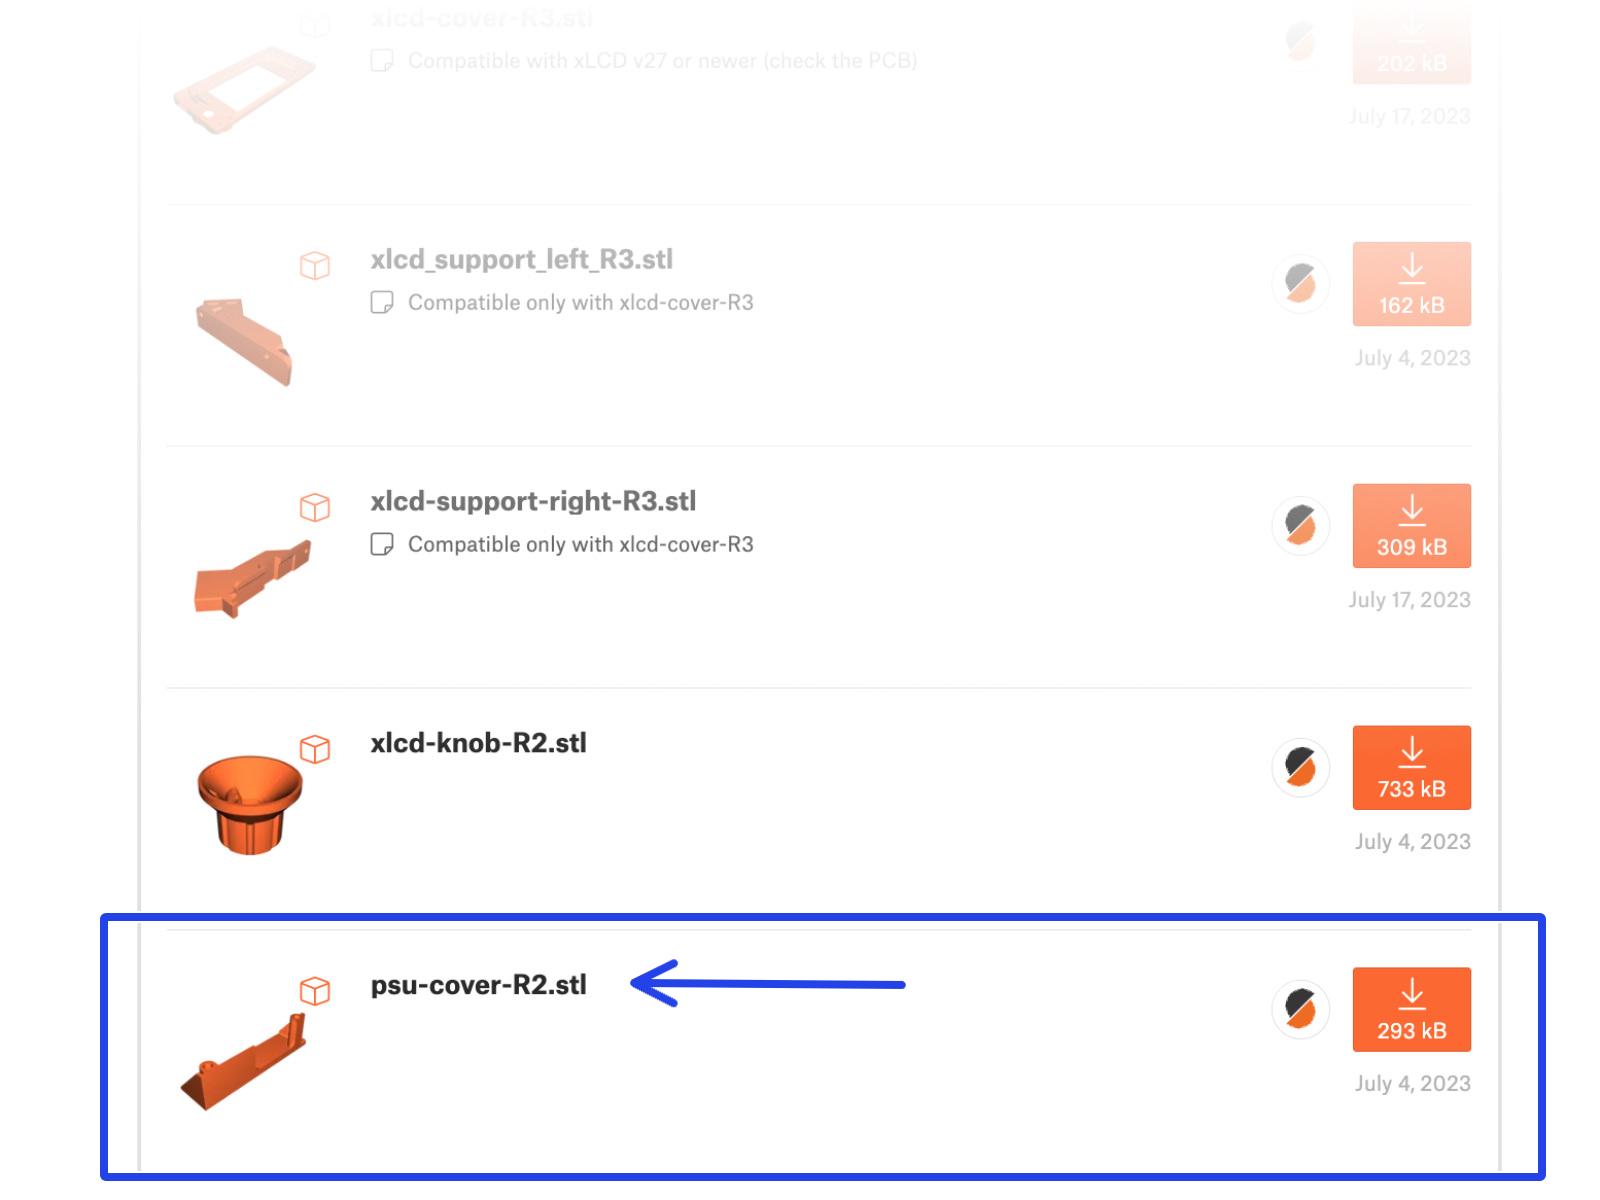
⬢This step is for users who have purchased the black 24V 240W PSU (Power Supply Unit) and would like to replace an existing silver power supply unit during the upgrade.
⬢For this replacement, the following parts need to be printed in addition:
⬢Some parts might require post-processing in order to be ready for assembly.
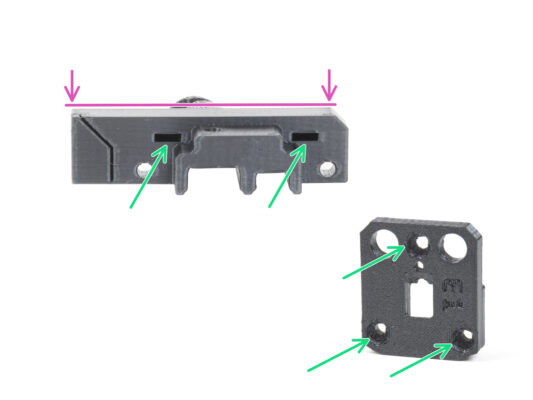
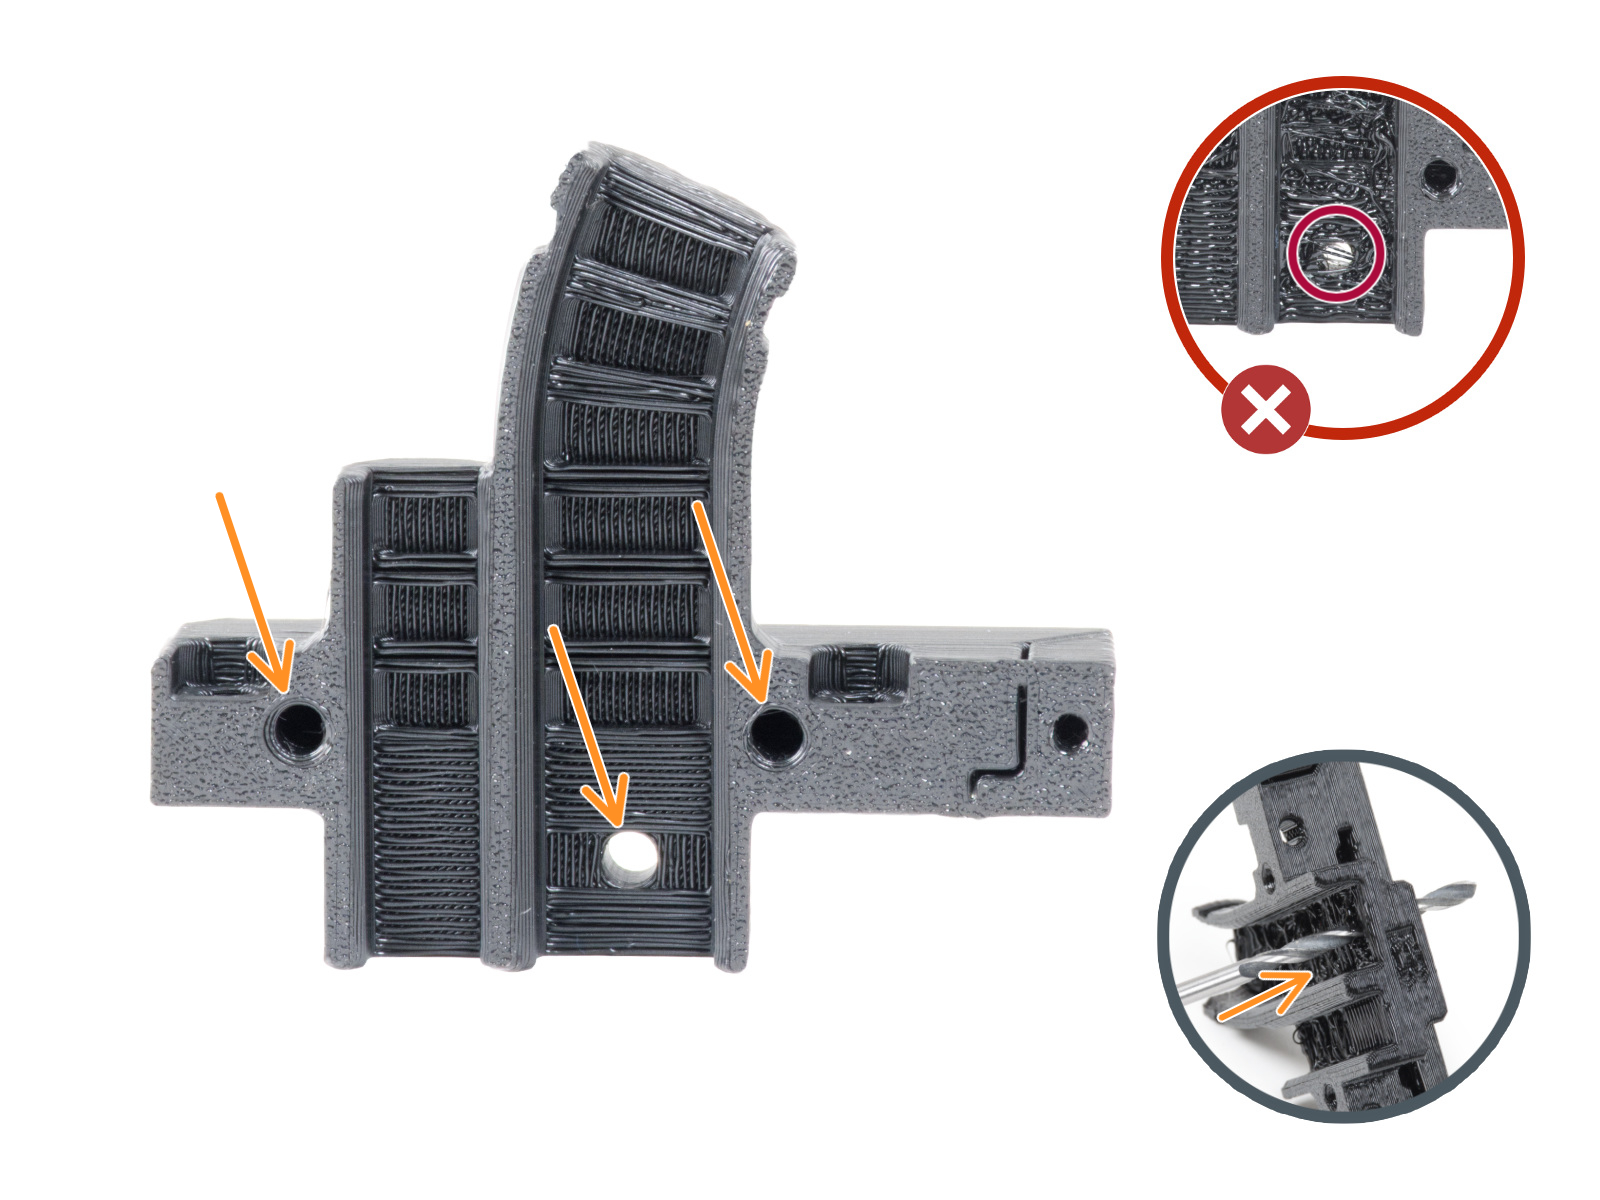
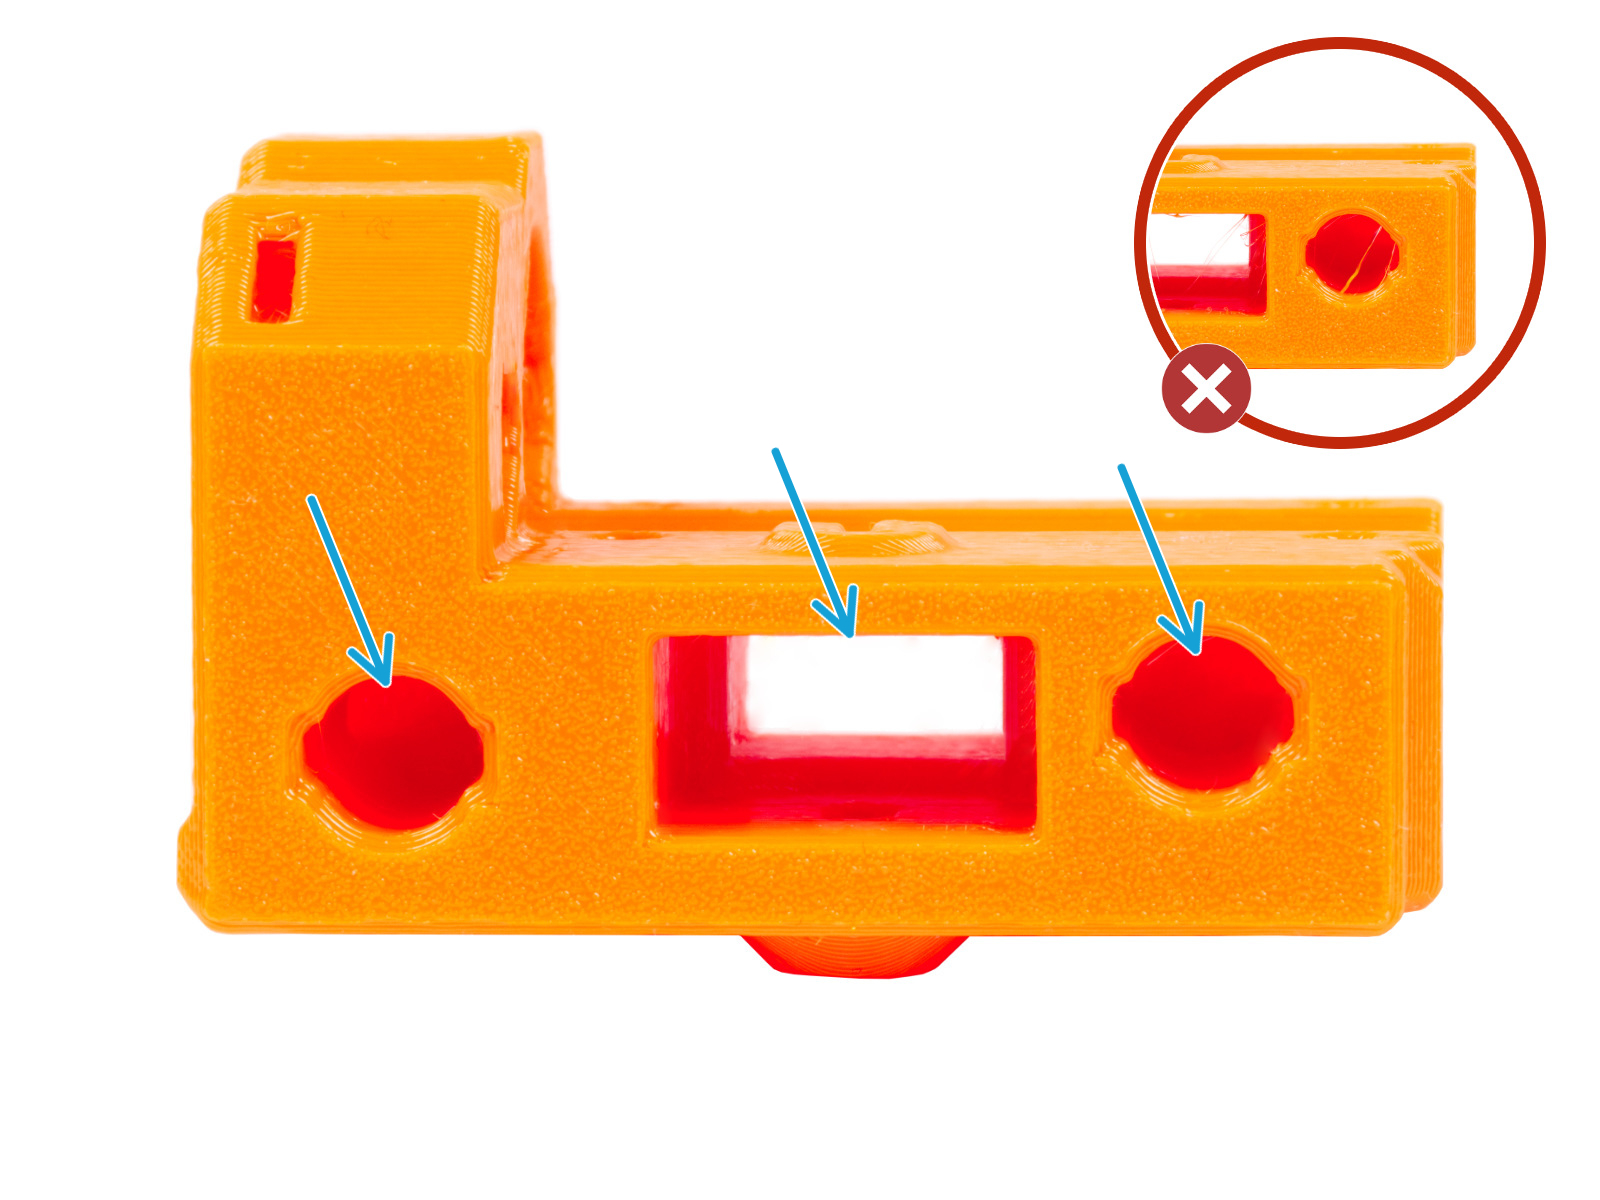
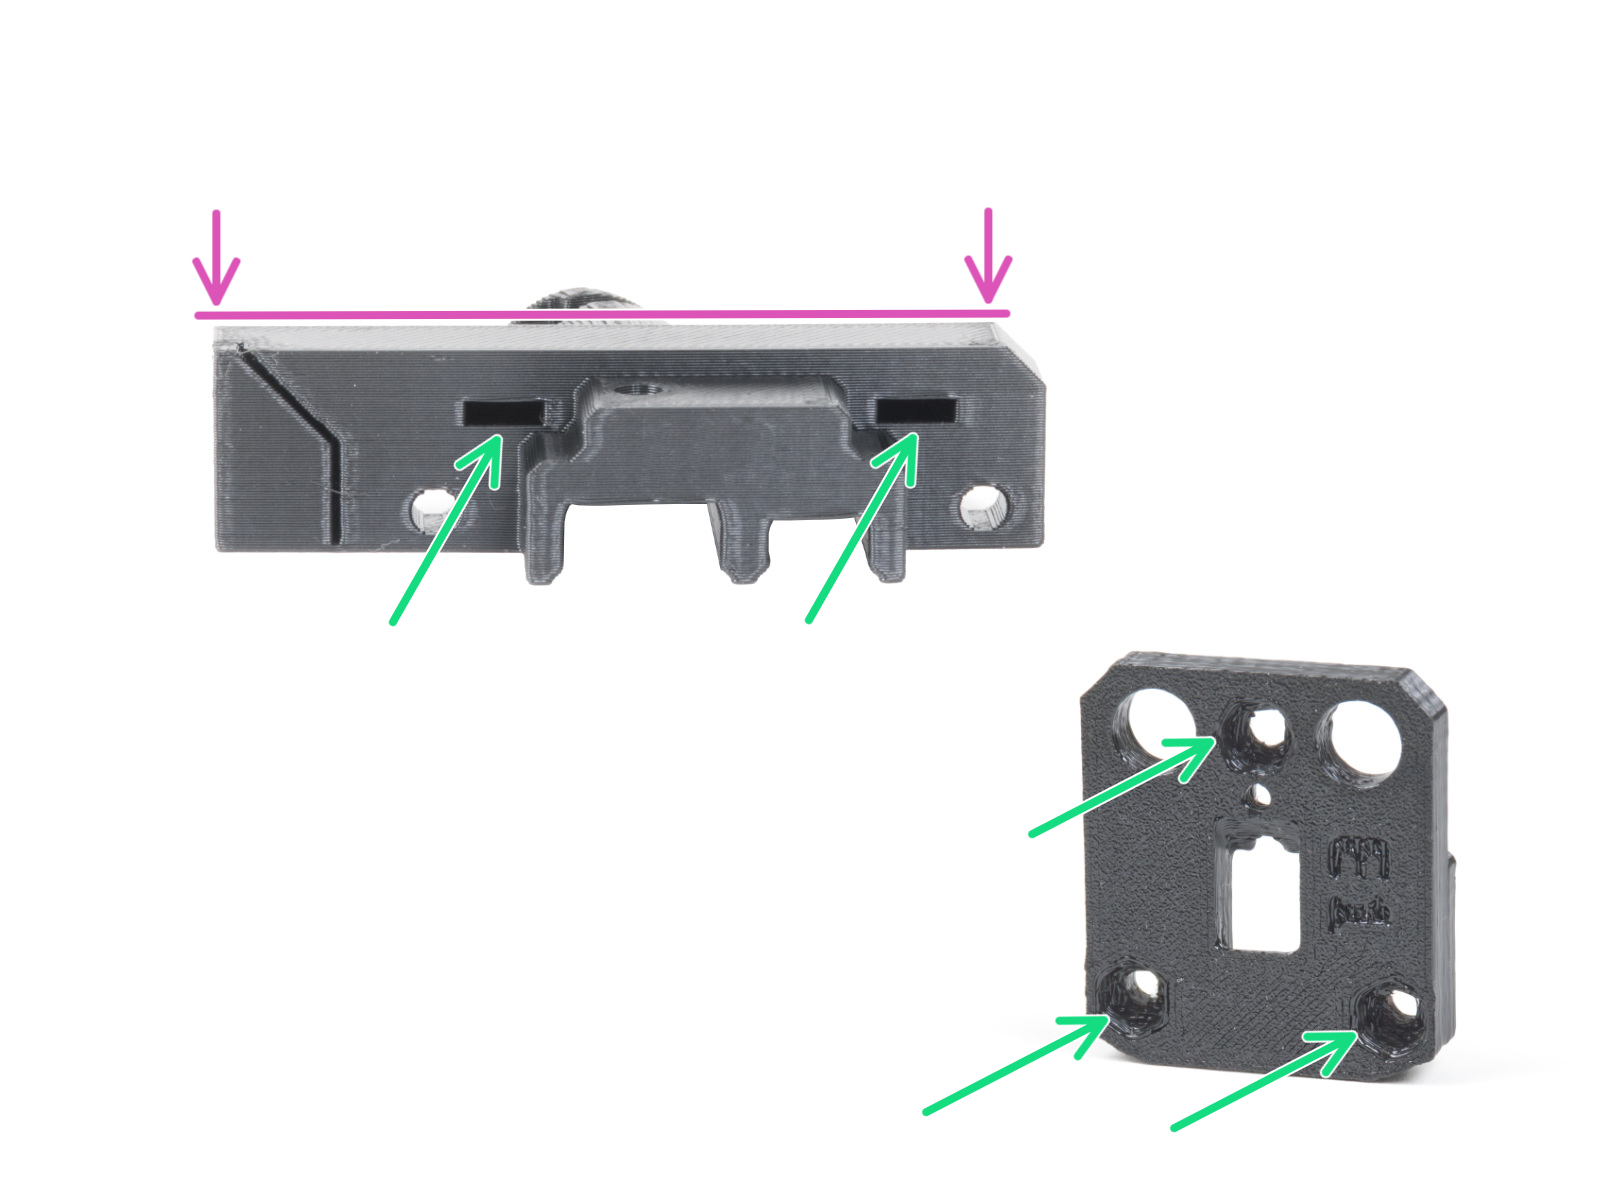
⬢In general for all printed parts (We will use just a few parts as an example):
⬢Each hole for a screw, nylon filament, etc. must be clean and free of any strings. If there are any remnants of filament inside the hole, hand drill the holes with a 3mm drill bit. Do not use electric power tools!
⬢All other holes, for example for the smooth rods, must be perfectly clean. If there is any filament residue inside the hole, use a heat gun to melt it.
Optimal temperature for the heat gun is 250 °C (482 °F) and blow on the parts from a distance of 10 - 15cm (4 - 6 inches).
⬢Check the square and hexagon nut holes. There must be no filament debris inside.
⬢Check the parts for straightness. For example, by placing it on a clean table surface. Bent parts can cause problems during installation and subsequent use of the printer.
Do not modify any parts unless instructed to do so.
⬢3D printed parts are very precise, however, there still might be a tolerance in the printed part and same goes for the size of the nut.
⬢Therefore it might happen, that the nut won't fit easily in or might be falling out. Let's see, how to fix it:
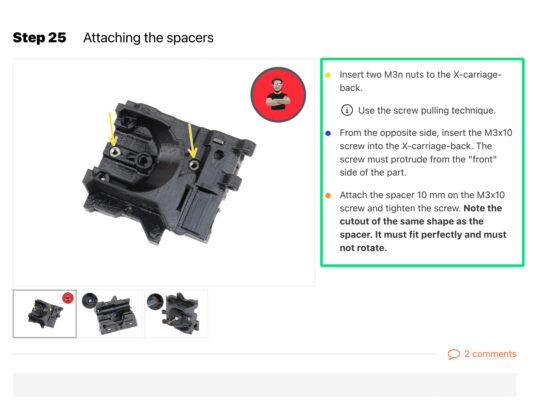
⬢Nut won't fit in: use a screw with a thread along its entire length (typically: M3x10, M3x18) and screw it from the opposite side of the opening. While tightening the screw, the nut will be pulled in. Remove the screw afterwards.
⬢Alternative option: you can use X-holder tool included in the package. Insert any screw (typically: M3x10 or M3x18) and screw the nut fully on the tip of the thread. Push the nut into the printed part and remove the screw with X-holder.
⬢Nut keeps falling out: Use a piece of tape to fix the nut temporarily in place, as soon as you insert the screw in, you can remove the tape. Using glue isn't recommended as it can partly reach into the thread and you won't be able to tighten the screw properly.
⬢Every time we recommend using the "screw pulling technique", you will be reminded with Joe's avatar ;)
⬢Based on the feedback, building the MK4 printer is even more enjoyable compared to the MK3S+. However, you should still treat yourself for every finished chapter. Look in the box and find bag of Haribo Bears.
The biggest issue from our experience (MK3S+, MK3S, MK3, MK2S, ...) is inadequate bear consumption. Many of you didn't have enough gummy bears for all chapters, some even ate them all before they started!
⬢After years of thorough scientific research, we came to a solution => At the end of each chapter, you will be told a specific amount of bears to consume.
⬢Eating incorrect amount than prescribed in the manual might lead to sudden boost of energy. Please consult a professional in the closest candy store.
Hide the Haribo for now! From our experience an unattended bag with sweets will suddenly disappear. Confirmed by multiple cases all around the World.
To successfully finish the upgrade please follow all these:
⬢Always read all the instructions at the current step first, it will help you to understand what you need to do. Don't cut or trim unless you are told to!!!
⬢Don't follow pictures only! It is not enough, the written instructions are as brief as they could be. Read them!
⬢Read the comments from the other users, they are a great source of ideas. We read them too and based on your feedback improve the manual and the entire assembly.
⬢Use a reasonable force, the printed parts are tough, but not unbreakable. If it doesn't fit, check your approach twice.
⬢Most important: Enjoy the build, have fun. Cooperate with your kids, friends or partners.
⬢Tidy up your desk! Tidying up decreases the probability of losing small parts.
⬢Clear your workspace. Make sure you have enough room. A nice clear flat workbench will get you the results you are aiming for.
⬢Let there be light! Make sure you are in a well-lit environment. Another lamp or even an extra flashlight will probably come in handy.
⬢Prepare something to contain the plastic bags and the removed packing materials so you can recycle them afterwards. Make sure there are no important parts being discarded.
⬢OK, we are ready. Let's start! Go to chapter 2. Parts check
Was this guide helpful?
Comments
Still have questions?
If you have a question about something that isn't covered here, check out our additional resources. And if that doesn't do the trick, you can send an inquiry to [email protected] or through the button below.