Regular Printer Maintenance
Although the Original Prusa SL1/SL1S has a number of smart sensors and has been carefully designed to be easy to use, it’s still a machine and requires regular maintenance and care. There are several key areas that require attention if you want to keep your printer in good shape for a long time.
Keeping the printer clean
The key to a trouble-free experience is first and foremost keeping the printer clean. Resins are liquids and they are easily spilled. Every time you use the printer, make sure you are not leaving drops or stains of liquid anywhere. A liquid resin will solidify even in regular daylight, making it much more difficult to remove compared to its liquid form.
When removing the printing platform / printed objects, use the black plastic tray to shield the printer from drops of resin. Always keep a bundle of soft paper towels near the printer, so you can wipe any spilled resin/resin drops immediately. To clean drops of resin more effectively, use a piece of cloth/paper towel dipped in isopropyl alcohol. Do not use alcohol or acetone on the FEP film! For more delicate surfaces (such as the display), use a mix of water and dishwashing product.
A good practice is to place a plastic tablecloth under the printer for easier cleaning. However, be careful - the tablecloth must not block the fan on the underside of the printer.
The lid is made of acrylic glass and it has a special surface finish to block UV light from reaching the printing chamber. You can clean it with standard products for cleaning glass, as long as it does not contain any alcohol, acetone or chlorine. It would damage the acrylic glass.
FEP film / Tank maintenance
Empty the resin tank after each print. The tank has one corner which has a different shape than the other three. Use it in combination with a funnel to pour the resin out of the tank into a bottle. Don’t mix used resin with unused liquid. Instead, use a new bottle.
Inspect the resin tank bottom before and after each print. Look for any scratches, dents, or holes. If the FEP film is damaged, replace it immediately, otherwise, you’re risking a resin spillage.
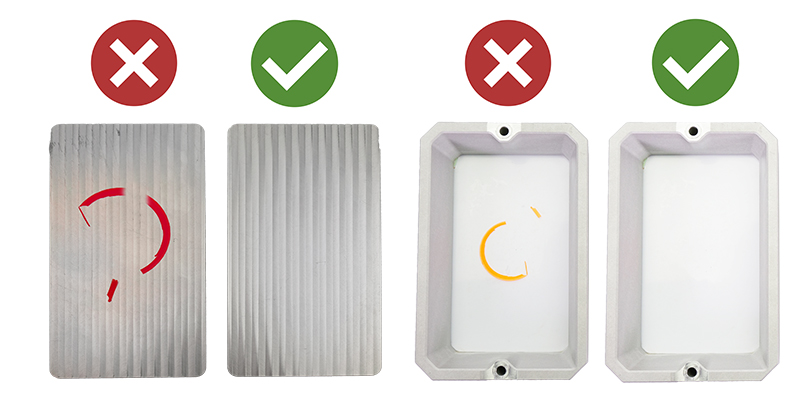
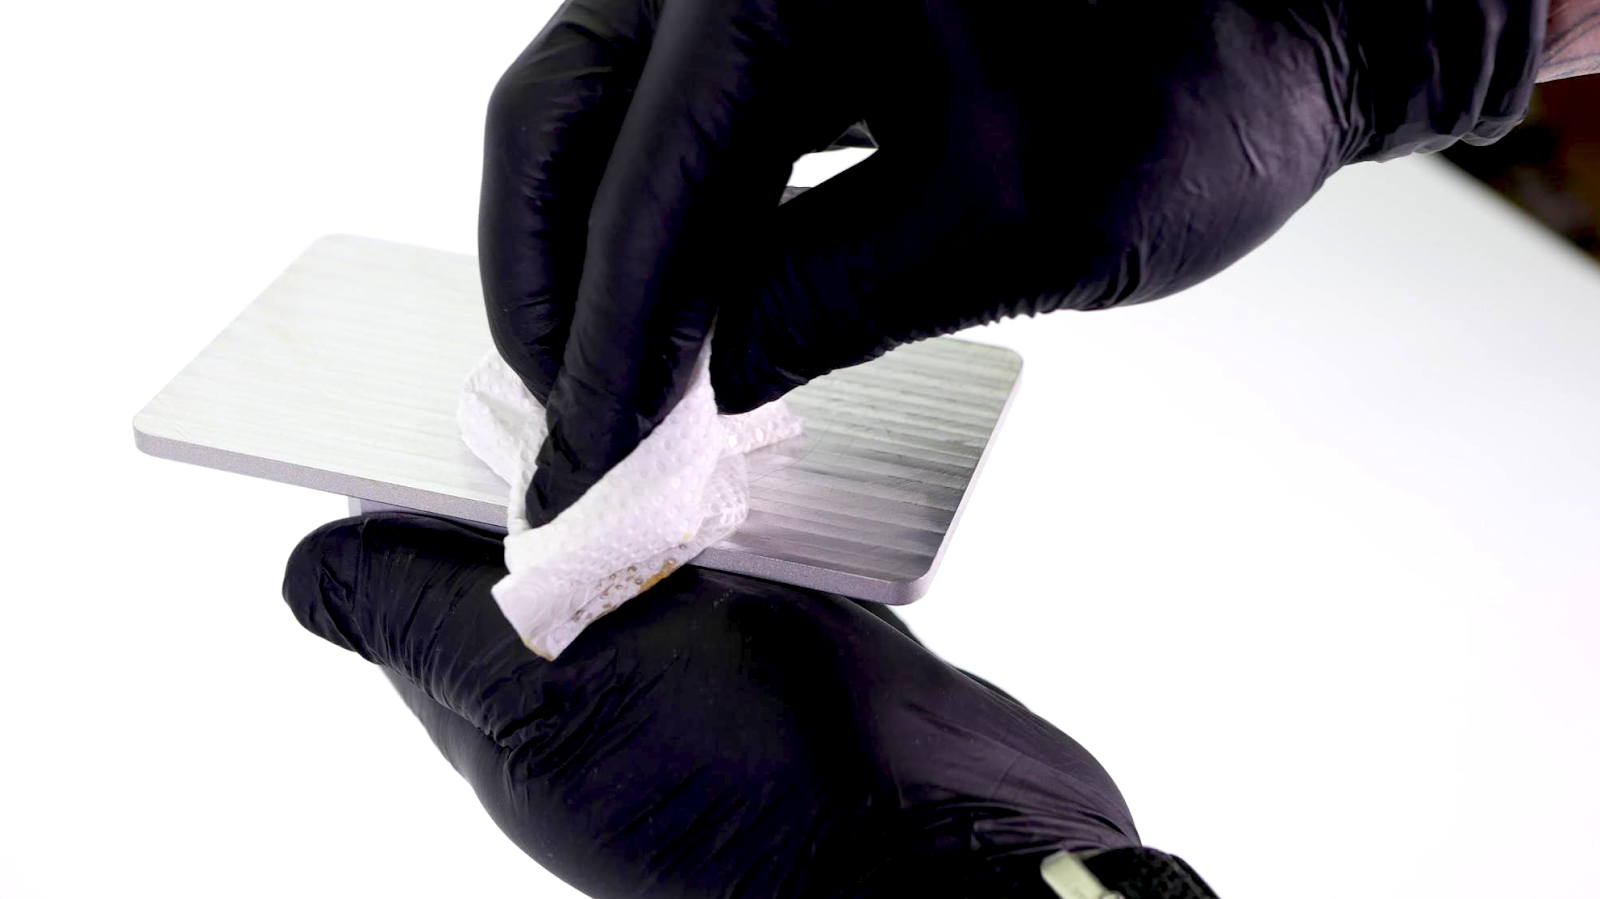
If the FEP film has a grey-ish tint, you can restore it to its original look by washing it with warm water with a bit of dishwashing soap (or even regular soap) before you start printing again. Don’t print with a dirty or damaged FEP film, as it will negatively impact the print quality. It may even lead to damage to your printer. NEVER use isopropyl alcohol to clean the FEP film!
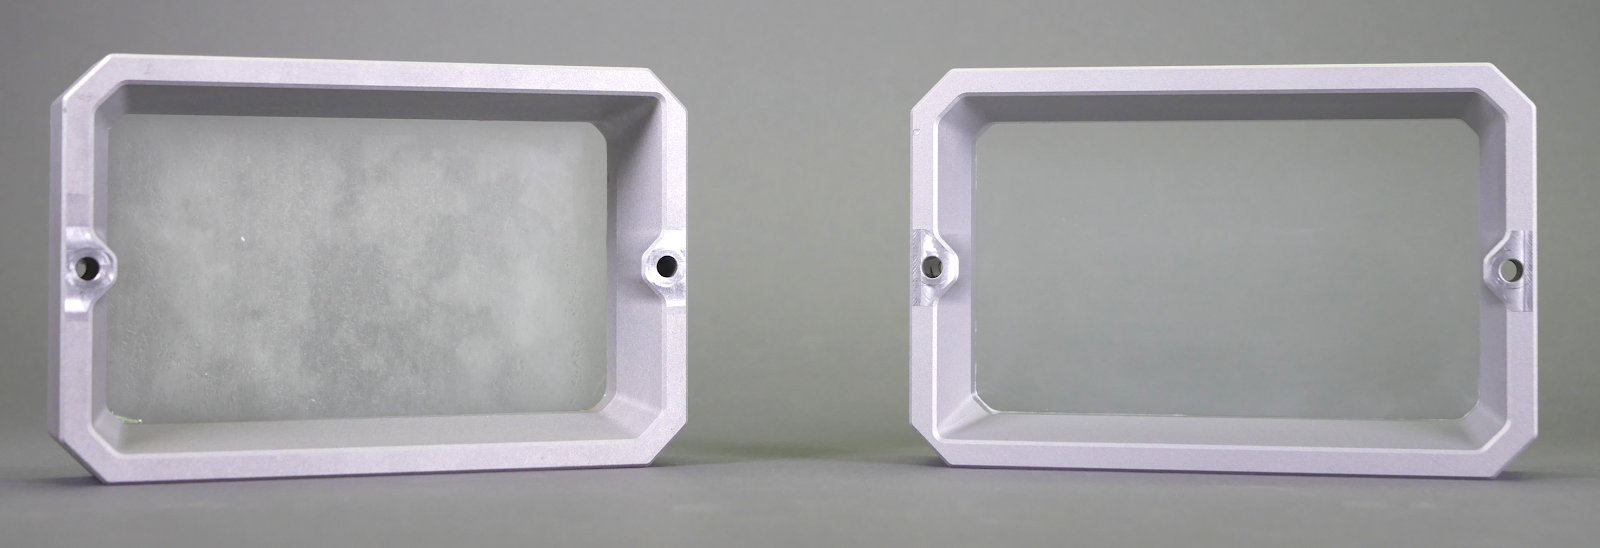
Cleaning the FEP film - before and after.
Printing platform maintenance
The platform should be cleaned thoroughly after every print - usually, there will be some leftover resin on the platform. Once a print finishes, place the black tray on the printer and use paper towels or a spatula to wipe the top of the platform clean, then proceed to remove the platform and the printed object.
Once the object is removed, use isopropyl alcohol and paper towels to clean the printing platform thoroughly. Leaving liquid resin on the platform for extended periods of time can lead to solidifying the material.
After removing an object, use a metal spatula to scrape any remnants of the previous print and use paper towels to wipe the underside of the printing platform clean - make sure that the printing platform is nice and shiny before you start the next print. Any leftovers on the printing platform (leftover supports, pads) could potentially damage the bottom of the resin tank or even the display. Surface scratches on the print platform won’t affect the quality of the print.
After you clean the printing platform with isopropyl alcohol, dry it thoroughly!
Exposure screen maintenance
Use a damp cloth or LCD cleaning spray to keep the glass / LCD display clean. Don’t use any rough materials (sanding paper) or low-quality paper towels, otherwise, you might scratch the surface. Make sure that the print display is clean before you start a print and that there are no smudges, stains, scratches, or cracks.
Acrylic lid
The lid has three major functions: it protects the printed model from potential damage, helps to contain resin fumes inside the box and blocks a significant amount of UV light so it doesn’t reach the printing chamber. Especially the last part is important - if you leave the resin in the tank and keep the lid open, it can start to solidify quickly depending on the environment.
This also means that you shouldn’t disable the cover check. It may be tempting to watch the print process, but for the sake of better results and safer operation, keep the lid closed during the print. You can, of course, open it for a quick check and then close it again.
Don’t run the printer with the lower case panels removed or with any parts missing. The case helps to contain the UV light.
UV light and potential health risks
Eyes are very sensitive to UV light and UV radiation because the cornea absorbs high amounts of UV light. Extended exposure to strong UV light may lead to corneal damage, macular degeneration, or cataracts - these conditions can ultimately lead to blindness.
This is why the Original Prusa SL1/SL1S is designed to contain the UV light inside, which means that when used according to the instructions in the manual, there are no health risks related to UV radiation during regular use.
Fan cleaning / Removing dust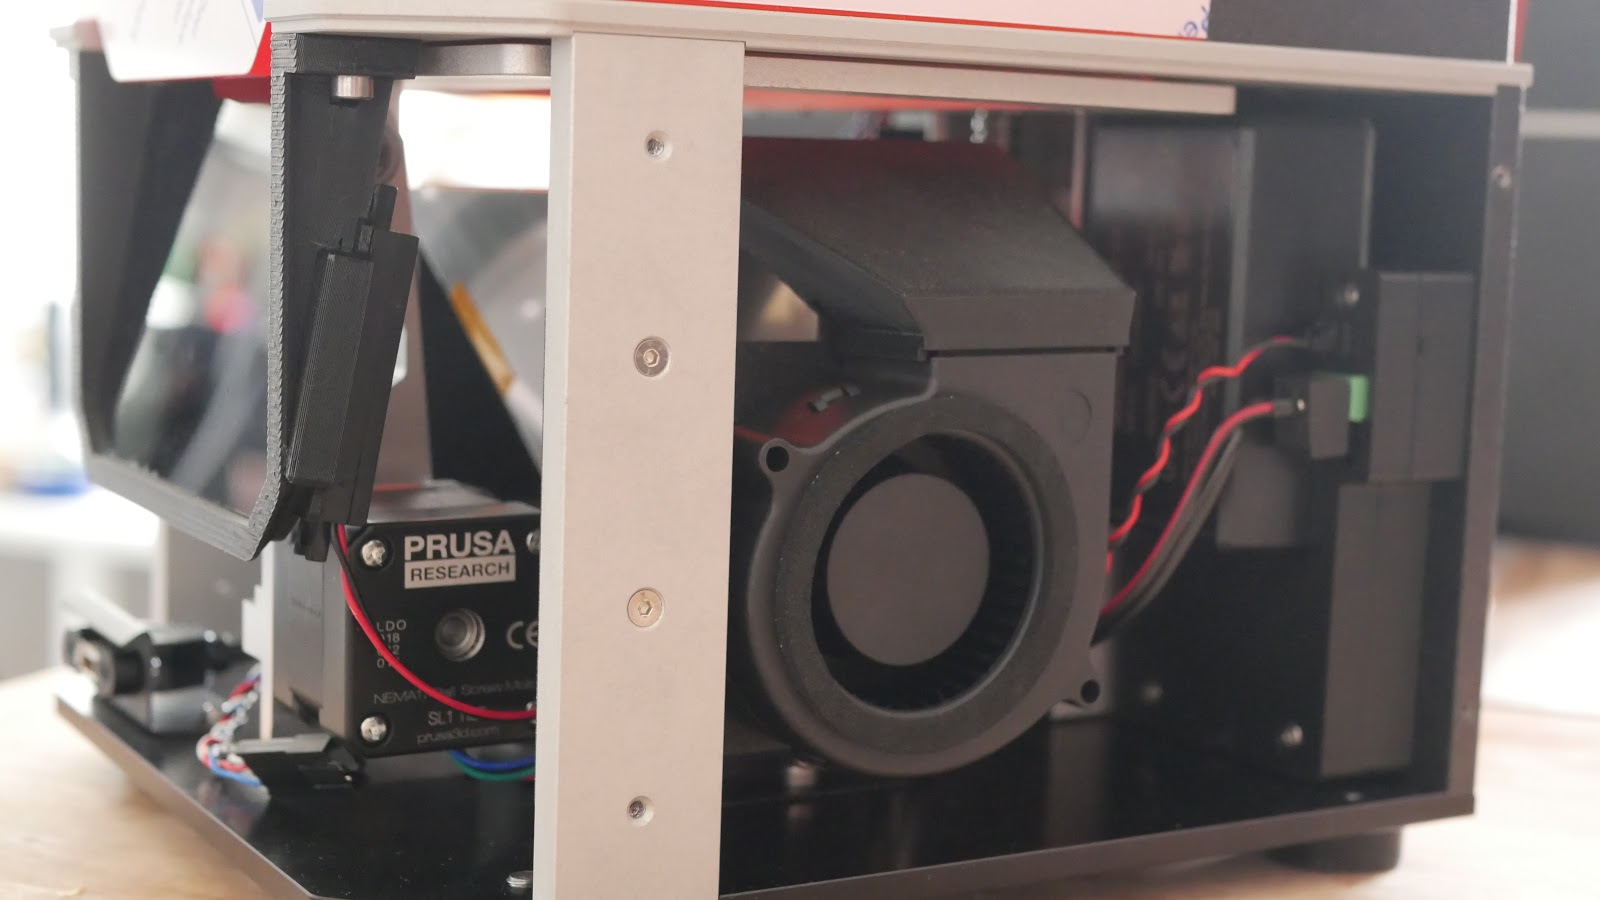
It’s a good practice to clean the fans from time to time, especially if you have pets at home - the recommended time period will vary depending on the environment, in which the SL1/SL1S is used. In general, it’s good to inspect the printer every 6-8 weeks. There are three fans placed inside the printer. You can get to the side fan and bottom fan by removing the main body cover.
First, turn off the printer and disconnect it from the power source. Locate eight screws on the sides of the printer (four on each side) and remove them with an Allen key. Then carefully slide the body cover out. Be careful not to damage any cables which are attached to the power button. This will give you better access to two fans. Use a can of compressed air to clean the fans carefully.
The third fan is located on the backside of the printer. Locate two screws holding a small door closed and remove them. Open the door and use a can of compressed air to clean the fan.
Dust can also accumulate on the underside of the display and on the reflector. You can clean these parts carefully with compressed air. First, unscrew the eight screws holding the display in place, then slowly and carefully remove the display - be careful not to damage the display’s wires. Then, use compressed air from a distance of about 30 cm to clean out the dust particles gently. Do not use sharp or rough objects!
Carbon filter replacement
Check the carbon filter from time to time to ensure it is in good shape. The carbon filter is located on the backside of the printer under a small door. Use an Allen key to remove two screws holding the door shut. Open the door and remove the filter. Check if it is in good shape, and consider replacing it if it isn’t.
Tower maintenance
The tower (Z-axis consisting of the trapezoidal rod and the cantilever) requires little to no regular maintenance. In case the printer starts making unwanted noises when lifting or raising the platform, consider applying a lubricant on the trapezoidal rod - any good super lube will do the trick.
Tilt maintenance
The key to a long-lasting and smoothly running tilt bed is simple: keep it as clean as possible. Use the included plastic tray every time you manipulate the resin or the printing platform with the finished print. The tray will stop the resin from spilling over the tilt bed.