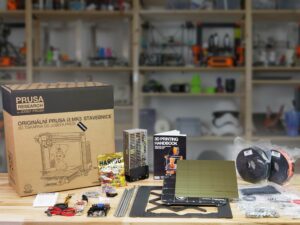
JA
  • English
  • Čeština
  • Español
  • Italiano
  • Deutsch
  • Polski
  • Français
Login

1. はじめに

1. はじめに
Relevant for:
Last updated 4 months ago
1. はじめに
 Difficulty
Very easy
 Steps
6
 Available languages
ENCSPLESDEITFR
アップグレードキットの準備
アップグレードキットの準備
アップグレードキットの準備
Original Prusa i3 MK2/SをOriginal Prusa i3 MK3Sにアップグレードするチュートリアルへようこそ。Prusa Researchから届いたアップグレードキットを用意します。パッケージには、オレンジと黒のPETGスプール1個、または黒のスプール2個が含まれています。これは、前回のご注文によって異なります。
The upgrade kit does not include all the parts needed to build MK3S, therefore we must disassemble following from the MK2/S:
All motors (Y-axis, X-axis, Z-axis and Extruder) and trapezoidal nuts
Motor pulleys (2x)
623h bearing housing (2x)
LCD screen, front cover and knob (supports will be different)
Labels guide
Labels guide
組立に必要な部品が入っている全ての箱や袋には、ラベルが貼られています。
This bag is used as an example.
Use labels for reference
ほとんどのラベルは1:1の縮尺で、パーツの識別に使用できます :-)
最も一般的なよく使う ネジ、ナット、PTFEチューブ など、 実寸大が描かれた Prusa Cheatsheet で、一つ一つ確認することができます。
You can download Prusa Cheatsheet from our site. Print it at 100 %, don't rescale it, otherwise it won't work.
高解像度の画像を見る
高解像度の画像を見る
manual.prusa3d.com で組み立てガイドをご覧の場合には、高画質なオリジナルの画像をご利用いただけます。
画像にカーソルを合わせ、左上にある拡大鏡ボタン(「オリジナルを表示」)をクリックします。
プリント部品のバージョン
プリント部品のバージョン
Most of the 3D printed parts on Original Prusa i3 MK3S most are marked with their version.
Cx シリーズ (例. C1) - これらのパーツは Prusa Research の工場でプリントされ、キットに同梱されています。
Rx series (e.g. R4) - those parts are available for download and printing by the user. They are identical to the factory ones.
もしプリンターの組み立て途中で、プリント部品に問題を見つけた場合には、このラベルを探し、サポートチームに連絡してください。
Printed parts in the picture are used as an example, yours might be different.
プリントパーツ - セルフプリント
プリントパーツ - セルフプリント
プリントパーツ - セルフプリント
プリントパーツ - セルフプリント
Before we start disassembly, you need to print all the necessary parts.
For MK2/S to MK3S upgrade you need to print several G-codes, which are separated according to the colour. Use enclosed PETG or similar material. Extruder parts should be always black to avoid issues!
G-codes and STL files are available on our website: prusa3d.com/prusa-i3-printable-parts
For printing individual parts it is recommended to use Slic3r PE with 0.2 mm layer height, GRID infill at 20%, no supports!
Fan-shroud must be printed from ABS only!!! We include this part in the upgrade package.
The pictures are used as examples, there are more G-codes to print.
Let's dive in the MK2/S disassembly! 2. 分解
Was this guide helpful?

Comments

Still have questions?

Still have questions?

If you have a question about something that isn't covered here, check out our additional resources.
And if that doesn't do the trick, you can send an inquiry to [email protected] or through the button below.

Contact us