If you see the error message “MMU load failed” on the printer’s LCD display, it indicates that the filament went through the Original Prusa MMU2S unit (registered by the F.I.N.D.A. sensor), but it didn't reach extruder Bondtech gears. Sometimes, the filament reaches the Bondtech gears once but not for the second time. The MMU2S unit is trying to retract the filament once during the initial loading sequence to prevent possible issues during the print.
What does it look like
This is what you most likely see on the LCD screen:
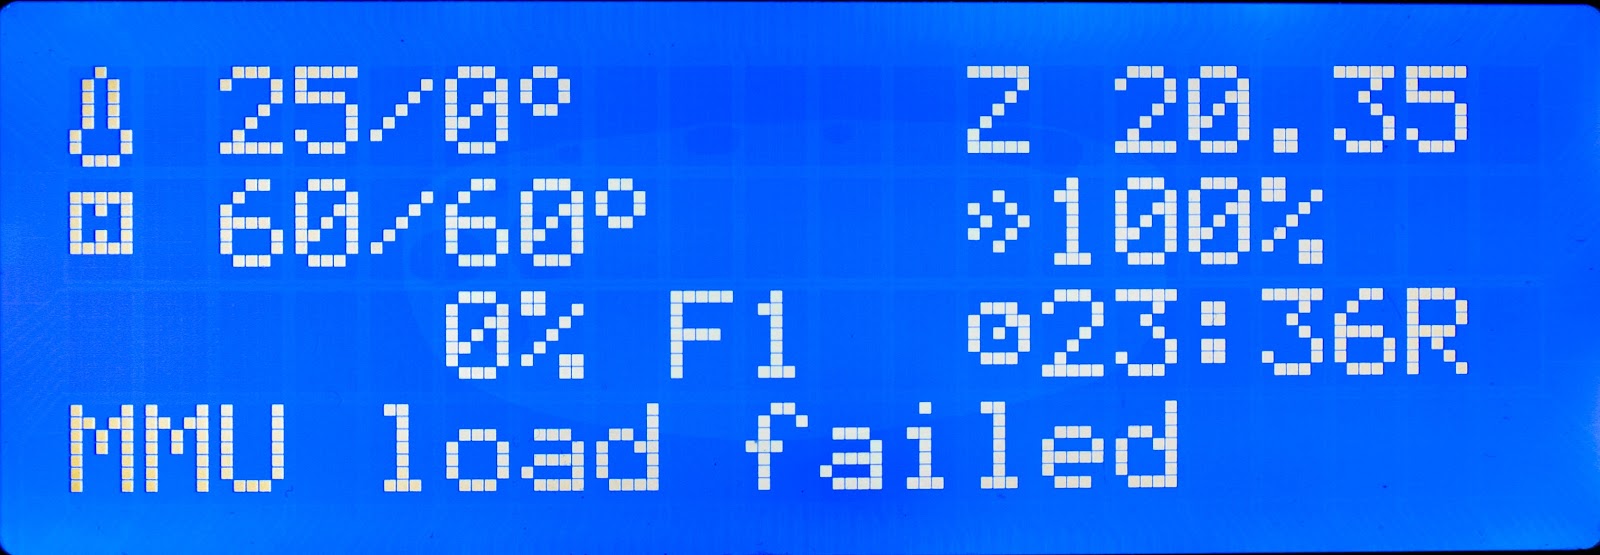
You can also open the LCD menu -> Support -> Sensor info and check the FINDA value. The F.I.N.D.A. sensor should be triggered, meaning the value should be 1.
How to fix it
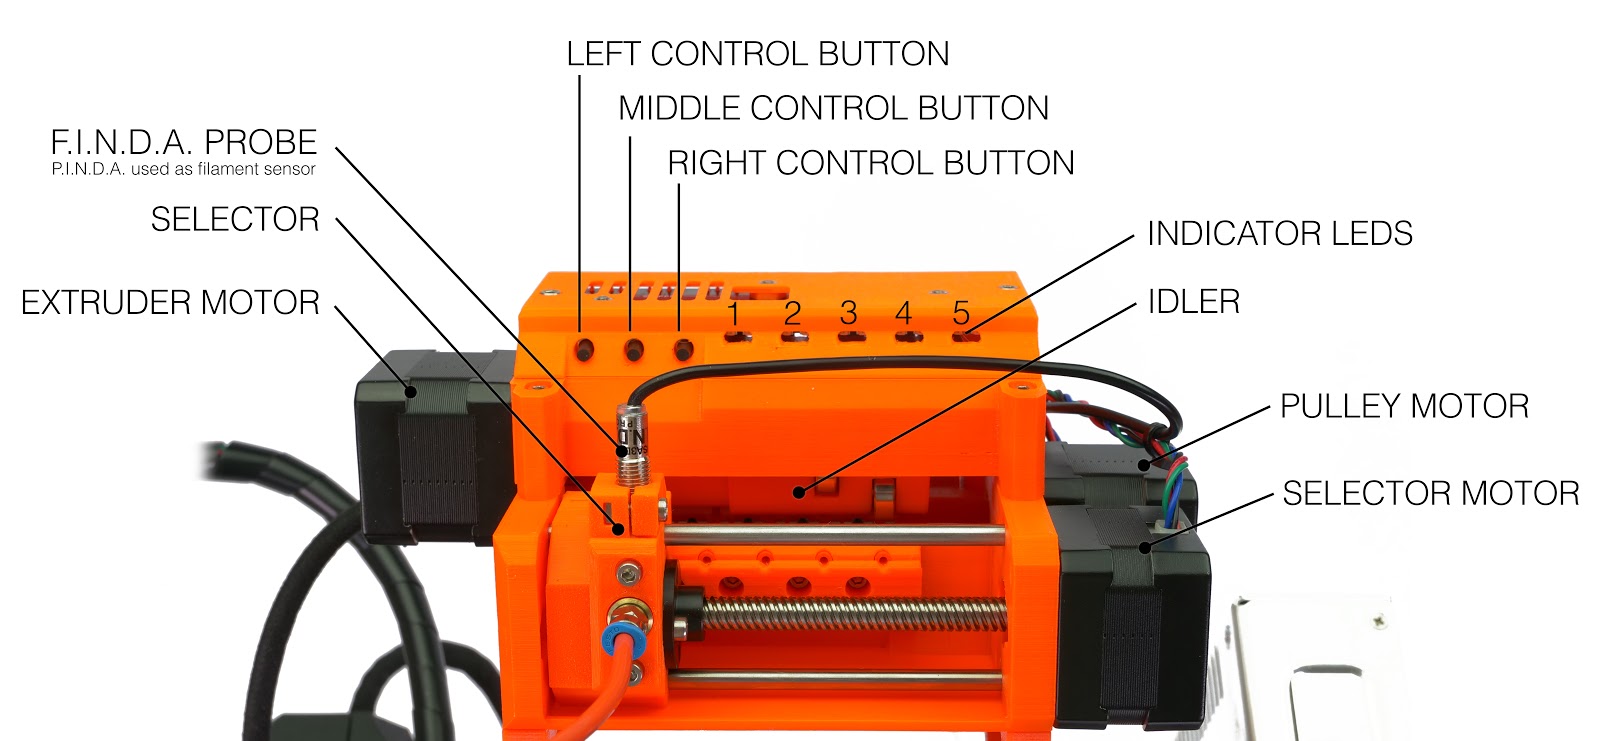
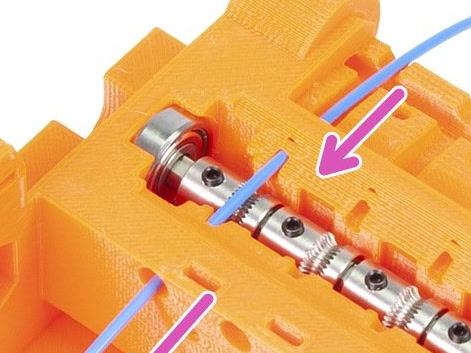
For future reference, see the picture below and remember the name of each part of the MMU unit. You will find this information in your printed MMU handbook as well.
There are multiple causes for this to happen. Let's go through all of them, ranged by their probability.
Filament spools
First of all, check the filament spools. Do they roll on the spool holders without any problem? The filament should not be tangling, neither on the spool nor in the space between the buffer and the spool holders.
IR sensor is not triggering correctly
Check that the IR sensor is working properly and calibrated correctly. Open LCD menu -> Support -> Sensor info and you will see the IR value. If the filament is not loaded, the value should be “0”. If the filament is loaded in between the Bondtech gears, you should see a steady “1”. Any flicker at any time will cause issues. Please see the article on how to perform the IRフィラメントセンサーのキャリブレーション (MMU3、MMU2S).
Filament stuck in the PTFE tube
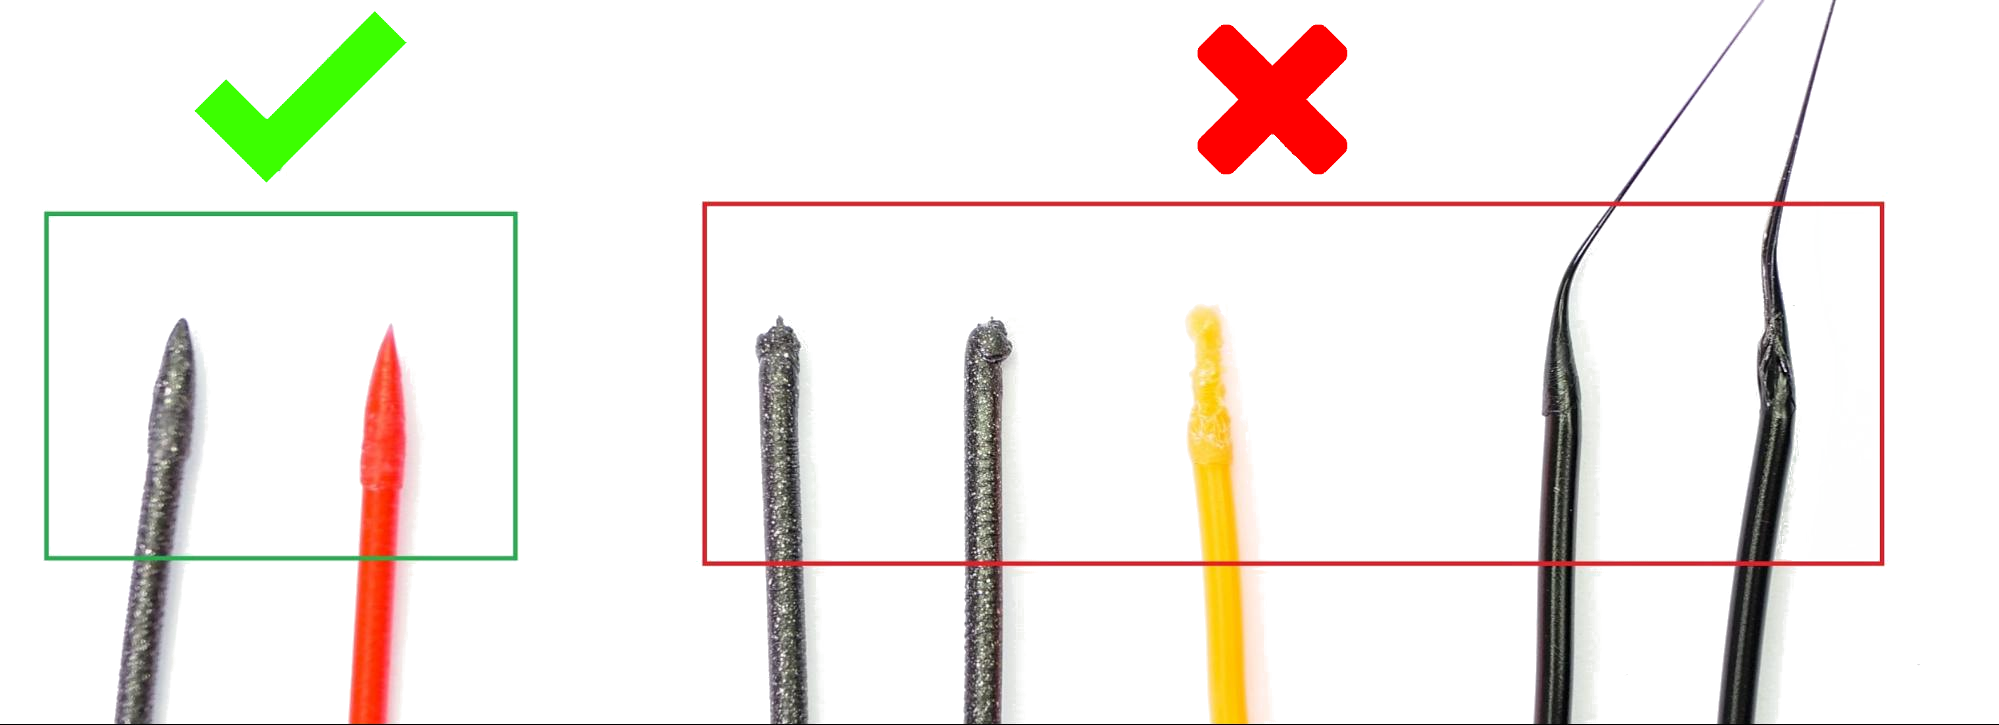
In most cases, it’s because of filament strings or the filament retracting with a thick end. The shape of the filament tip is very important for a successful MMU print. The tip should be pointy, but there must not be any lump or string. The diameter of the tip can be slightly bigger than the rest of the filament, but not too much.
To solve this in the short term, unscrew both Festo fittings of the long PTFE tube connecting the MMU2S and the printer's extruder. The filament string will probably stick out of the MMU2S unit. Pull approximately 20 cm of filament out of the unit and cut it (the MMU2S gears have likely damaged part of the string, so it’s better to remove it). Make sure the filament can go freely through the tube and that the tube is clean inside. Mount everything back and resume print. Check also the short PTFE tube that is inside the printer's hotend. If its mouth is deformed, replace it with a new one.
In general, if your filament comes out with a long string, it is because it unloaded at too high temperature. If it unloads with a blunt end, the temperature was too low.
Cooling moves
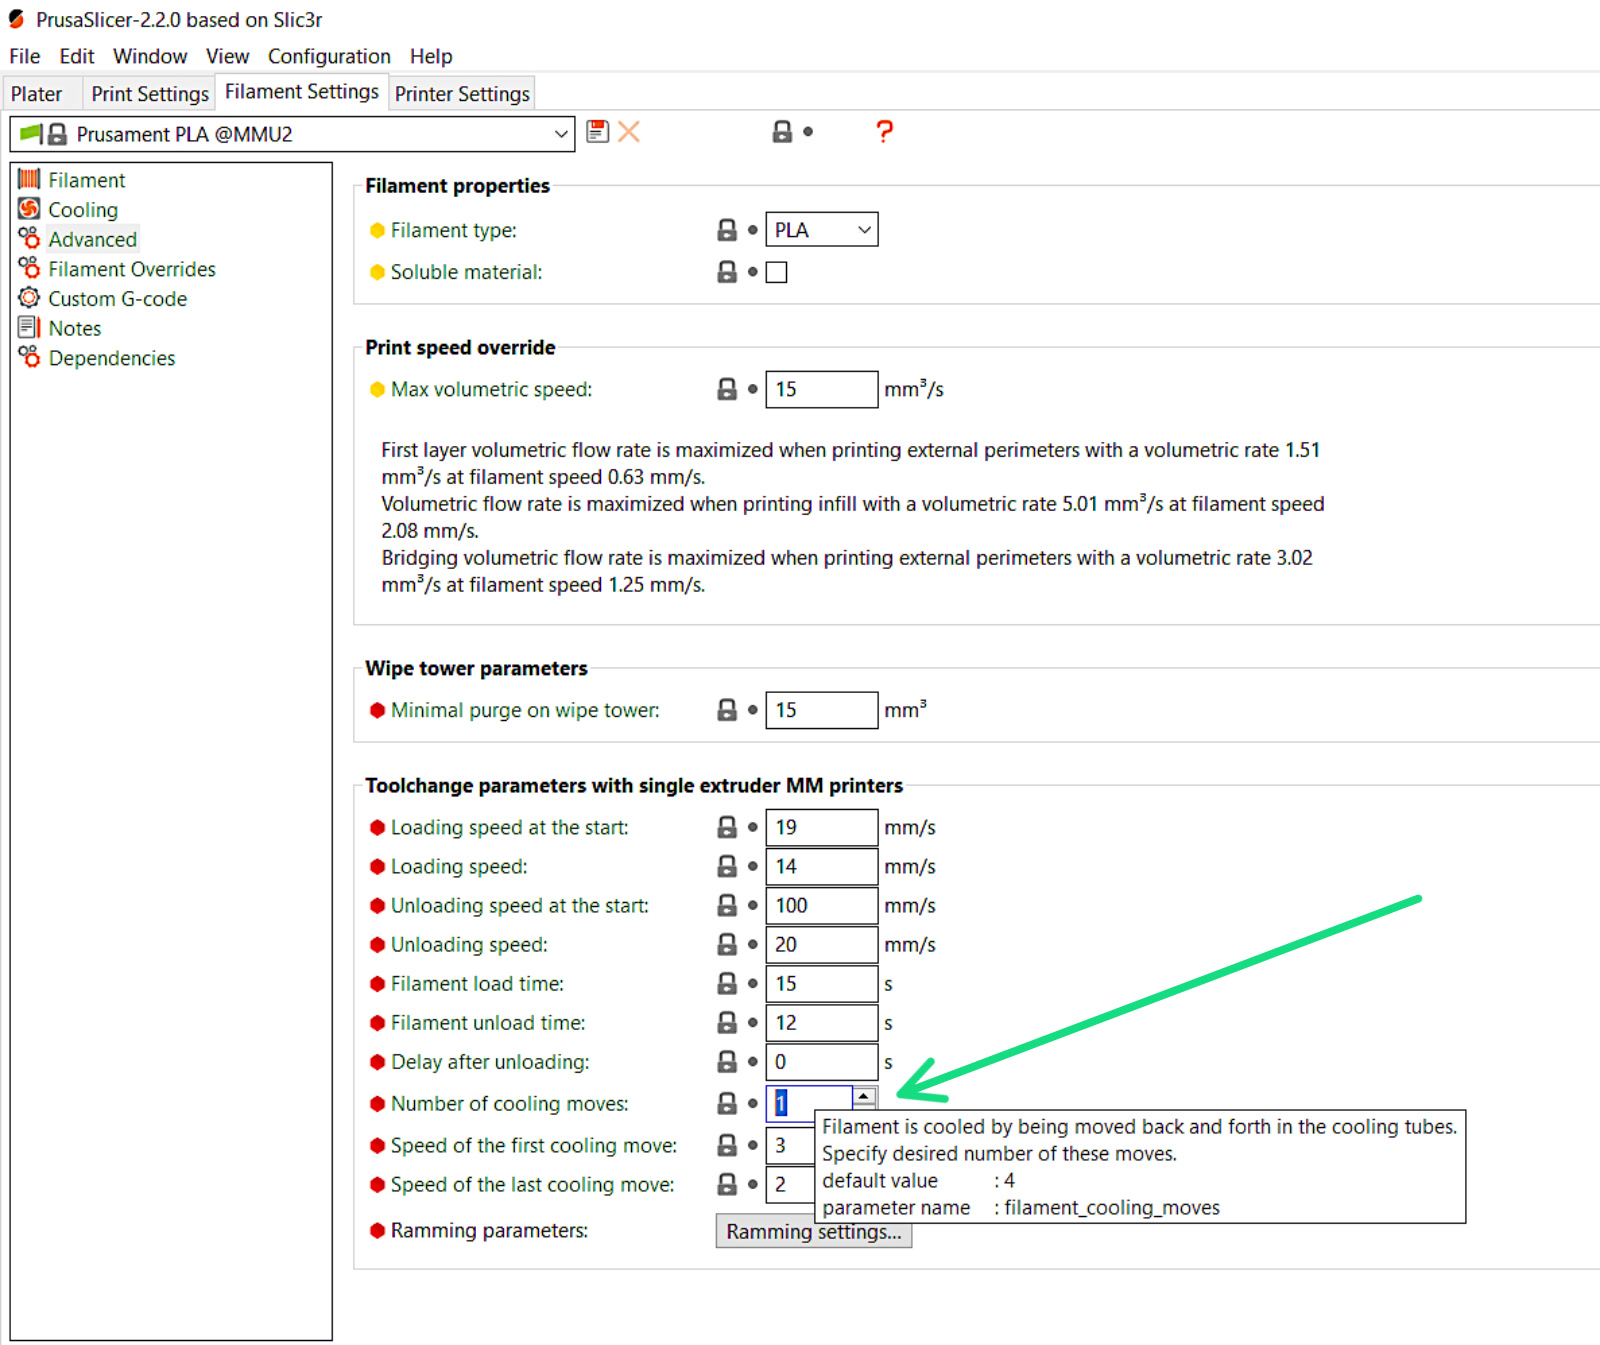
A good setting is to increase the number of "Cooling moves" in PrusaSlicer. This will move the filament back and forth in the cooling tube a set number of times before retraction, which can improve the tip of the Filament. The setting is found at the 'Filament Settings' tab, under Advanced (picture below). Start by increasing the number of cooling moves to 2-3. More cooling moves will increase the print time.
F.I.N.D.A. sensor check
See if the FINDA sensor is correctly calibrated as described in this article. Always keep in mind the selector must be free of any leftover filament and dust. If you have issues with the selector not moving, see MMU2Sセレクターが動かない.
Filament pulleys
It is very important that the five hobbed filament pulleys are aligned with the filament and secured on the flat side of the pulley motor's shaft.
Silent mode
Sometimes, switching the MMU2S into the Stealth mode can help. In this mode, the motors are running slower and thus the filament movement is slower. You can enable the Stealth mode in LCD Menu -> Settings -> MMU Mode [] / [Stealth].
Idler-body tension screws and idler
Idler body tension screws
On the top of the MMU2S units is two tension screws, with springs, applying pressure to the filament upon load/unload. These should be slightly below the surface of the plastic part (about 1 millimeter).
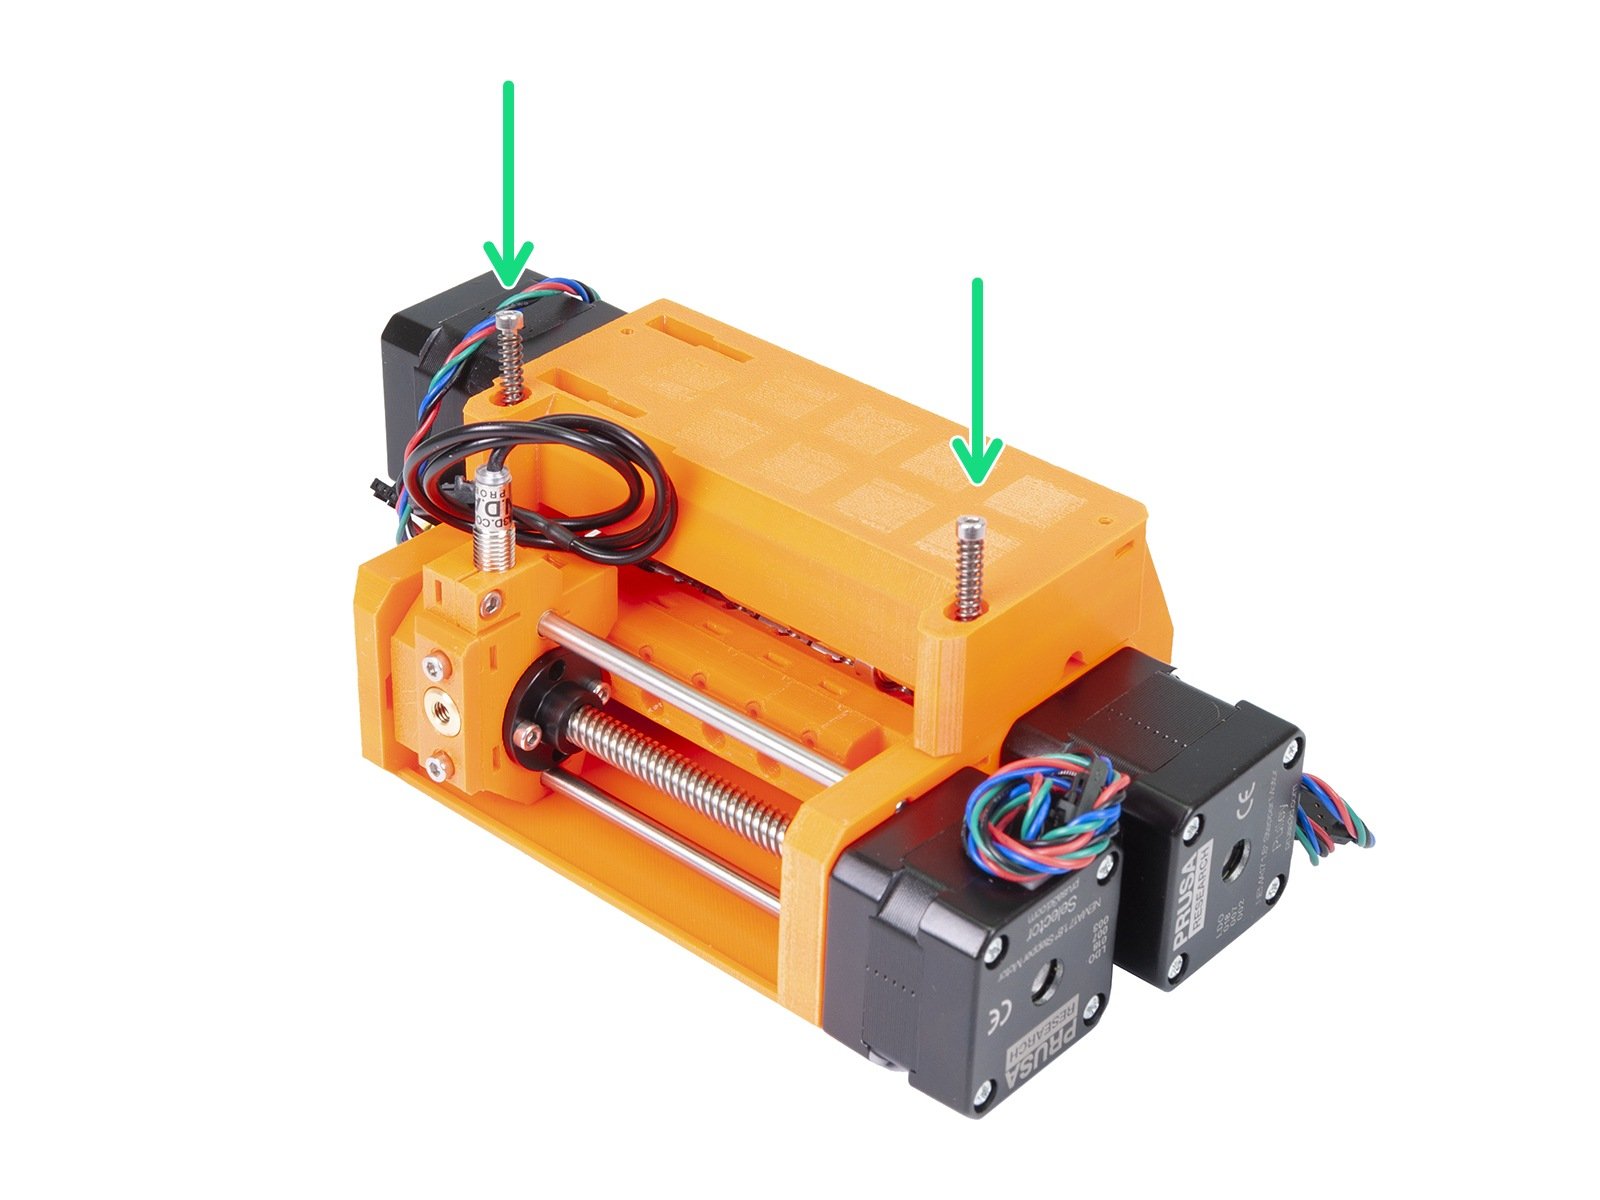
Idler tightened on the motor shaft
First of all, make sure the motor on the left of the MMU unit (named Extruder or Idler motor) is seated correctly and in direct contact with the idler-body. The hole in the center of the idler barrel isn't entirely round, there is a flat part that matches the shape of the motor shaft. When the idler barrel is on the shaft, it has to be tightened by two M3x10 screws.

These screws must be tightened neither too much nor too little. If the screws were tightened too much, the plastic part will crack, in the opposite case, the idler will not be secure on the motor shaft.
Make sure there is a small gap between the idler barrel and the idler-body. These two parts must not be grinding on one another.
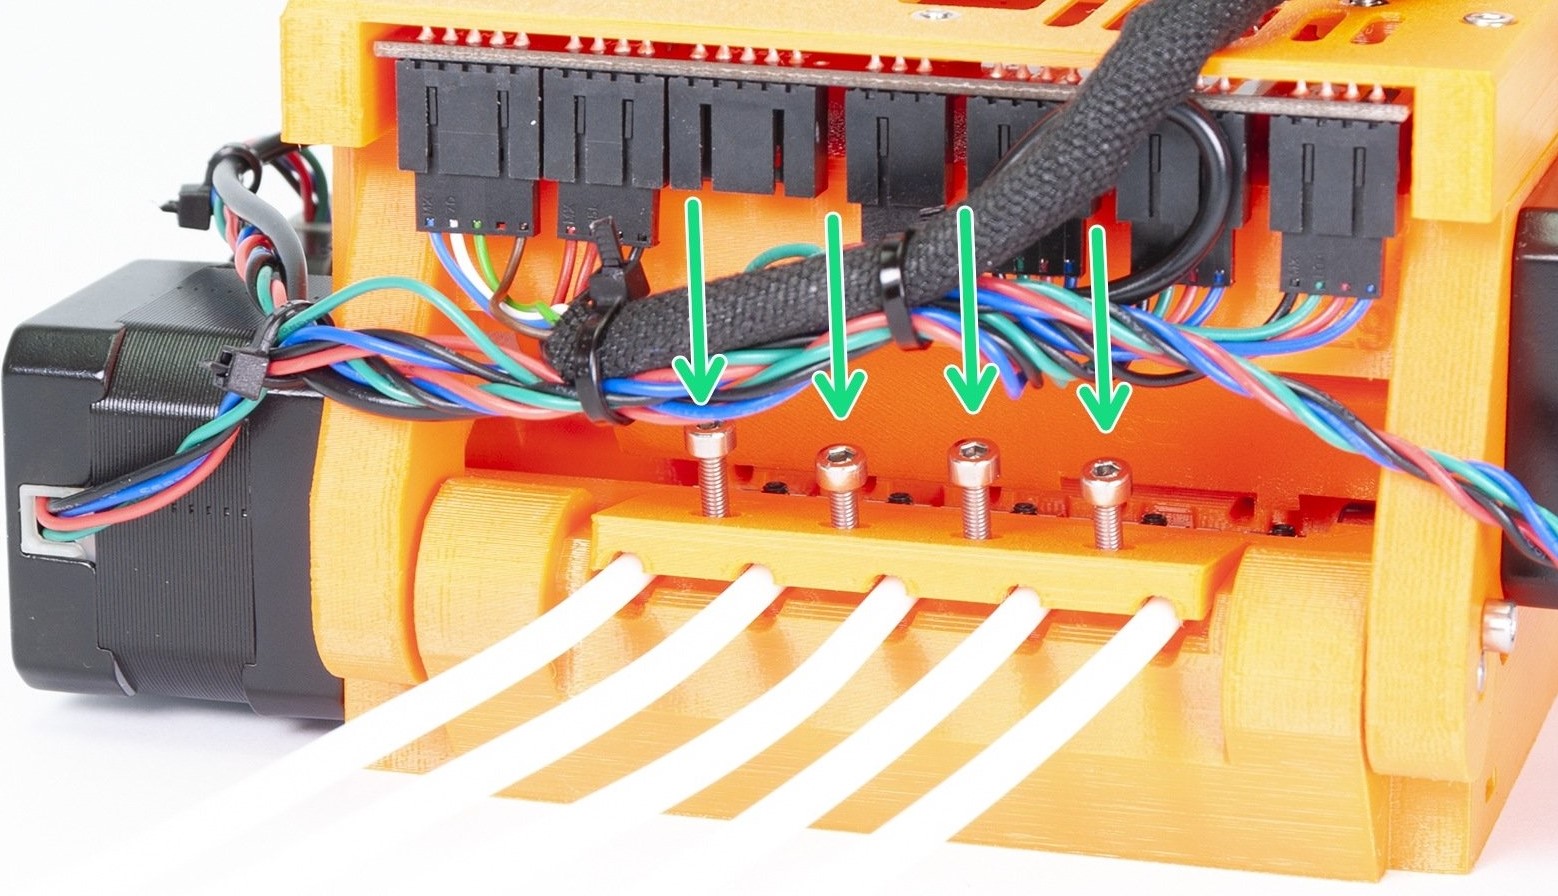
Rear PTFE holder too tight or too loose
Check the 5 long PTFE tubes leading the filament up to the MMU unit. Make sure the mmu2-rear-PTFE-holder is not tightened too much: manually push the filament back and forth through this section, it should be passing through without any resistance. It can also be too loose, in which case the PTFE tubes might accidentally snap out.
Individual filament length calibration
On the MMU2S upgrade, both filament sensors (FINDA and the IR sensor) are cooperating, so there is no reason to do this calibration anymore. The length of the filament is measured automatically thanks to the new IR filament sensor mechanism.
However, if you have changed the length of the Bowden PTFE tube between the extruder and the MMU2S unit, you can still do this calibration. Please refer to this guide.
Resuming print after repair
There are two ways to do that:
- Select Resume print on the LCD. The printer will automatically preheat the nozzle, try to load filament and if it’s successful, it will continue.
- Press the middle button on the MMU2S and it will repeat the last unsuccessful operation, to test if the problem is resolved. If the repair was successful, the LED will flash an alternating red and green. Once you’re ready, press the Right button to resume the print.
If the issue was not resolved you will see the red LED still on and you will have to try to resolve the issue again.