Prusa CORE One および CORE One Lでは、ベルトを最適なテンションに調整することが、高品質なプリントを得るうえで非常に重要です。ベルトが緩すぎると、レイヤーのずれやゴースティングなどの不具合、または円形が歪むなどの異常な形状が発生する可能性があります。逆にベルトを締めすぎると、X軸およびY軸の動きが不規則になる場合があります。
アライメント
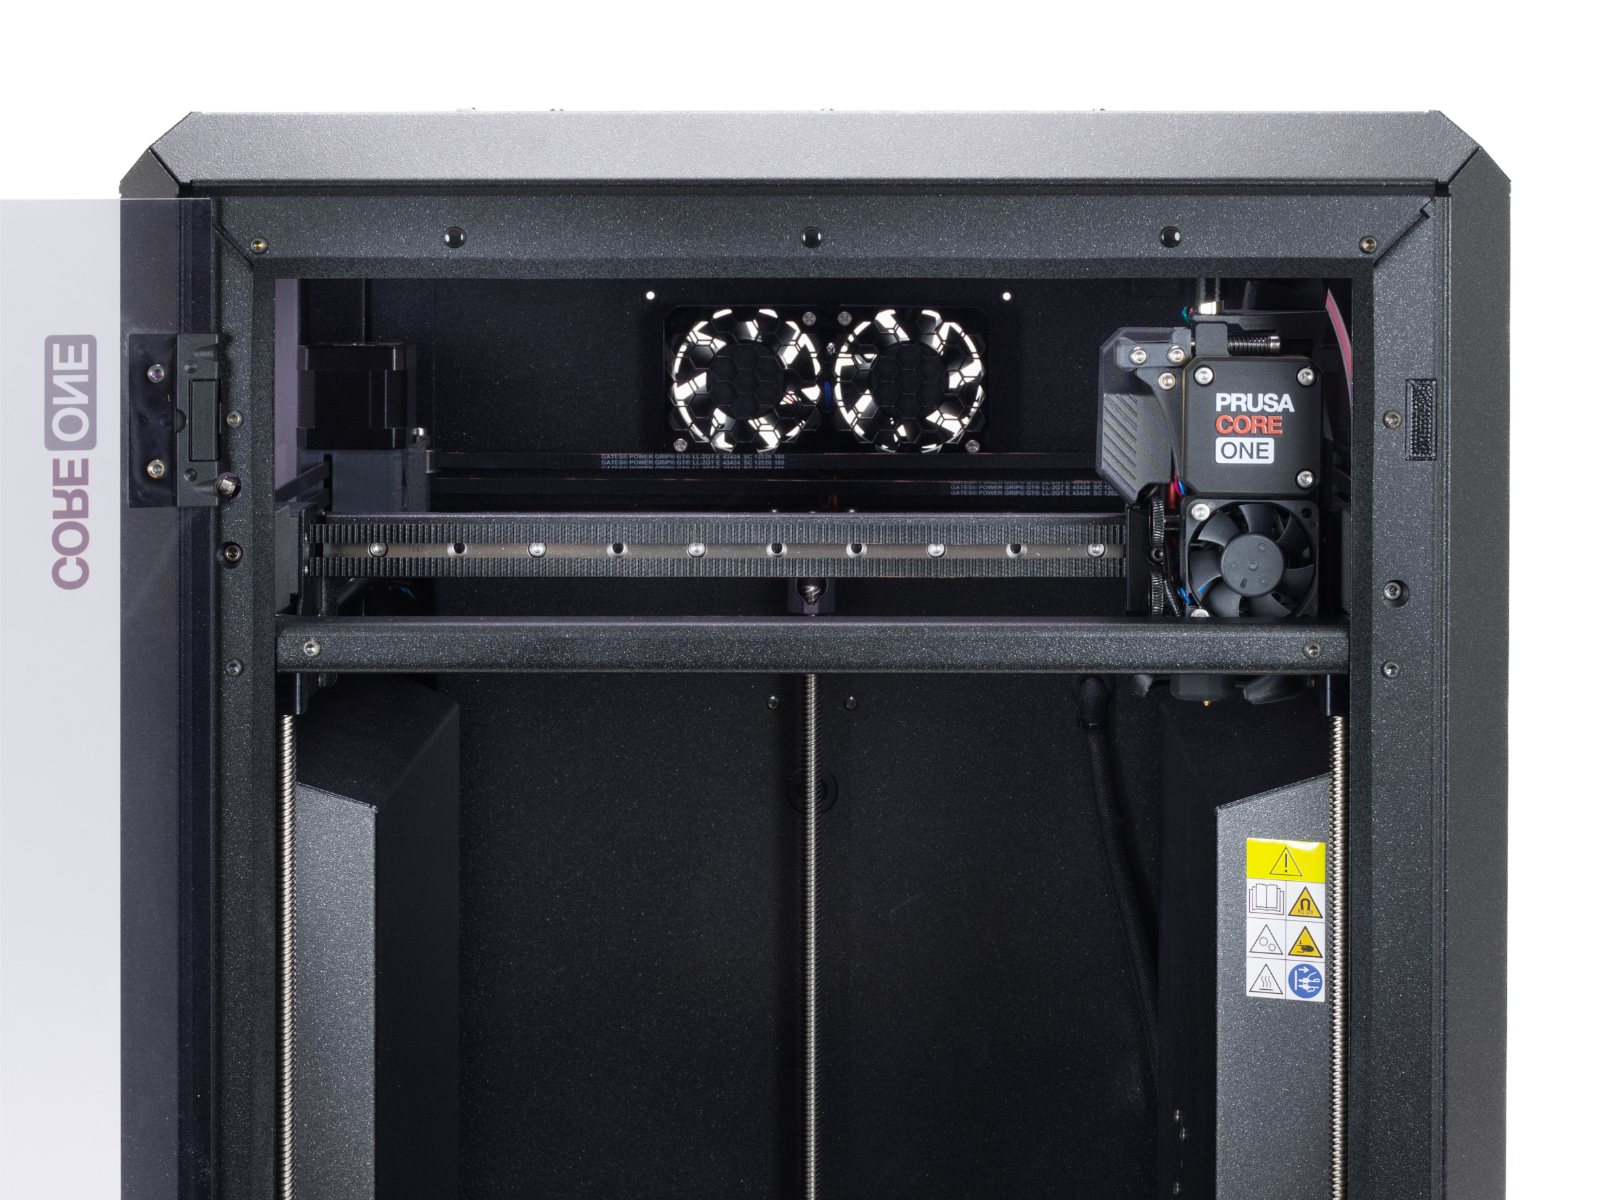
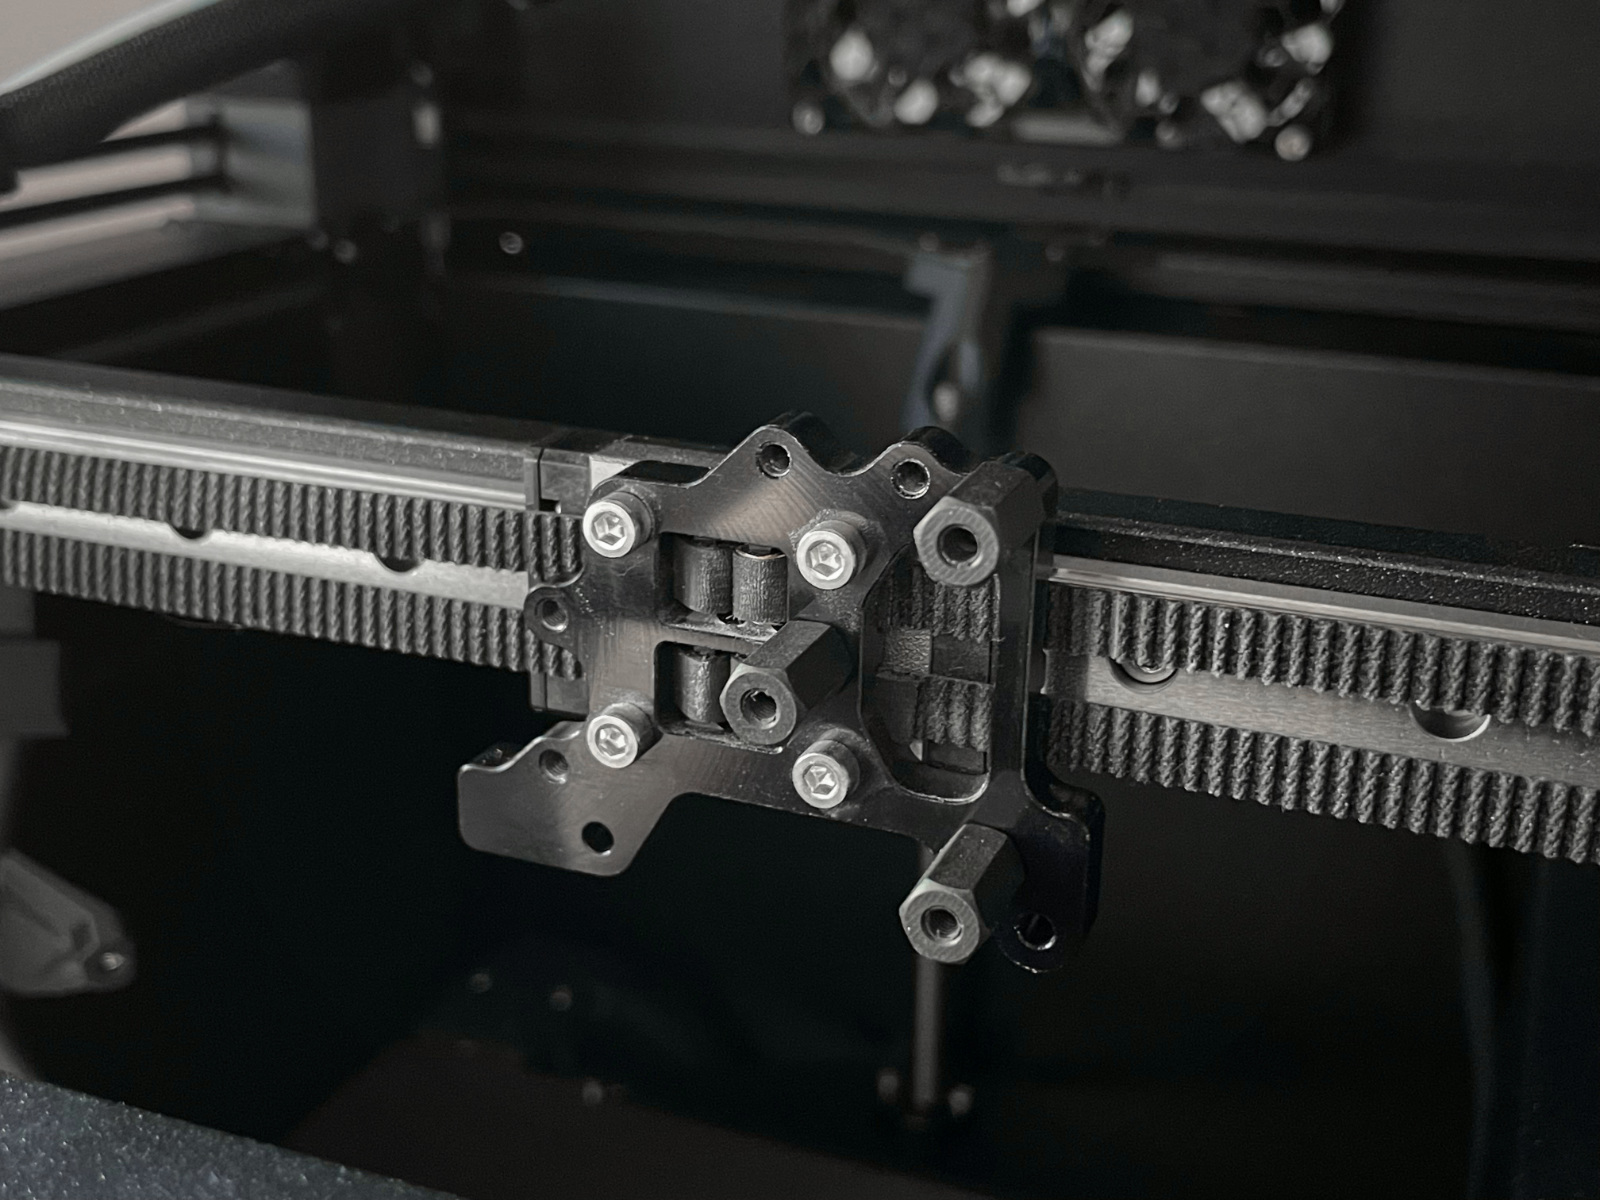
ベルトを調整する前に、CoreXY構造の正しいアライメントを確認します。
- ステッピングモーターが無効になっていることを確認します。これはプリンターの電源をオフにするか、LCDメニュー → Control → Disable Motorsから実行できます。
- 手動でNextruderをY軸の最前位置、およびX軸の中央に移動します。
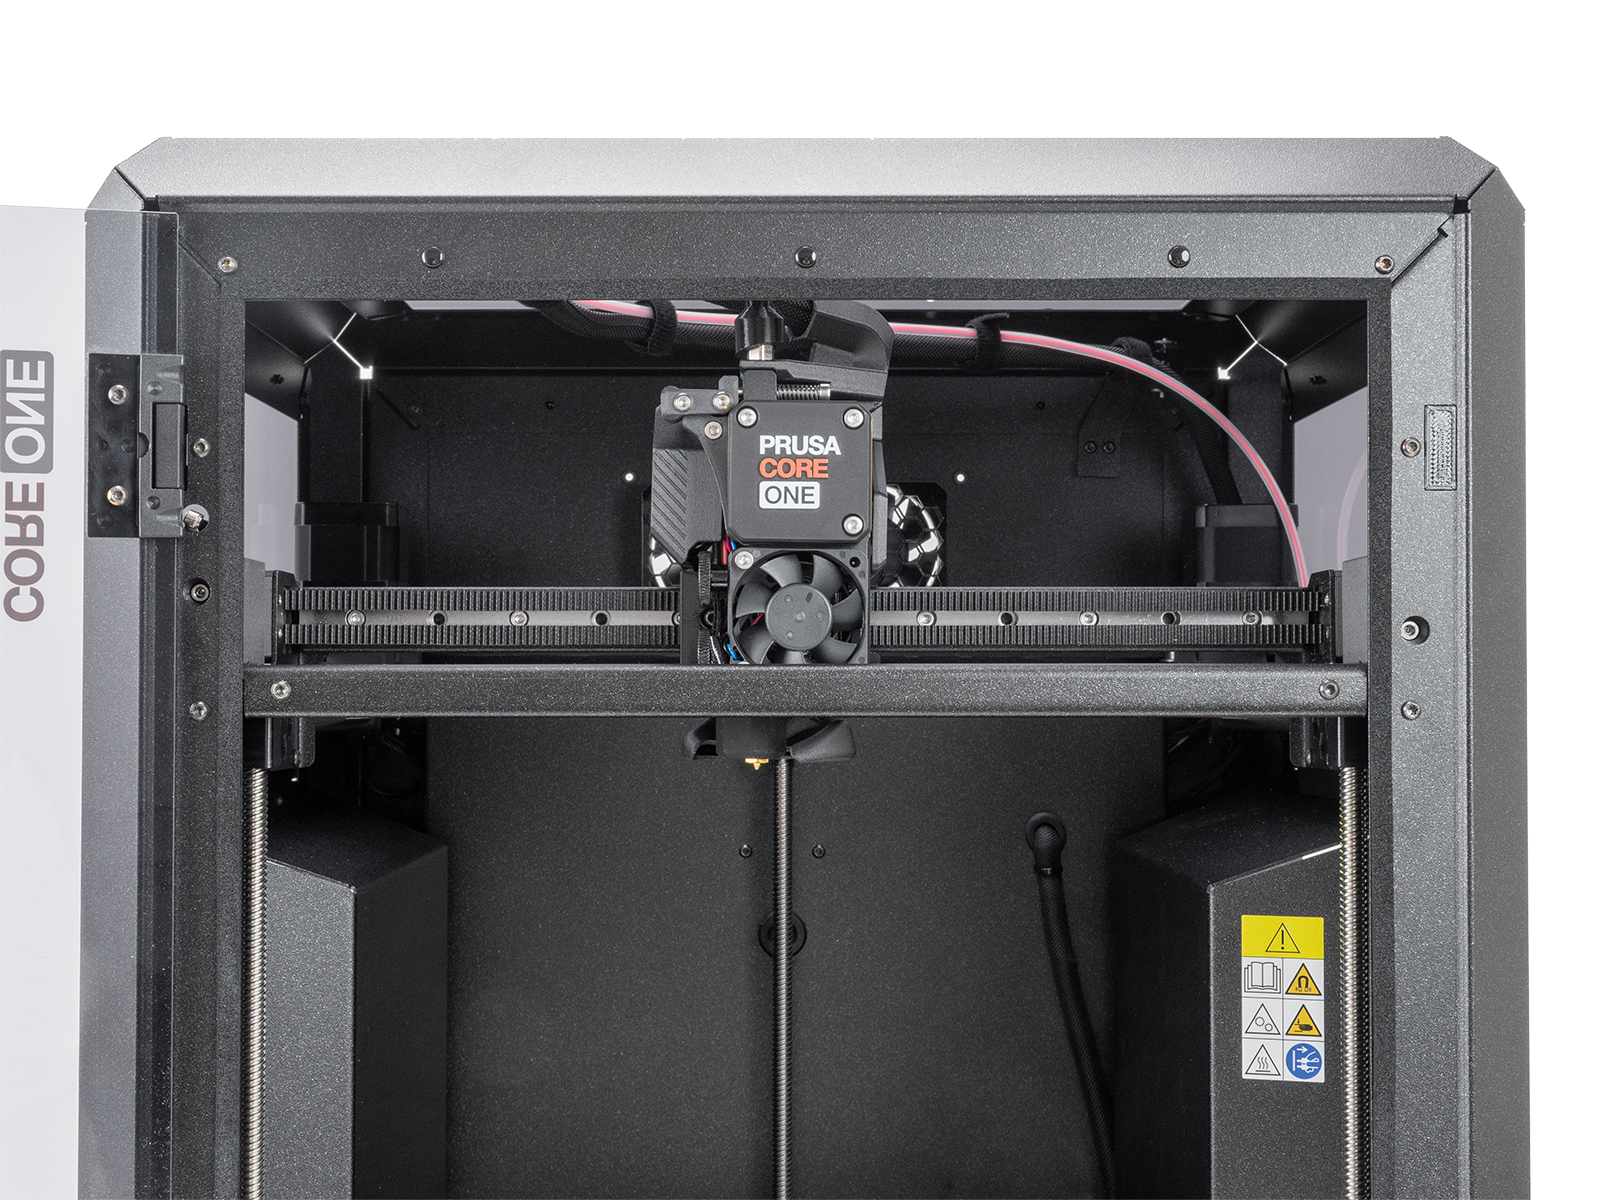
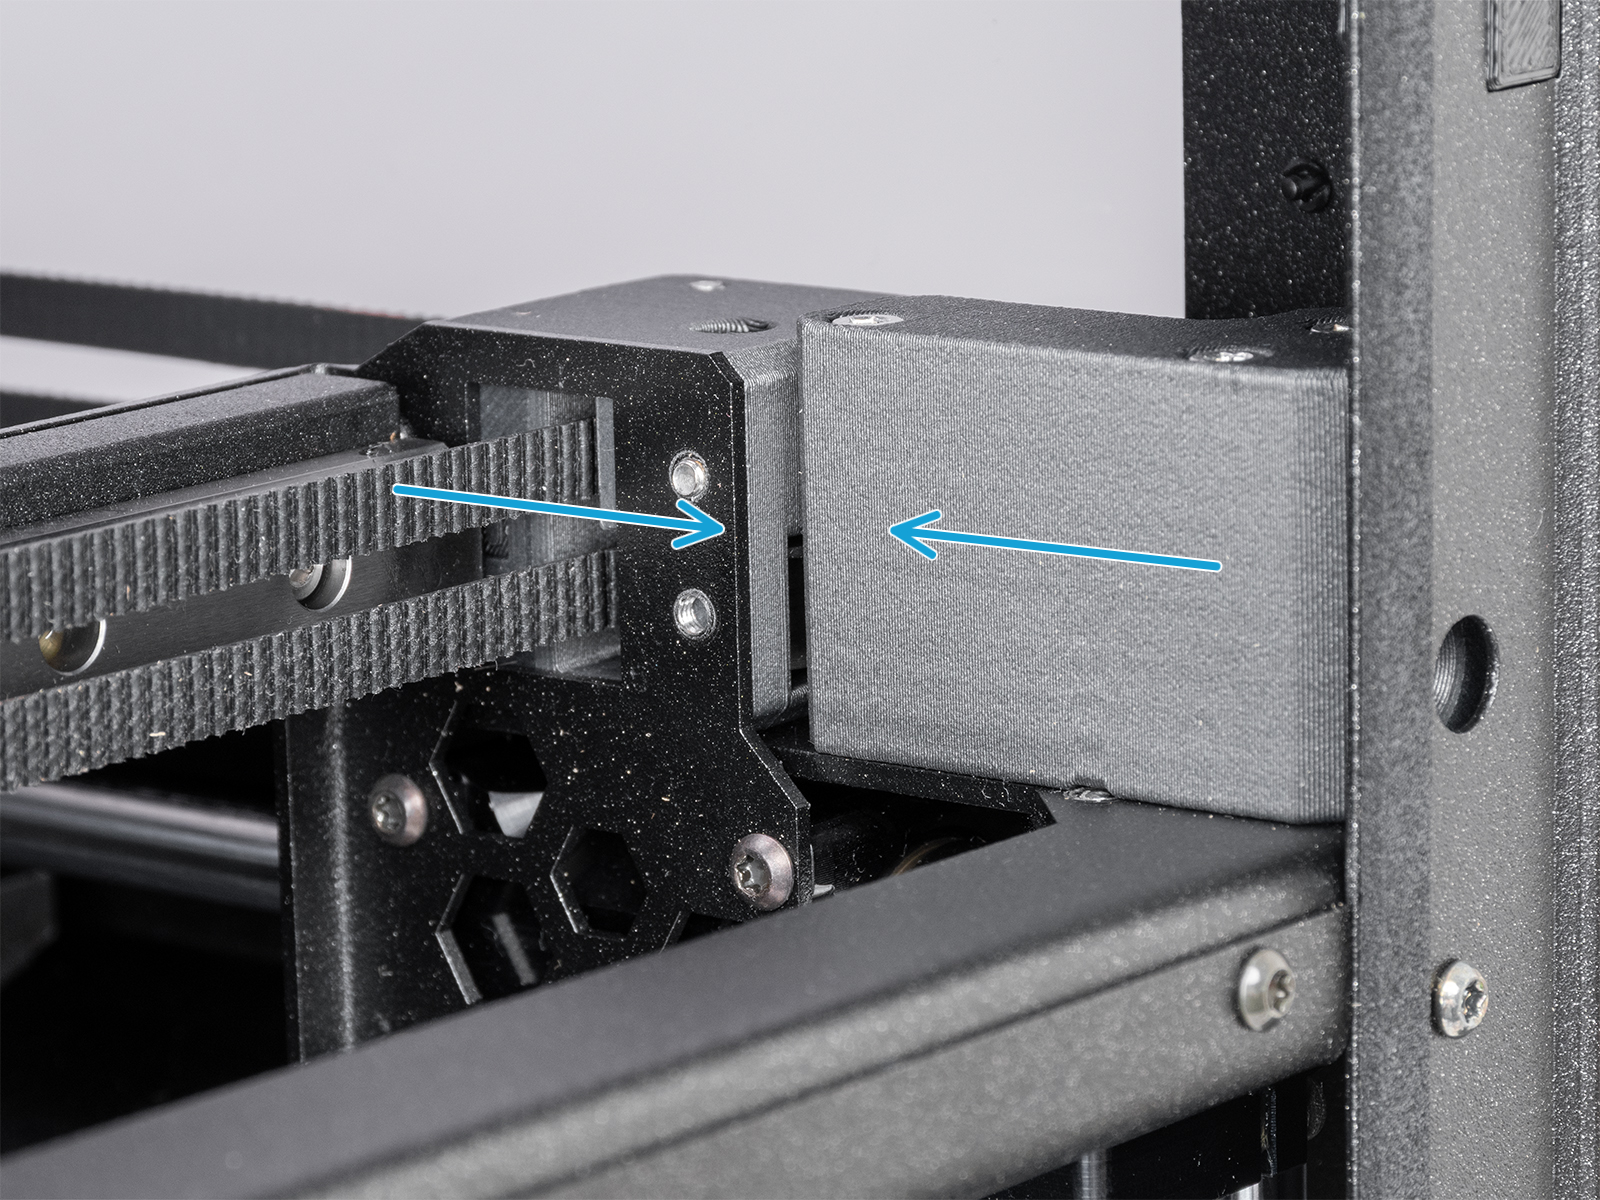
- ガントリーの角をCoreXYの前面に押し付け、ガタつきがないことを確認します。両側でこの手順を行います。どちらかの側にわずかな隙間や動きがある場合は、アライメントが正しく取れていません。

 クイックガントリーアライメント
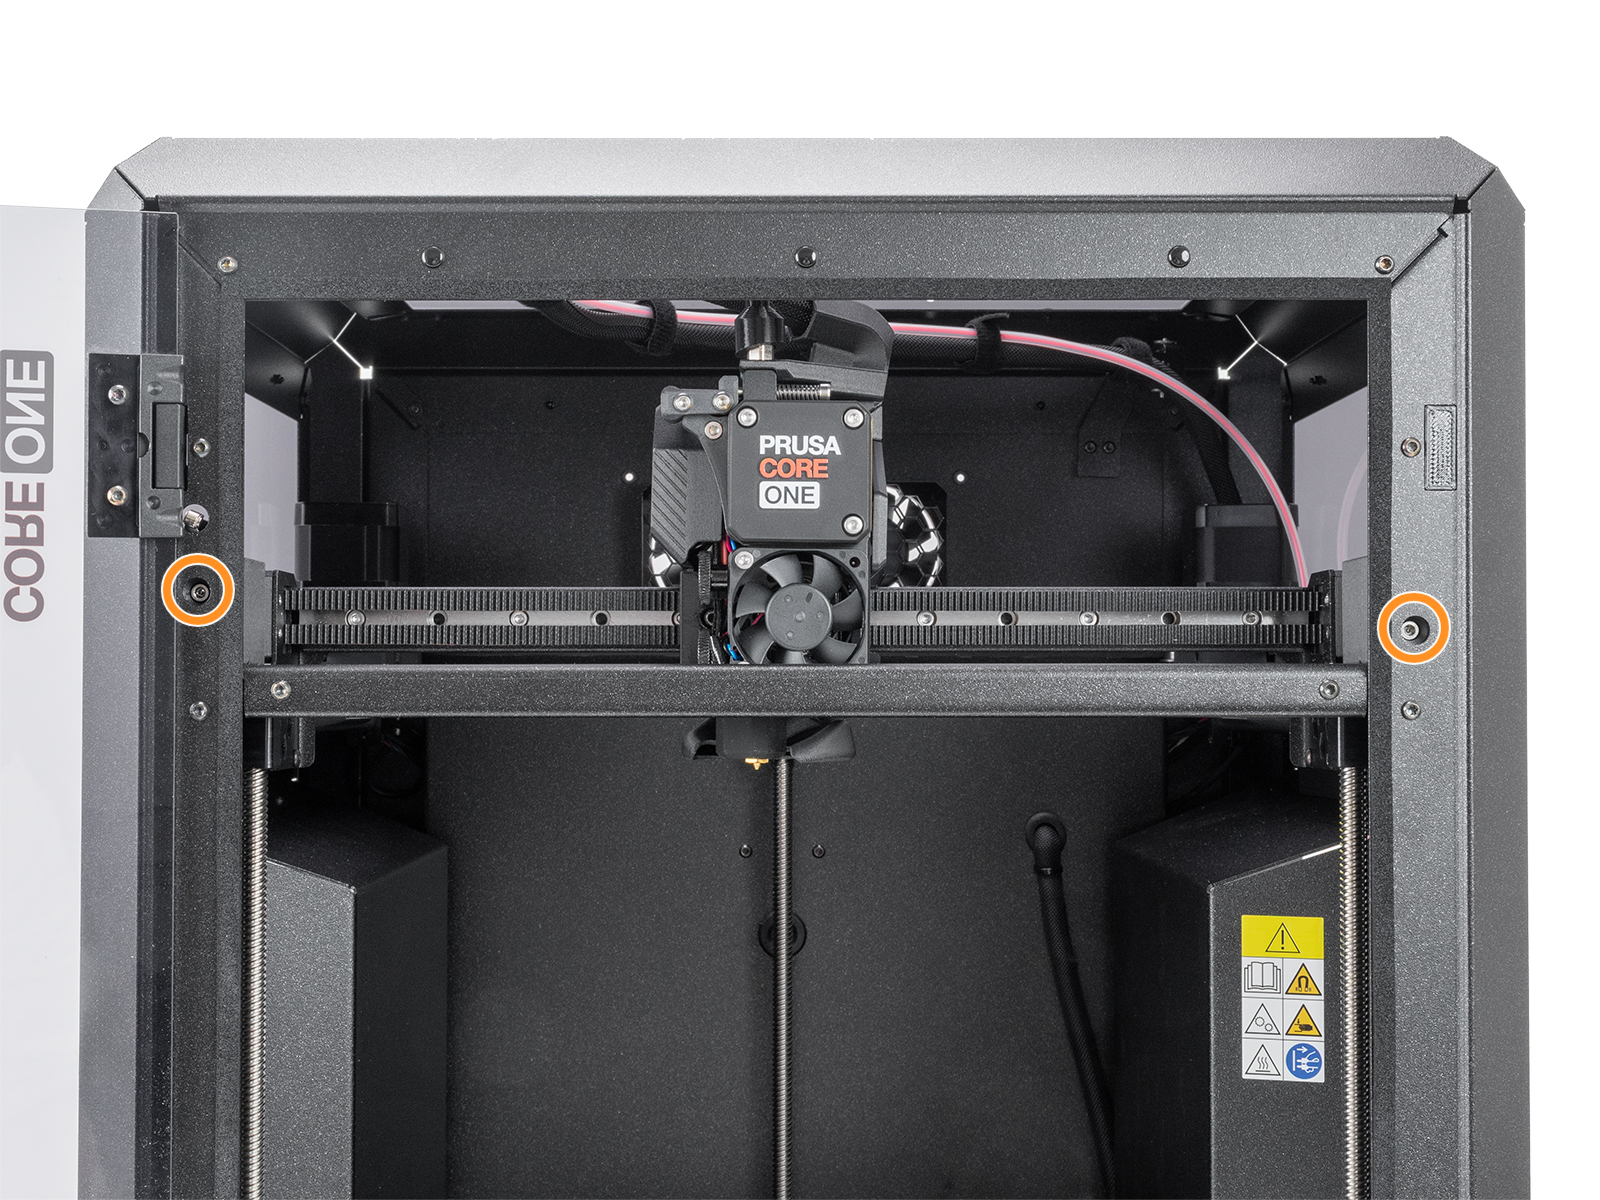
ガントリーの片側に隙間がある場合、手動で反対方向に軽く力を加えて修正できます:1. 両方のテンショナーボルトを完全に緩めます。これによりガントリーが自由に動けるようになります。
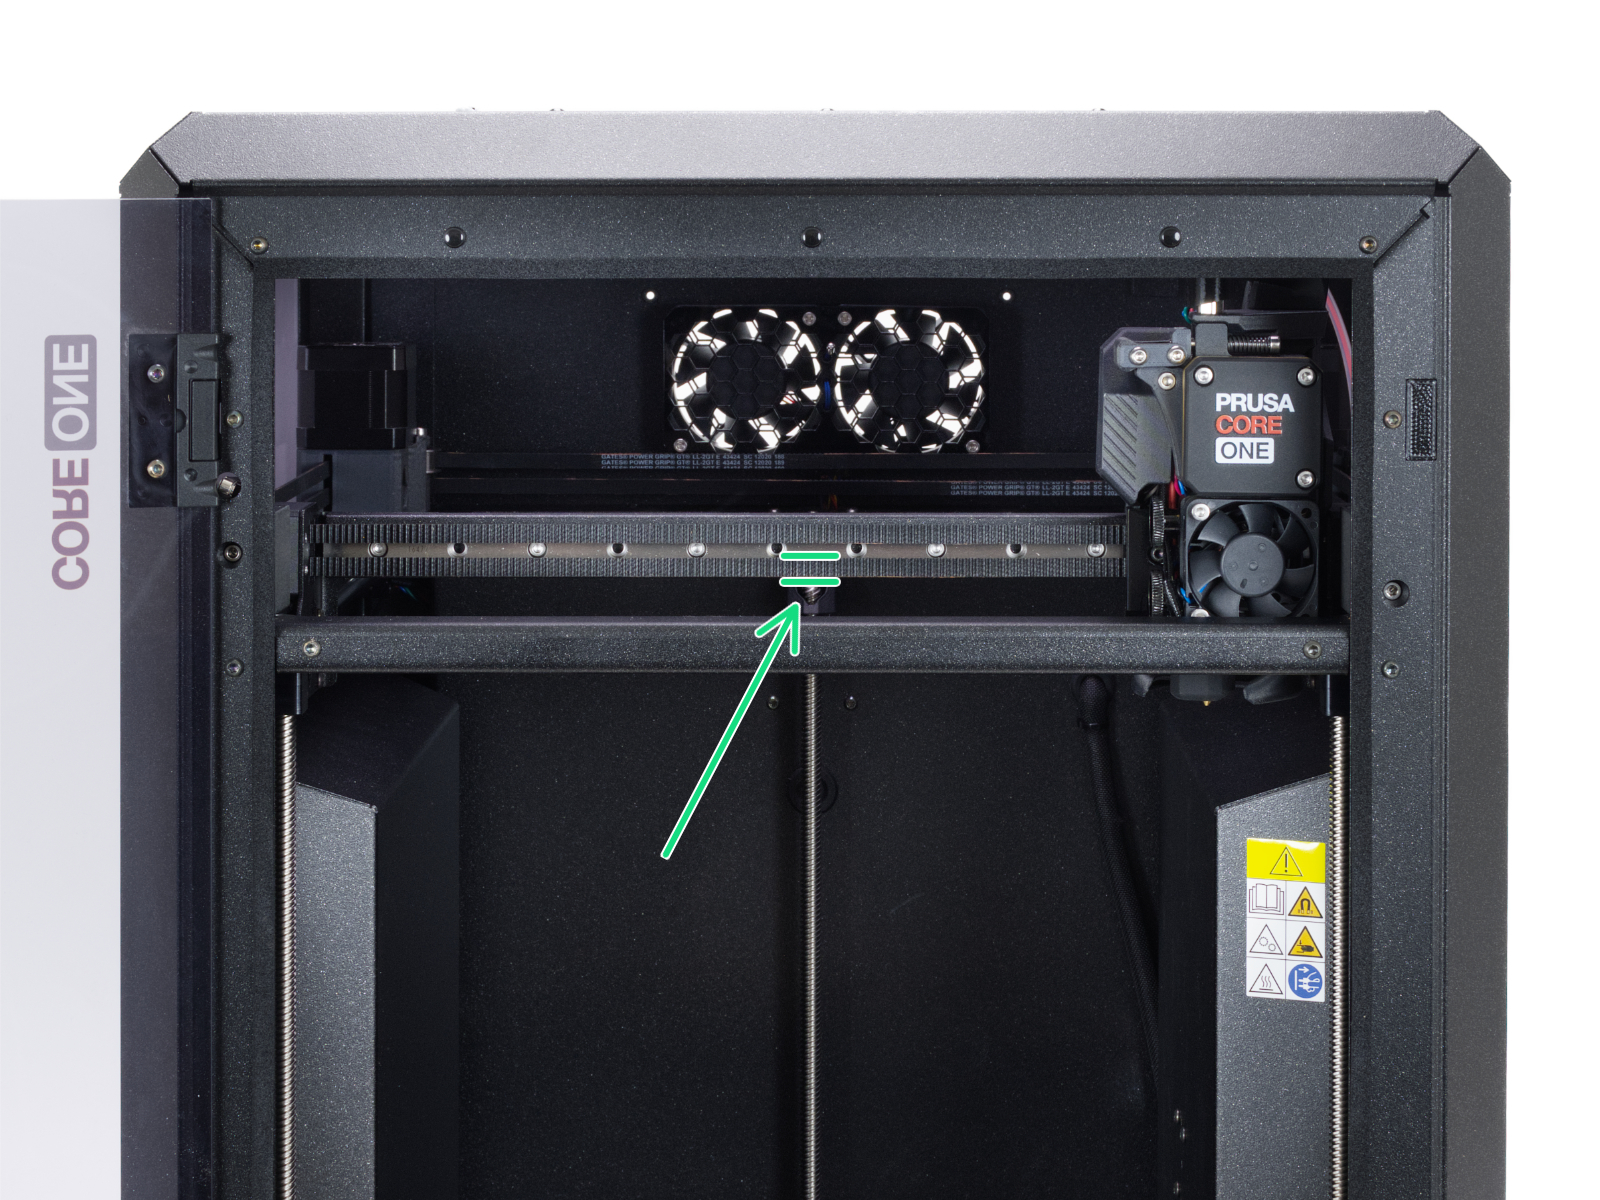
2. ガントリーをレールの中央付近まで後方へ移動します。
3. ガントリーの両端をしっかり握り、傾いている方向とは逆方向に軽く力を加えてまっすぐにします。
4. ベルトがまだ緩い状態で前方へ押してアライメントを確認します。緩いベルトは完全に前まで引っ張られないため、必要に応じて手でガイドします。前方位置で両側に隙間がないことを確認します。
5. 両方のテンショナーボルトを交互に均等に締め付け、ガントリーがまっすぐな状態を保つようにします。締め付けたあと、隙間が再び生じていないか確認します。注意: ベルトやベアリングを破損しないように、力を入れすぎないようにします。
- 両方のベルトテンショナーボルトを少し緩めます。ガタつきがある側のボルトを、もう一方より多めに緩めます。
- ステップ3と4を、ガタつきがなくなるまで繰り返します。この段階ではベルトが緩いままで問題ありません。ベルトのテンション調整は後のステップで行います。
ベルトチューニングウィザード
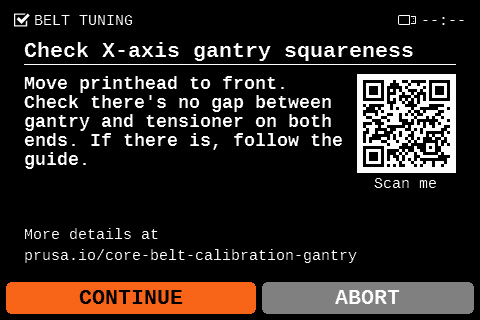
ファームウェア6.4.0以降では、プリンターのメニュー内にベルトチューニングウィザードが追加されています。LCDメニュー → Settings → Manual Belt Tuningからアクセスできます。このウィザードでは、ベルトの共振をストロボスコープを用いて可視化します。
ウィザードを開始すると、まずガントリーのアライメントを確認するように促されます。アライメントがずれていると計測の精度が低下するため、ずれがある場合は前述のアライメント手順を行ってください。
ウィザードでは、両方のベルトの振動周波数を測定し、締めるか緩めるかの推奨を表示します。画面の指示に従ってエンコーダーを回し、ベルトの振動を観察します。
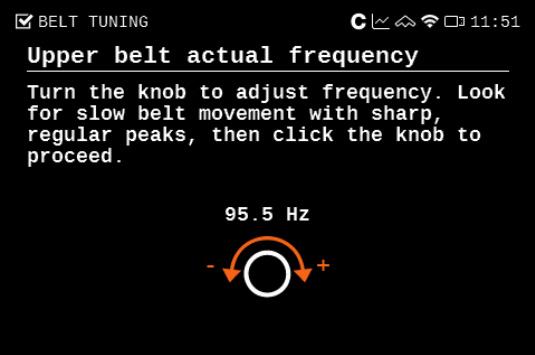
ベルトがゆっくりと長く安定して共振する動きを見つけ、その時点の周波数を選択します。
| 上側ベルトの共振 | 下側ベルトの共振 |
理想的な周波数は、上側ベルトが96Hz、下側ベルトが92Hzです。共振テスト完了後、ウィザード画面に測定結果と推奨調整値が表示されます。
重要: 2本のテンショナーボルトは、常に交互かつ均等に締めます。これにより、ガントリーの直角が保たれます。
ベルトチューナー
Prusa専用のベルトチューナーは、ベルトチューナーのウェブページから利用できます。また、Prusaアプリ内のメニュー → Belt Tunerからもアクセス可能です。
ベルトチューナーは、お使いのデバイスのマイクを使用し、ベルトを弾いたときに発生する振動音の周波数を計測してテンションを判定します。
CORE Oneを選択し、次にXY-beltを選びます。画面の指示に従って操作してください。計測の準備ができたら、Start listening(リスニング開始)をタップし、マイクを使用してベルトの振動周波数を測定します。
ベルトの調整
最適なベルト周波数は、上側ベルトが96Hz、下側ベルトが92Hzです。
もしガントリーのアライメントがずれている場合、これらの数値を正確に再現できないことがあります。下側ベルトの方がわずかに高い周波数を示す場合もありますが、2本のベルトの差が8Hz以内であり、かつ両方の値が90〜98Hzの範囲内であれば問題ありません。
この範囲に調整できない場合は、ベルトテンションを調整する前に手動でガントリーを直角に戻す必要があります。「クイックガントリーアライメント」またはページ下部の「ガントリーとベルトの大幅な調整」の手順を参照してください。
重要: テンショナーボルトは両方を交互かつ均等に締めます。これにより、ガントリーの直角が維持されます。
小さな調整
- ステッピングモーターが無効になっていることを確認します。プリンターの電源をオフにするか、LCDメニュー → Control → Disable Motorsから実行できます。
- 手動でNextruderをY軸の最前位置、およびX軸の右端に移動します。
- ガントリー前面の上側ベルトの中央を指で弾きます。このとき、デバイスをベルトの近くに置き、Hz単位の音の周波数を測定します。上側ベルトの理想周波数は96Hzです。

- 続いて、下側ベルトの中央を弾き、同様に測定します。下側ベルトの理想周波数は92Hzです。
- ベルトテンショナーボルトを同じ量だけ締めたり緩めたりして調整します。ボルトを締めると周波数が高くなり、緩めると低くなります。
 |  |
ガントリーとベルトの大幅な調整
ベルトテンショナーの調整でほとんどの問題は解決しますが、ガントリーのアライメントが大きくずれている場合や、ベルトがホルダーから外れてしまった場合は、以下の手順でベルト部分にアクセスします。
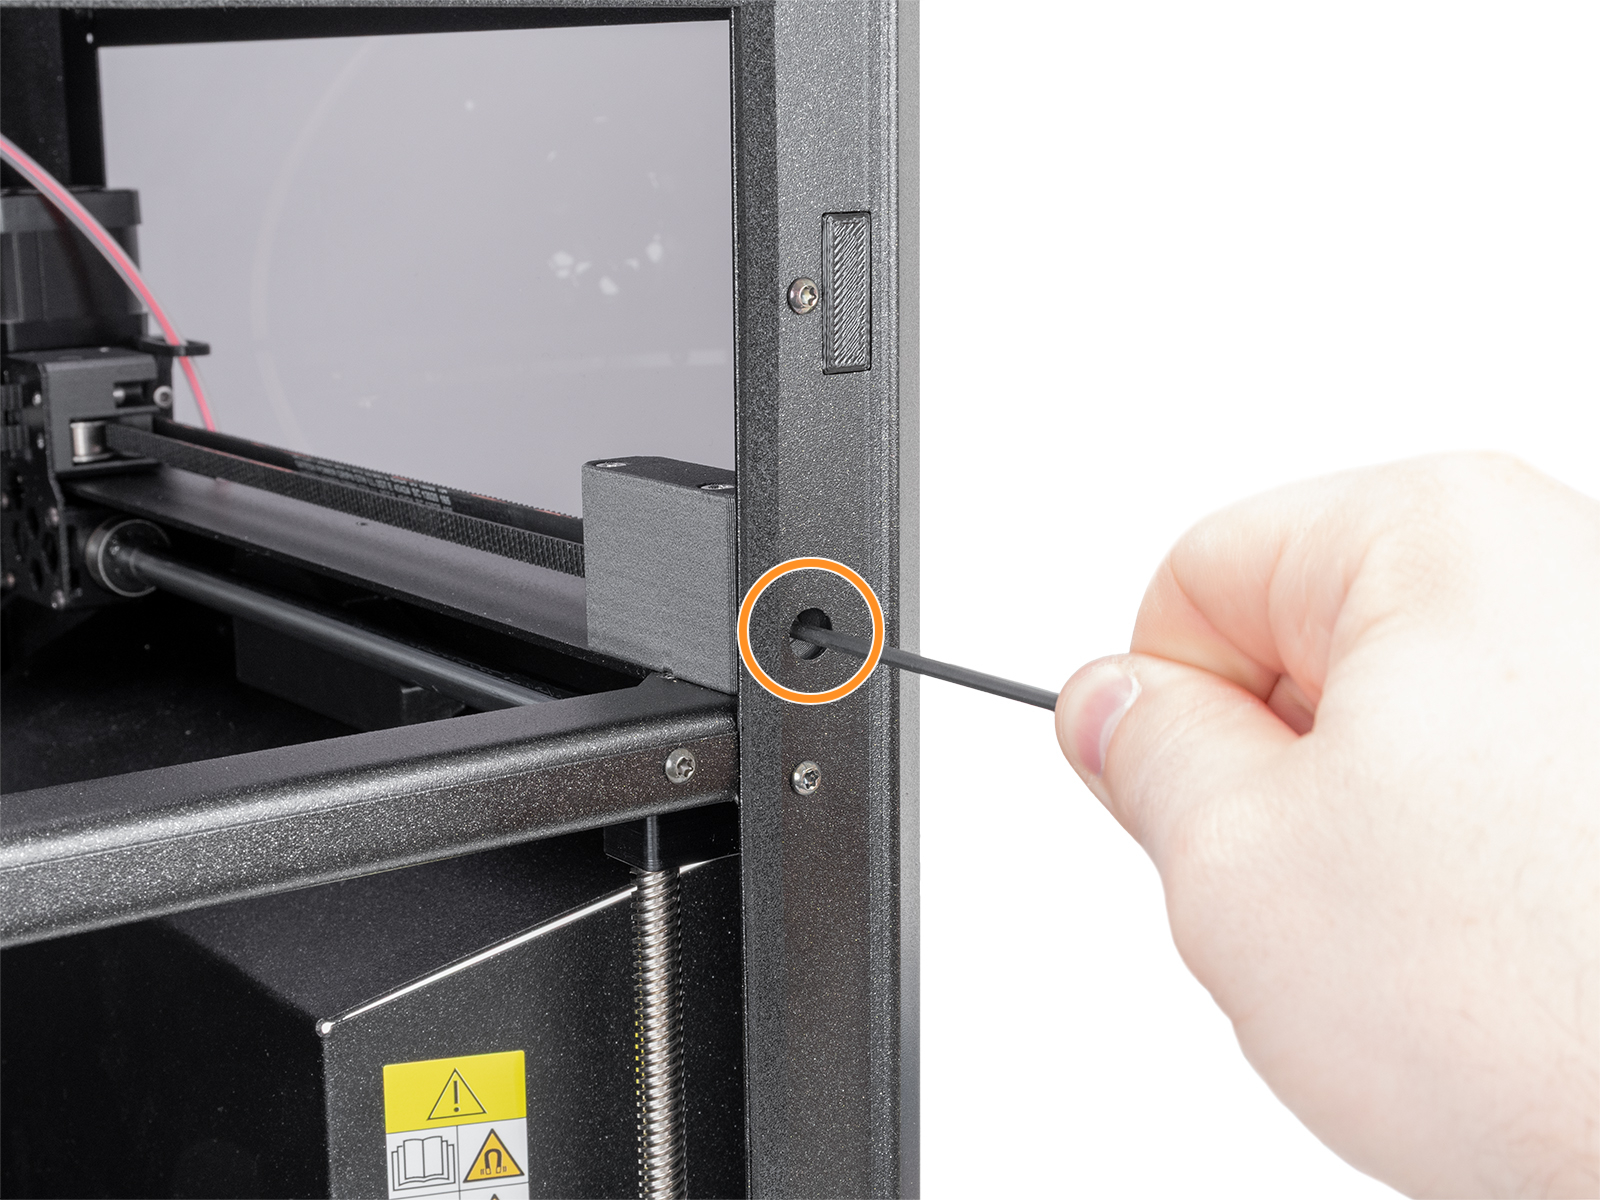
- Nextruderを手動で前方中央に移動し、両側からアクセスできるようにします。
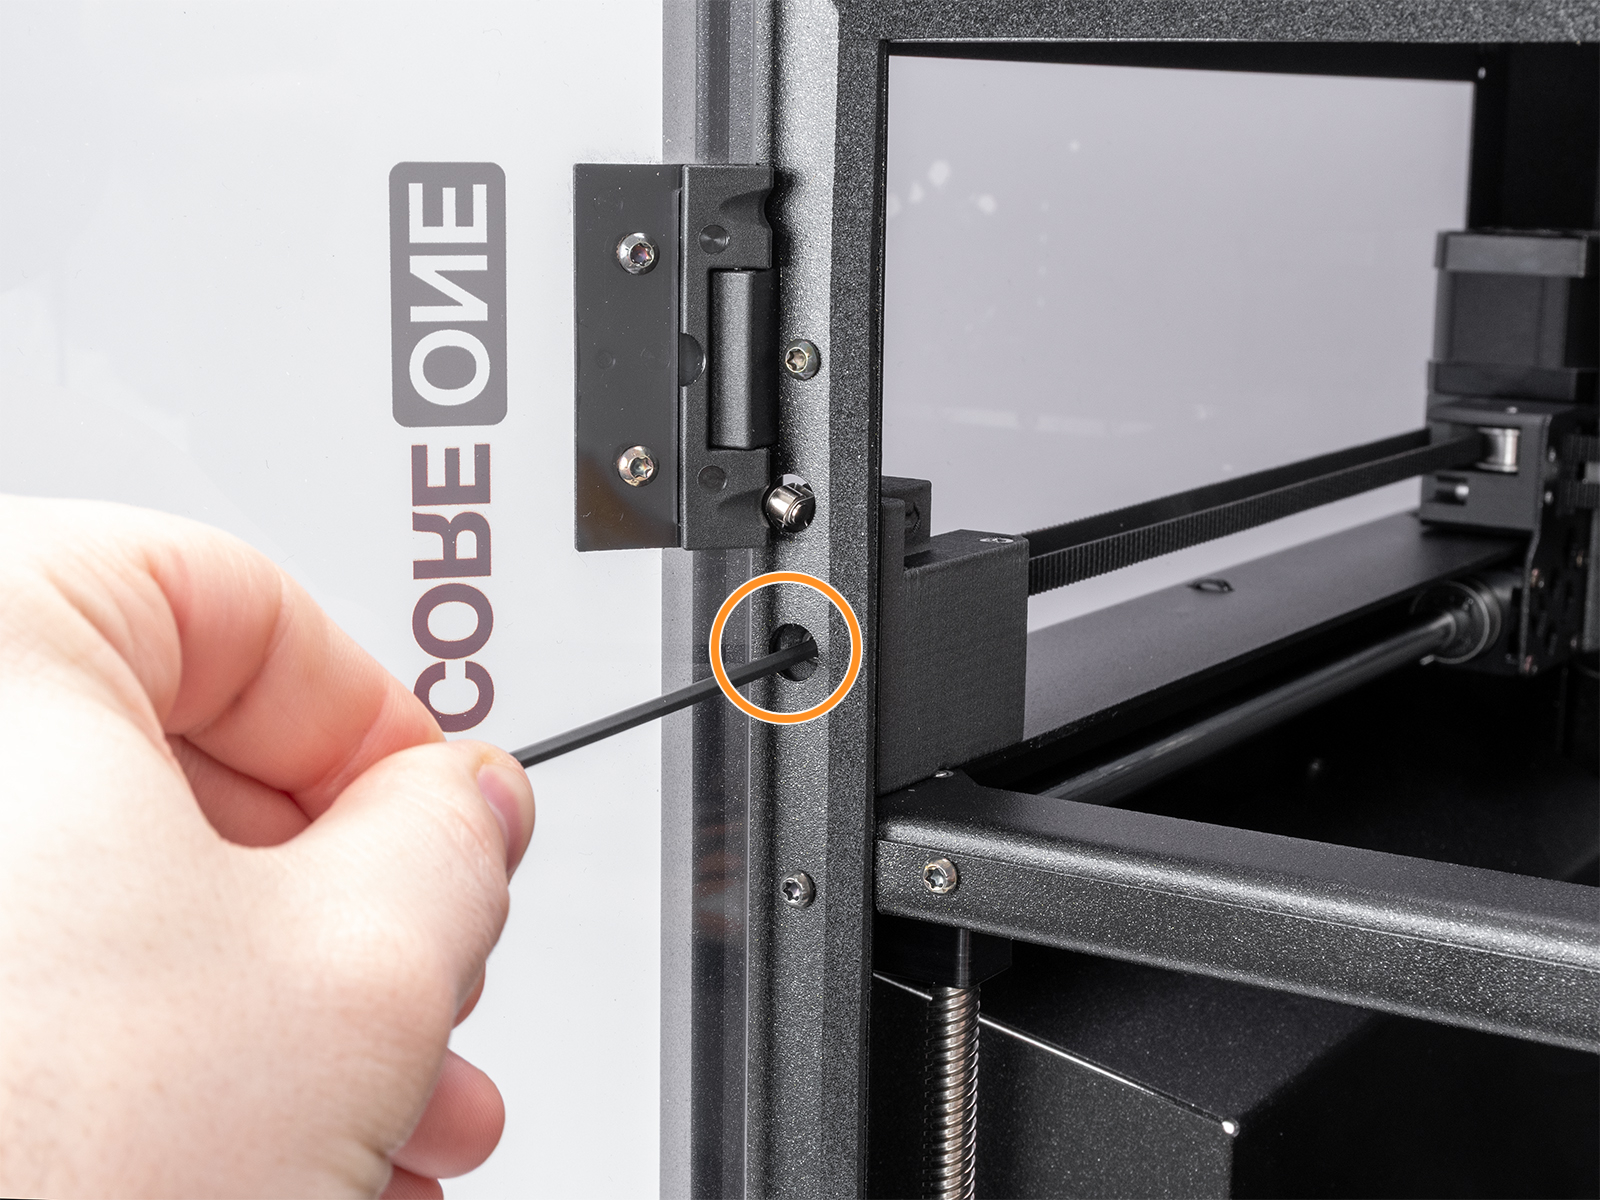
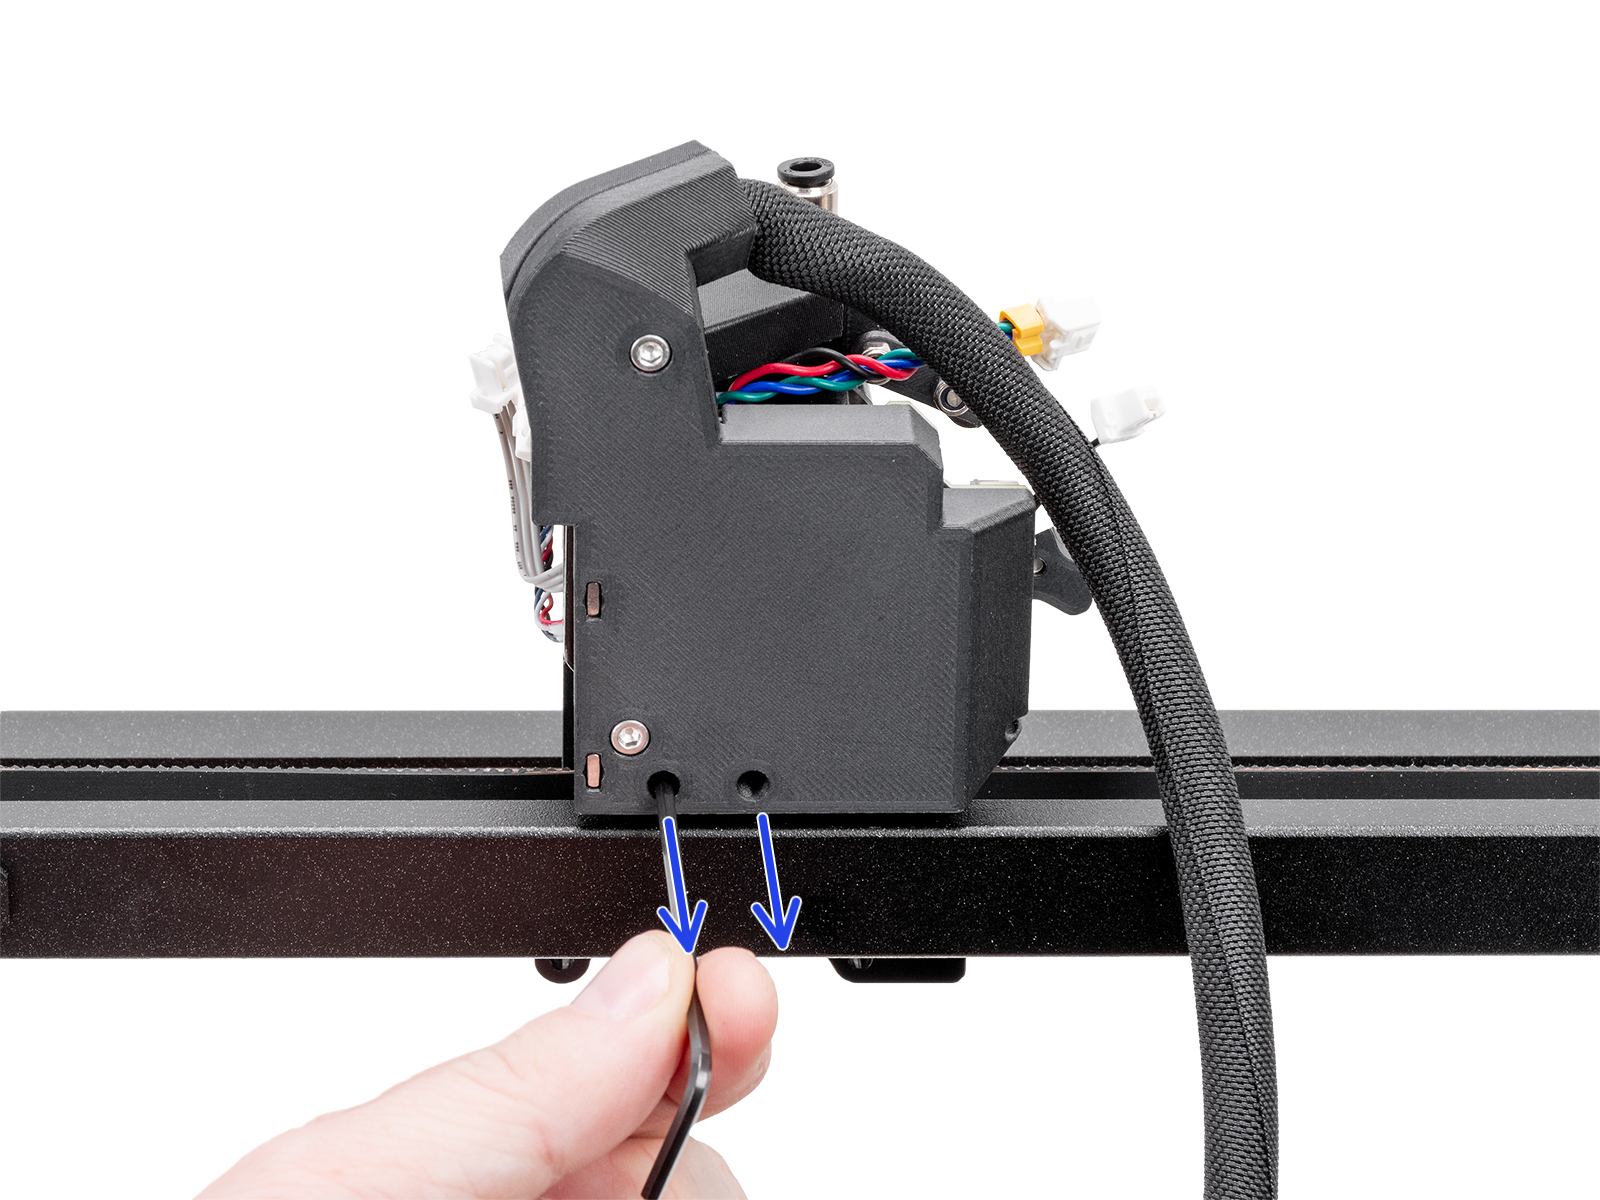
- 下の図に示すM3x10ネジを外して、左側と右側のプリントヘッドカバーを取り外します。
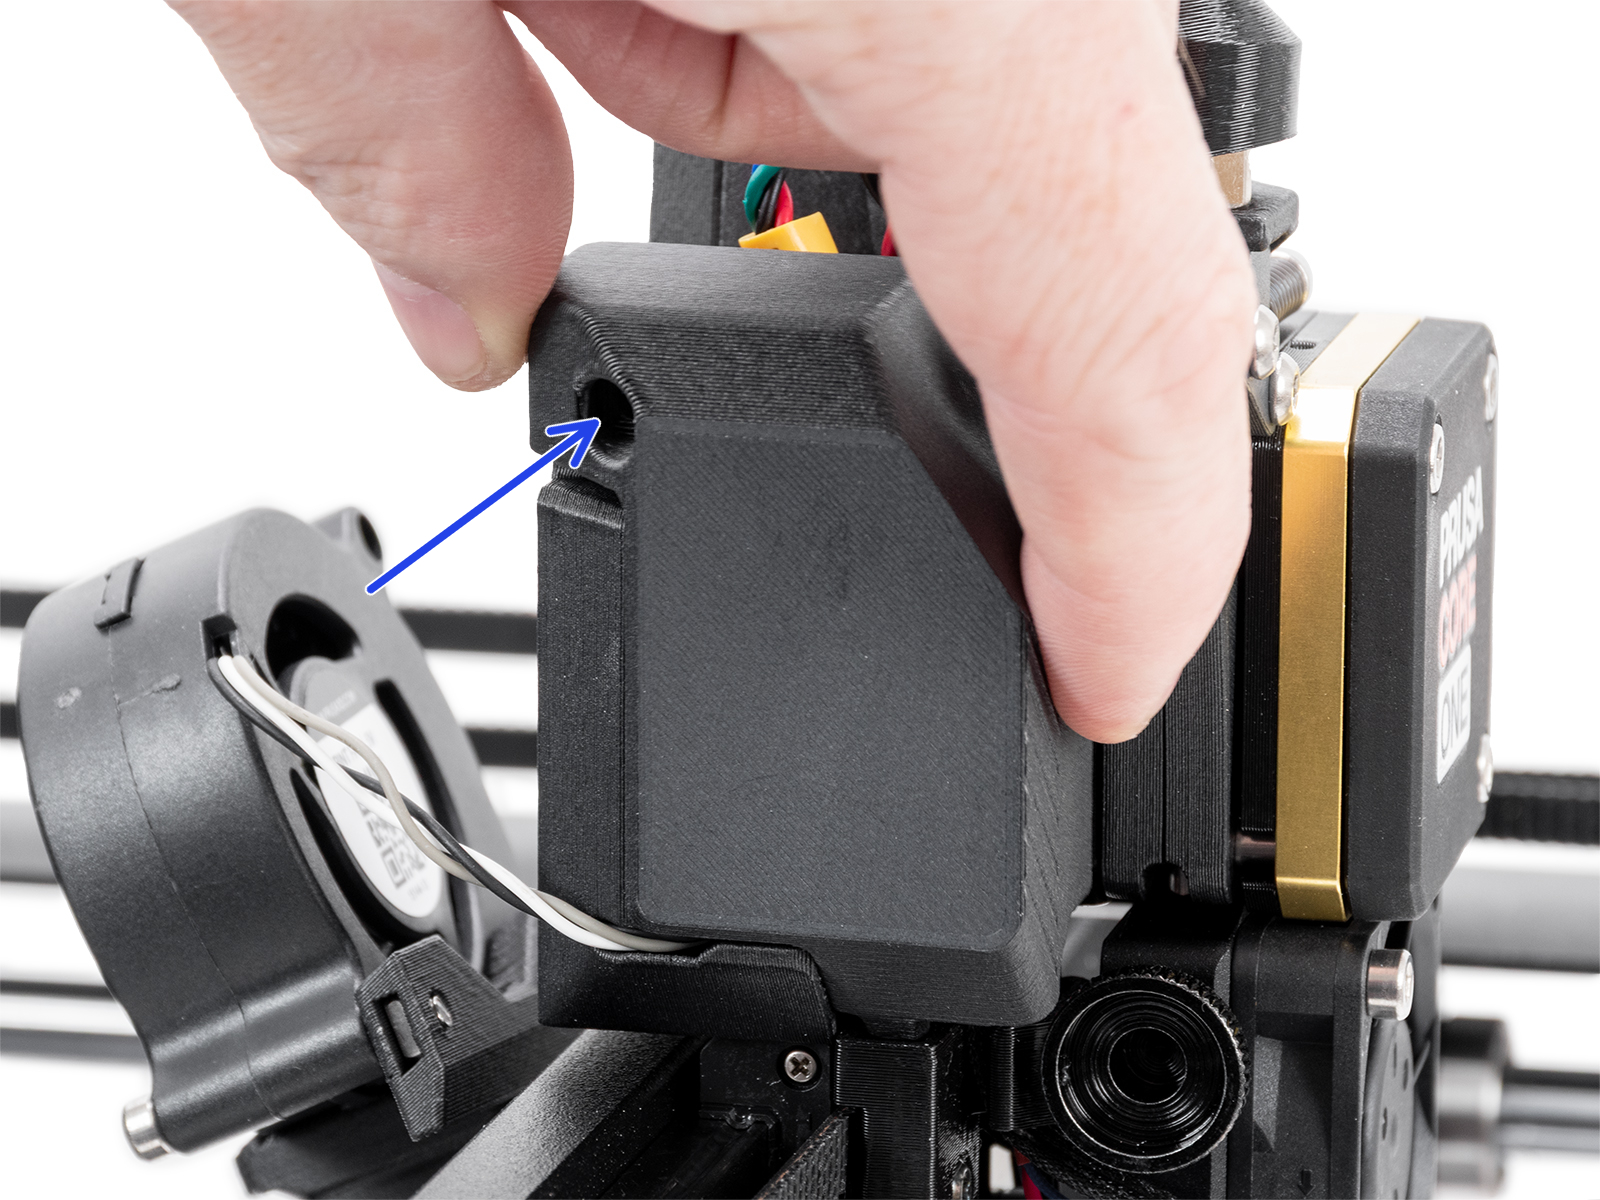 |  |
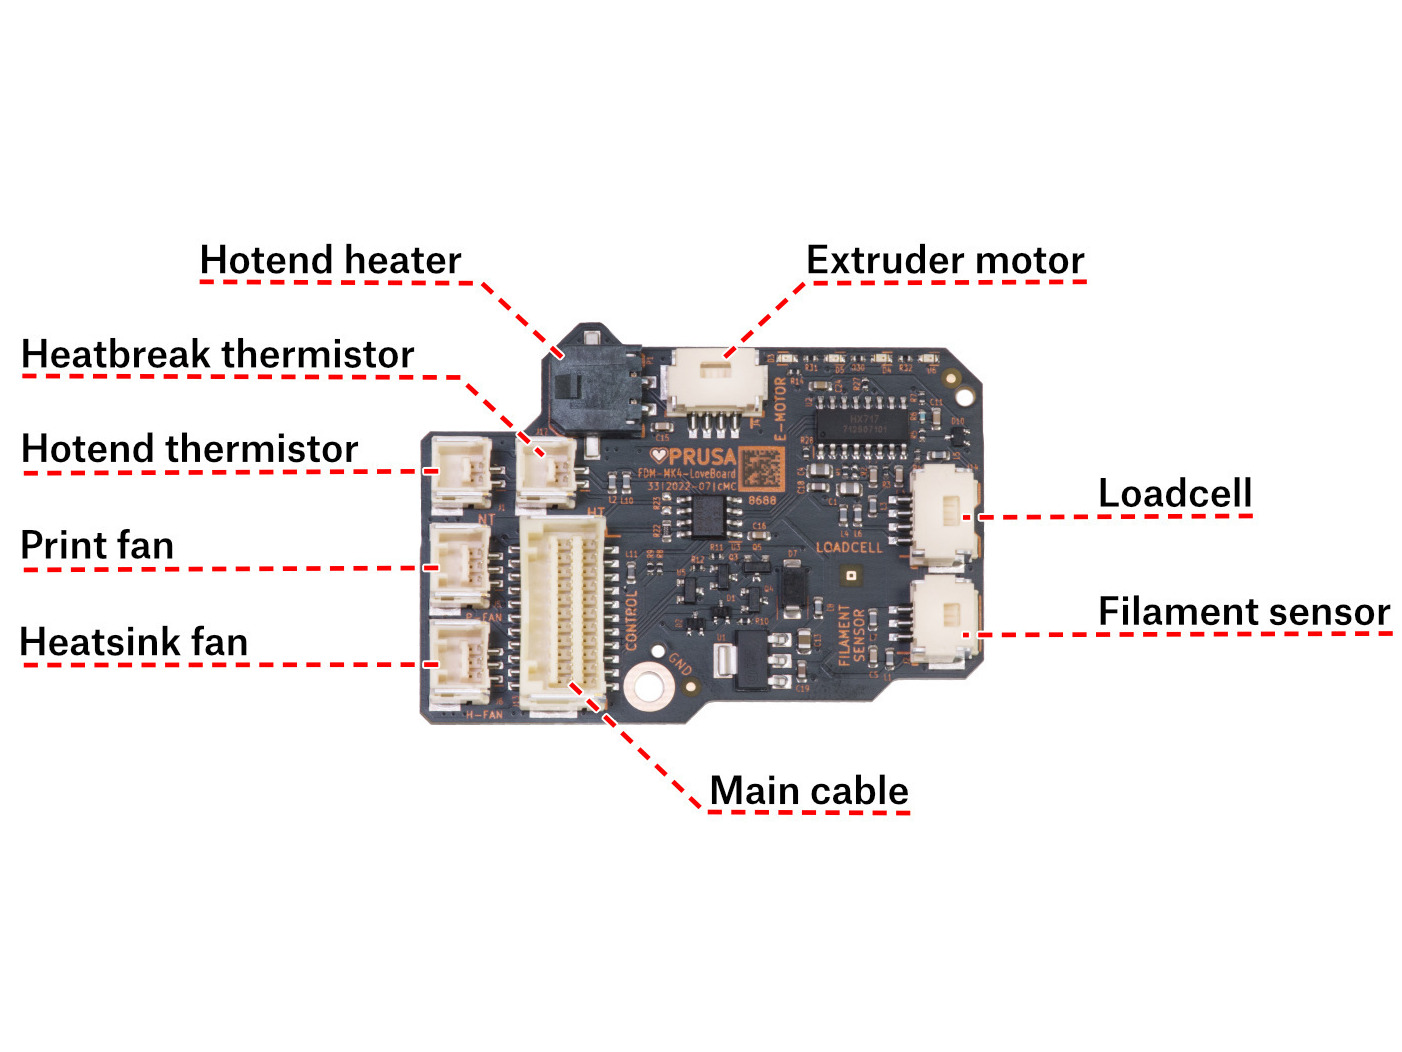
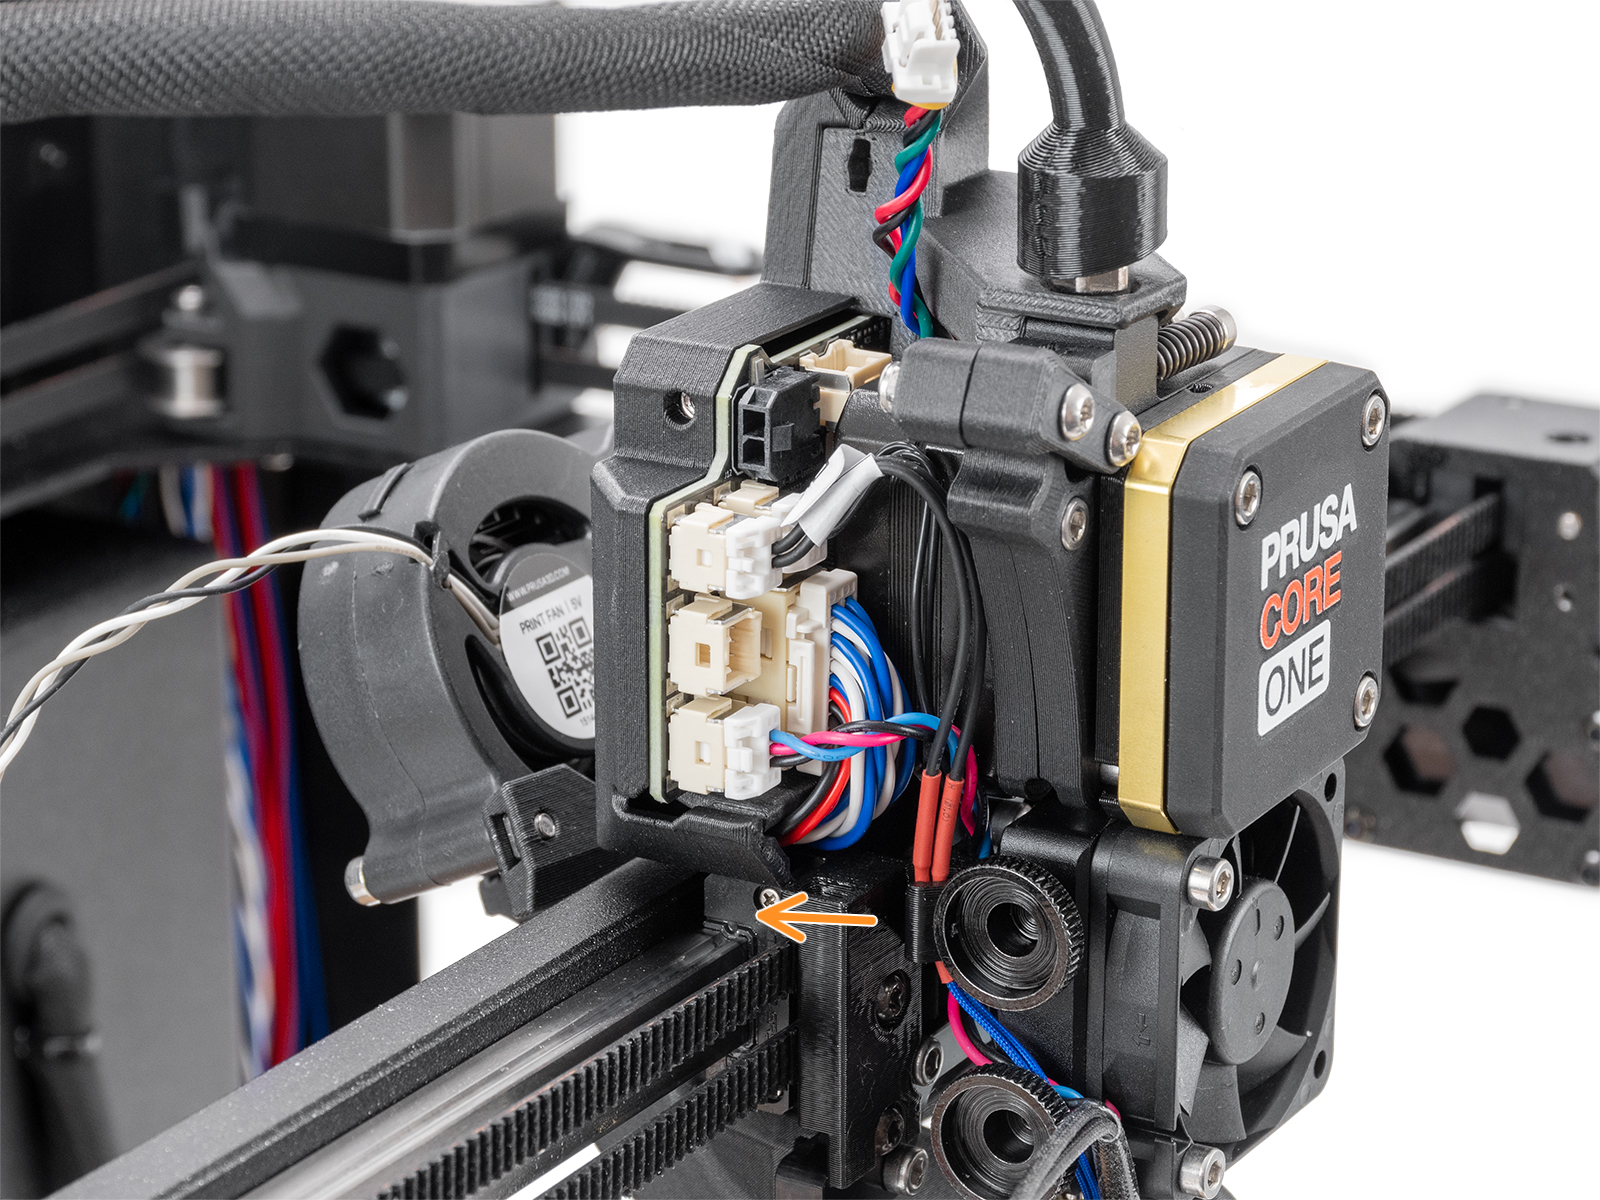
- LoveBoardからメインケーブルを除くすべてのコネクタを外します。
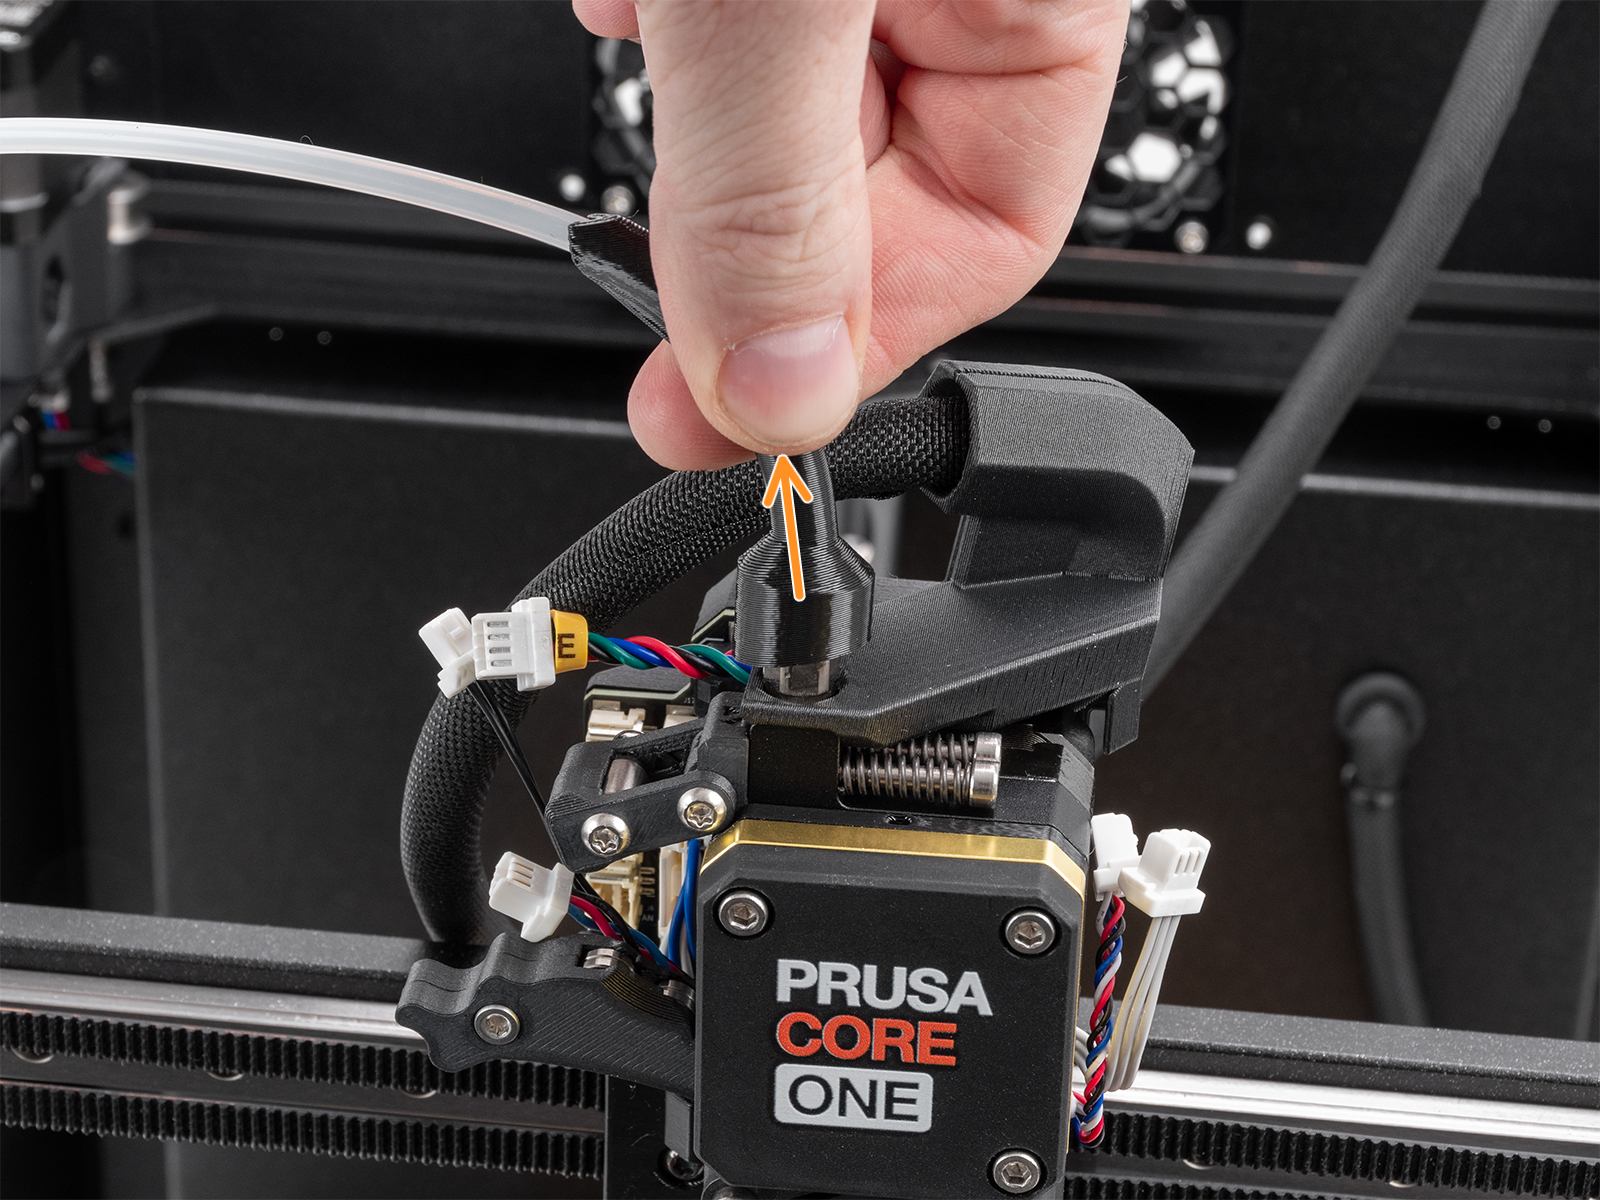
- ボーデンチューブの曲がり部分をエクストルーダー上部のフィッティングから外し、フィッティングを取り外します。その後、LoveBoardアセンブリを固定しているM3x10ネジを外します。
 |  |
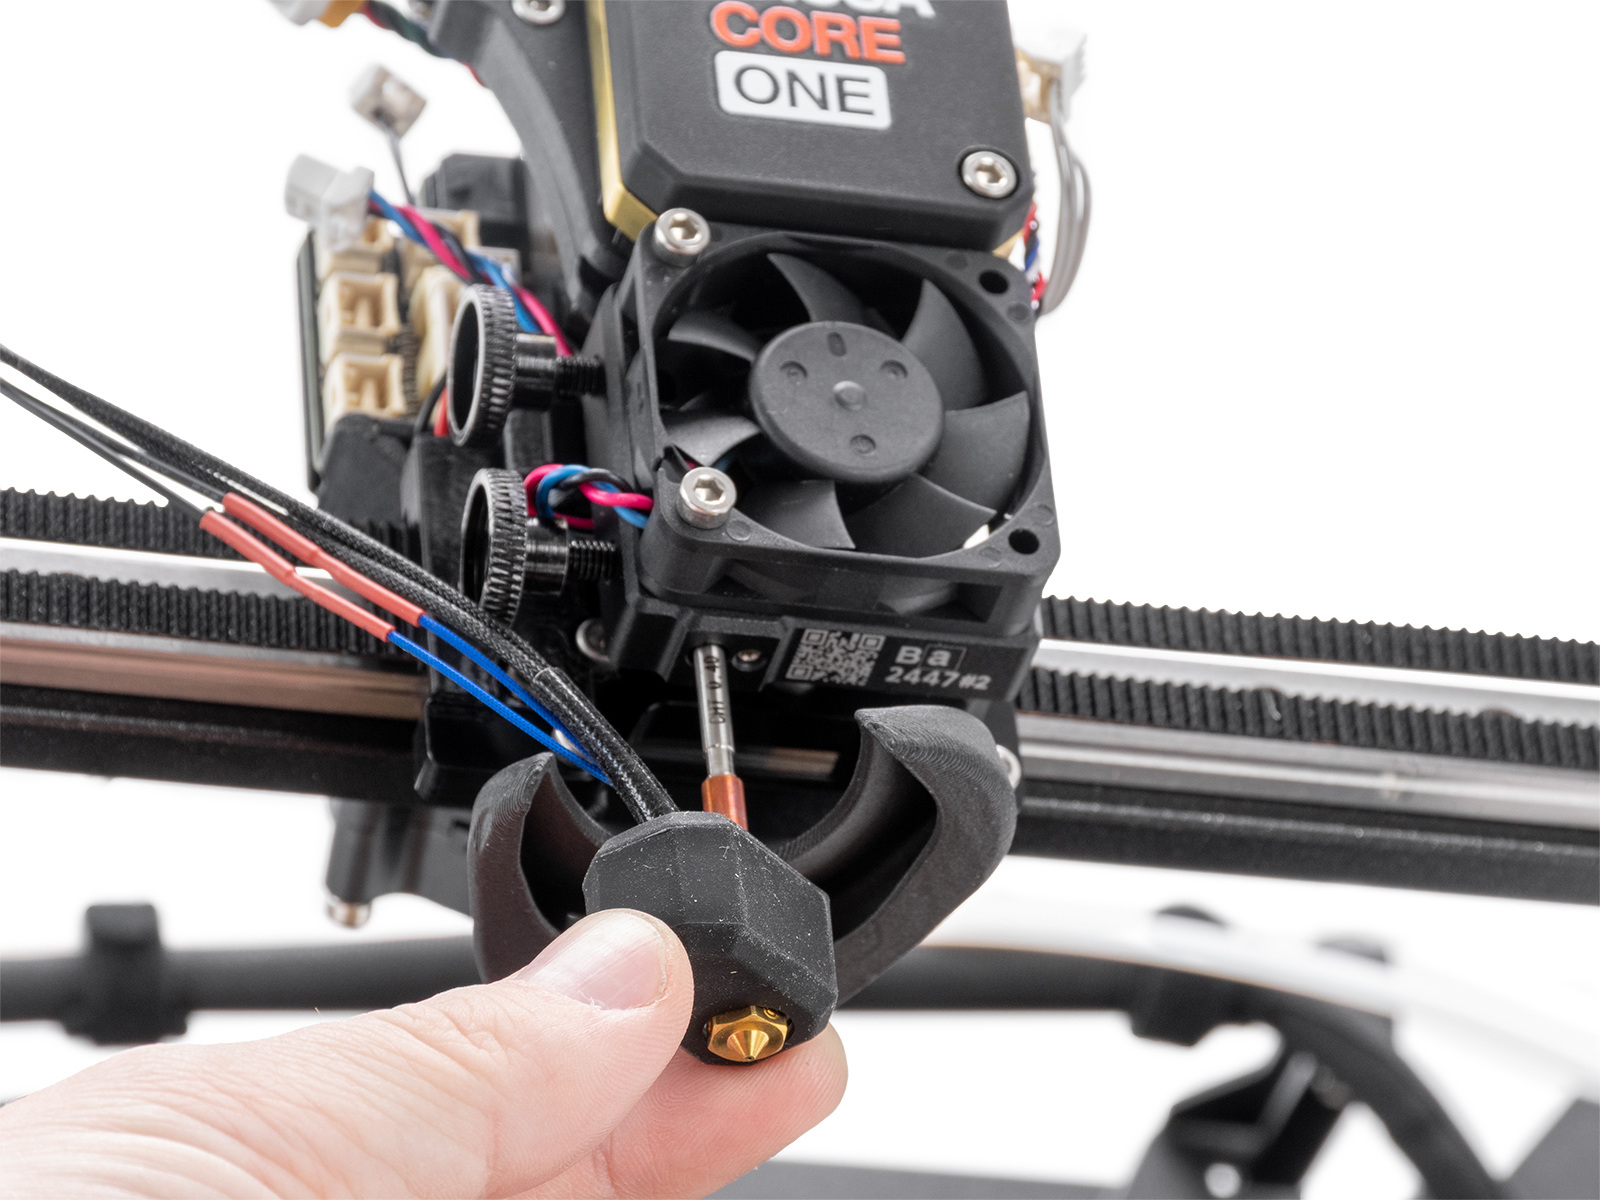
- ホットエンドのサーミスタとヒーターケーブルをケーブルクリップから外します。親指ネジを緩め、ケーブルに注意しながらホットエンドを取り外します。
 |  |
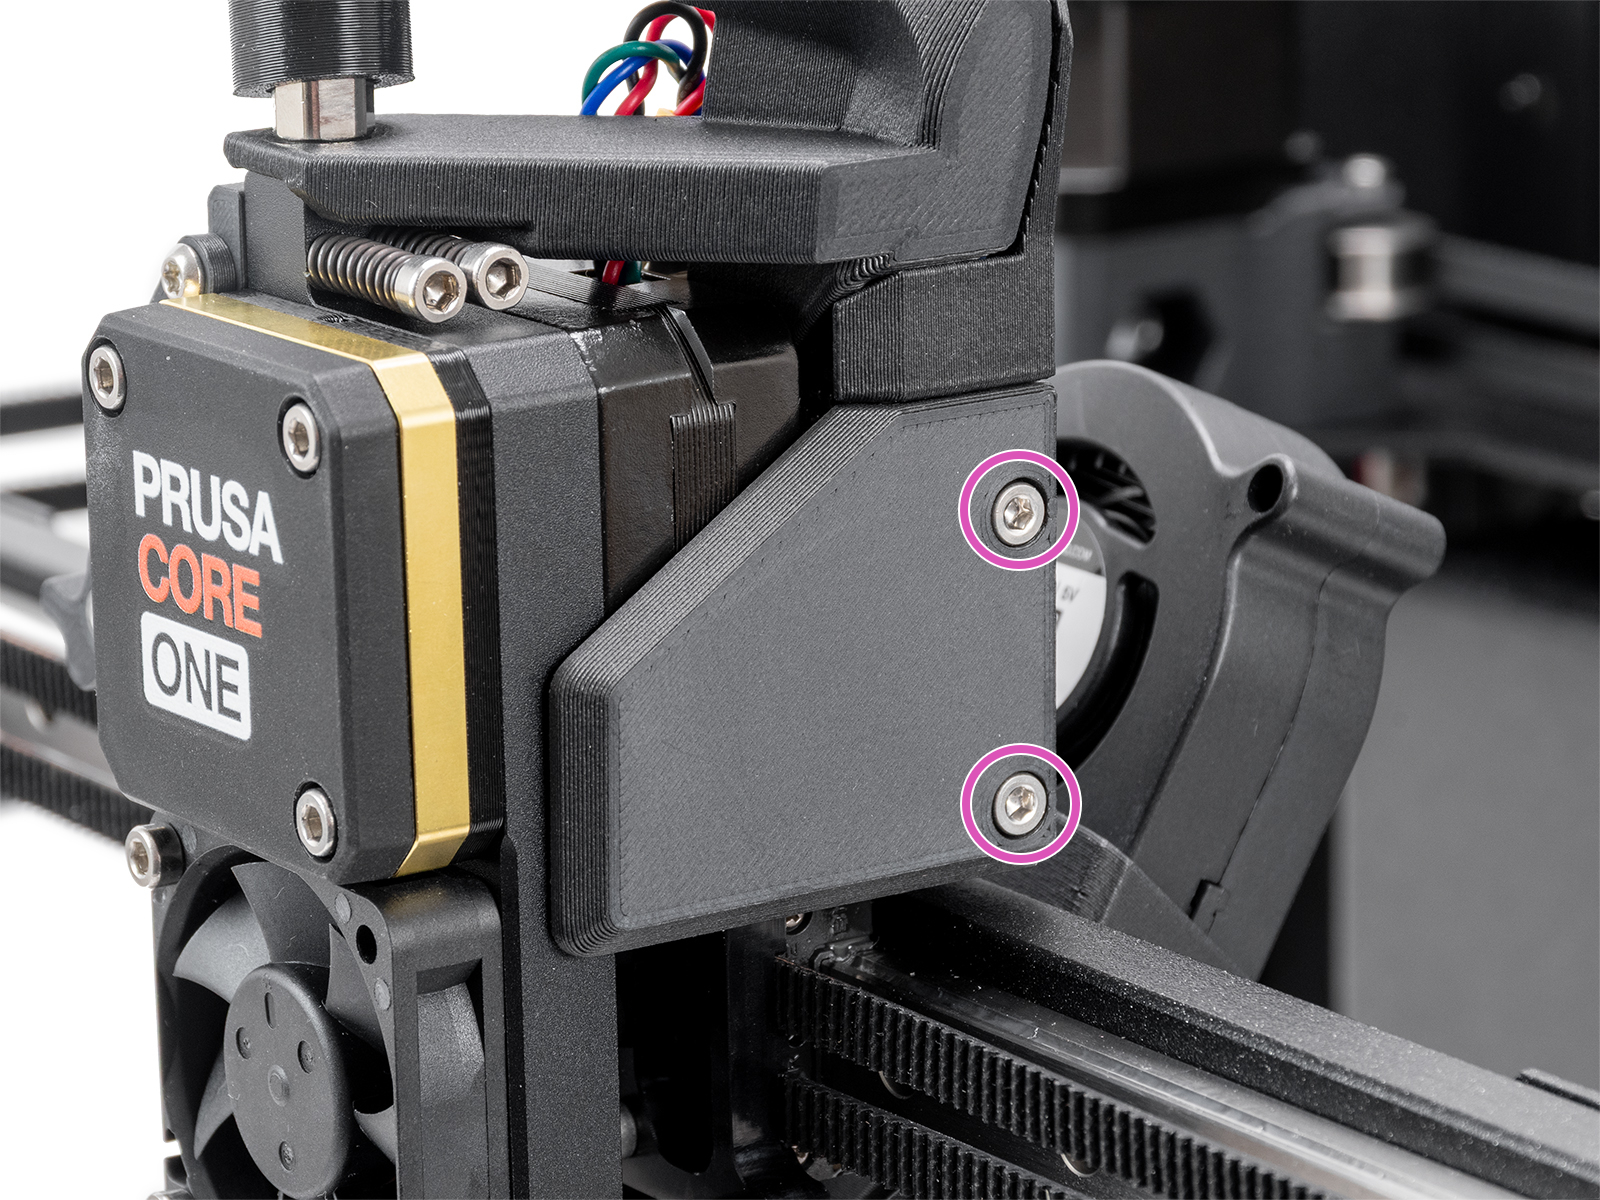
- ホットエンドケーブルクリップの2本のM3x4rTネジを外し、ヒートシンクファンとヒートシンクサーミスタのケーブルを取り外します。
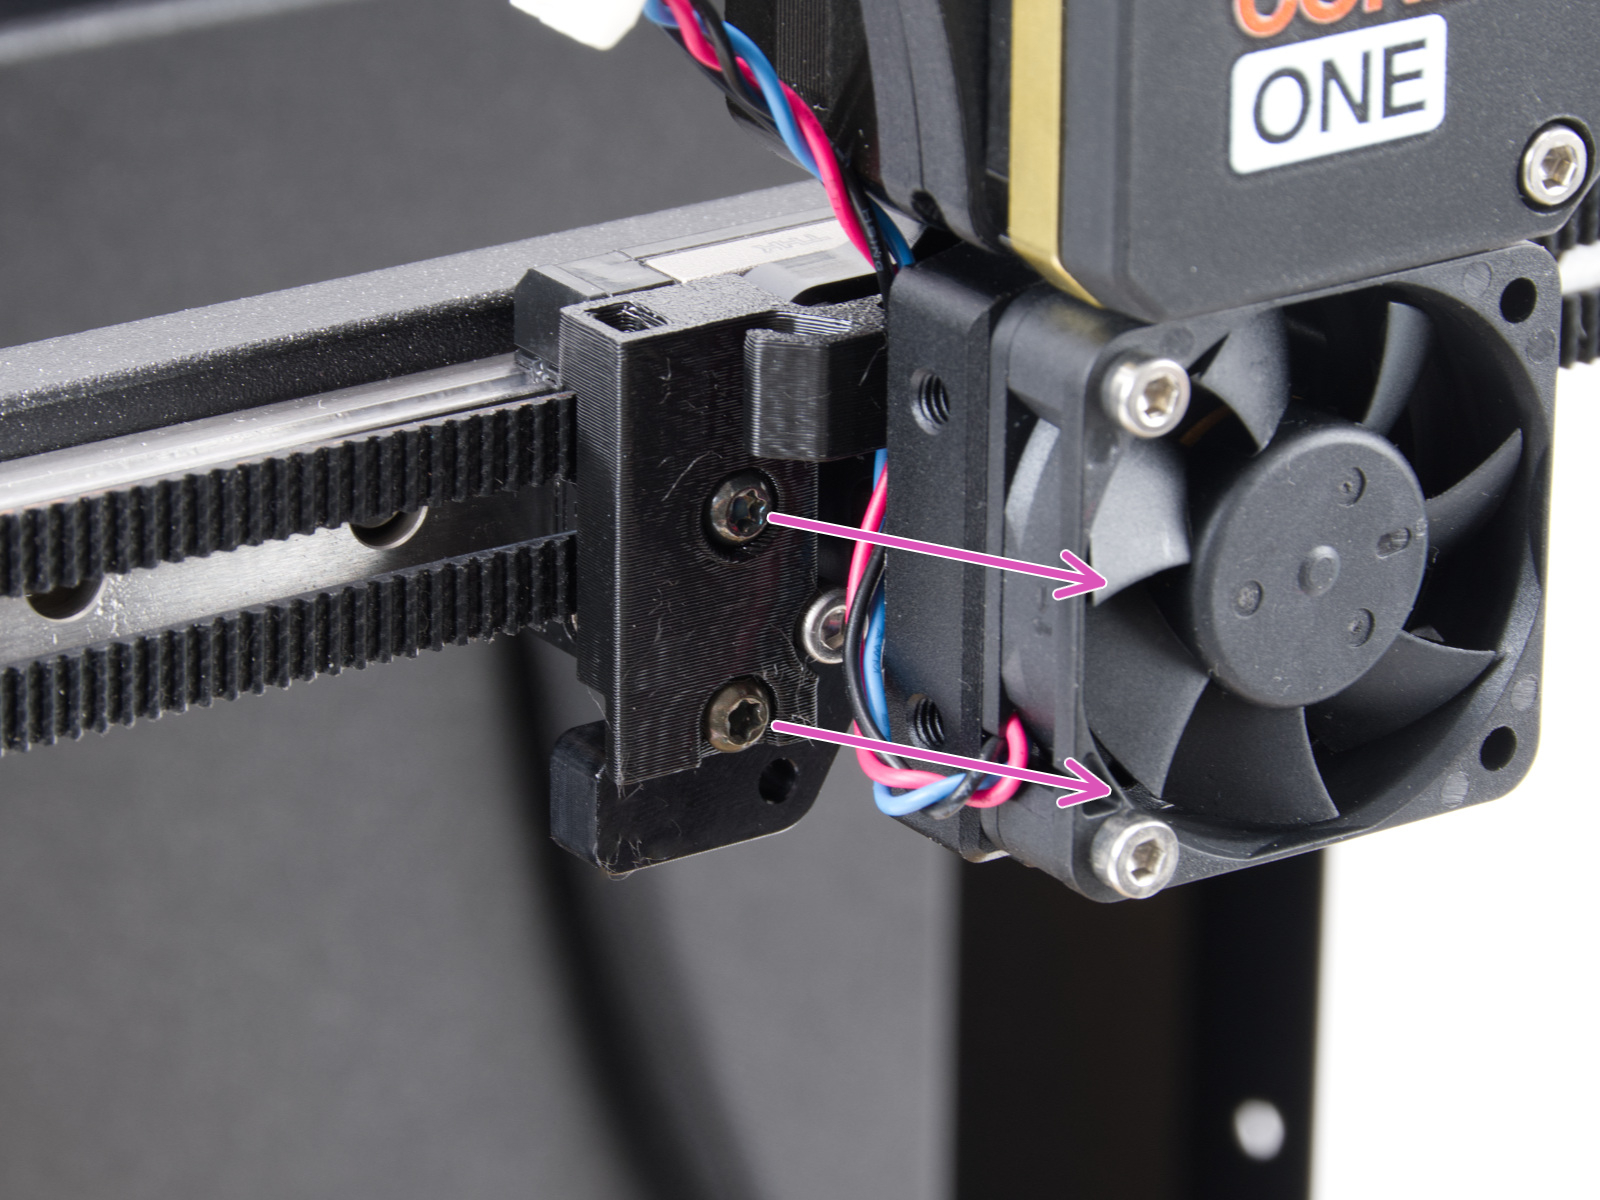 | 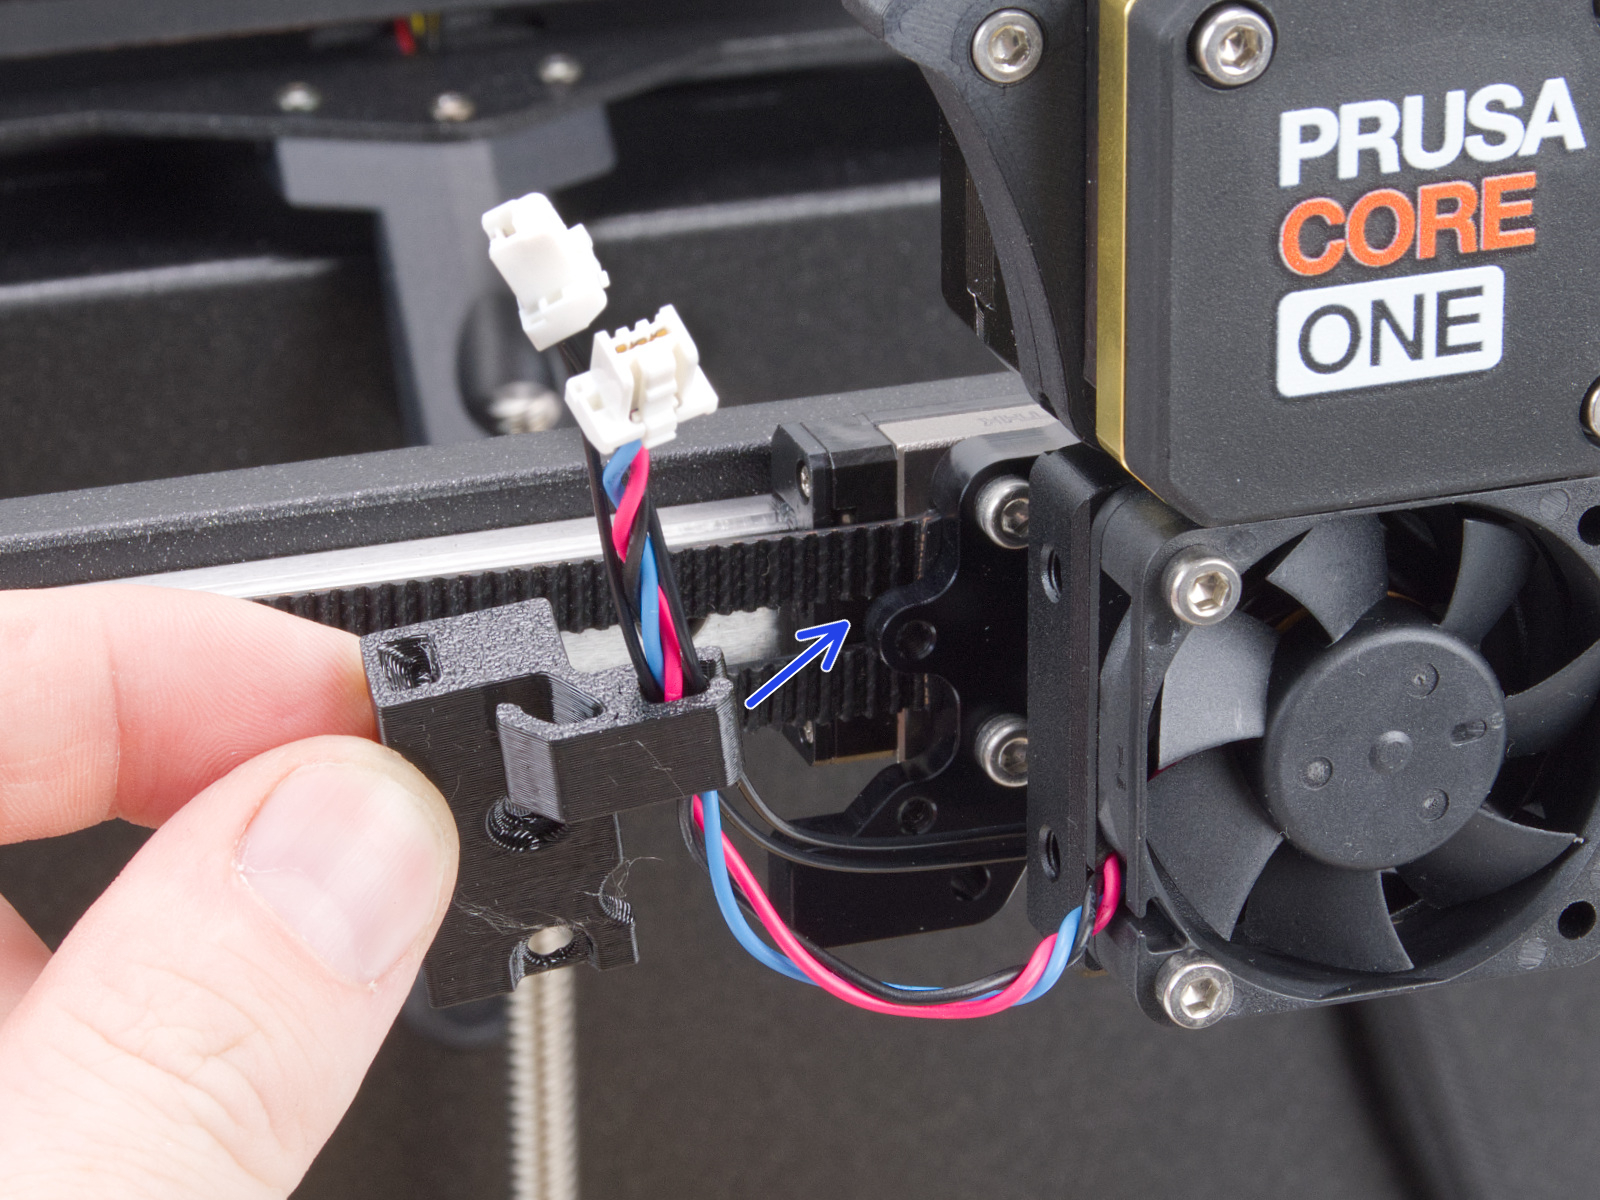 |
- M3x18ネジを外してヒートシンクファンを取り外します。
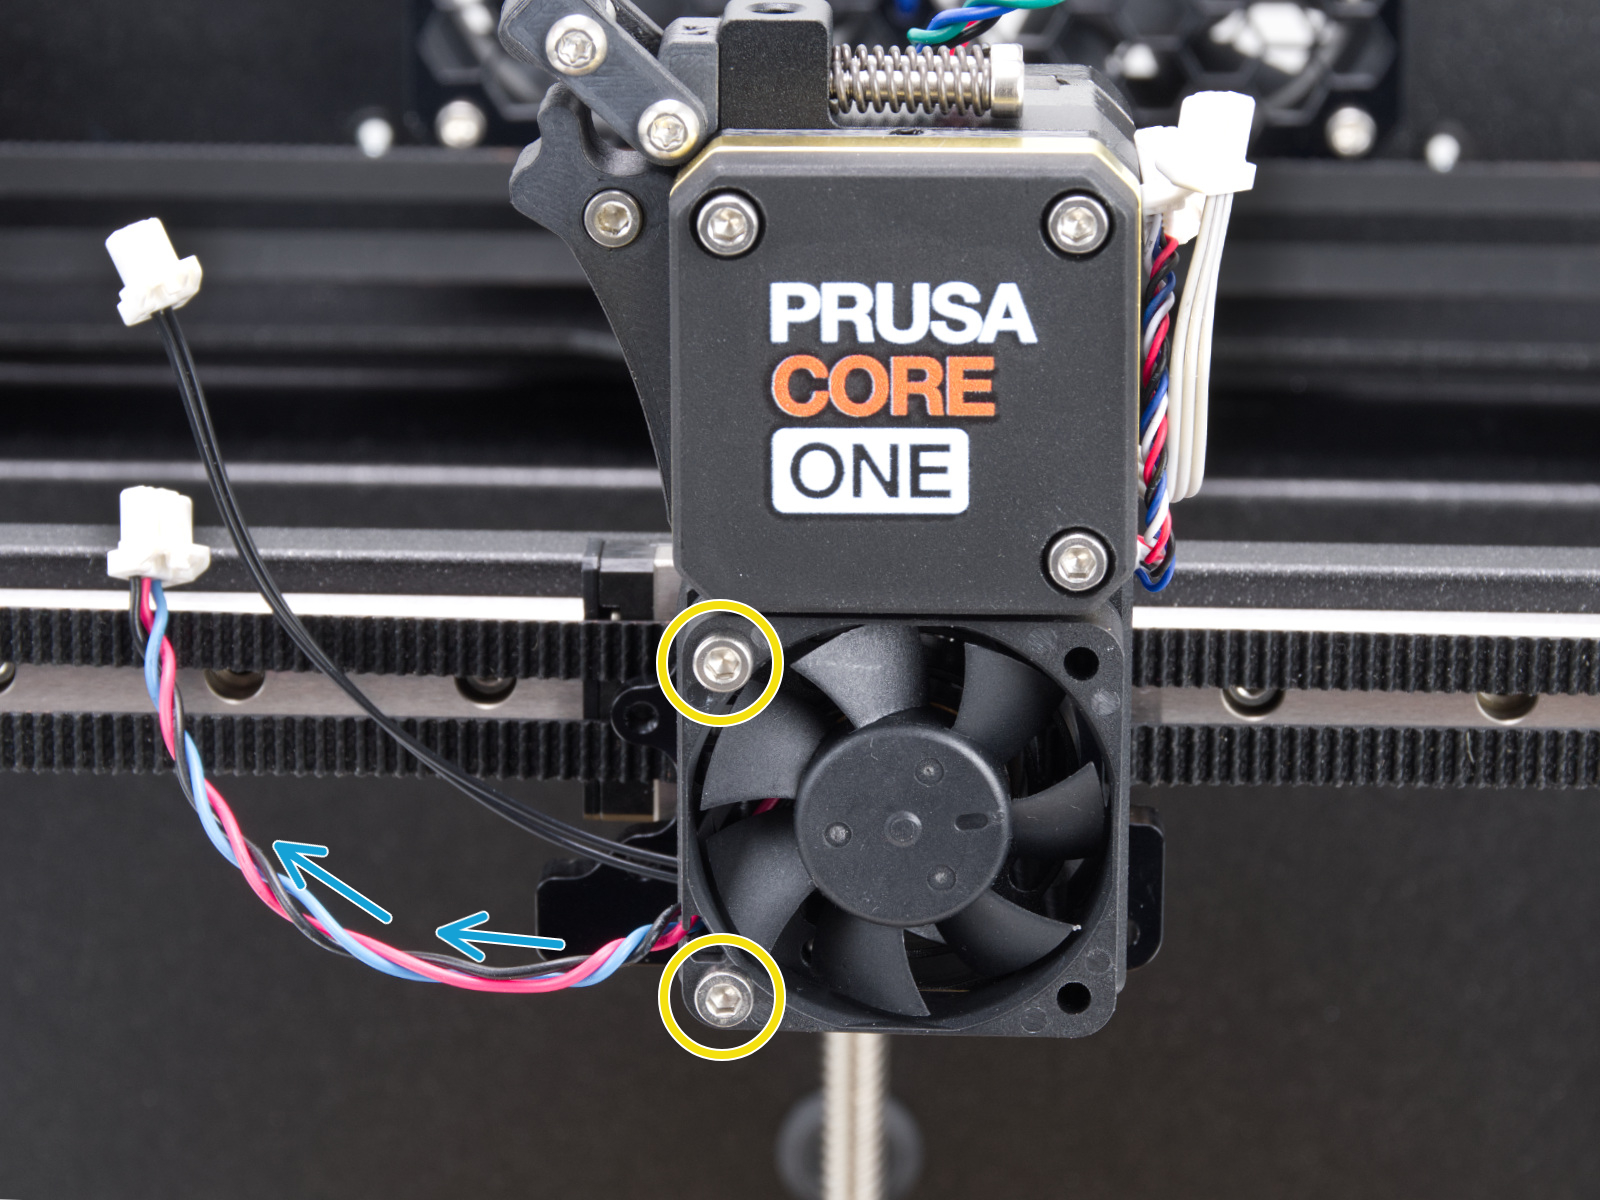
- ヒートシンクを固定している3本のM3x10ネジを外し、ケーブルに注意しながら引き抜きます。
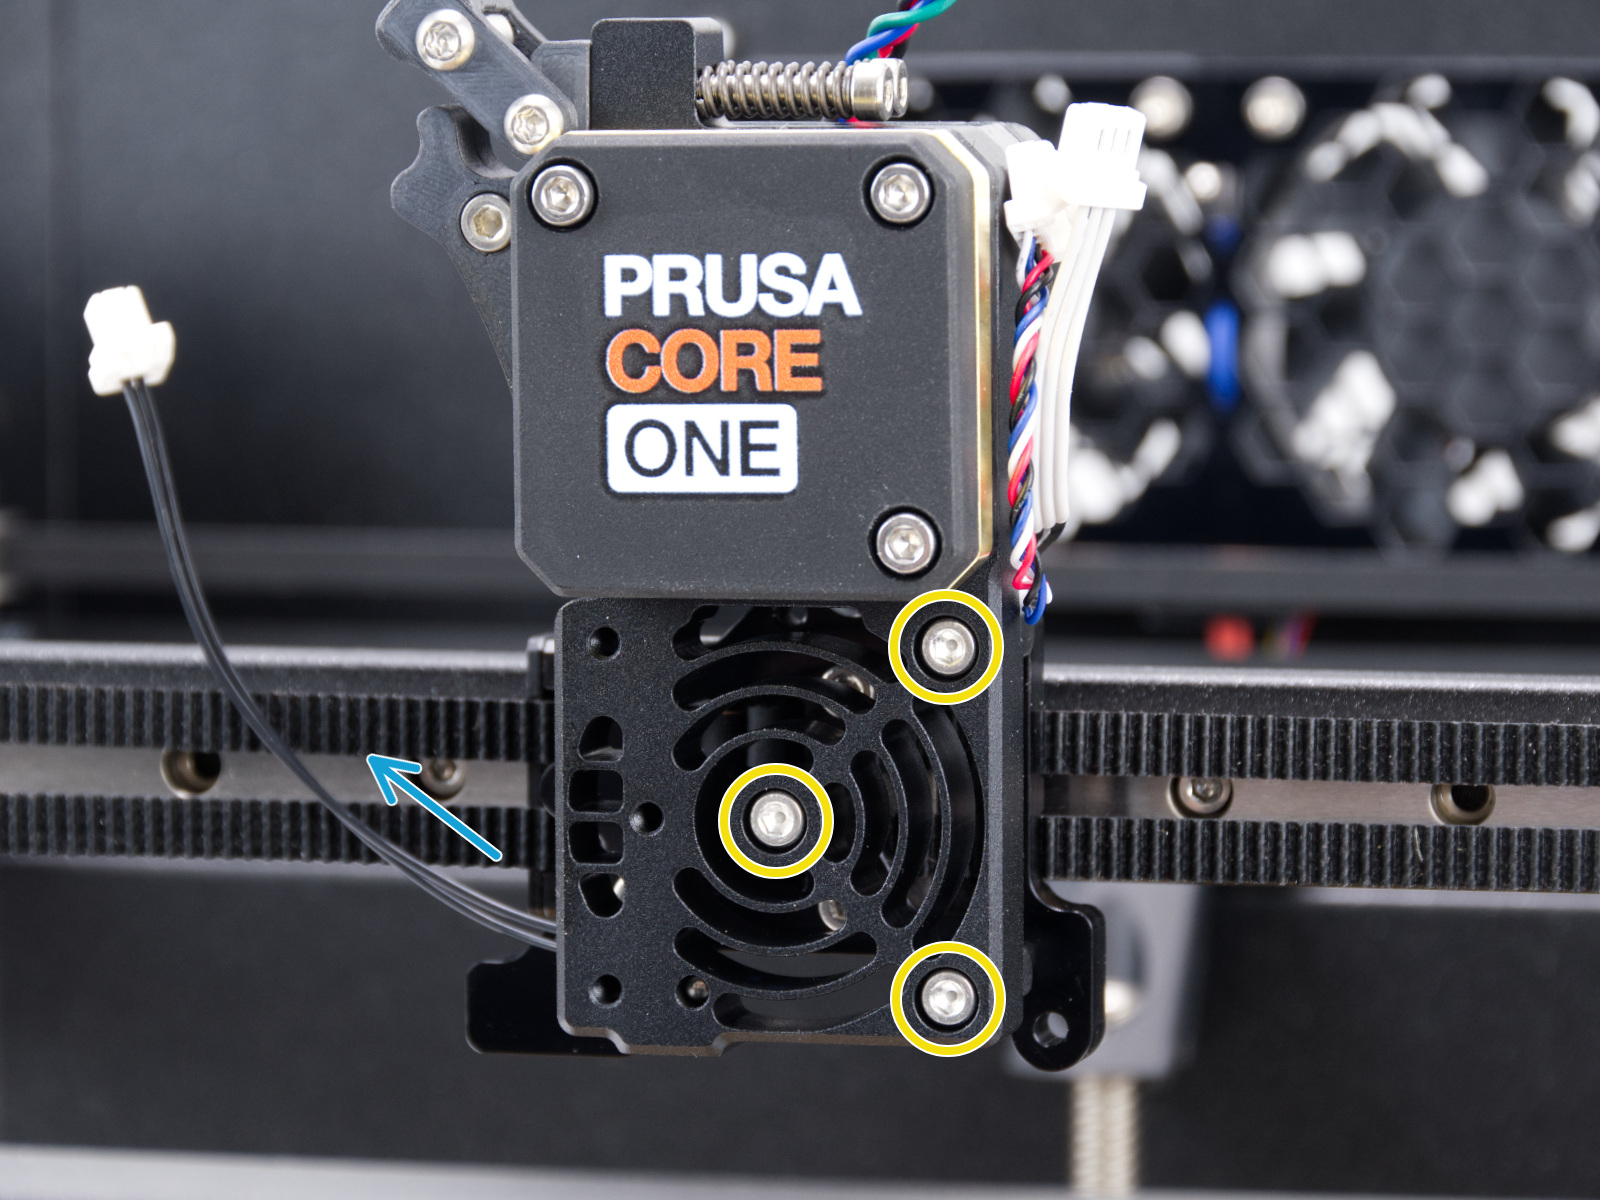 |  |
- これでベルトにアクセスできます。外れてしまったベルトを元に戻すか、緩みすぎているベルトを正しい位置に調整します。再装着が難しい場合は、ベルトテンショナーボルトを緩めてください。さらにアクセスが必要な場合は、ホルダーをキャリッジに固定している4本のネジを外します。
- 再組み立て時は、組み立てマニュアルに従い、最後にベルトチューナーアプリを使って再度ベルト調整を行います。
2 コメント
その場合は以下のように行ってください。
・ベルトチューナーのウェブページを利用する場合に「部屋が静かである」ことが必要です。調整前に周波数が表示されるということは雑音を拾っているということです(正しい作業ができません)。
・ベルトチューナーのウェブページを利用する際にスマートフォンを手にもってはいけません。ベットの上に何か置いてスマートフォンのマイク(マイクはスマートフォンの下部です!上部ではありません)をベルトに近づけてください。こうする理由は片手でベルトをはじきながらもう片手でベルトテンショナーボルトを締めるor緩めるためです。
・ベルトチューナーのウェブページの利用感覚を掴む作業をします。ベルトをはじくとスマートフォンに周波数が表示されます。そのときベルトテンショナーボルトを【試しに少し】緩める(or締める)してベルトをはじいてください。はじく間隔は3秒に一度くらいにしてください。変化を見て取れるはずです。片側のベルトテンショナーボルトだけで実行するとCoreXY構造の正しいアライメントがズレますので回した分を戻して元の位置にしましょぅ。
・ひとまず96Hzくらいに調整します。その際注意すべきことは片方のベルトテンショナーボルトで調整しないことです。CoreXY構造の正しいアライメントを調整しましたよね?片方で96Hzにしたらズレます。「ベルトテンショナーボルトを左右均等に少しづつ締め(or緩め)てベルトをはじく(周波数確認)」してください。
・左右とも試して調整できたら改めて「プリンターのメニュー内にベルトチューニングウィザード」を実行してください。おそらく問題ないレベルになっているはずです。
私はandroidをメインに使っており、手にもってベルトチューナーのウェブページを利用したところうまくいきませんでした。androidではダメなのかと思いましたが、iphoneとandroidを同じように「設置」してテストしたところ、両者とも同じ値を表示できました。