La Prusa Pro HT90 supporta due configurazioni di testine di stampa. La testina di stampa ad alto flusso predefinita gestisce materiali fino a 300°C. Per materiali industriali come PEI, PEKK e PEEK, bisogna utilizzare la testina ad alta temperatura, che arriva fino a 500°C.
Rimuovere la testina di stampa
- Scarica il filamento e raffredda l'ugello al di sotto dei 50°C.
- Spegni la stampante e scollegala dall'alimentazione.
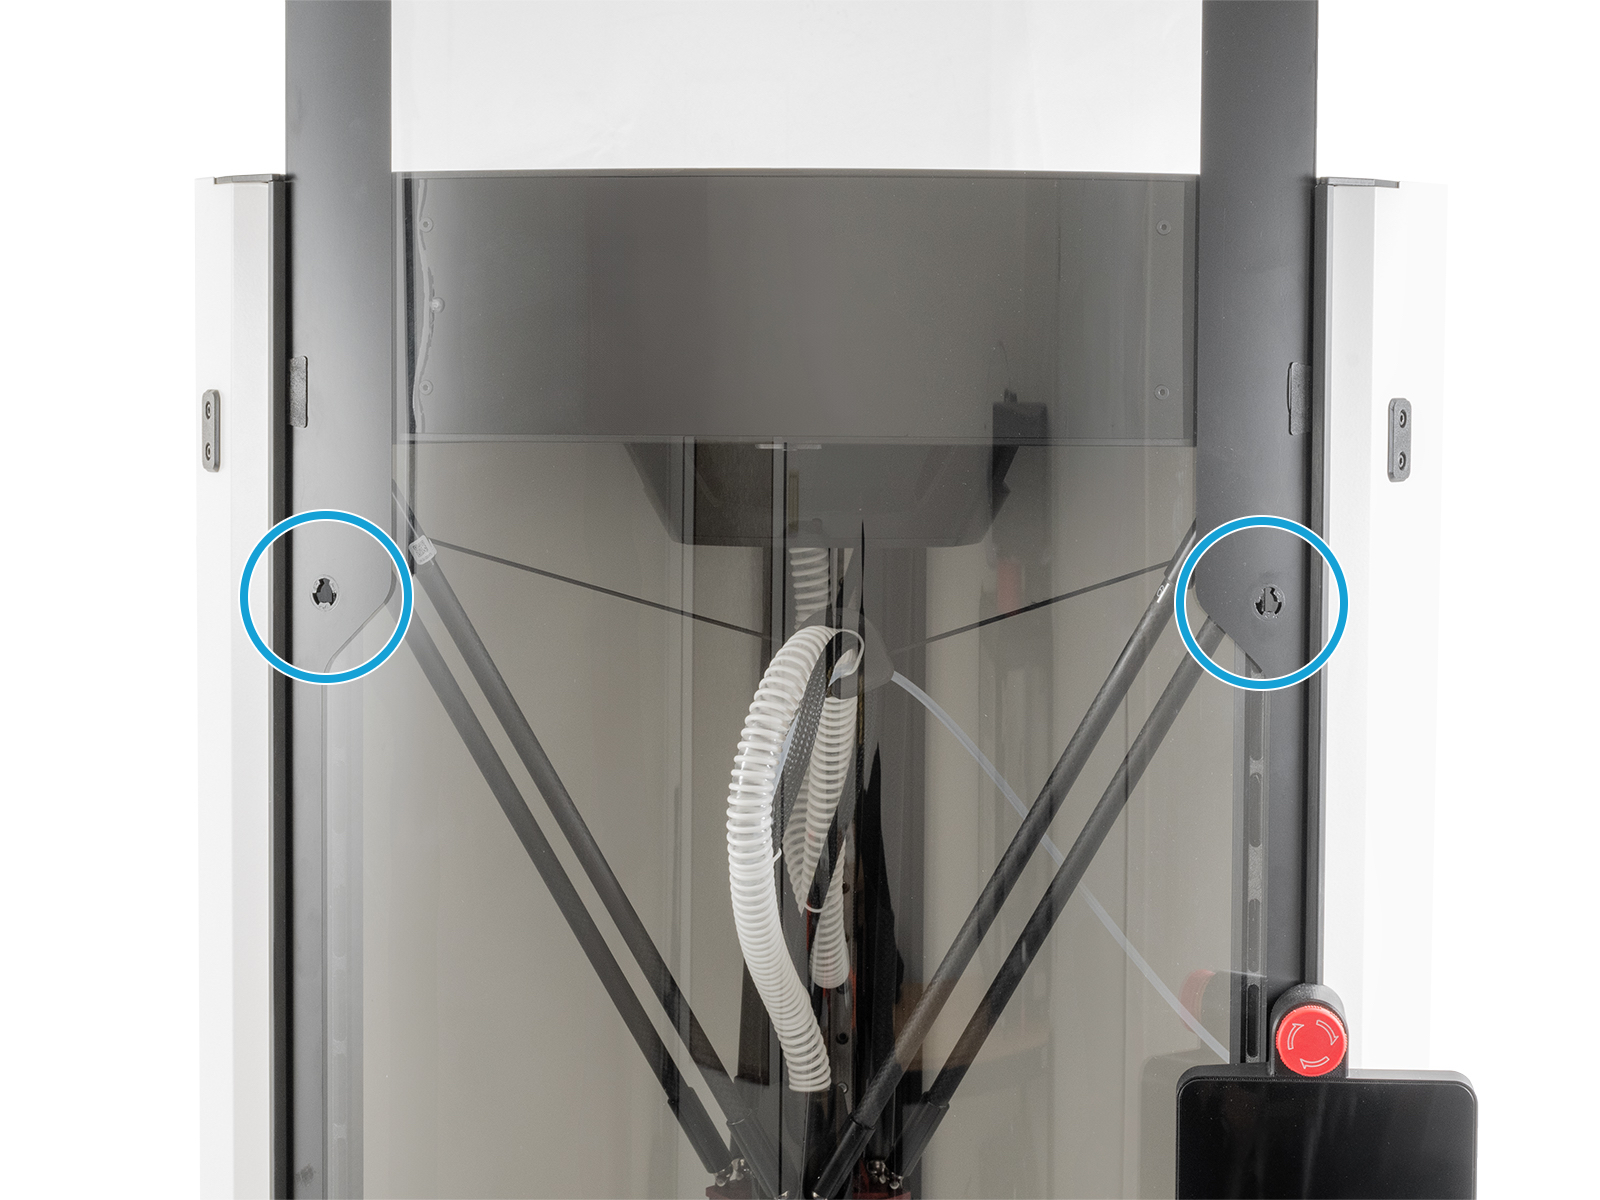
- Utilizzando un cacciavite a testa piatta, ruota i tappi di 120° in senso antiorario e rimuovili. Apri lo sportello alla massima altezza.
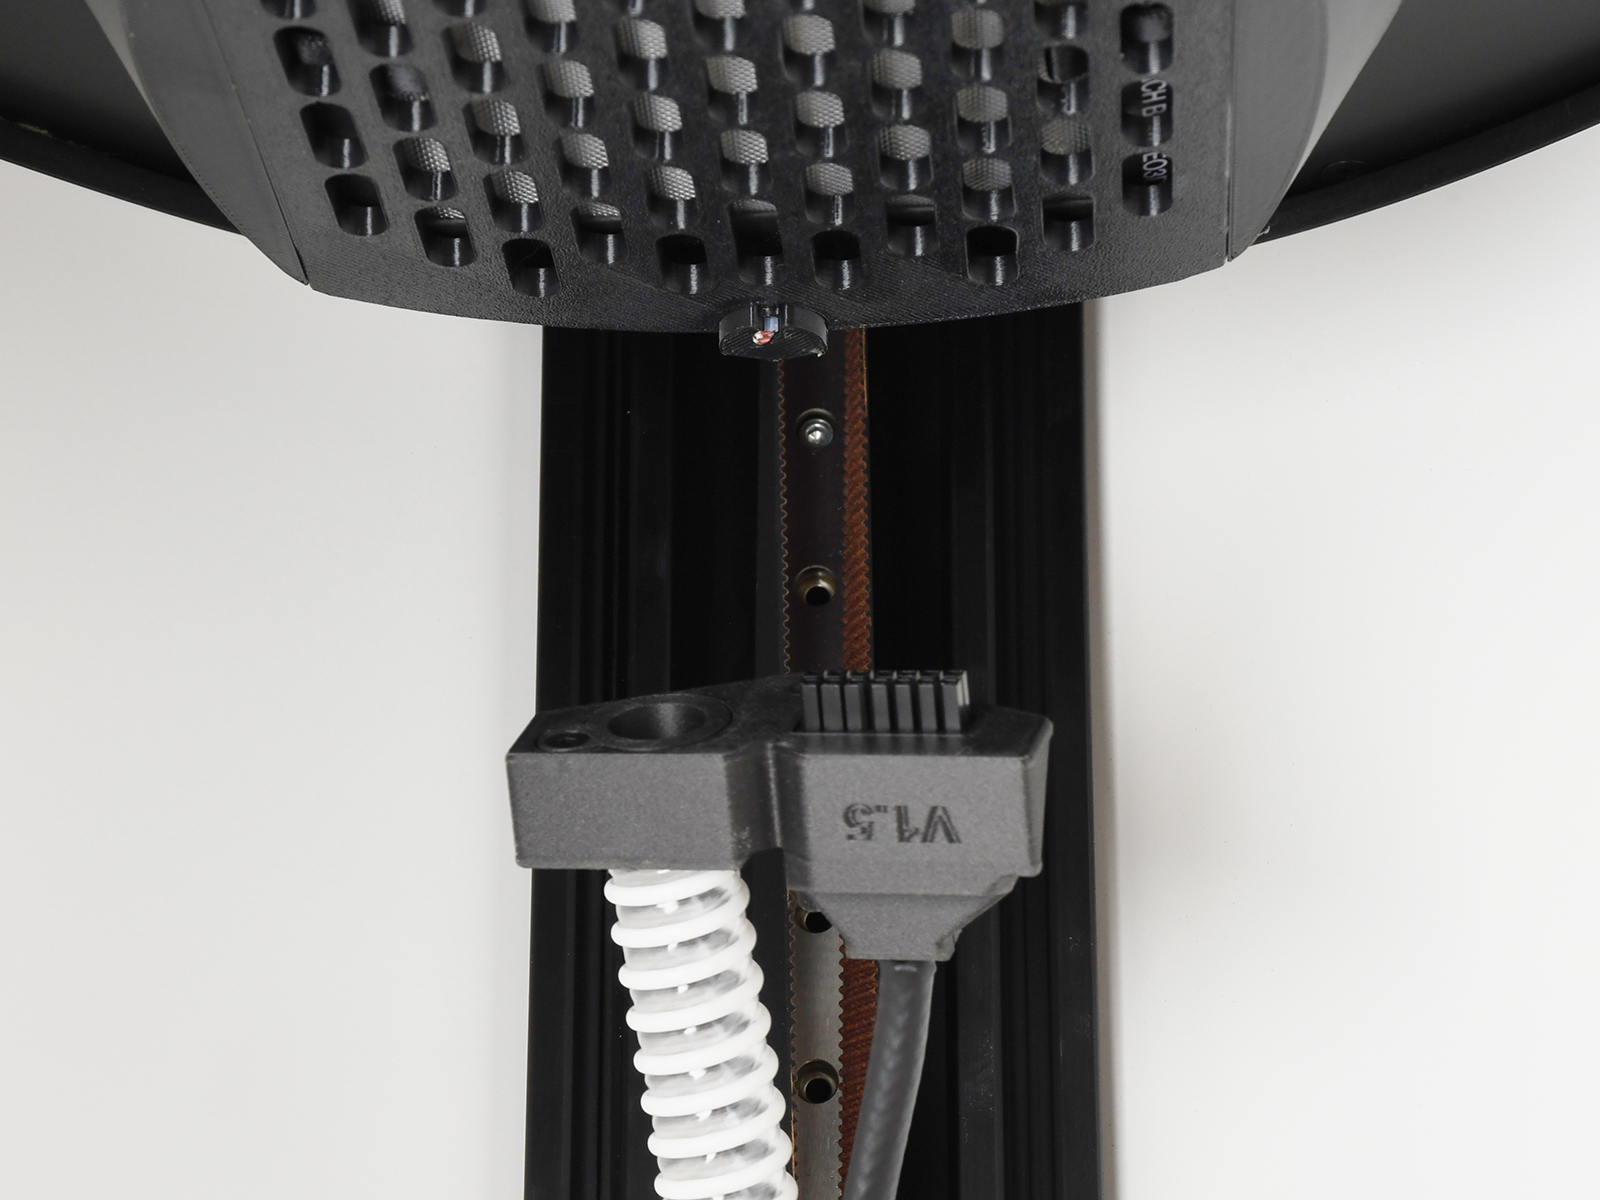
- Nella parte superiore della stampante, dietro il filtro HEPA, c'è un gruppo di connettori tenuti da una vite a testa zigrinata. Svita la vite.
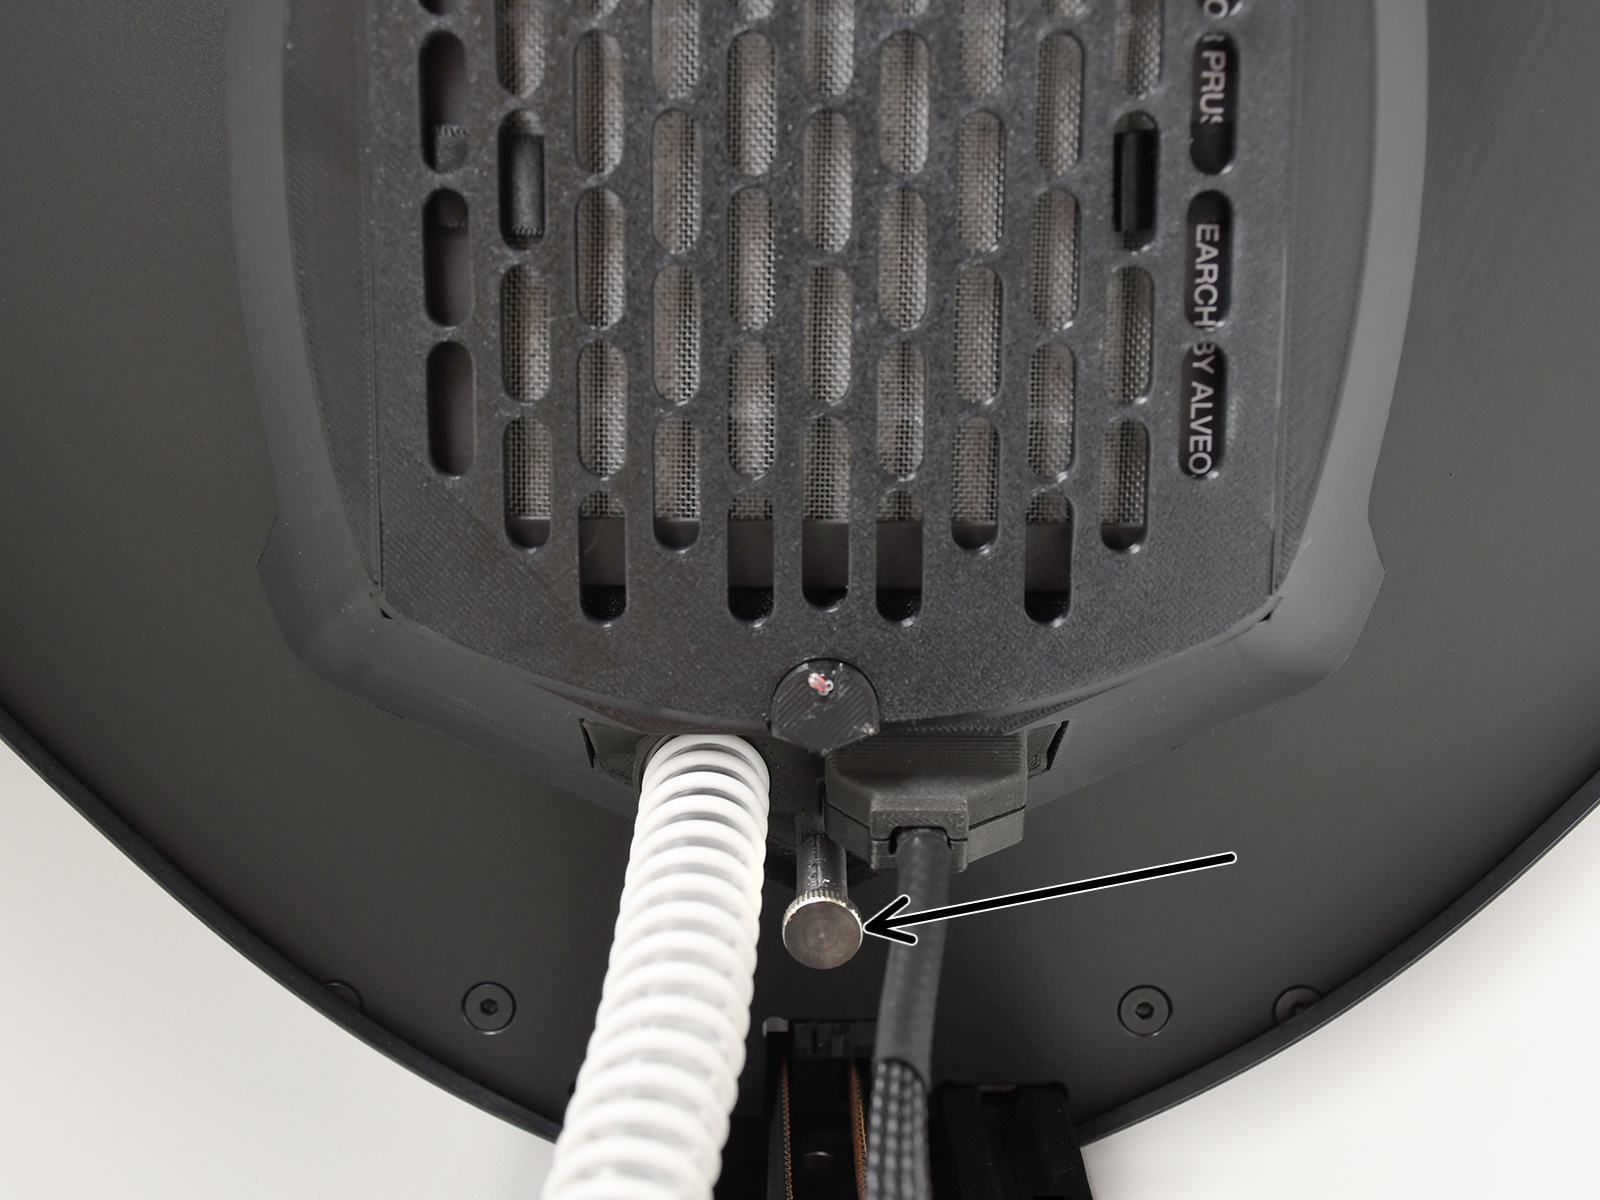
- Tira l'intero gruppo di connettori verso il basso per scollegarlo.
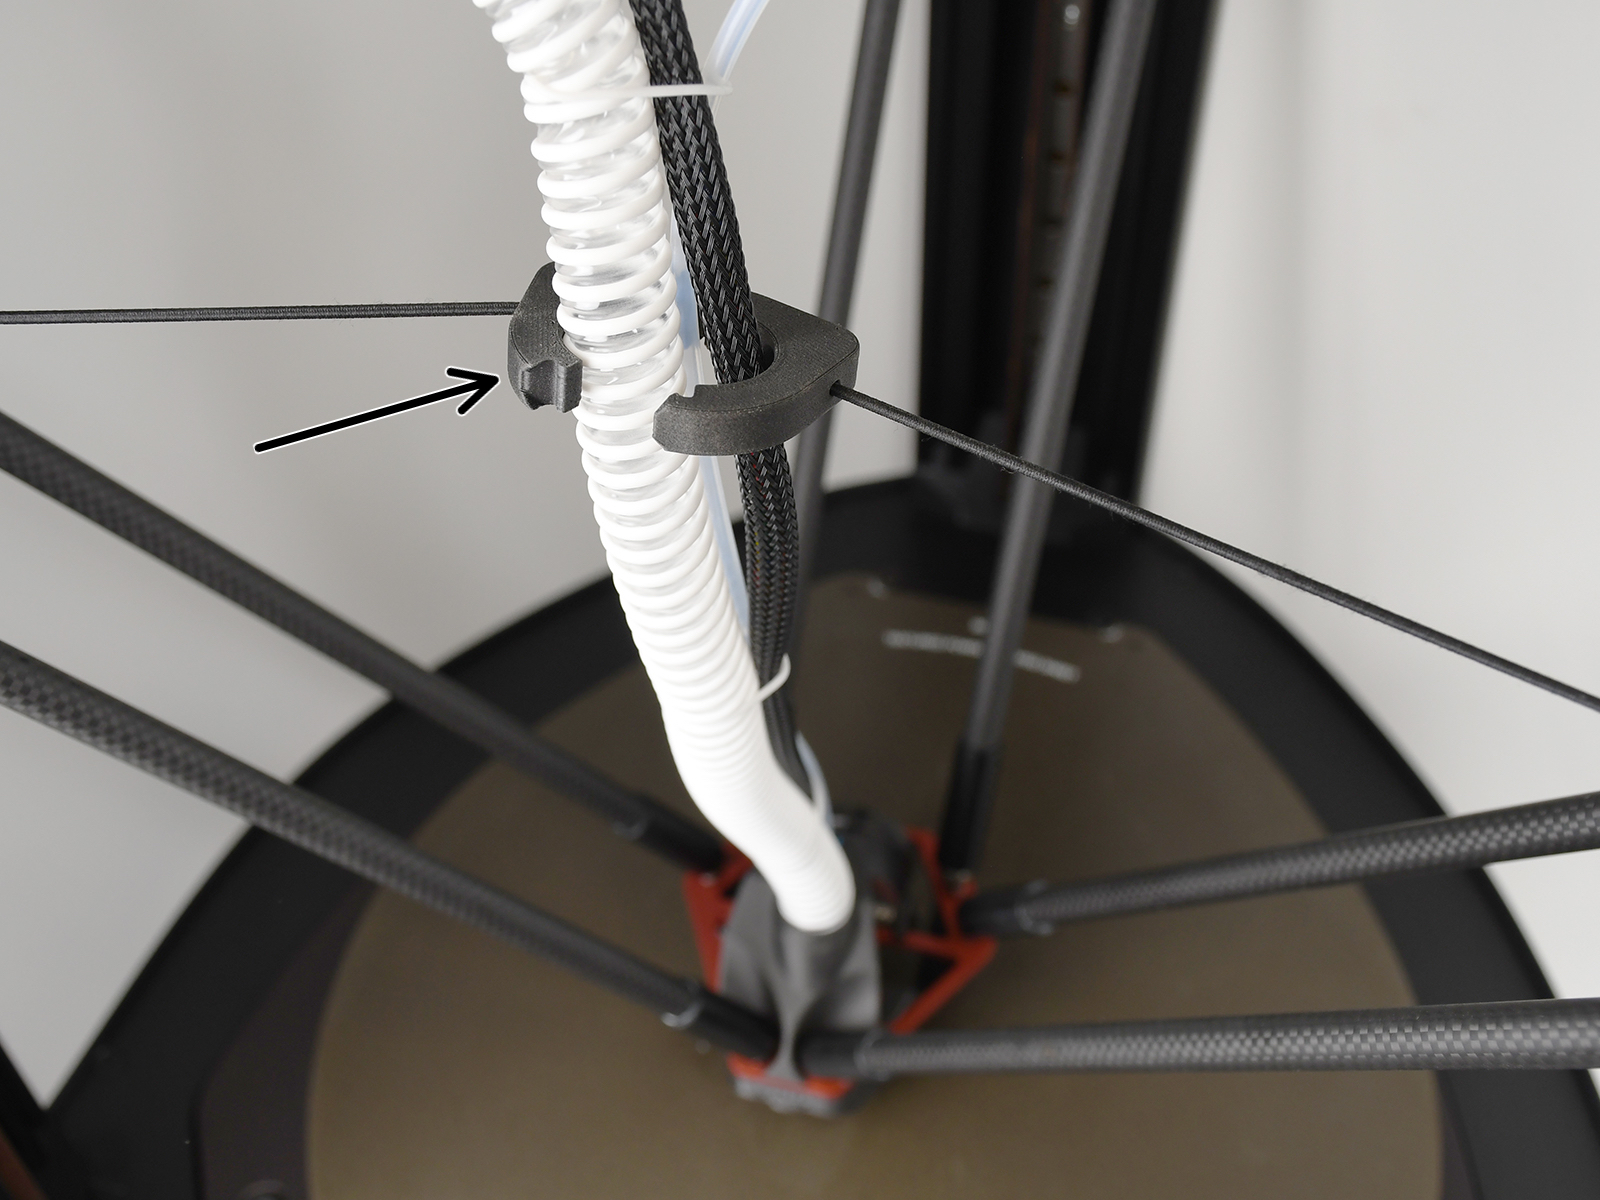
- Apri il morsetto a C che trattiene il tubo dell'aria e il fascio di cavi.
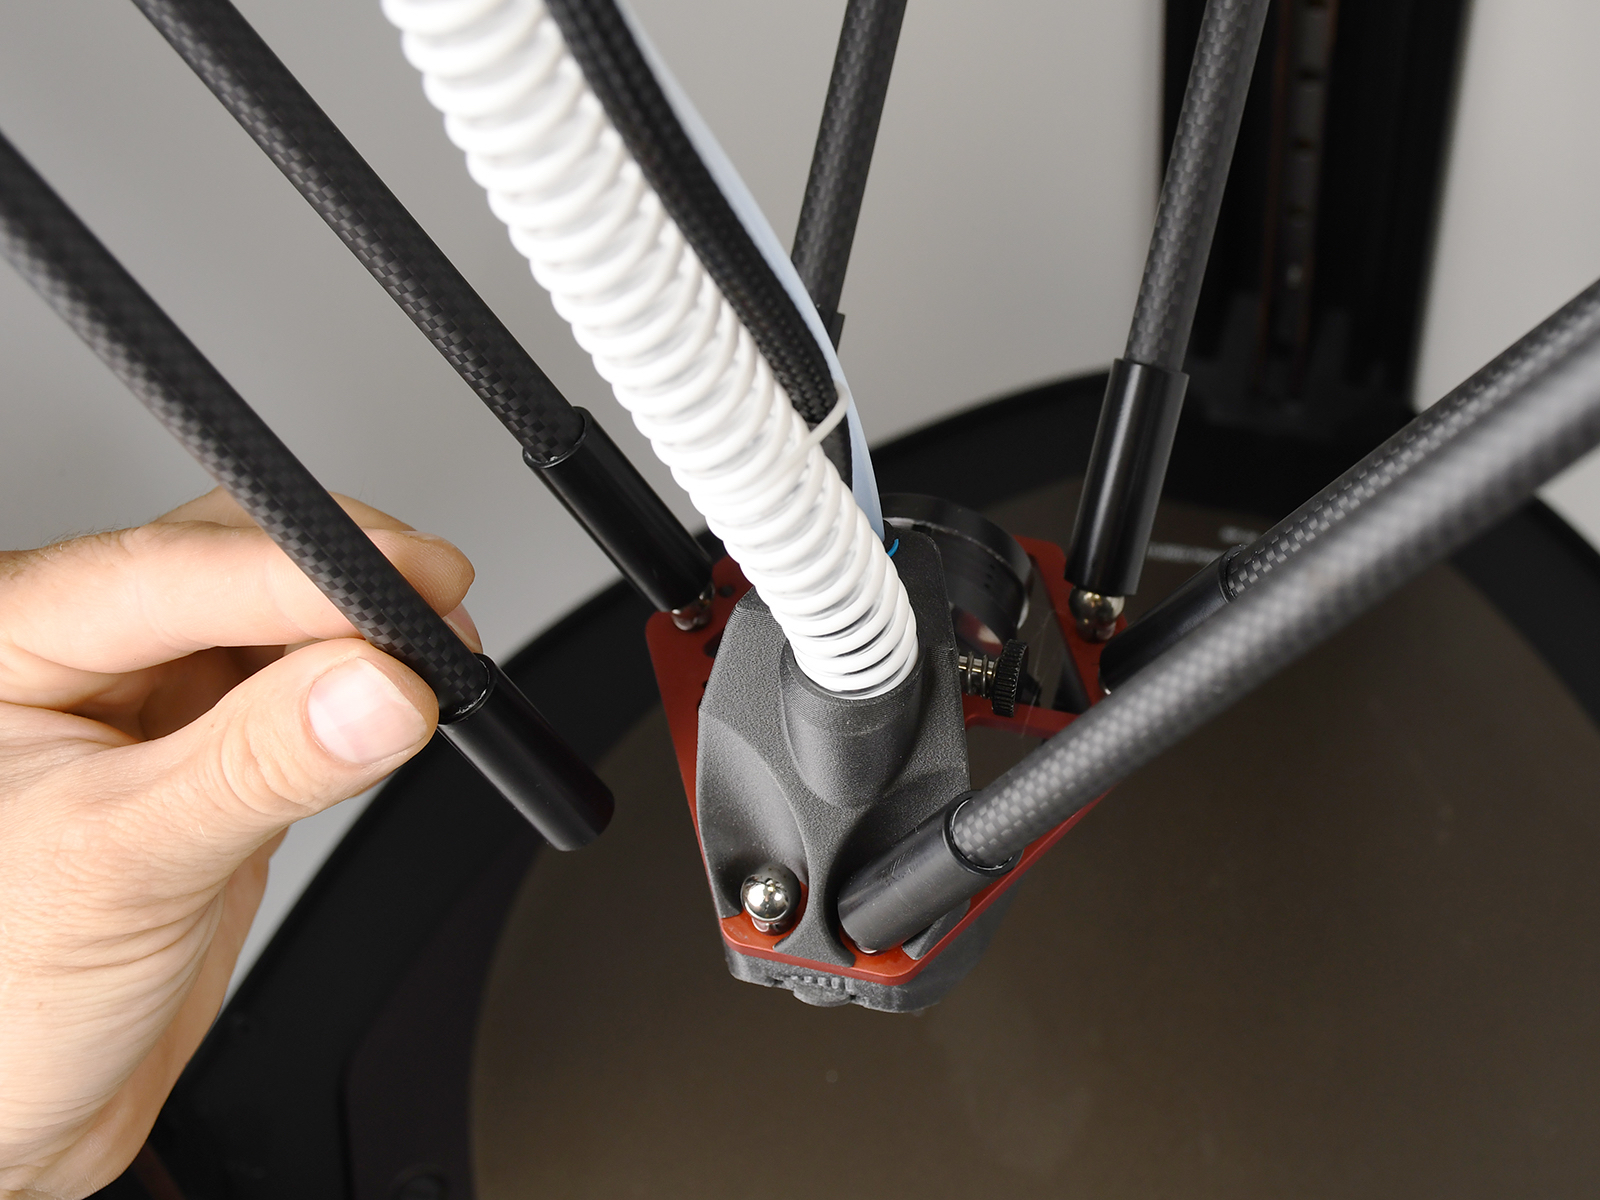
- Tieni la testina di stampa con una mano e scollega con attenzione i bracci dai giunti sferici con l'altra mano, uno alla volta. In questo modo la testina di stampa verrà rilasciata.
- Rimuovi la clip di ritegno del colletto del tubo in PTFE.
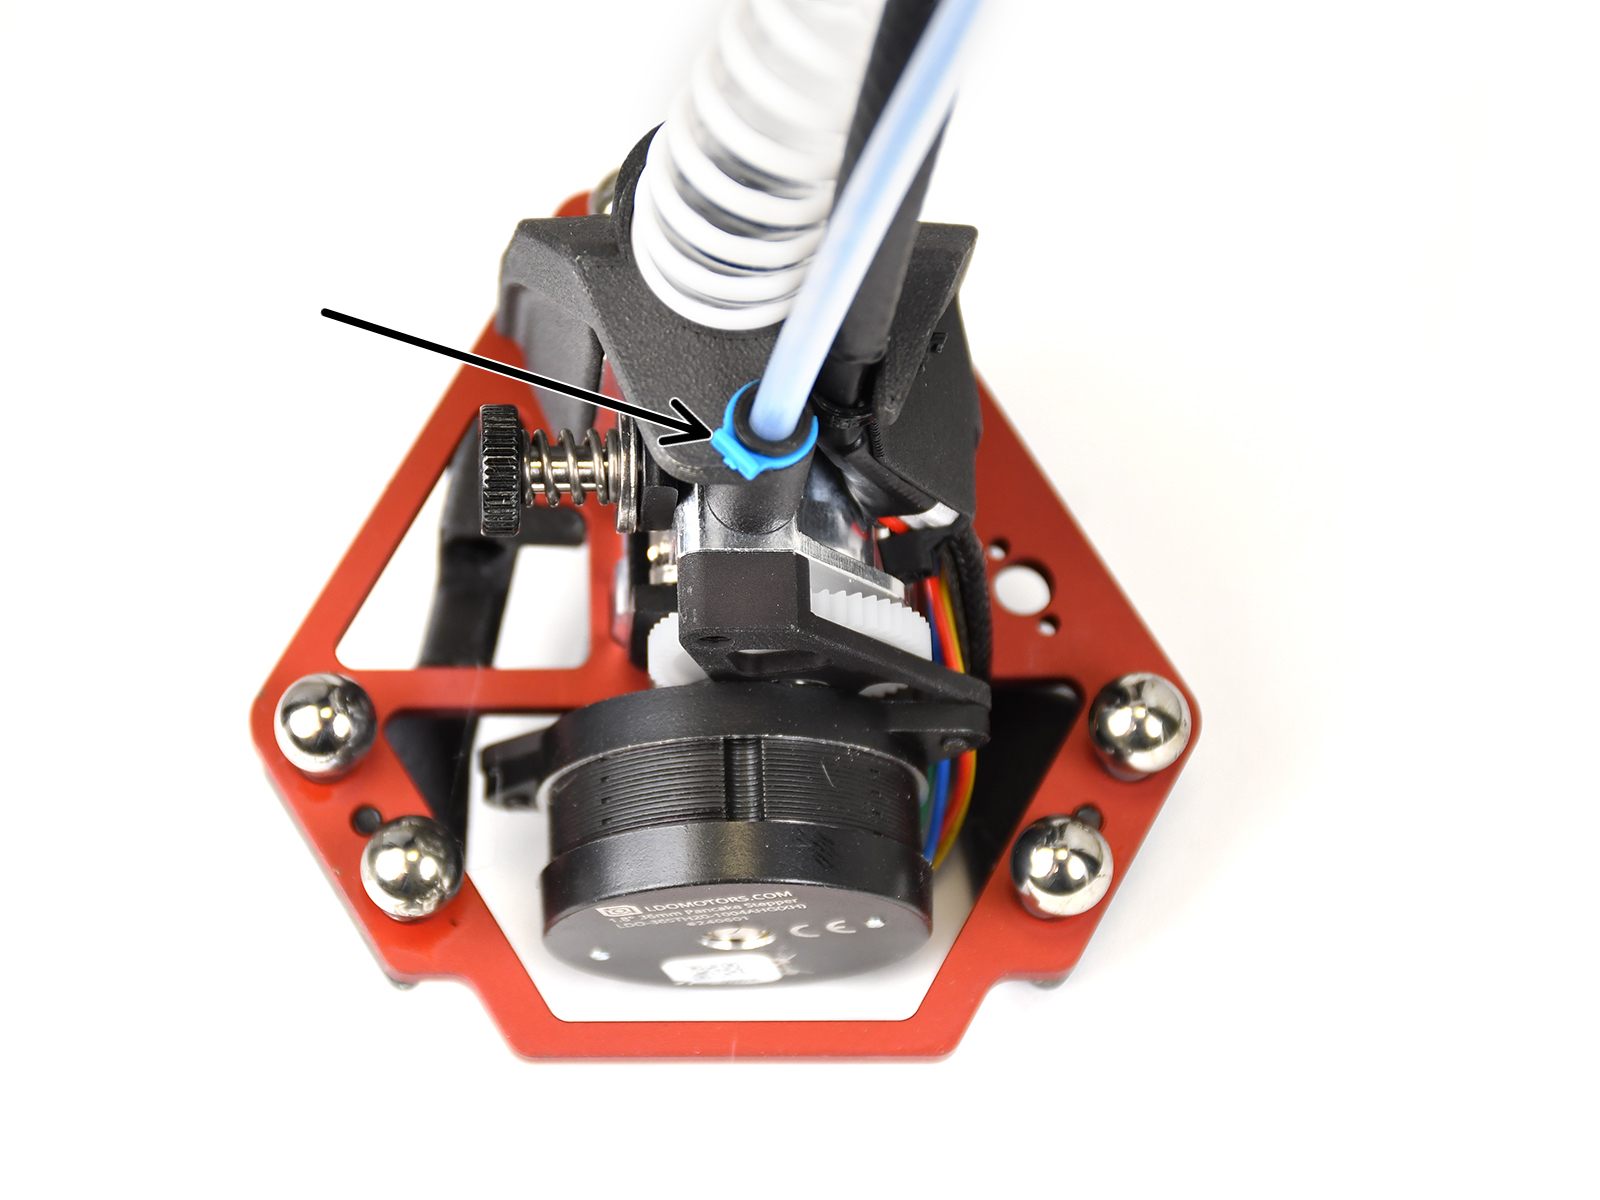
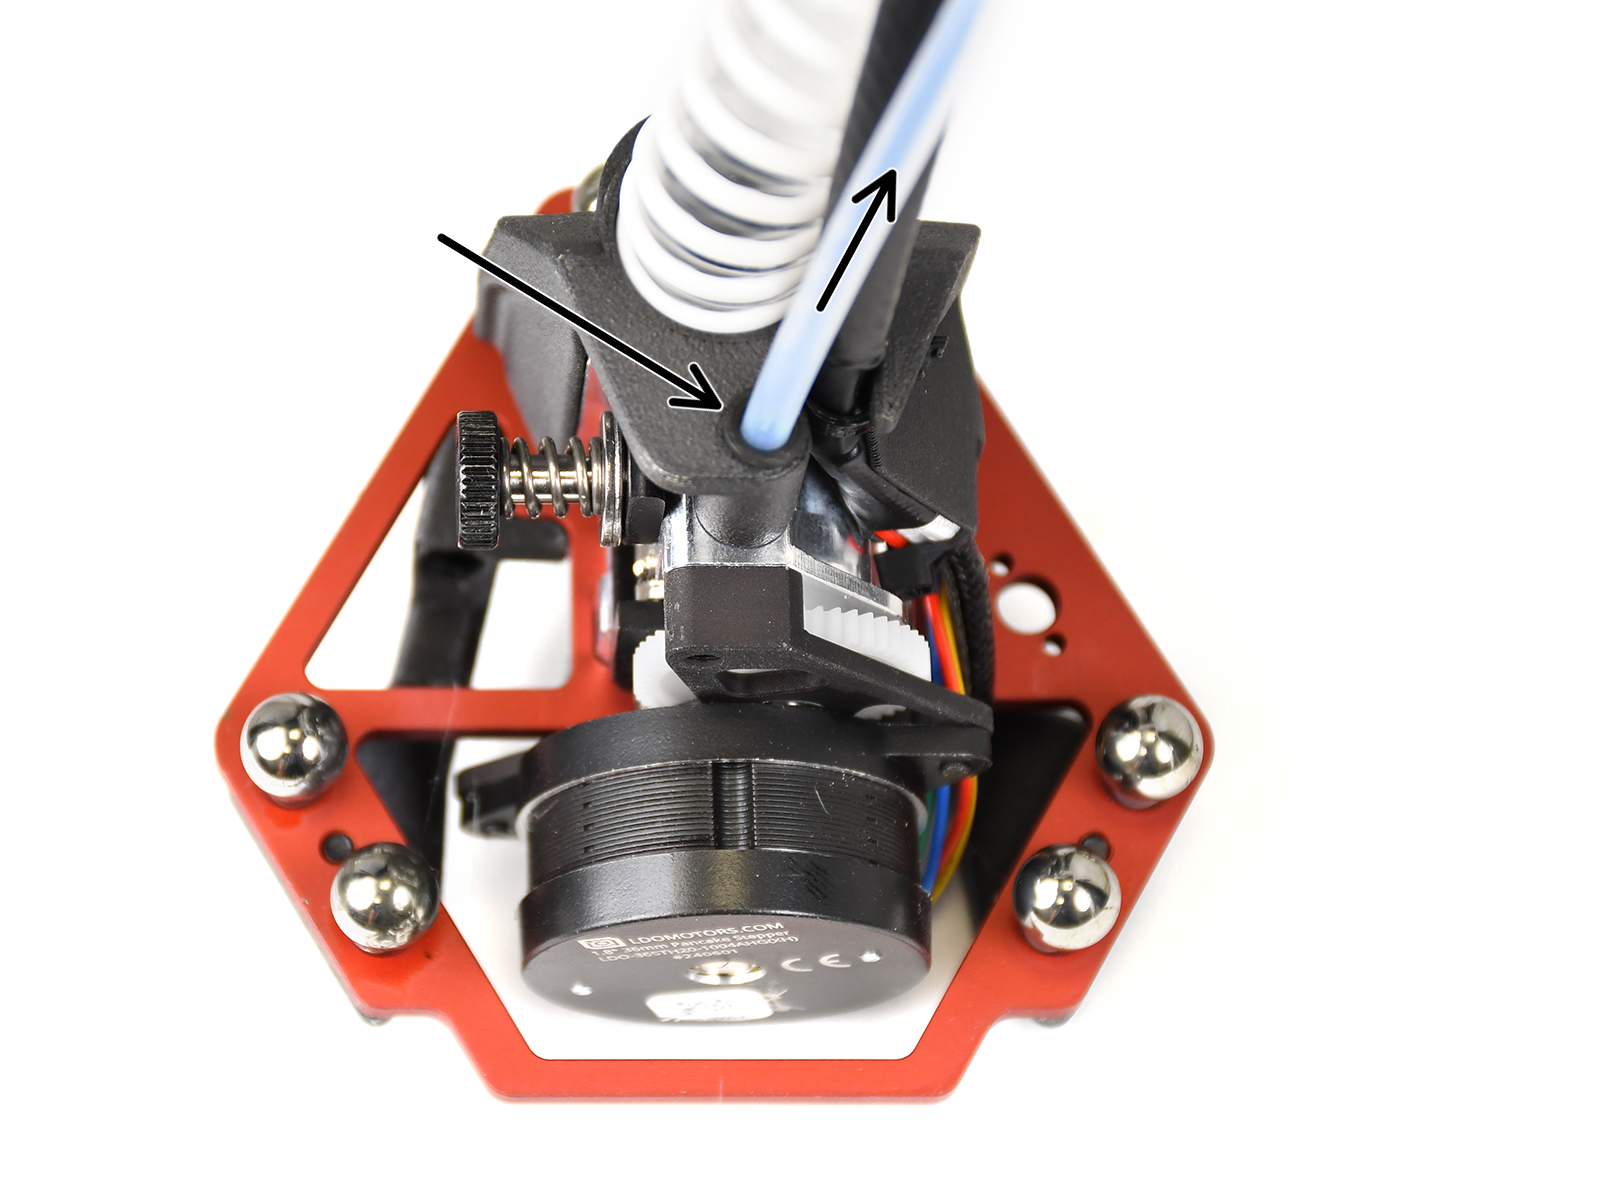
- Spingi verso il basso la pinza, mentre estrai il tubo in PTFE, per rimuoverlo.
Installare la testina di stampa
- Lubrifica i giunti sferici della nuova testina di stampa con una piccola quantità di lubrificante al PTFE.
- Collega i bracci ai giunti sferici.
- Riunisci il supporto del morsetto a C intorno al tubo dell'aria e al fascio di cavi.
- Inserisci il tubo in PTFE nella testina di stampa e fissa la pinza con la clip di fissaggio.
- Ricollega il tubo dell'aria e il fascio di cavi dietro il filtro HEPA.
- Fissa il gruppo connettore con la vite a testa zigrinata.
- Chiudi il coperchio e reinstalla i tappi del coperchio.
Questo articolo è stato utile?
Questa azione è disponibile solo per gli utenti registrati. Per favore accedi.
Accedi per inviare un commento
Nessun commento