English

Contents
Printer maintenance
- Filament Guide addon (MK4S/MK4)
- How to install the Nextruder V6 Nozzle Adapter (MK4/MK3.9)
- How to replace the Prusa Nozzle (MK4/MK3.9)
- How to replace Loveboard (MK4S/MK4/MK3.9S/MK3.9)
- How to replace the silver PSU with the black PSU
- How to replace a hotend heater (MK4/MK3.9)
- How to replace a hotend thermistor (MK4/MK3.9)
- How to replace a hotend fan (MK4 / MK3.9)
- How to replace the xBuddy board (MK4/MK3.9/MK3.5)
- How to replace a print fan (MK4 / MK3.9)
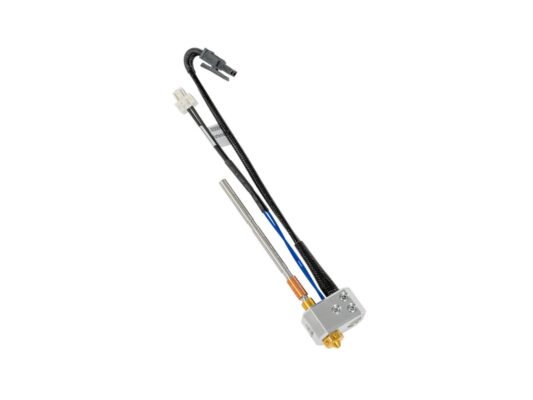
- How to replace a hotend assembly (MK4 / MK3.9)
- Begin assembly
- Introduction
- Preparing the printer
- Protecting the heatbed
- Accessing the hotend cables
- Disconnecting the hotend cables
- Removing the hotend
- Hotend assembly parts preparation
- Inserting the hotend
- Connecting the hotend
- Guiding the hotend cables
- Arranging the cables
- Covering the LoveBoard
- Setting up the nozzle diameter
- Final check
- That's it!
- How to replace a Heatbed Thermistor (MK4/S, MK3.9/S, MK3.5/S)
- How to replace a hotend heatsink (MK4 / MK3.9)
- How to replace xLCD (MK4/MK3.9/MK3.5)
Comments
Log in to post a comment
No comments