The Magnetic heatbed enables you to use flexible, removable steel sheets. There are different properties and strengths of each sheet, but they also have different thickness which affects calibration.
We implemented steel sheet profiles for our printers that need first-layer calibration. The function allows you to create up to eight specialized profiles for your printer setup.
For each sheet, set the Live Z adjust value. Once the values for each sheet are stored on the printer, it is possible to quickly toggle bewteen sheet profiles. The printer will not remind you to change the steel sheet profile, as it cannot sense which steel sheet is installed.
How it works (MK2.5/S & MK3/S/+)
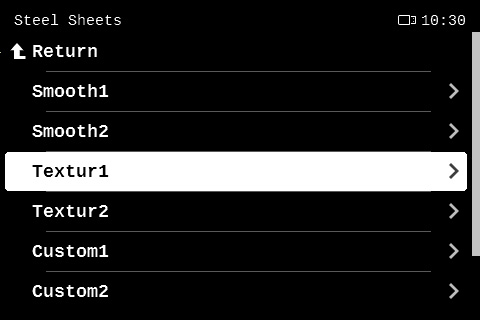
There are currently eight sheet profiles available with predefined, but customizable names.
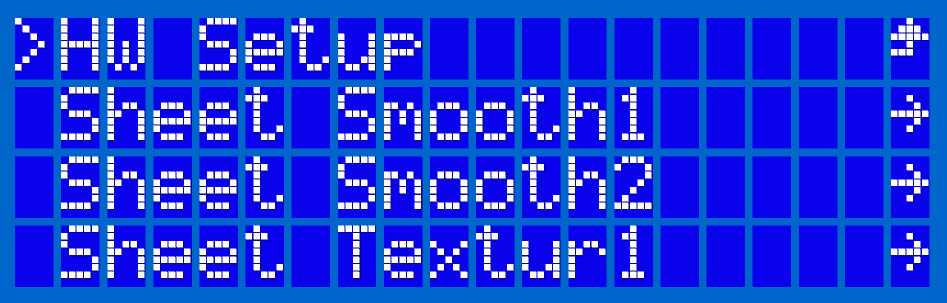
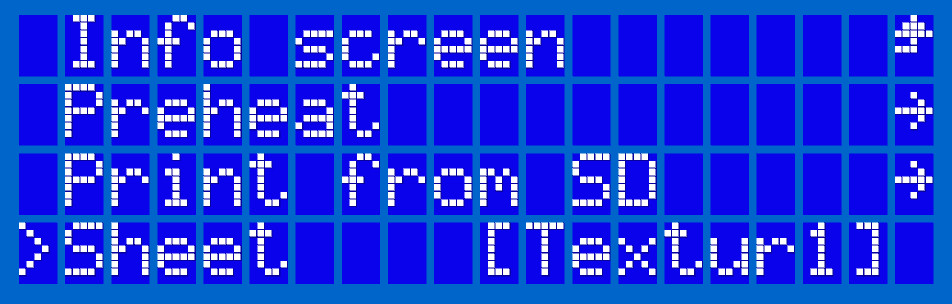
To set up the individual sheet profiles, please head to the LCD Menu -> Settings -> HW setup -> Steel Sheets:
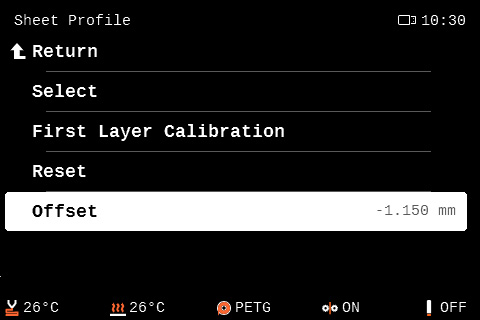
For each sheet, the following settings are available:
- Select - confirms the selection of the sheet, which will then become the default
- First layer calibration - starts the First Layer Calibration (i3) process for the given profile
- Rename - enables you to change the name, by up to seven characters
- Reset - sets the values back to the factory defaults
Quick-toggle
As soon as two or more profiles are configured (by the First Layer Calibration), you will be able to quick-toggle between them directly from the main menu.
Renaming of the sheet
After selecting the Rename option in the sheet profile menu, you can change up to 7 characters of the profile name. The word "Sheet" cannot be changed; it is the "Smooth1", "Textur1" etc. that you can customize. There is no way to delete or erase a wrongly selected character, but you can always restart the renaming procedure.
You start from the left and move to the right. By turning the knob, you are changing the characters, and by clicking it, you confirm the current character and move to the next one. When a character position is redefined, a small chevron mark will appear underneath it.
How it works (MINI/+, MK3.5/S)
To set up the individual sheet profiles, please head to the LCD Menu -> Settings -> Hardware -> Steel Sheets.
For each sheet, the following settings are available:
- Select - confirms the selection of the sheet, which will then become the default
- First layer calibration - starts the First Layer Calibration process for the given profile
- Reset - sets the values back to the factory defaults
- Offset - sets the Live Z adjust value for the given profile, without calibration
 |  |
Screenshots taken on the MK3.5. The same settings are available on the MINI/+.
Quick-toggle
As soon as two or more profiles are configured by the First Layer Calibration, you will be able to quick-toggle between them directly from the Control menu. The quick toggle is available in LCD menu ->Control ->Sheet profile.
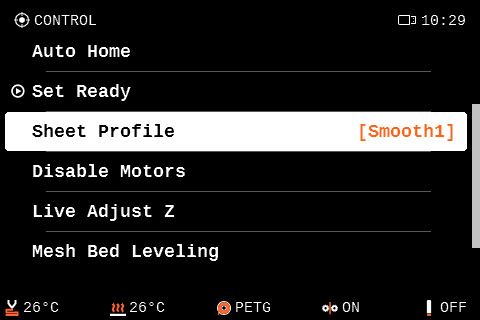
Screenshot taken on the MK3.5. The same toggle is available on the MINI/+.
26 comments
I also miss the bed mesh result in Prusa connect like I had with the MK3s+. Since I upgraded to MK3.5s I can see it anymore. 🤷🏻
After saving a new sheet, the printer will start with what you used last. You can see all your saved profiles in the quick toggle. If the sheet profile you were using before is not there, you will need to save it again.