Any cured bit of resin left in the tank after a print can cause failed prints (holes, missing geometry) and even damage to the print display. Firmware version 1.7.0 introduces the feature of cleaning the resin vat for cured bits or other debris left behind at the bottom of it.
How it works is that a single layer of the entire build space is cured simultaneously, capturing any solid bits that may have sunk to the bottom of the resin vat. This is then easily removed using a cleaning adaptor placed into the tank prior to running the cleaning procedure.
We recommend running the cleaning procedure before each print unless you have just changed the resin and cleaned the tank by hand.
What you need
- Firmware 1.7.0 installed on your printer: Navigate the menu to System -> Firmware -> and select Check for updates. Alternatively, the firmware file can be downloaded from our Downloads page and flashed using a memory stick. Please see Firmware updating (SL1/SL1S) for details.
- Cleaning adaptor: This is part of the Example prints that can be downloaded directly to your printer from Support -> Download example prints of the main menu, then printed on your SL1/SL1S. The example file is sliced for Prusament Resin Tough Prusa Orange, which we ship with all Original Prusa SL1S. You can also find the adaptor for download at Printables.com if you want to slice it yourself for another resin.
Tank cleaning procedure
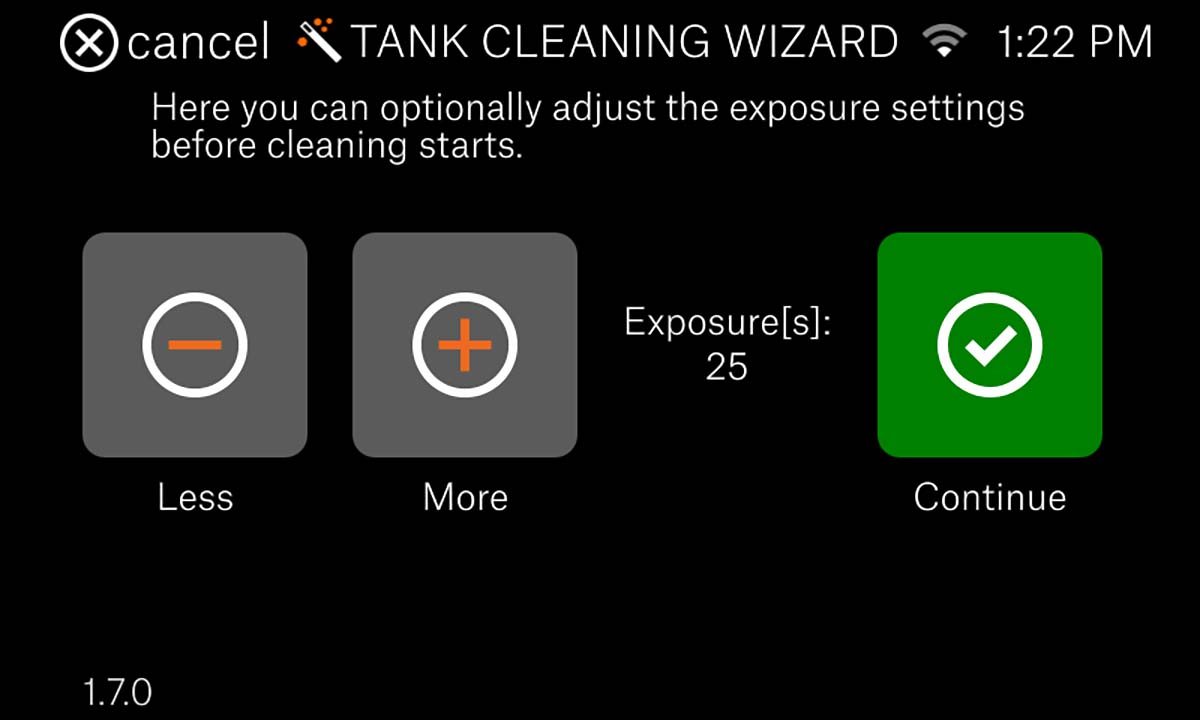
The resin tank cleaning procedure is available on the screen provided once a print finishes and from the menu under Control -> Resin Tank Cleaning.
- Make sure the printer is calibrated homed and the platform is clean and secured on the printer.
- Select Resin Tank Cleaning on the screen provided once a print has finished or navigate the on-screen menu to Control -> Resin Tank Cleaning.
- The tank cleaning wizard will instruct you to install the Cleaning adaptor on the tank (at the front right corner.)
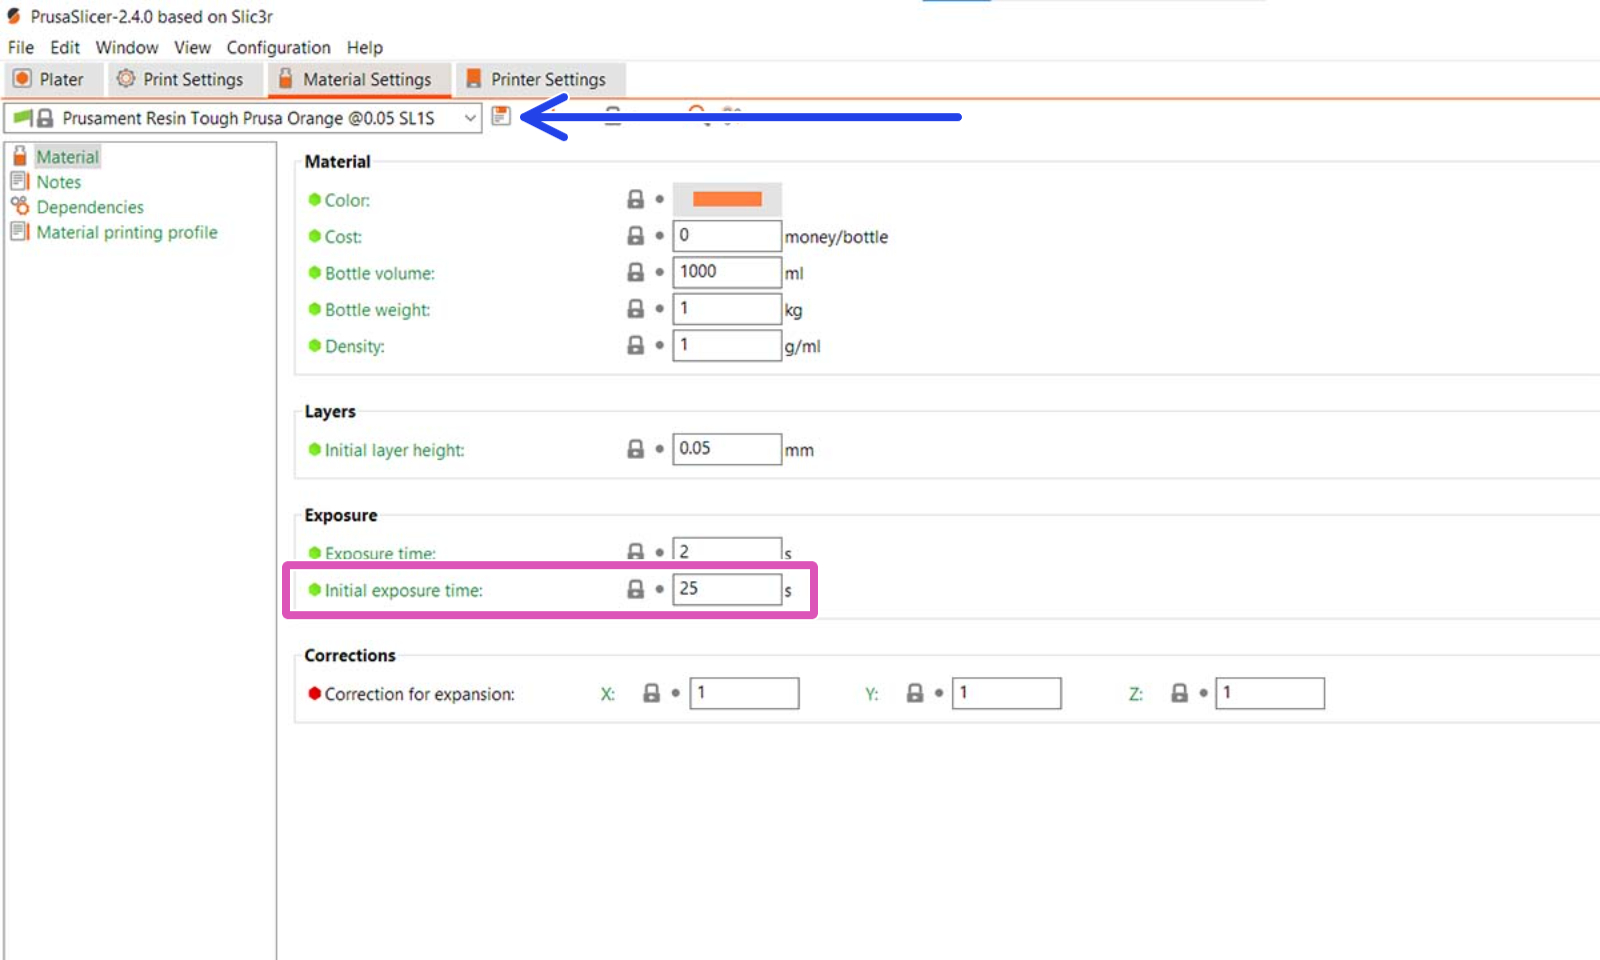
- Set the exposure time based on what is the Initial exposure time (purple square) you find for the specific resin in the tank (blue arrow), in PrusaSlicer. If there are larger pieces of debris in the tank you can try to increase the exposure time by ~5 seconds.
 |  |
- The platform will lower until the Cleaning adaptor makes contact with the FEP-film, making sure the cleaning adaptor does not move during the exposure.
- Let the exposure process finish and wait for the tank to tilt forward and the print platform to move back up, taking the cleaning adaptor and the exposed layer of resin with it.
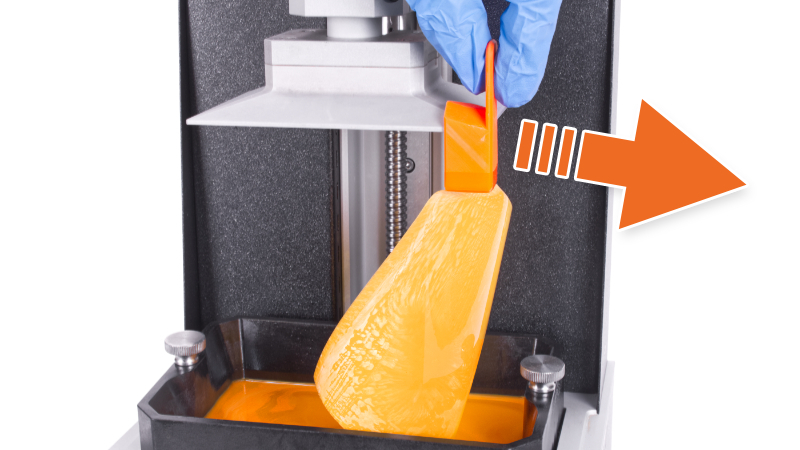
- Open the lid and carefully slide the cleaning adaptor away from the platform to remove it with the cured cleaning layer still attached to the adaptor. When removing the cleaning layer we recommend using the protective tray and allowing the uncured resin to drip off before moving it out away from the tank.
 |  |
| Cleaning procedure on SL1S | Cleaning procedure on SL1 |
- Place both the cured cleaning layer and the Cleaning Adaptor in IPA for cleaning and then dry/cure them inert.
- The cured cleaning layer is very thin and fragile and can easily be removed from the cleaning adaptor which can be used again. Simply throw away the cured cleaning layer.
1 comment