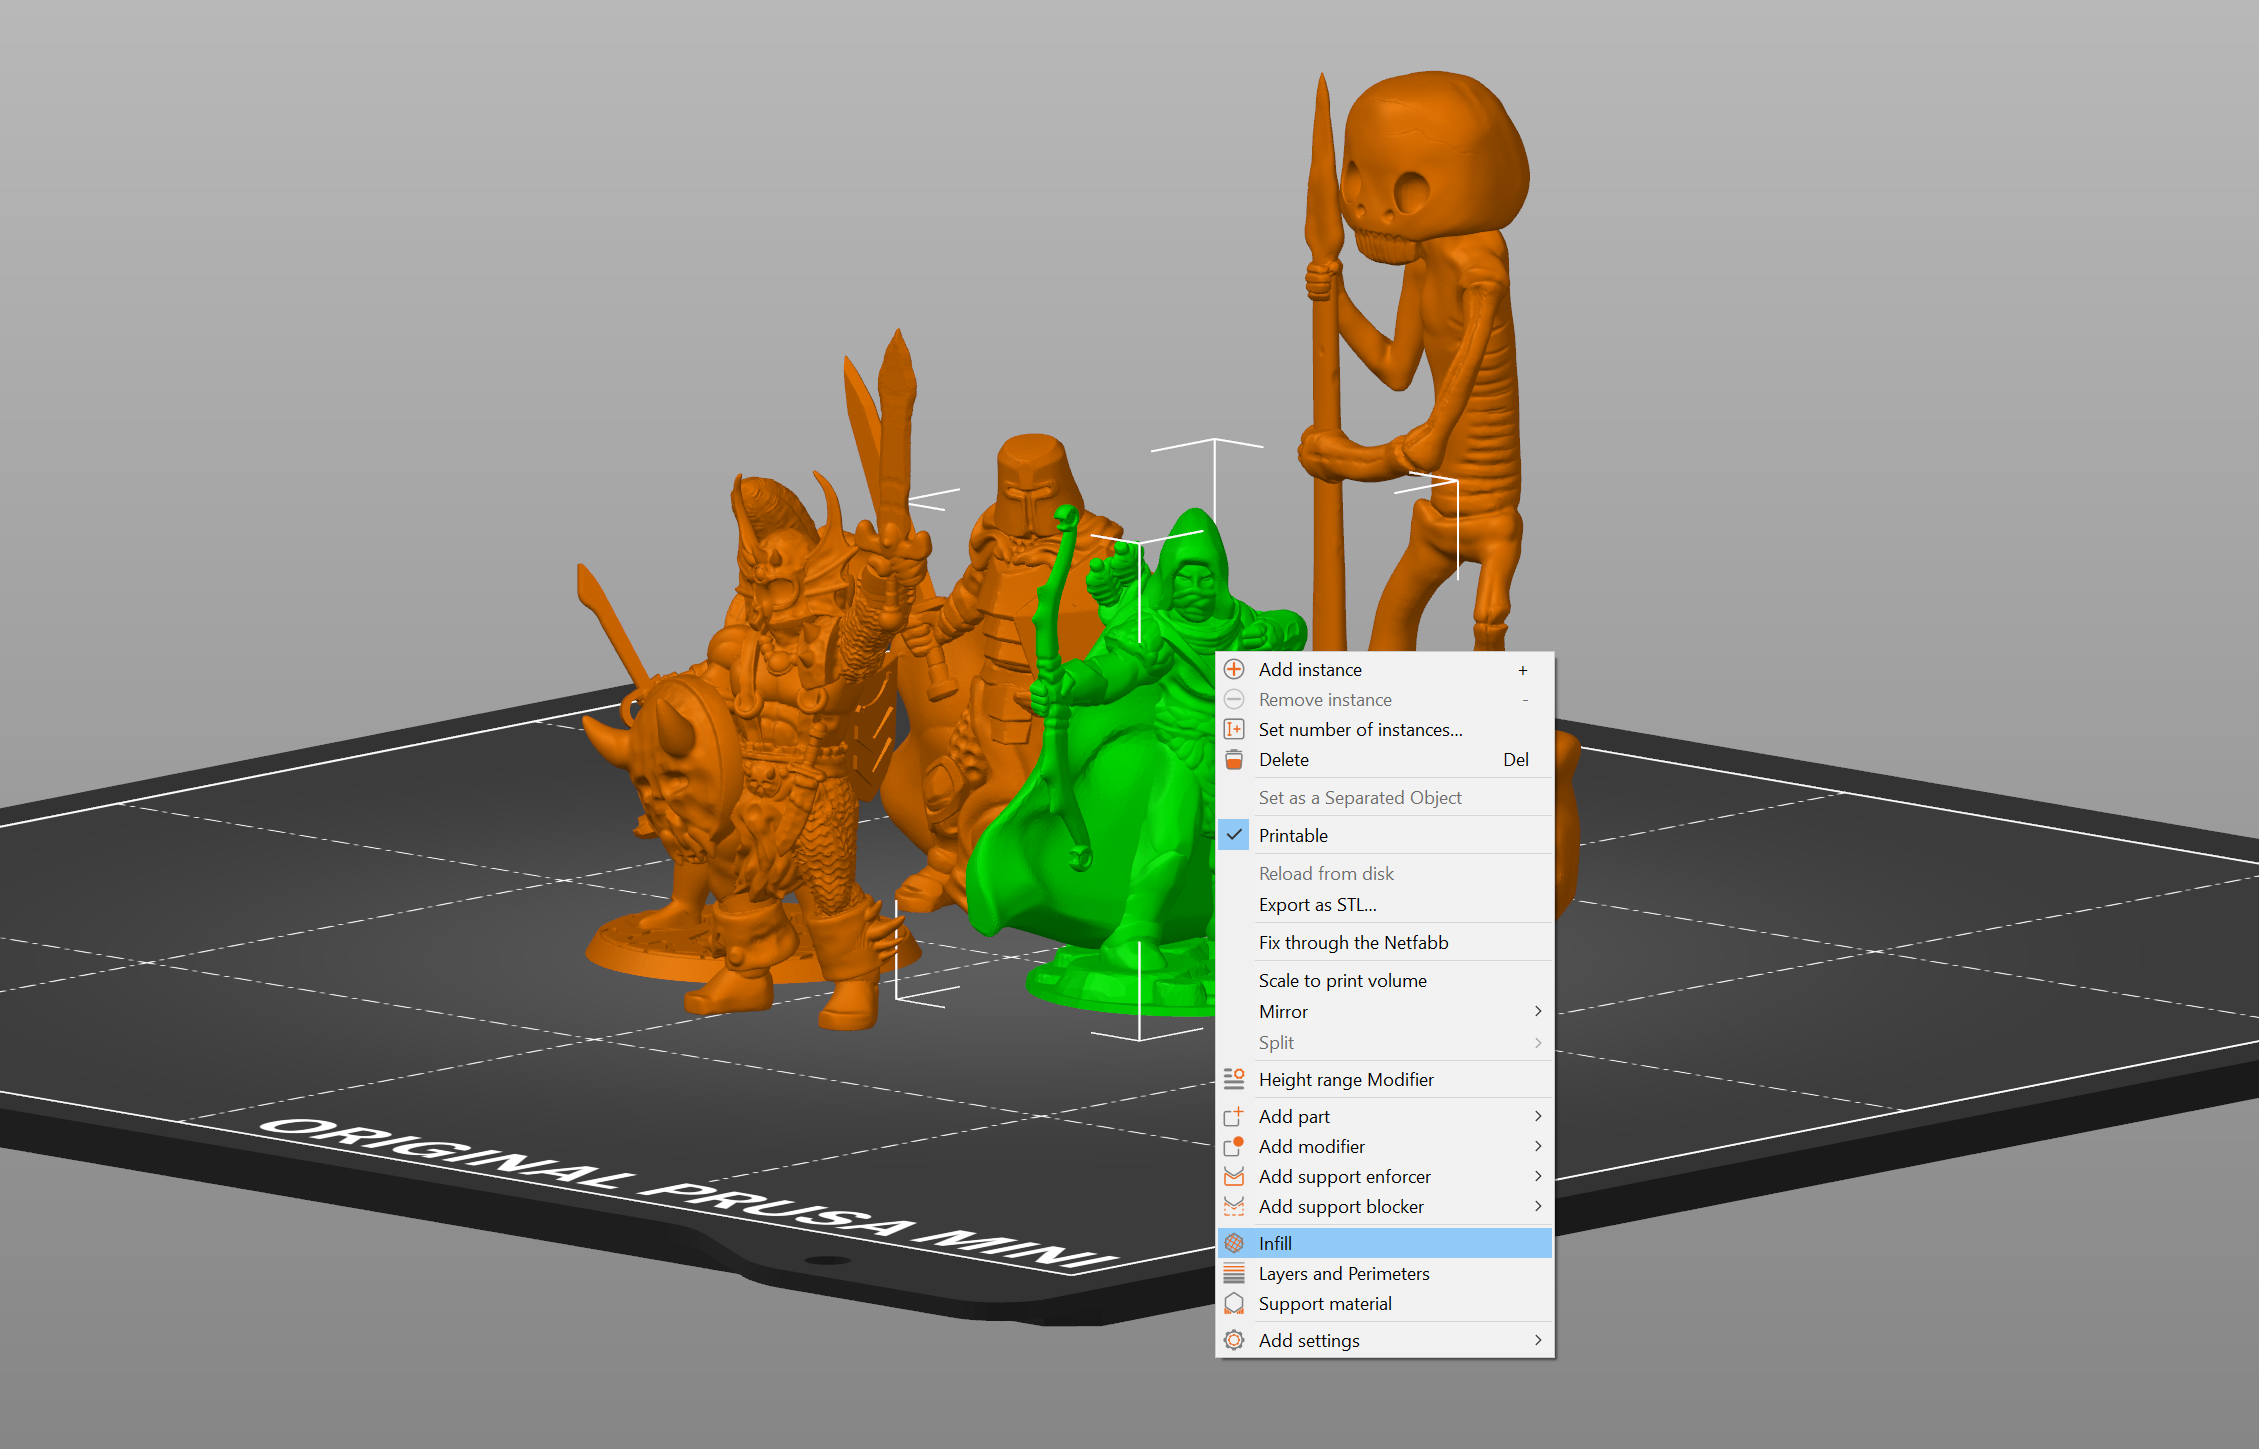
With PrusaSlicer, you can print multiple models at once, each with slightly different settings. For example, with different infill or layer height.
Right-click (Advanced mode) on a model and pick either:
- Infill
- Layers and perimeters
- Support material
In the Expert mode, an additional Add settings option is available that lets you adjust settings such as speed, extrusion width, infill/perimeter overlap and more.
Alternatively, you can right-click on the editing icon in the Object list.
A new window will appear in the right panel called Object settings to modify. Changing these settings will affect only the relevant object and its instances. You can remove the settings overwrite by clicking on the red cross icon. When you do so, the global settings will once again be applied.
Was this article helpful?
This action is available only to registered users. Please log-in.
7 comments
The print should have only a small deviation from the model, if the change is too large then you need to check your axes. This feature specifically is meant to be used only for small adjustments (like the size of threads or holes), not to completely fix your model size. If you wish to use this, add positive values to enlarge the prints on the YX axes, and negative values to shrink the prints on the XY axes.
"In the Expert mode, an additional Add settings option is available that lets you adjust settings such as speed, extrusion width, infill/perimeter overlap and more."
I am trying to print several objects sequentially and change the (Max volumetric speed) of each object.
When you set up a printer with multiple nozzles, you pick the filament profile for each of them independently. So you can create profiles like PLA180, PLA200, PLA215 and assign them to your desired nozzles. Check the MMU docs ;)
https://help.prusa3d.com/en/article/assigning-colors-extruders_124811