Deutsch
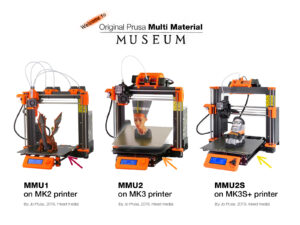
Willkommen bei der MMU3-Anleitung! Es gab mehrere Generationen der Original Prusa Multi-Material-Drucklösung. Vergewissern Sie sich, dass Sie die richtige Anleitung für Ihre MMU-Einheit und Ihren Drucker vor sich haben.
MMU1 für MK2 und MK2S Drucker (eingeführt in 2016-2018)
Sie verwendete vier separate Extruder, die eine Düse versorgten.
MMU2 für MK2.5 und MK3 (2018-2019) Fünf Filamente speisen einen direkt angetriebenen Extruder.
MMU2S für MK2.5S, MK3S, MK3S+ (2019-2023)
Einführung eines Kamins am Extruder mit dem IR-Filament-Sensor.
Und schließlich, das neueste Modell:
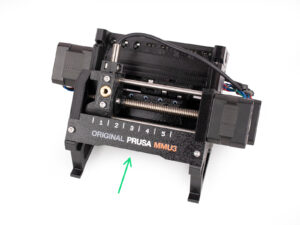
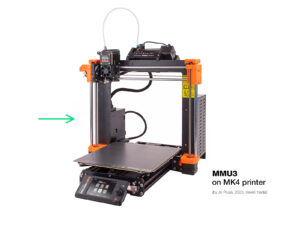
MMU3 für MK3S+, MK3.5/S, MK3.9/S, MK4/S und CORE One.
Diese MMU3 ist das Modell, mit der wir uns in dieser Anleitung beschäftigen werden.


ich habe wie empfohlen das Upgrade auf MK4S (solo) gemacht und bin jetzt auf der tieferen Suche wie ich das MMU2 zu einem MMU3 aufbauen muss das ich es an einem MK4S anschliesen kann. Es geht hier nicht um den zusammenbau selbst es geht hier um die Schritte am MK4S die meines erachtens hier noch nicht dokumentiert sind bzw. Updates die die S version erhalten hat rückgängig machen zu scheint
the 400 g Prusament black PETG spool does unfortunately not allow to print all the parts needed if you did not order the set including the printed parts. 400 g are enough to print all the different (five) parts, but you need to print MMU3_BUFFER2 five times instead of one time! It seems that someone did not calculate the quantity of filament required to print all the parts needed correctly.
So keep some additional PETG available to fix this!
Take a look in "MMU fasteners" box, you'll find another 400 g spool there.
Hallo! The codename "Kamil Turbo" was used internally for product beta testing to prevent the actual product name from leaking. However, it seems the translators overlooked translating this key. Thanks for pointing that up. The name has been updated.
Hallo! Yes, the label plate with the UV-ink printed design is included in all MMU3 packages.