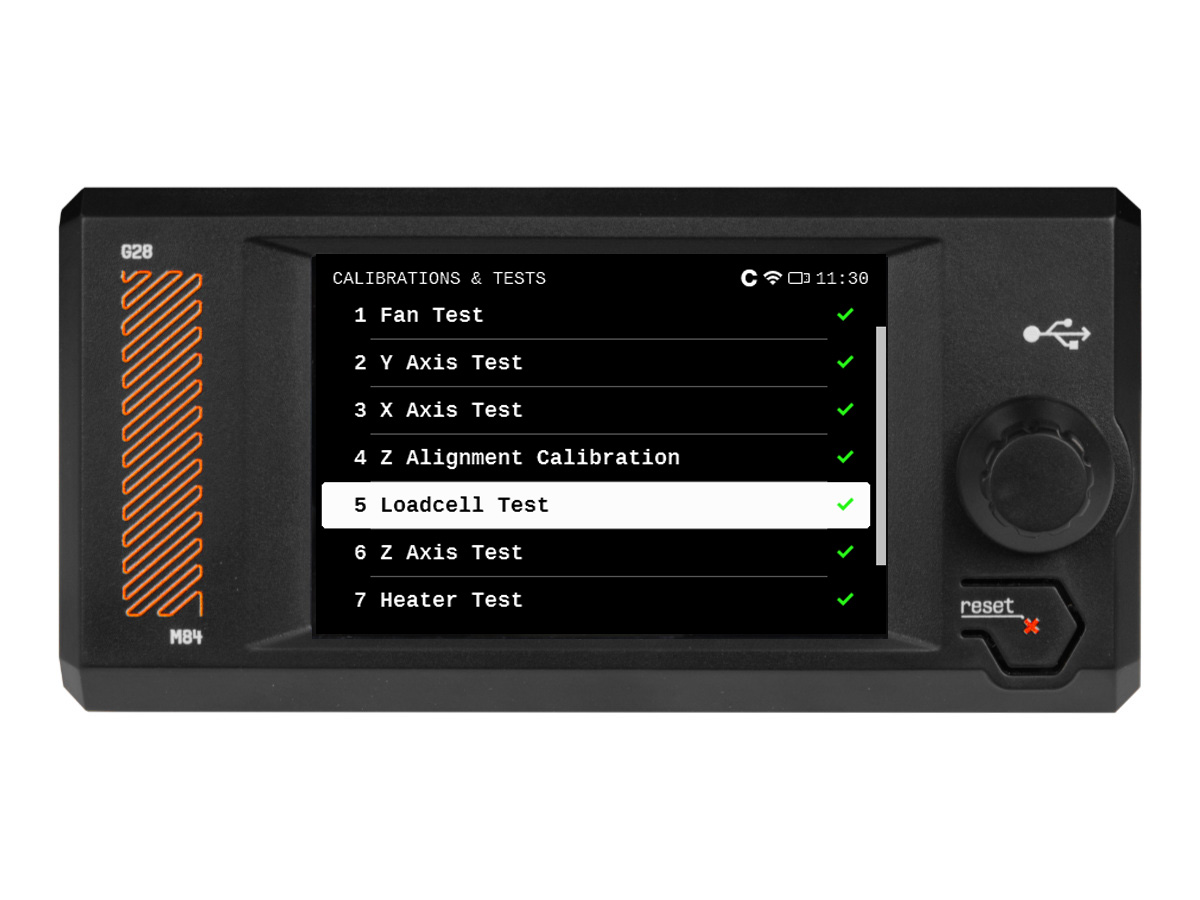
Beim Prusa CORE One/+ prüft der Selbsttest den Zusammenbau, die Verkabelung und die elektronischen Komponenten des Druckers auf Probleme. Es ist der erste Teil des Kalibrierungsassistenten, der automatisch aufgerufen wird, wenn Sie den Drucker zum ersten Mal einschalten oder nach einem Werksreset. Nachdem die Erstkalibrierung abgeschlossen ist, kann jeder Schritt des Selbsttests unter LCD-Menü -> Steuerung -> Kalibrierungen & Tests gestartet werden.
Bitte beachten Sie, dass die Kalibrierung beeinträchtigt werden kann, wenn der Drucker auf einer instabilen Oberfläche steht oder wenn ein anderer 3D-Drucker daneben in Betrieb ist. Der Drucker sollte auf einer stabilen Unterlage aufgestellt werden.
Prüfungen des Selbsttests
- Lüfter Test
- Türsensor
- Test der Y-Achse
- Test der X-Achse
- Z-Ausrichtung Kalibrierung
- Test der Wägezelle
- Test der Z-Achse
- Heizungstest
- Getriebekalibrierung (nicht obligatorisch, für Kits gedacht)
- Kalibrierung des Filament-Sensors
Ergebnisse des Selbsttests
Während des Selbsttests werden die Ergebnisse auf dem Bildschirm angezeigt, wobei für jeden Punkt Erfolg oder Misserfolg angegeben wird.
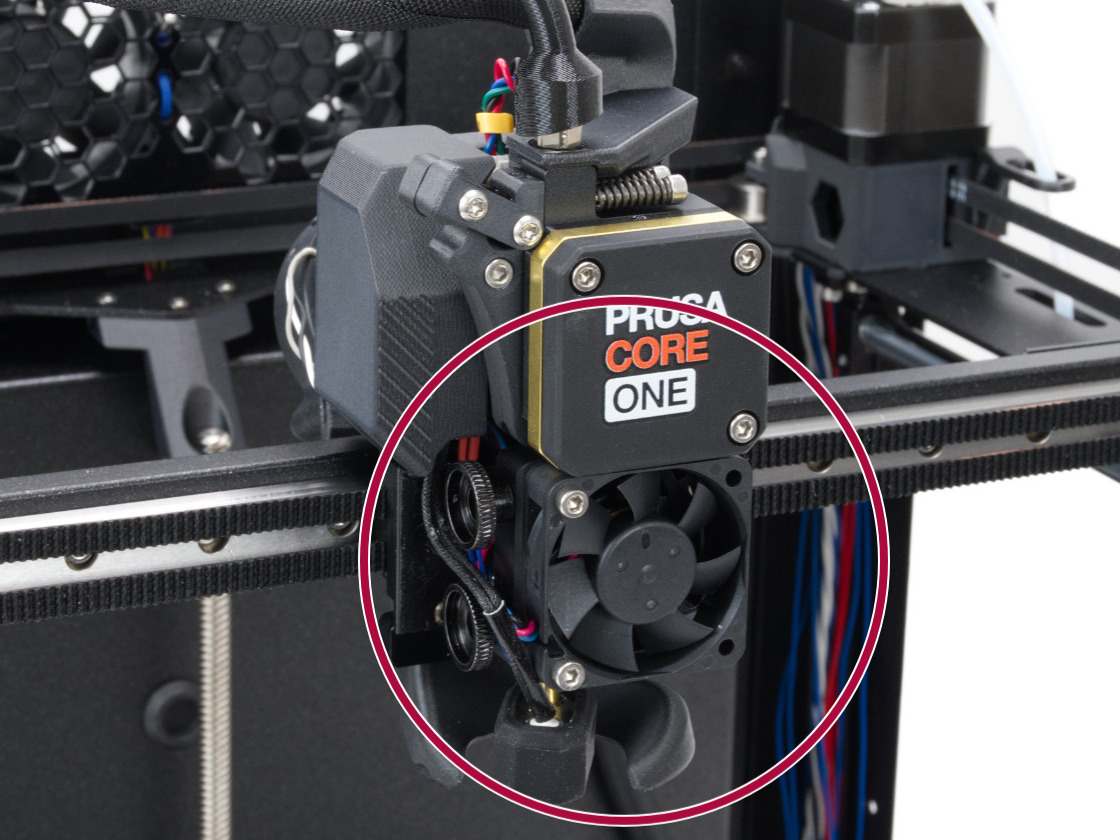
Lüfter testen
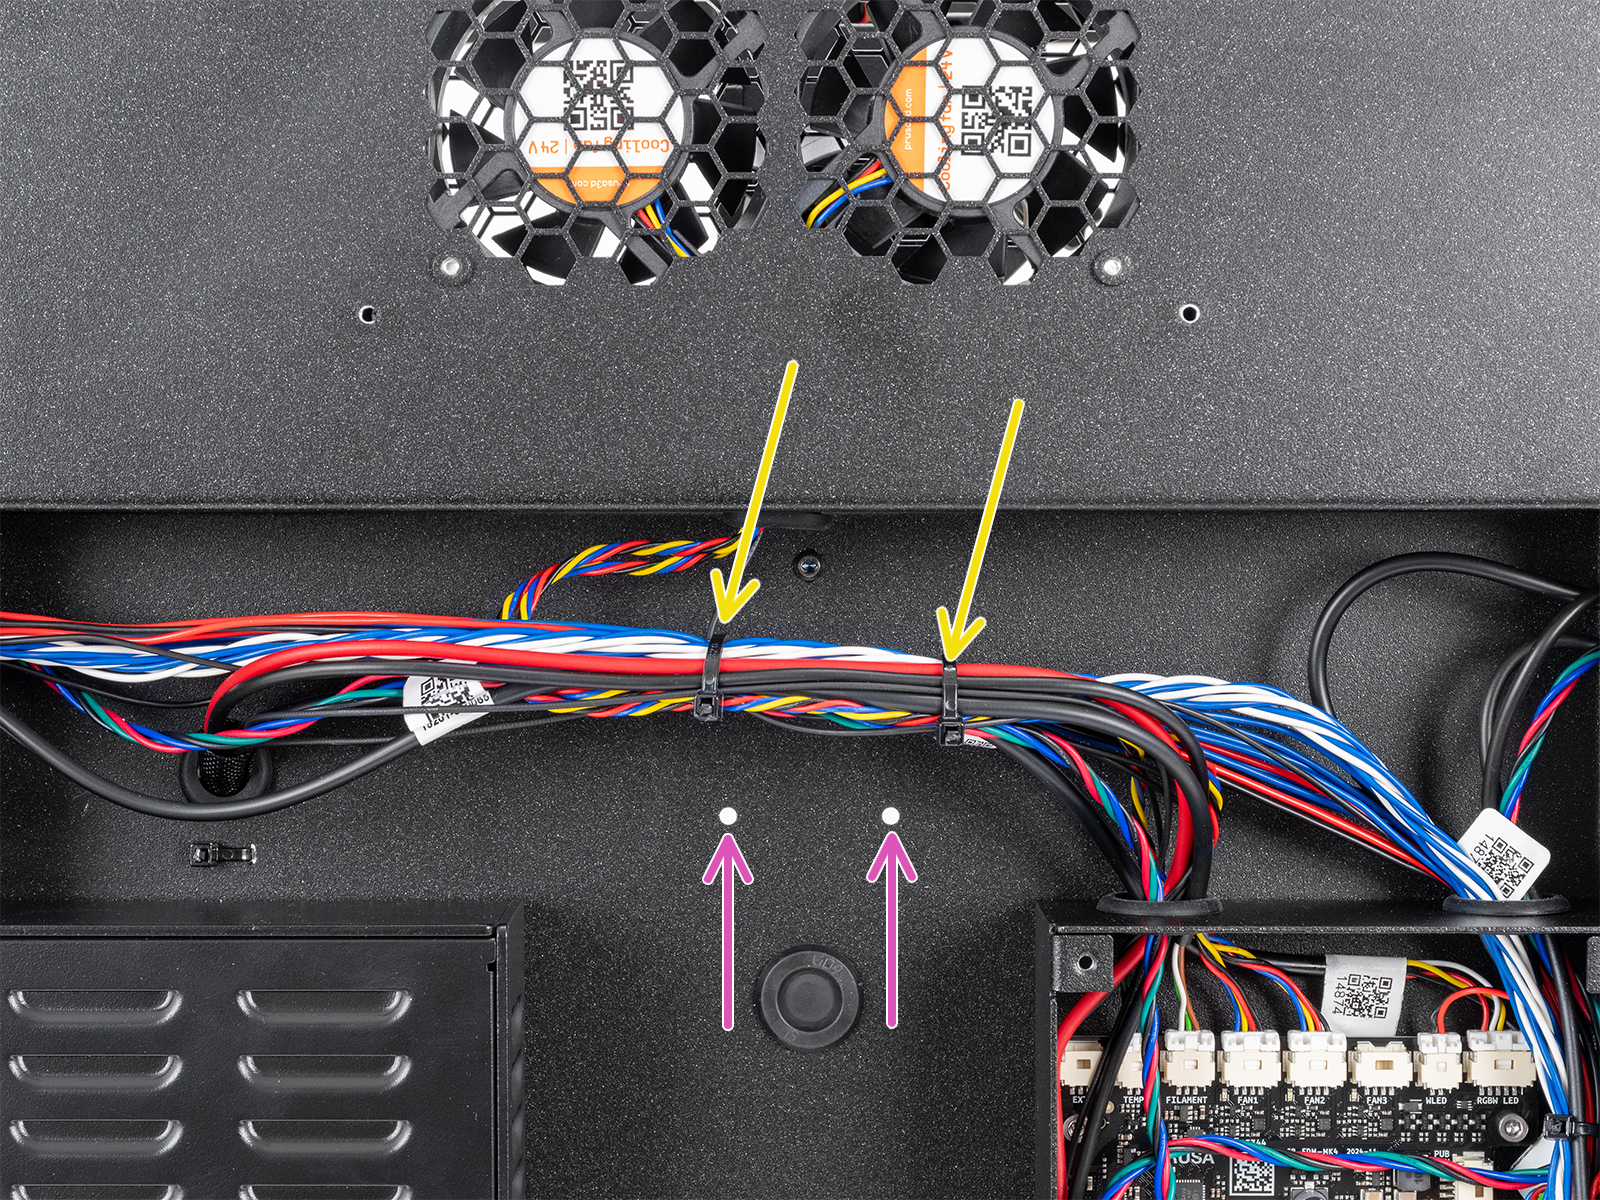
Das Prusa CORE One/+ Selbsttestverfahren testet den Lüfter des Hotends, den Drucklüfter und die Kammerlüfter. Wenn ein Problem auftritt, überprüfen Sie:
- Prüfen Sie auf Hindernisse, die das Drehen des Lüfters verhindern könnten.
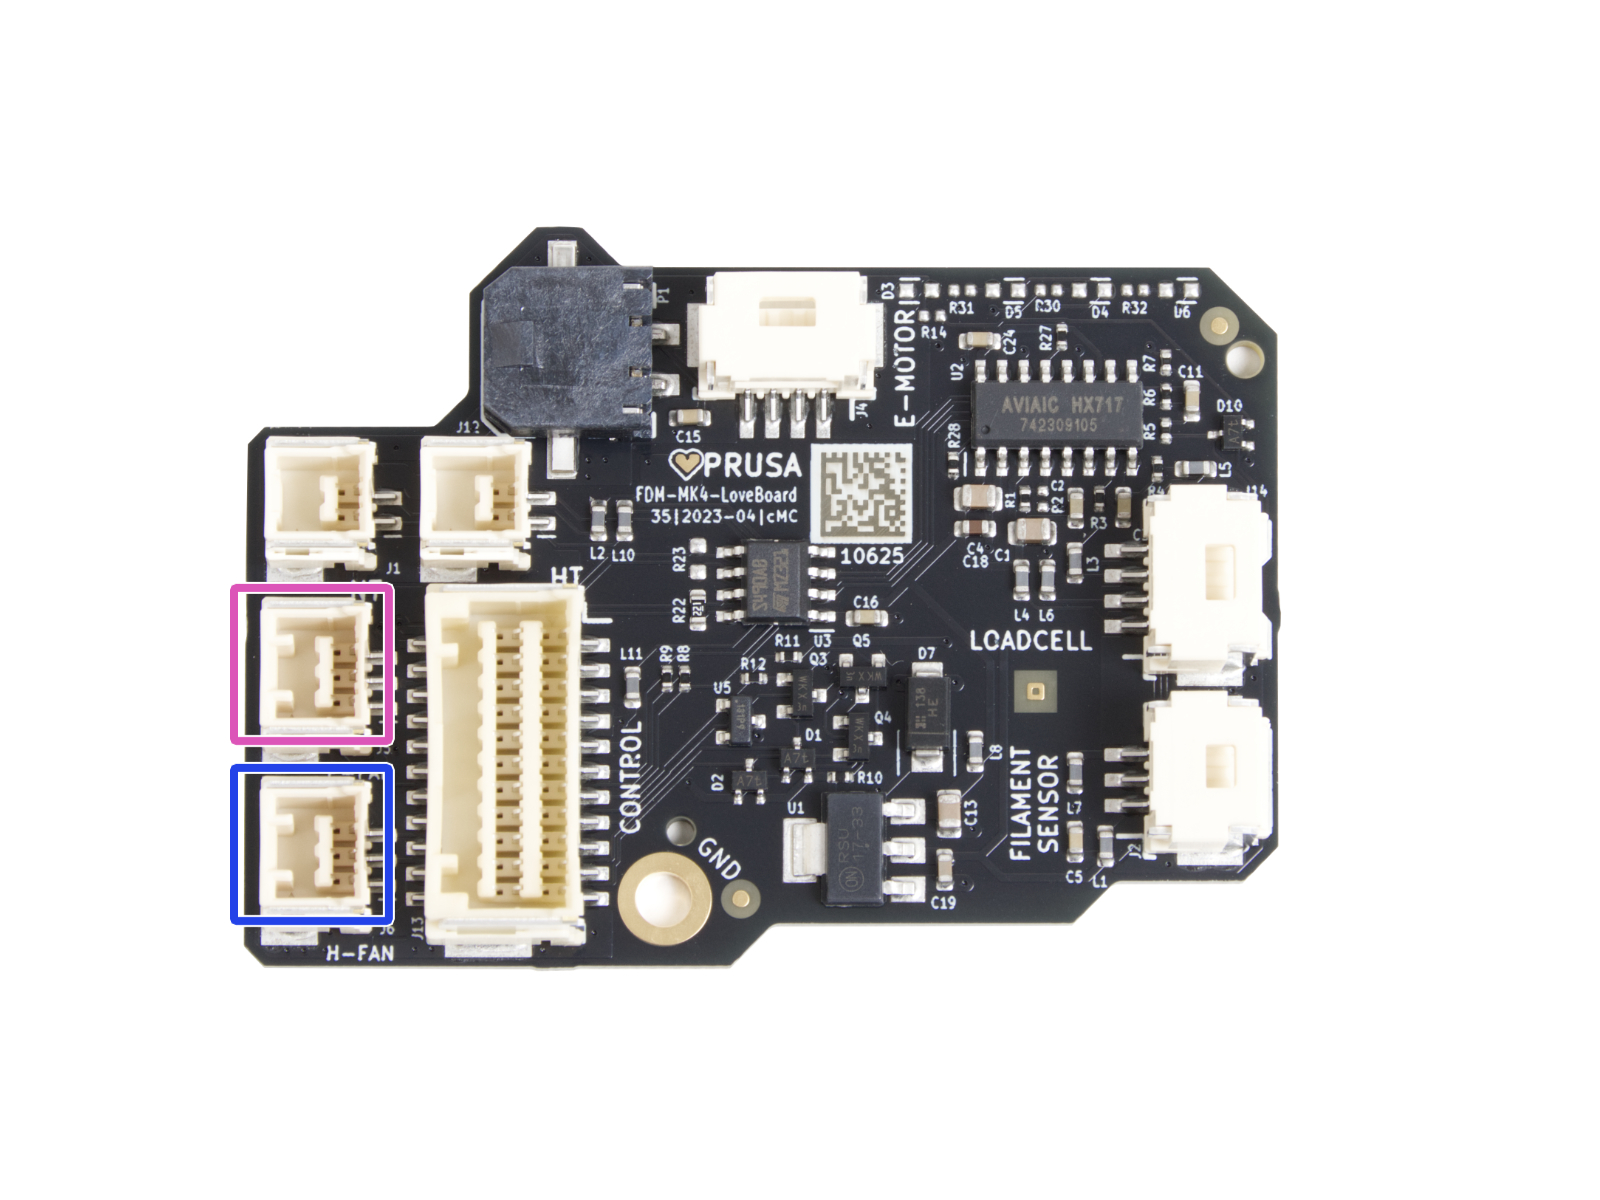
- Stellen Sie sicher, dass die Lüfter korrekt an das LoveBoard oder die xBuddy-Platine angeschlossen sind.
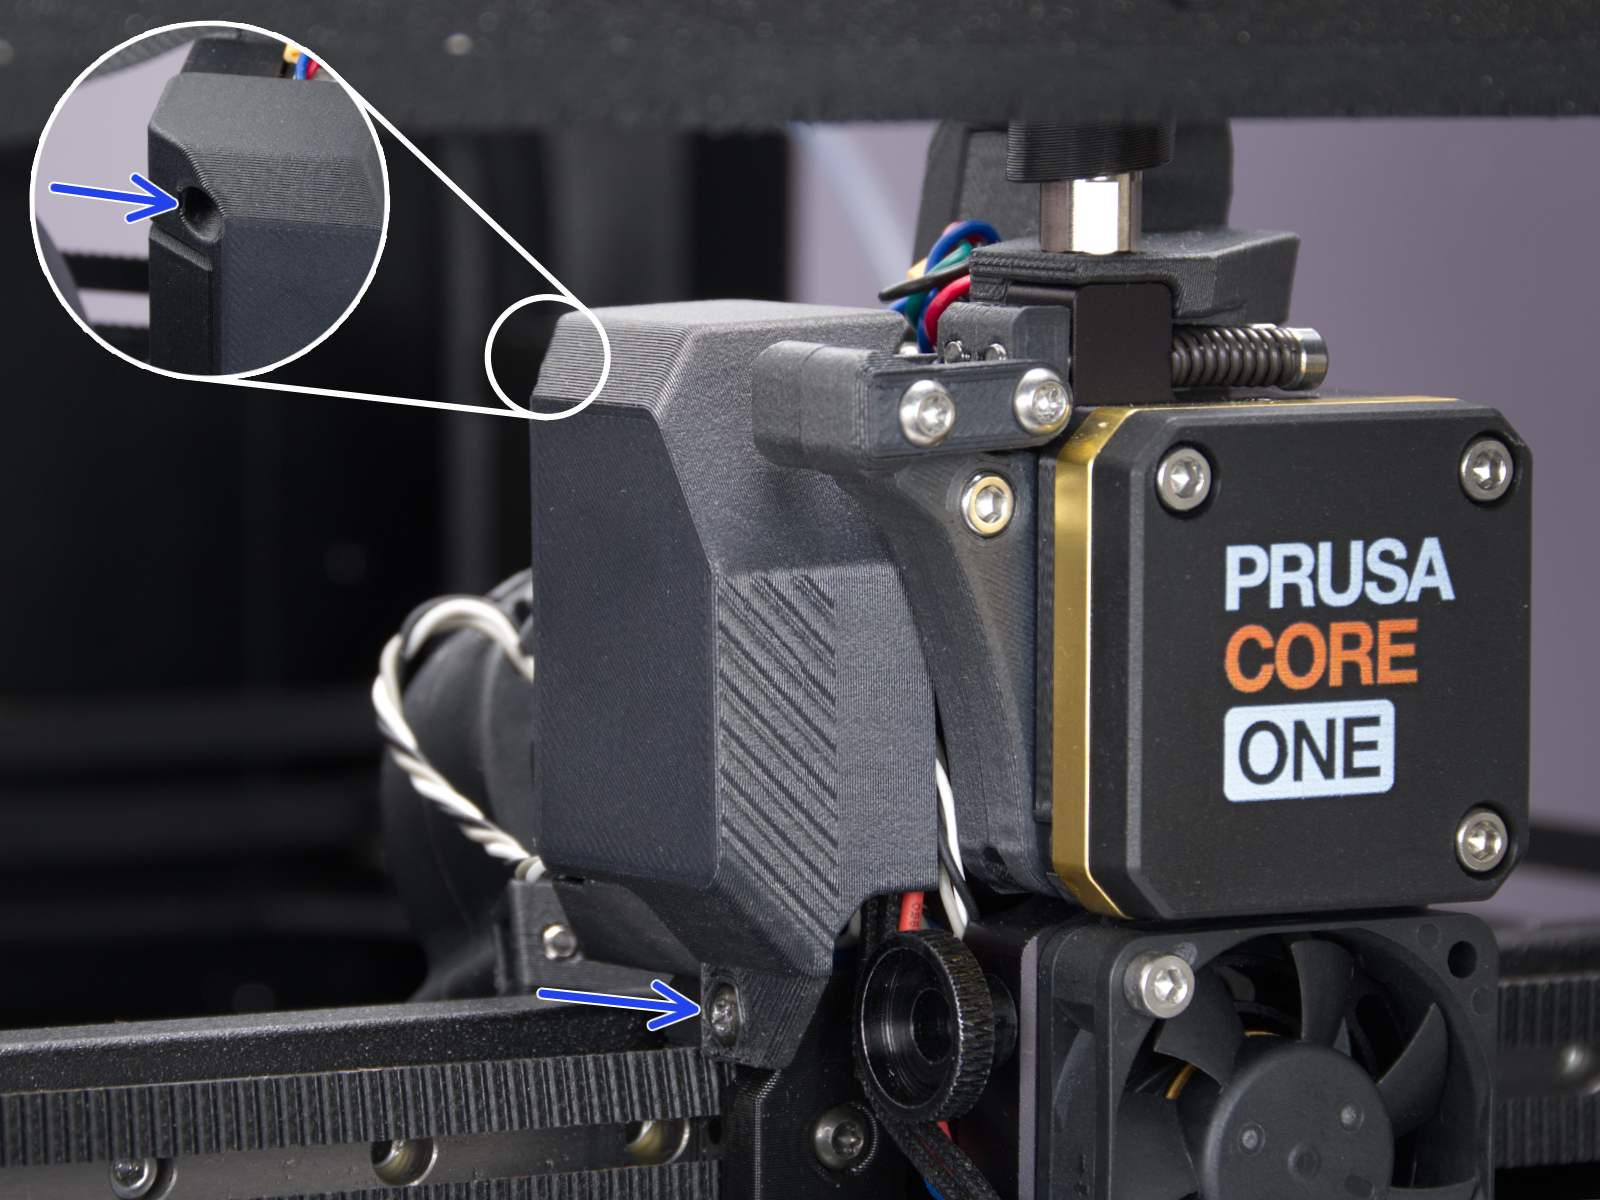
- Wenn der Fehler beim Lüfter des Hotends auftritt, stellen Sie sicher, dass er in der richtigen Position und Ausrichtung installiert ist, wie in der Abbildung unten gezeigt.
- Für den Drucklüfter und die Kammerlüfter gehen Sie im Druckermenü auf Steuerung -> Temperatur, und stellen Sie den zu testenden Lüfter auf 100%. Prüfen Sie, ob sich der Lüfter dreht oder ob er irgendwelche Fehler anzeigt.
Anstatt eines fehlgeschlagenen Selbsttests zeigt der Drucker möglicherweise die Meldung „Lüfter dreht sich nicht“ an. Dies kann auch als fehlgeschlagener Selbsttest gewertet werden.
 |  |
| Drucklüfter | Hotendlüfter |
 | 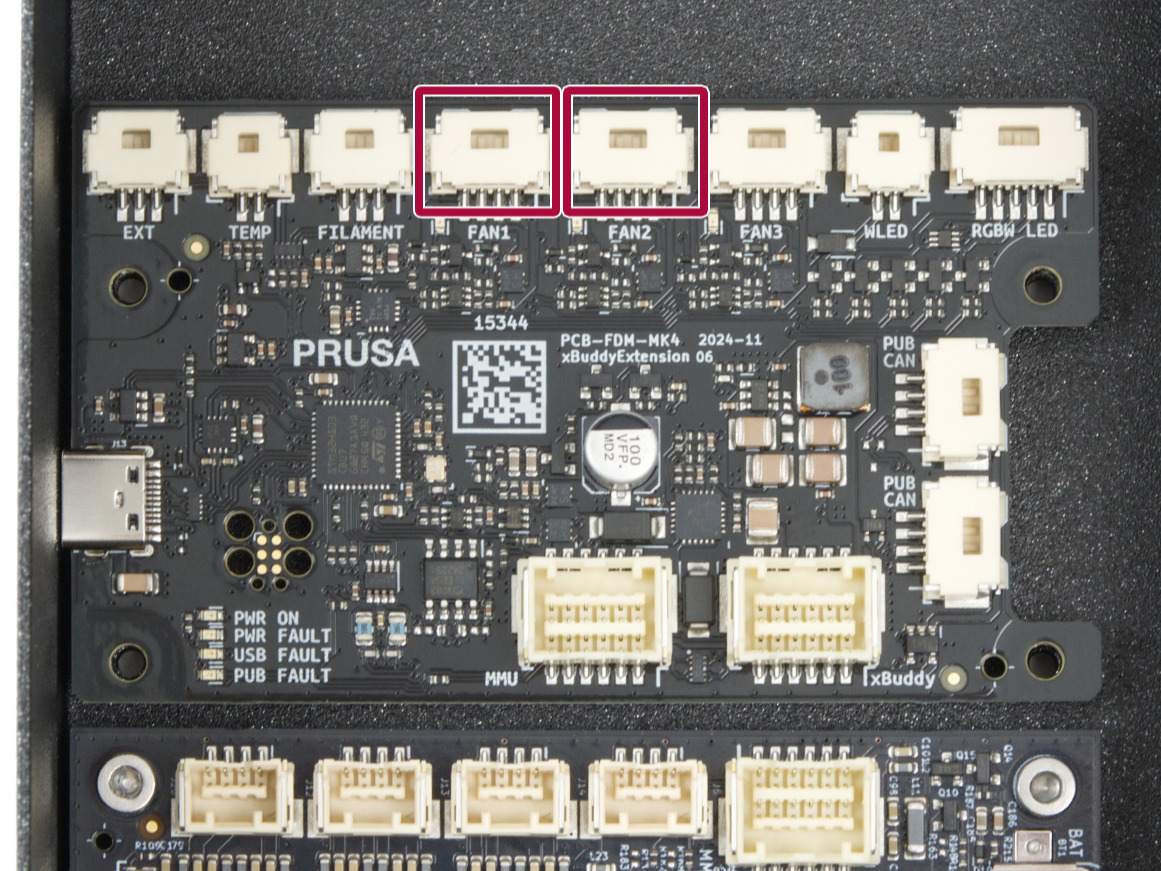 |
| Drucklüfter und Hotendlüfter Anschlüsse | Kammerlüfter Anschlüsse |
Türsensor-Kalibrierung
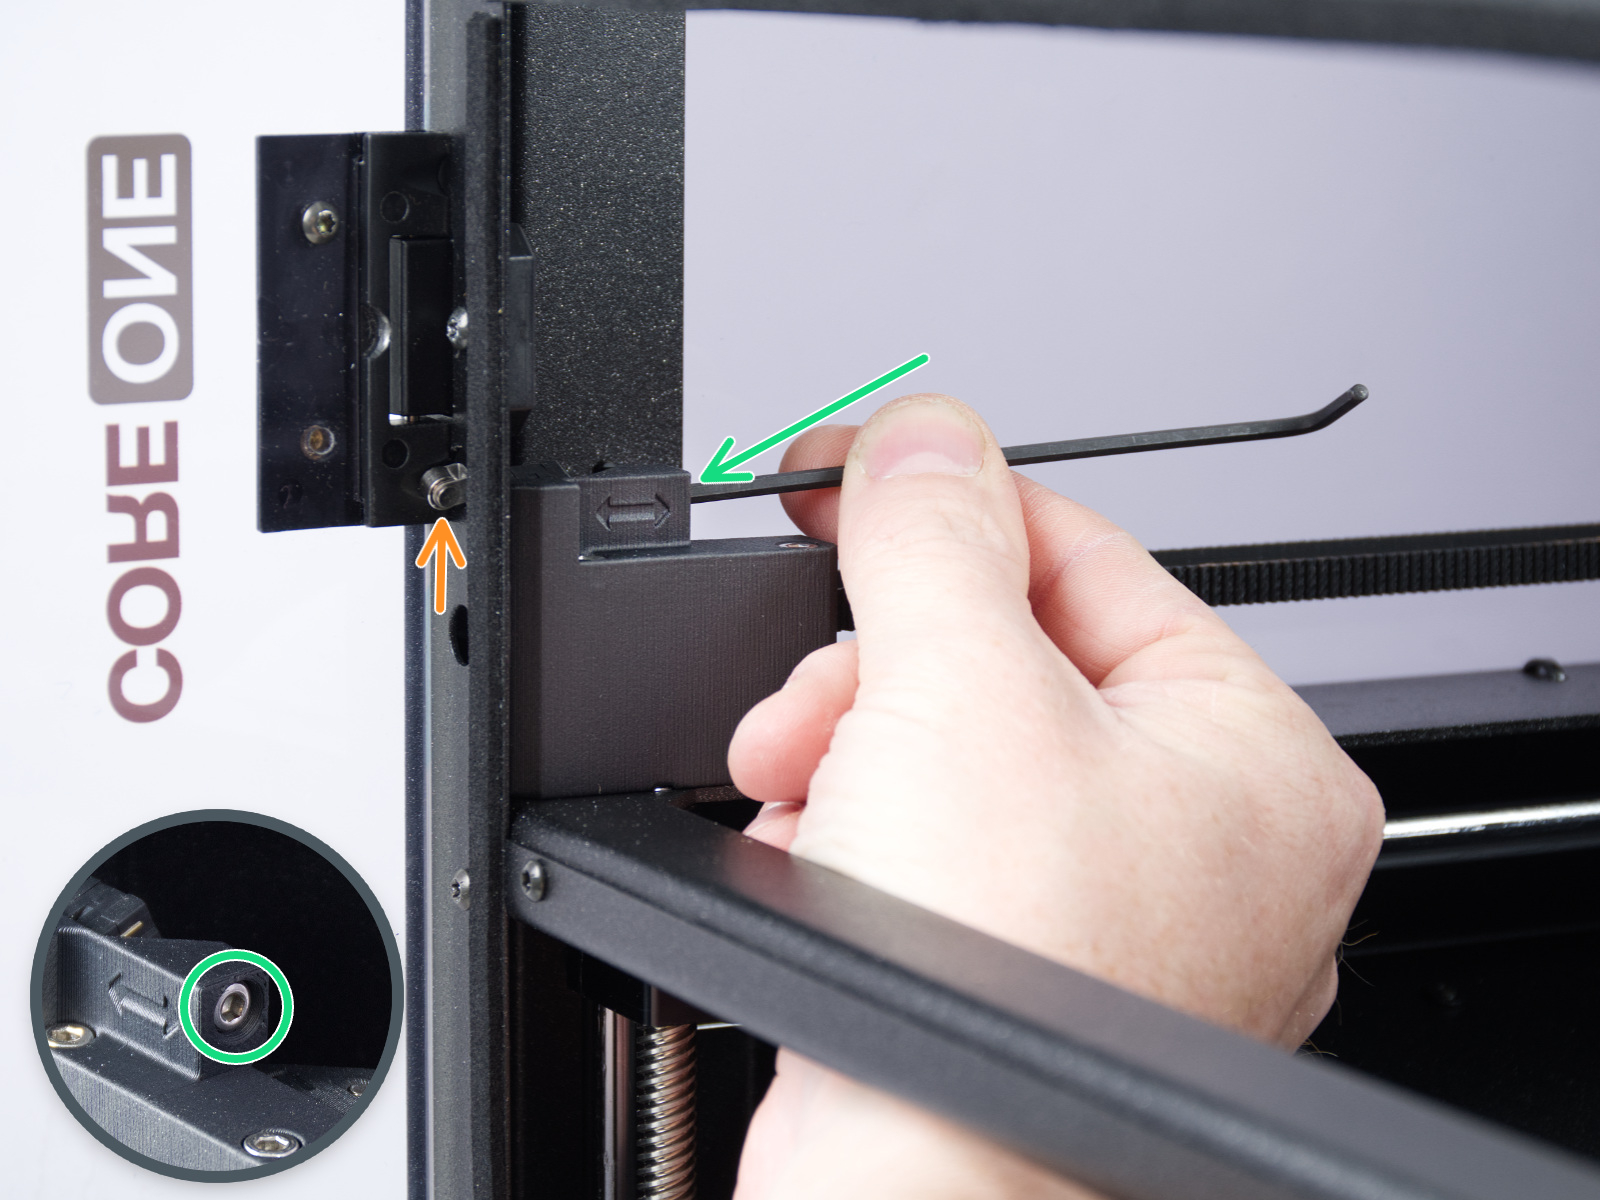
Falls sich der Sensor anders verhält, als von der Türsensor Kalibrierung erwartet, müssen Sie überprüfen, ob der Sensor funktioniert. Gehen Sie im Druckermenü auf Info -> Sensor Info -> Türsensor. Versuchen Sie dann, die Tür zu öffnen und zu schließen, um zu sehen, ob der Sensor ausgelöst wird. Wenn die Tür den Sensor nicht auslöst, versuchen Sie es, indem Sie mit dem Finger auf den Riegel drücken.
Wenn der Sensor den korrekten Status anzeigt, gehen Sie zurück zur Kalibrierung, indem Sie zu Steuerung -> Kalibrierungen & Tests -> Türsensor gehen und den Anweisungen zum Festziehen oder Lösen der Schrauben folgen.
Im letzten Teil der Kalibrierung fordert der Drucker Sie auf, Ihre Finger zwischen Tür und Rahmen zu halten. Dies dient dazu, Verletzungen zu vermeiden. Wenn es bei diesem Test ein Problem gibt, können Sie die Tür ganz offen lassen, um den Test zu bestehen.
Wenn der Türsensor nicht funktioniert, überprüfen Sie die Kabellänge und die Verbindung.
Test der Y- und X-Achse
Der Drucker kann feststellen, ob sich die Komponenten entlang jeder Achse korrekt bewegen.
Wenn ein Problem auf der X- oder Y-Achse auftritt, stellen Sie sicher, dass kein Hindernis die Bewegung behindert, und justieren Sie die Riemenspannung nach.
Testen Sie auch die Bewegung des Druckers, indem Sie die Schrittmotoren vorübergehend deaktivieren (LCD-Menü -> Steuerung -> Motoren deaktivieren) und sich entlang beider XY-Diagonalen bewegen.
Bewegen Sie die X-Achse zur Vorderseite des CoreXY und prüfen Sie, ob beide Seiten gleichzeitig die Vorderseite berühren. Wenn die Seiten nicht ausgerichtet sind, die Riemen aber die richtige Spannung haben, gehen Sie wie folgt vor:
- Lockern Sie die Riemen vollständig. Achten Sie darauf, dass die Vierkantmuttern beim Abnehmen nicht von den Kunststoffteilen abfallen.
- Prüfen Sie, welche Seite am vorderen Ende anliegt (straffe Seite) und welche Seite gegen das vordere Ende geschoben werden muss, um es zu berühren (lose Seite).
- Setzen Sie einen Universalschlüssel oder etwas ähnlich Dickes zwischen die feste Seite und das vordere Ende. Ziehen Sie leicht an der losen Seite, um den Schiefstand zu korrigieren.
- Prüfen Sie die Ausrichtung erneut und wiederholen Sie sie bei Bedarf. Sollten sich die feste und die lose Seite vertauscht haben, wiederholen Sie den Vorgang von der anderen Seite aus, üben aber einen geringeren Druck aus.
- Ziehen Sie die Riemen erneut an.
- Bei Fehlern in der Y-Achse überprüfen Sie, ob das Kabel des seitlichen Filament-Sensors die Achsenbewegung nicht blockiert.
Wenn das Problem weiterhin besteht, schauen Sie durch die Öffnungen an den Kunststoffteilen unter den CoreXY Motoren. Dort können Sie die Riemenscheiben der Motoren sehen. Stellen Sie sicher, dass sie richtig ausgerichtet sind, dass beide Madenschrauben fest angezogen sind und dass eine von ihnen über dem flachen Teil der Motorwelle angezogen ist.
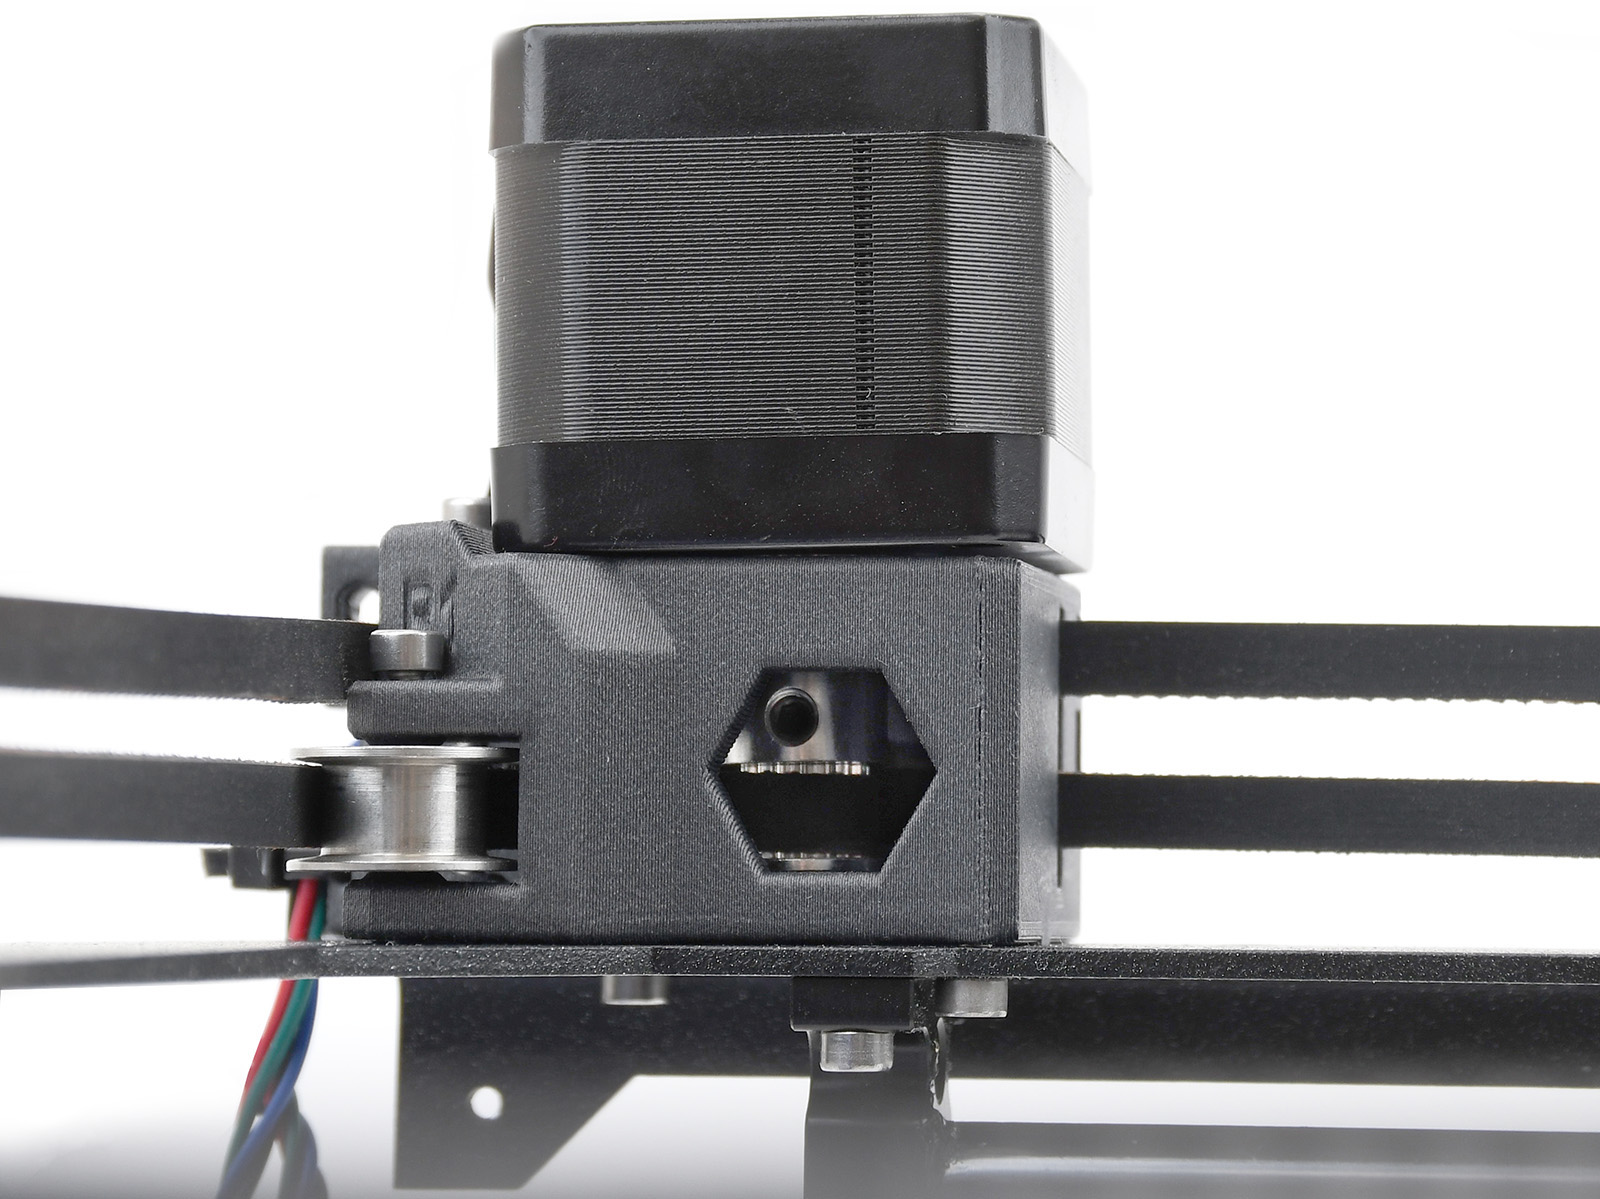 | 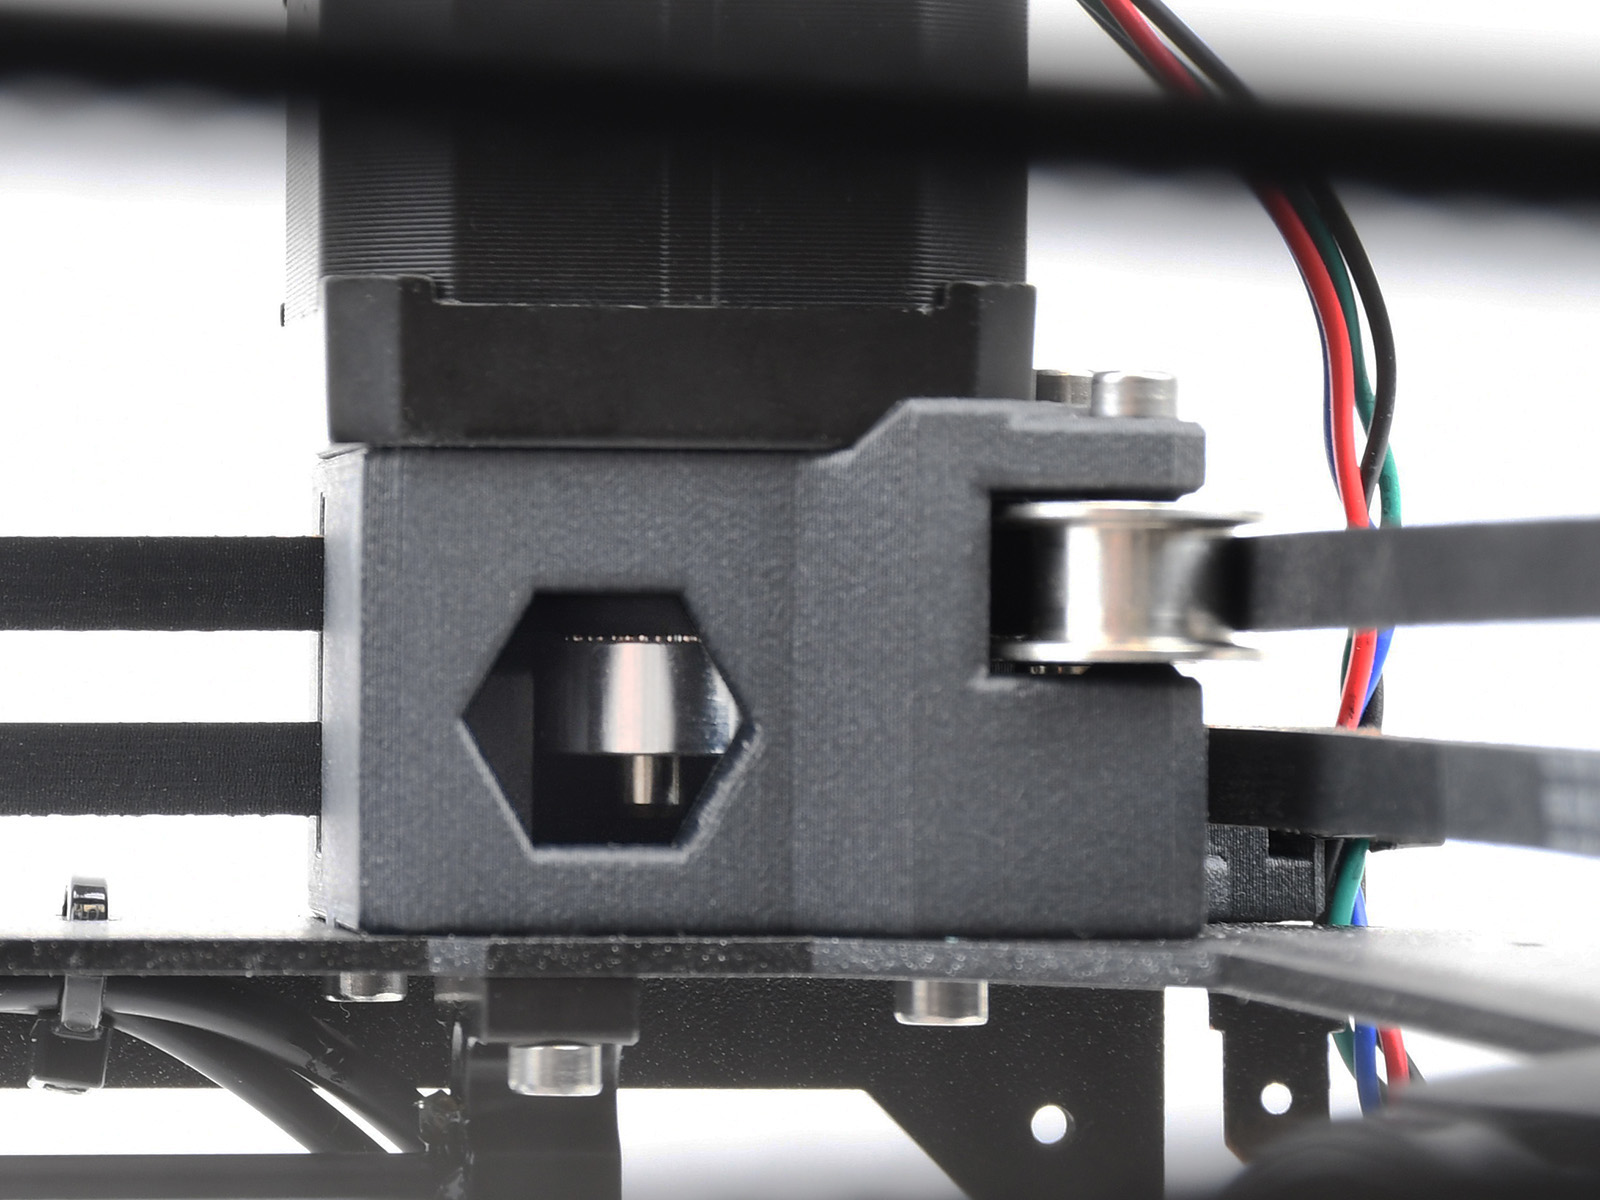 |
| Y-Motor Riemenscheibe | X-Motor Riemenscheibe |
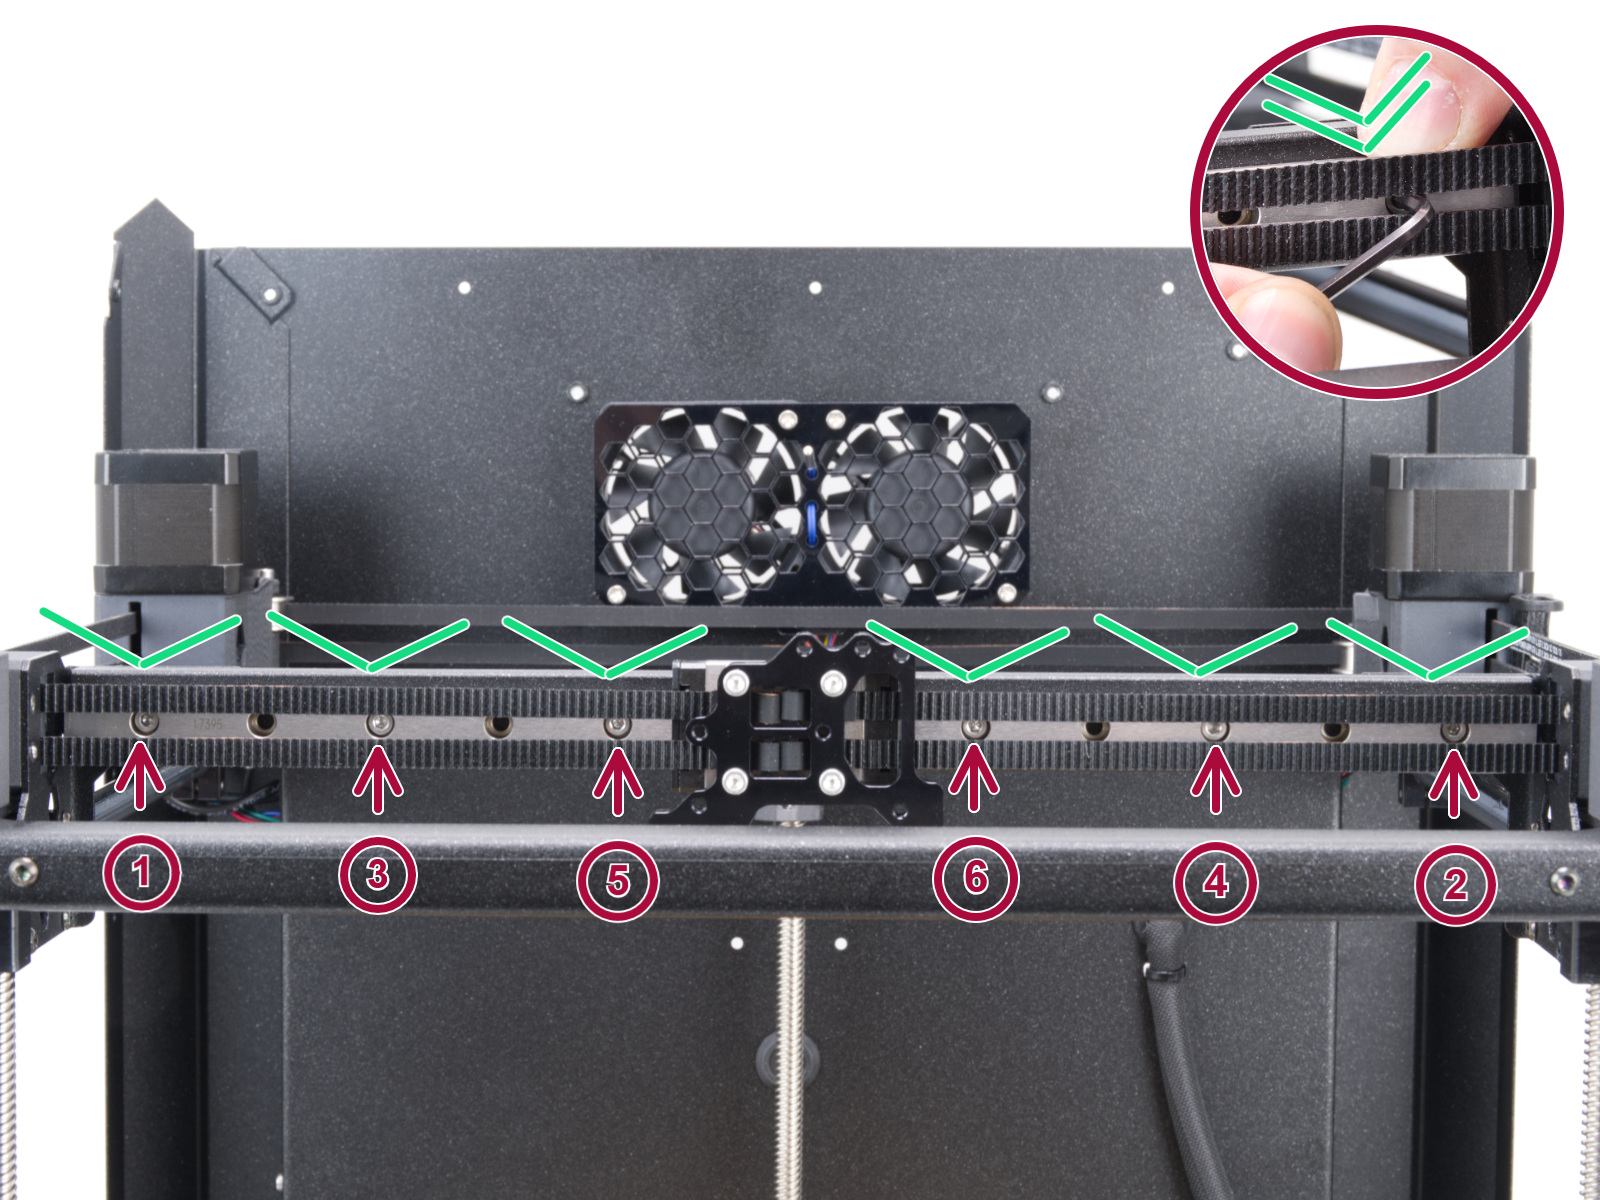
Wenn keiner der genannten Punkte hilft, lösen Sie die sechs Schrauben, die die Linearschienen der X-Achse halten, leicht (ein bis zwei Umdrehungen), lassen Sie die Schiene nach unten fallen und ziehen Sie sie in der korrekten Reihenfolge wieder an.
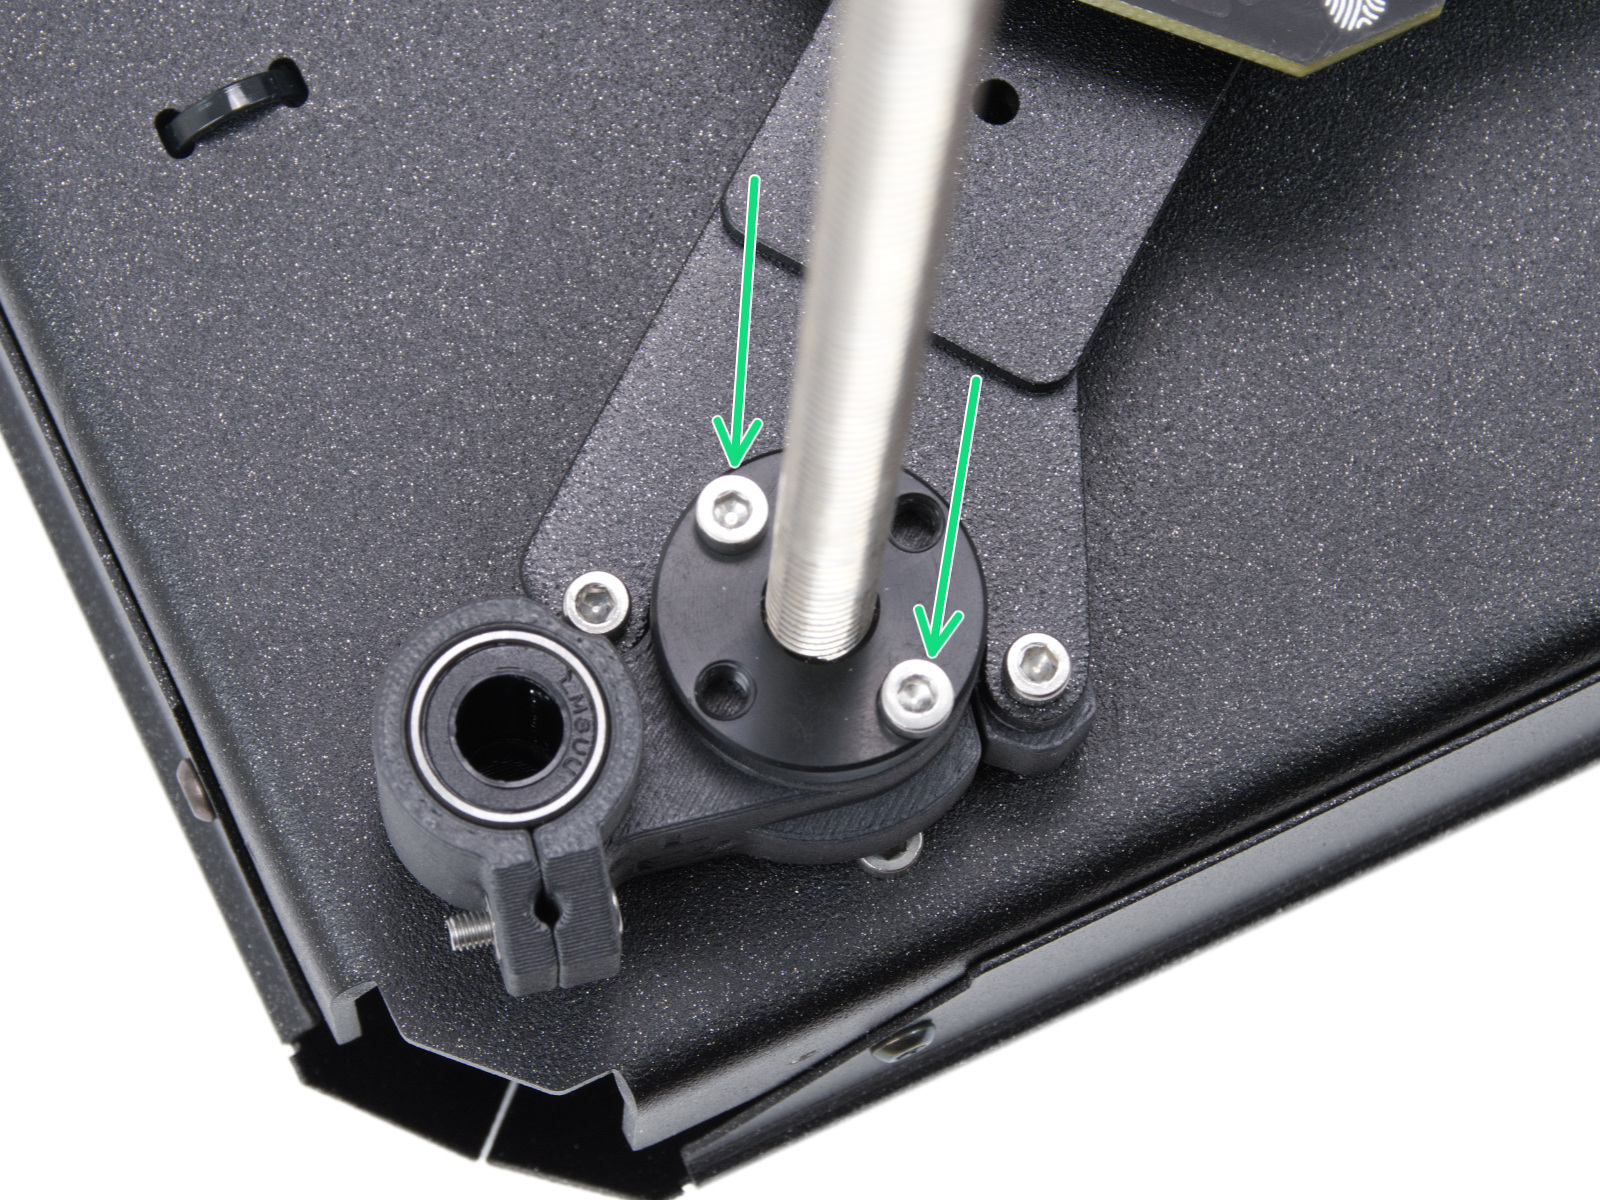
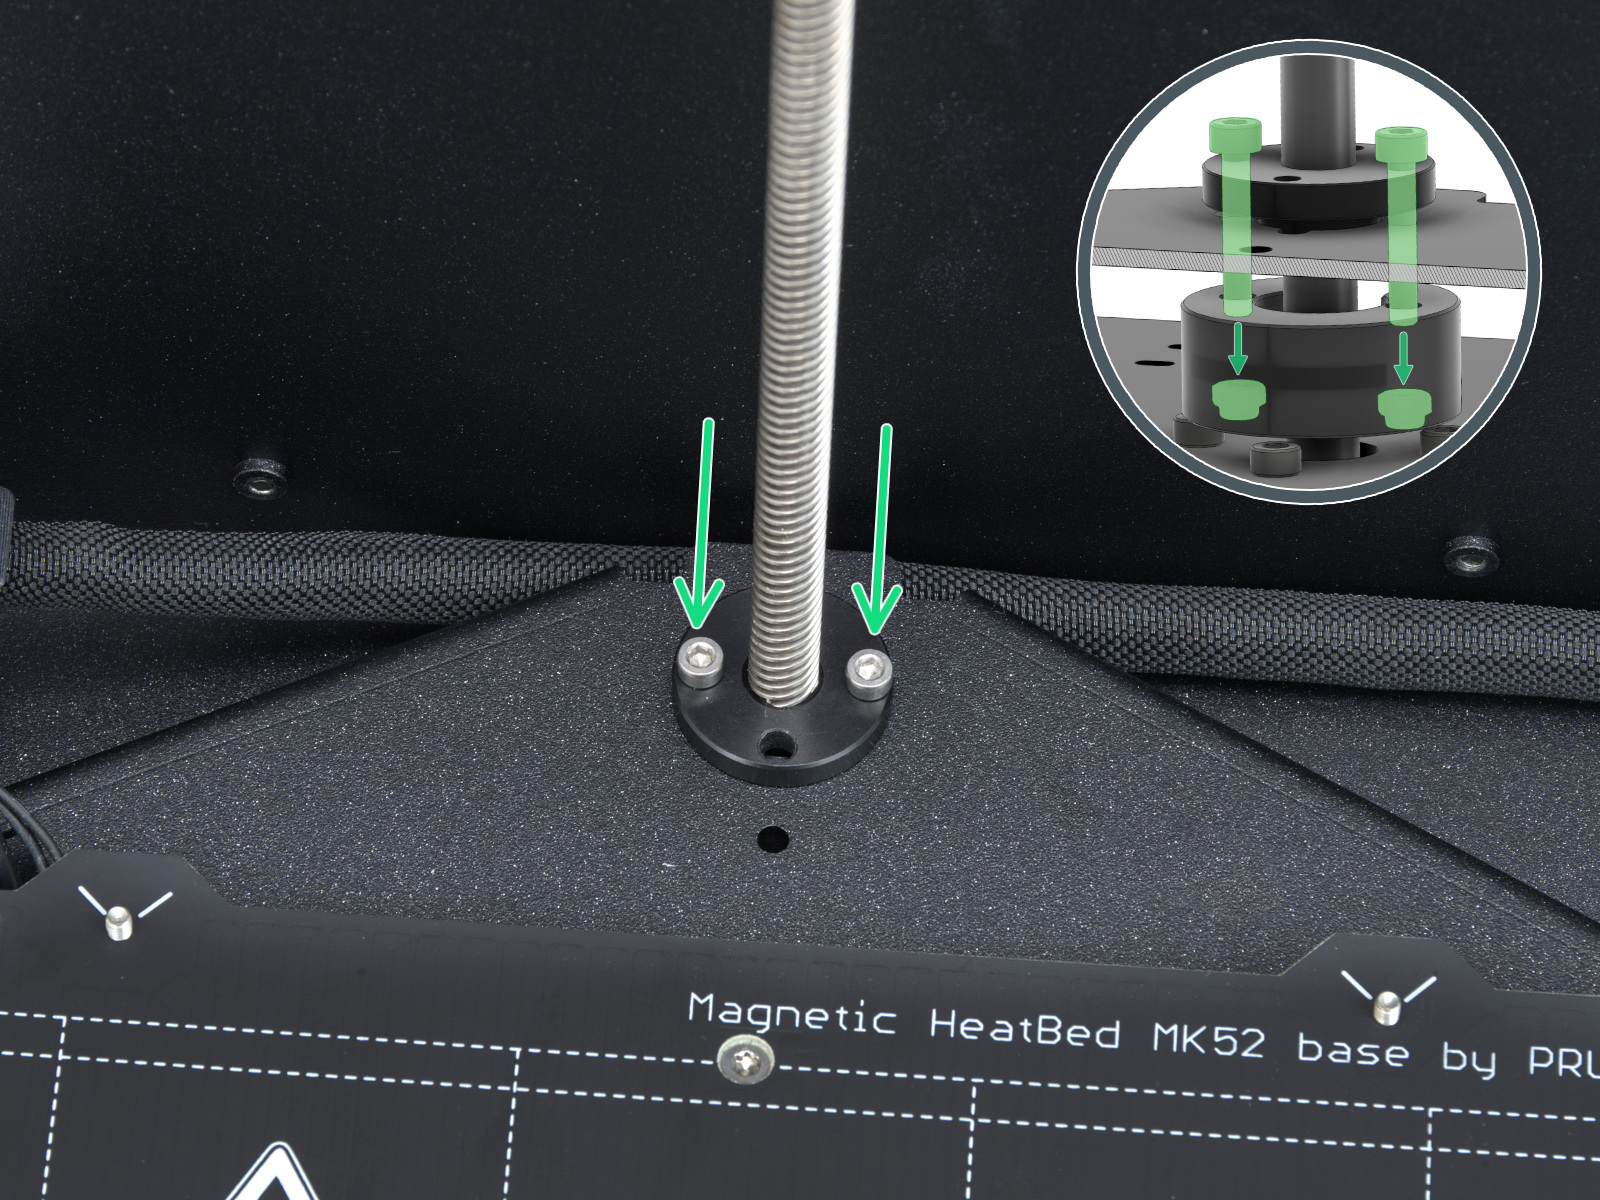
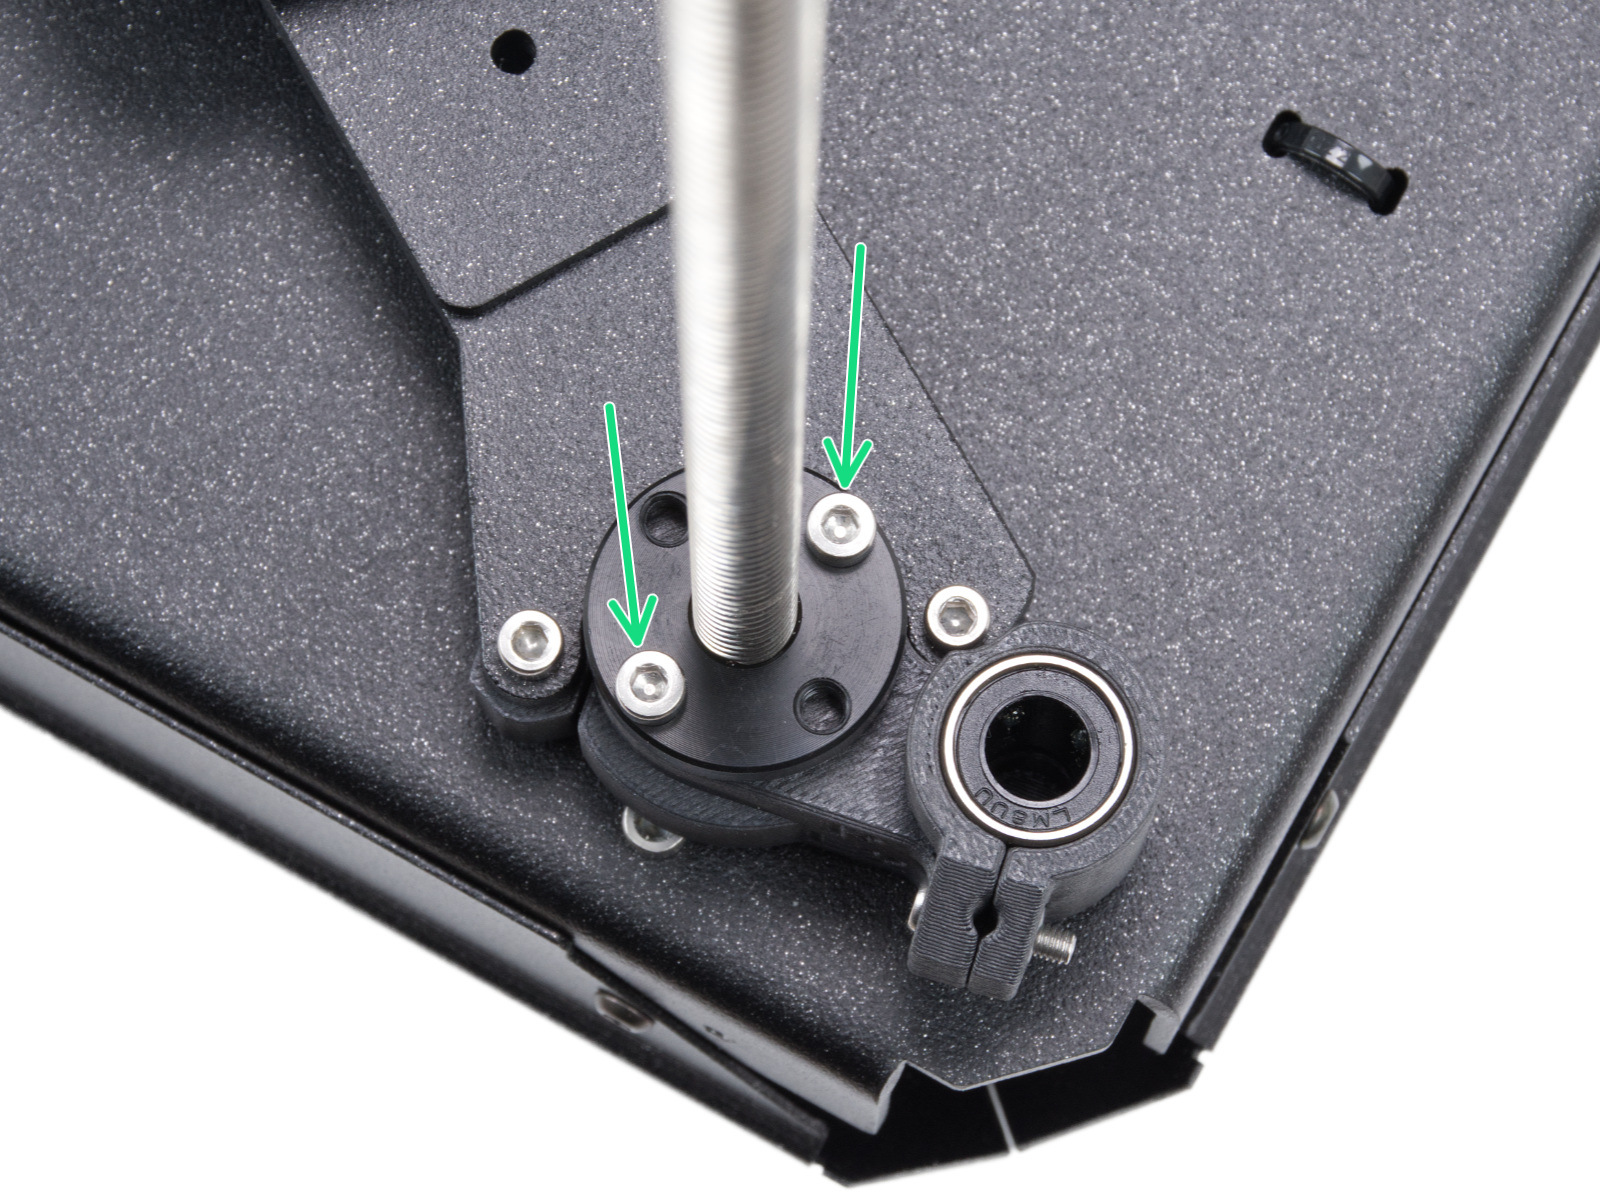
Kalibrierung der Z-Ausrichtung
Dieser Teil der Kalibrierung dient dazu, die drei Motoren auf der Z-Achse so auszurichten, dass das Heizbett eben ist. Sollten bei diesem Test Fehler auftreten, überprüfen Sie die Trapezmuttern an den Gewindestangen der Motoren. Bewegen Sie dazu das Bett ganz nach unten, entweder über das Menü in Steuerung -> Achse bewegen -> Z bewegen, oder durch Drehen der Gewindestangen an den z-Motoren. Lösen und entfernen Sie die in der Abbildung unten gezeigten Schrauben. Bewegen Sie die Mutter entlang der Gewindestange und prüfen Sie, ob die Bewegung flüssig ist oder nicht. Wenn die Trapezmutter immer noch locker ist, versuchen Sie, die Gewindestange des Motors von Hand zu bewegen (der Drucker muss dazu ausgeschaltet sein) und sehen Sie, ob sie sich leicht dreht.
 |  |  |
| Linke Seite Trapezgewindemutter | Hinterer Motor Trapezgewindemutter | Rechte Seite Trapezgewindemutter |
Test der Wägezelle
Eine funktionierende Wägezelle ist für den Prusa CORE One/+ von grundlegender Bedeutung, um zu erkennen, dass die Düse nahe genug am Blech ist, um gedruckt zu werden, und um Schäden zu vermeiden, die dadurch entstehen würden, dass sich die Düse in das Blech eingräbt.
- Stellen Sie sicher, dass die Wägezelle korrekt mit dem LoveBoard verbunden ist.
- Vergewissern Sie sich, dass die Oberfläche, auf der der Drucker steht, so stabil wie möglich ist: Jede Form von Vibration, die sich auf die Oberfläche unter dem Drucker überträgt, oder eine nicht ganz stabile Oberfläche unter dem Drucker kann zu einer falschen Anzeige der Wägezelle führen, so dass der Selbsttest nicht bestanden wird.
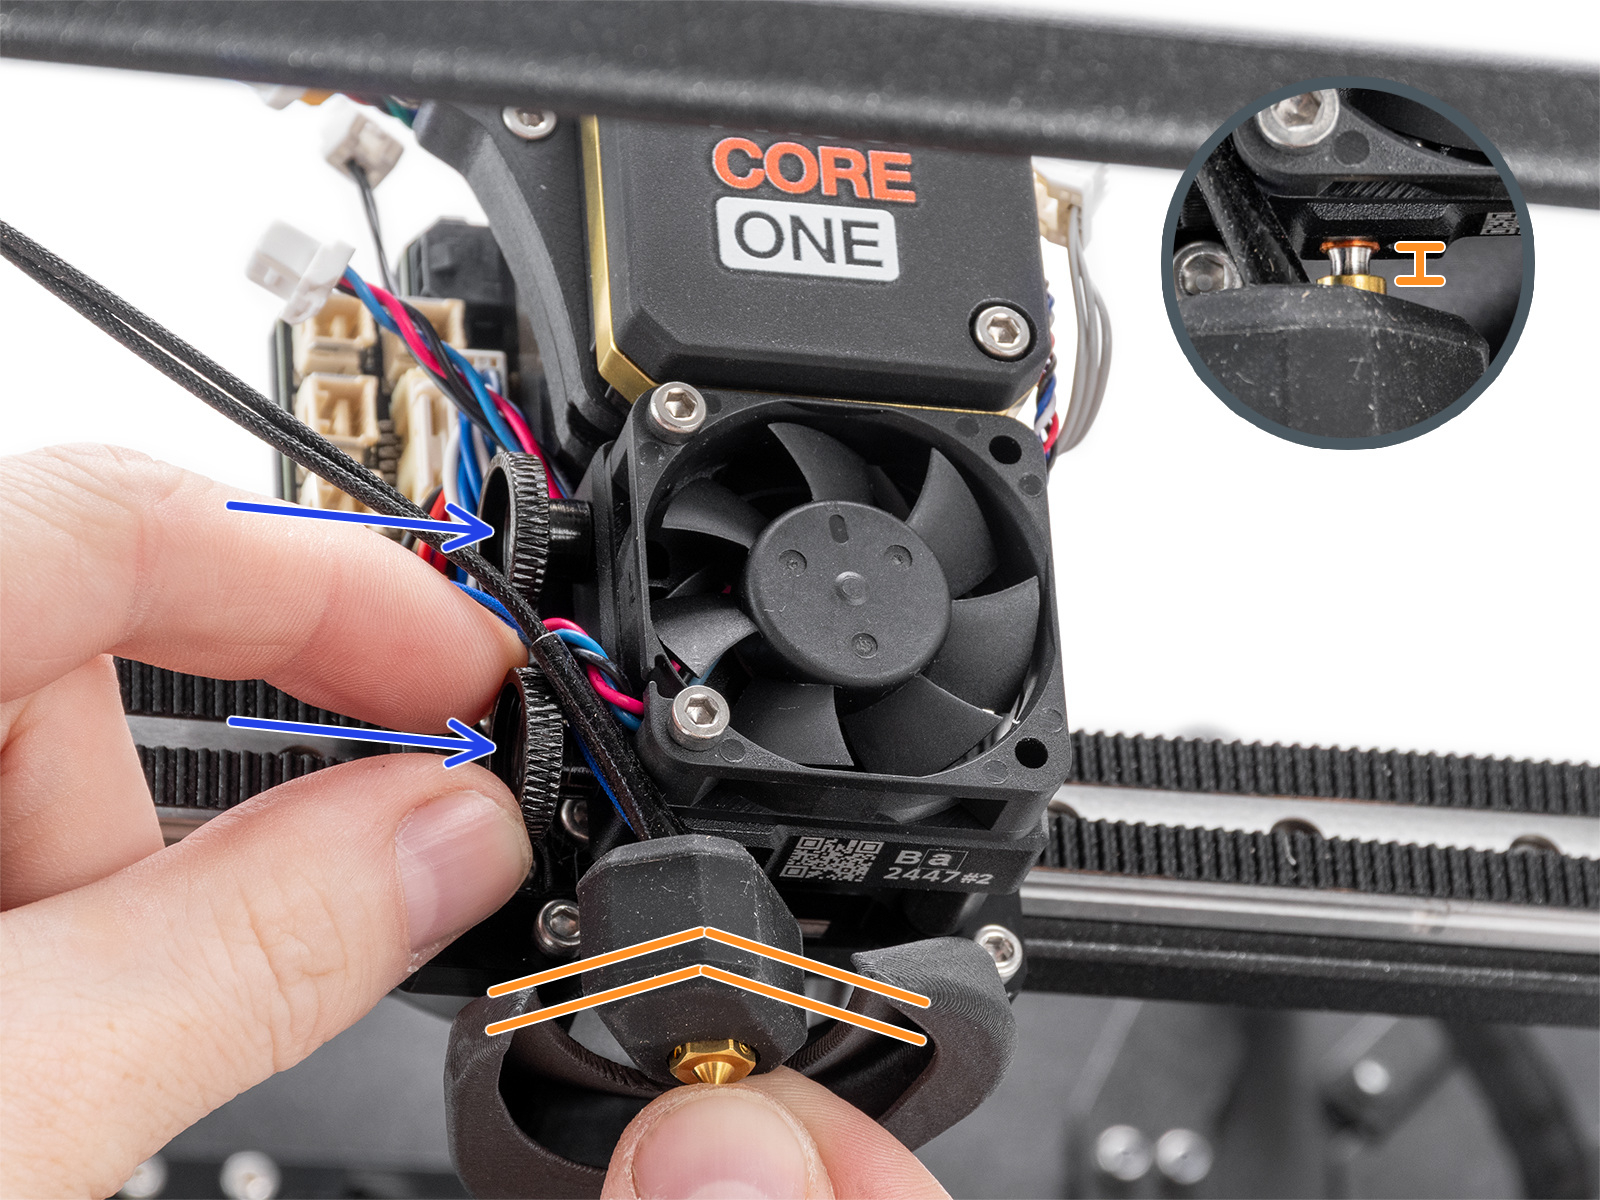
- Prüfen Sie, ob sich das Hotend nicht bewegen lässt und bis zum Anschlag eingeschoben ist.
 |  |
 | |
Heizungstest
Der Selbsttest kann einen Fehler beim Aufheizen einer Komponente und die betroffene Komponente ermitteln.
Heizen Sie die betroffene Komponente unter LCD-Menü -> Steuerung -> Temperatur auf, heizen Sie das Teil auf, das den Selbsttest nicht bestanden hat, und sehen Sie nach, ob ein Fehler angezeigt wird. Wenn dies der Fall ist, sollte der Fehler einen QR-Code enthalten, der Sie zu dem Artikel weiterleitet, in dem die Fehlerbehebung für diesen speziellen Fehler beschrieben wird.
Filament-Sensor
Der Prusa CORE One/+ ist mit zwei Filament-Sensoren ausgestattet: Der erste befindet sich an der Seite, nahe dem Eingang des PTFE-Schlauchs, in den Sie das Filament einführen. Der zweite befindet sich im Nextruder.
Beide Filament-Sensoren sind für den korrekten Einzug des Filaments notwendig. Wenn der Sensor an der Seite feststellt, dass das Filament ausgegangen ist, wird das Filament rechtzeitig zurückgezogen.
Der Drucker fordert Sie auf, das Filament in den Extruder einzulegen, um die Sensoren zu testen. Während des Selbsttests werden die beiden Sensoren am unteren Rand des Bildschirms angezeigt. Falls einer der Sensoren nicht ausgelöst wird:
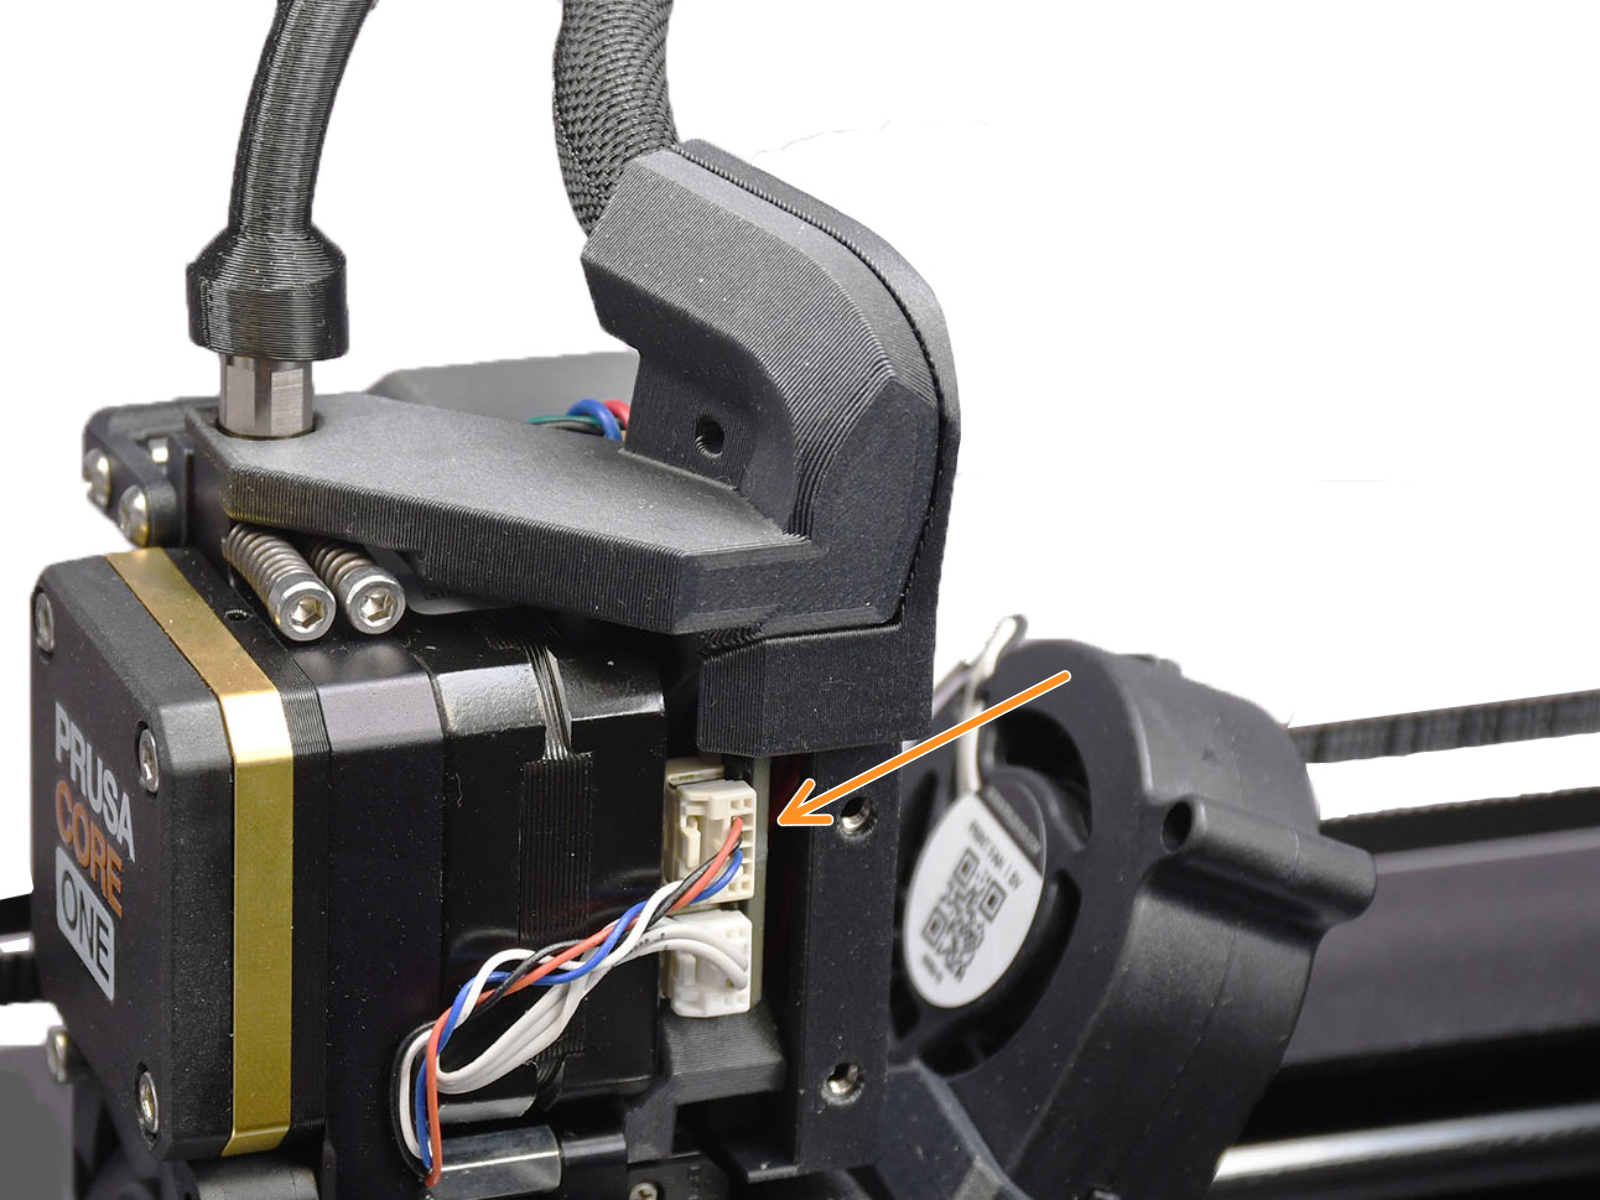
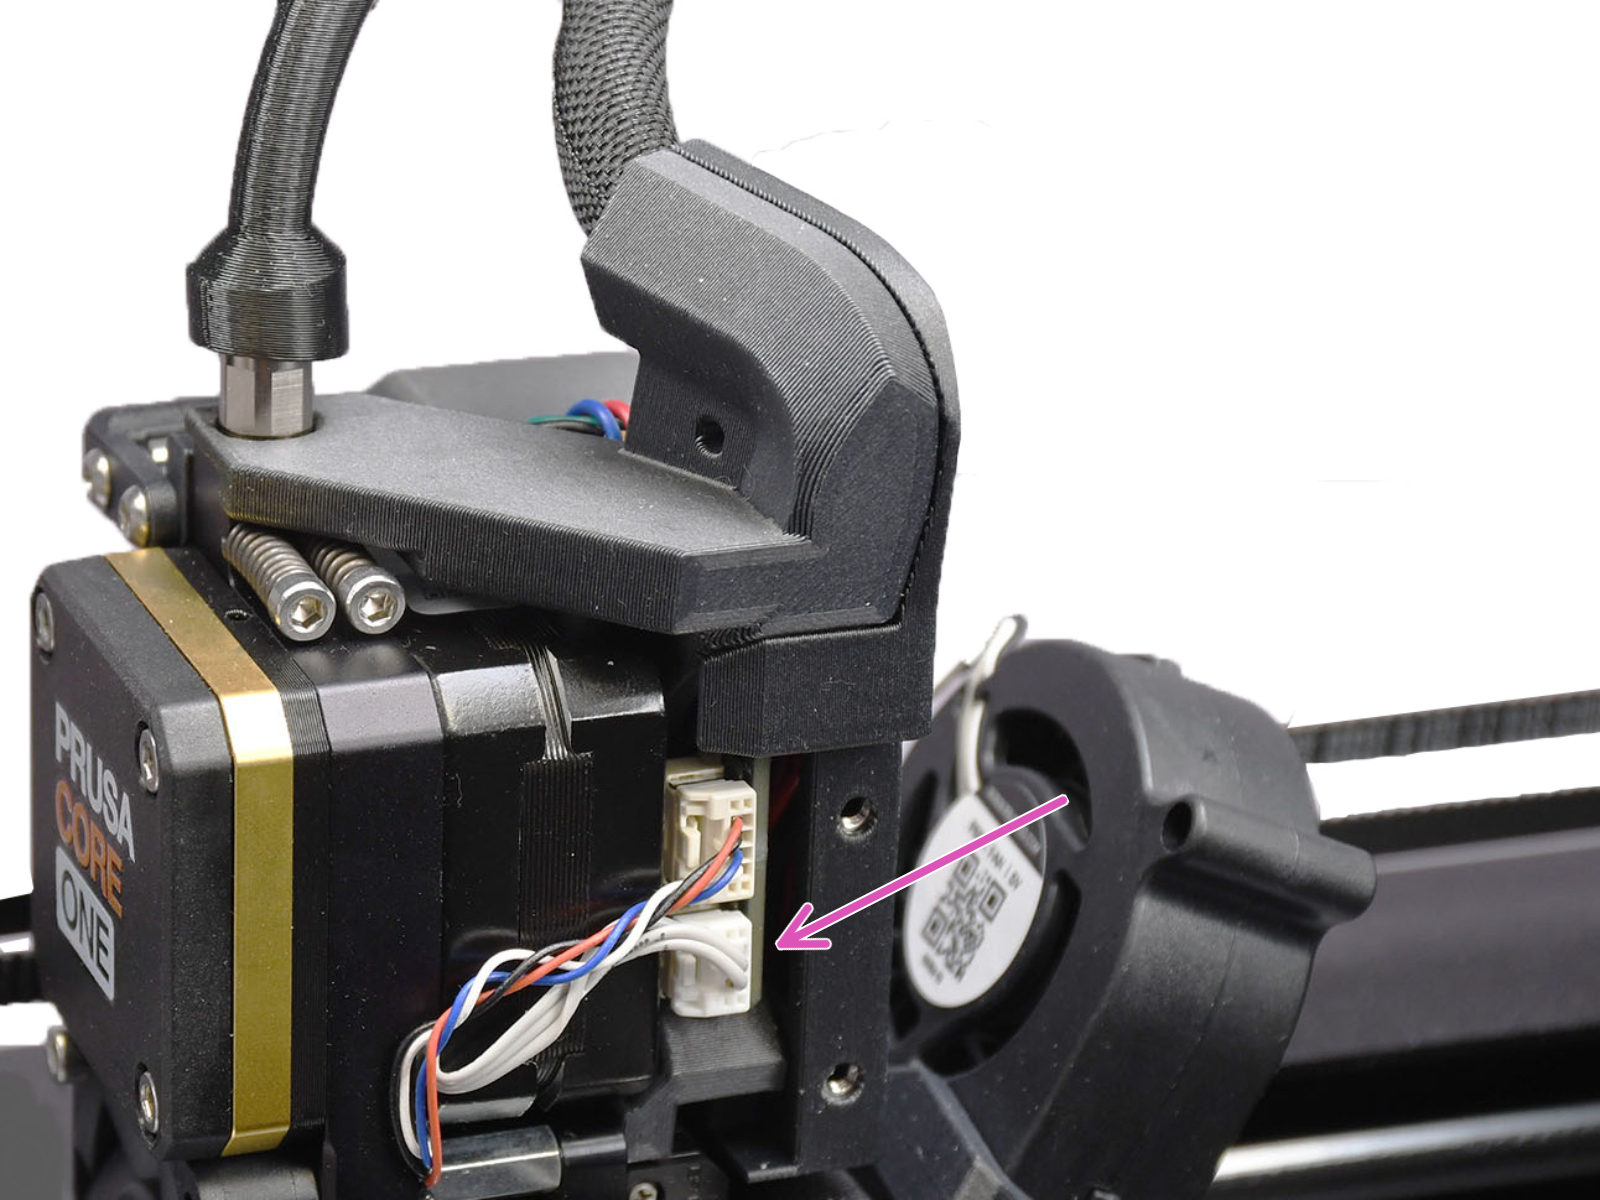
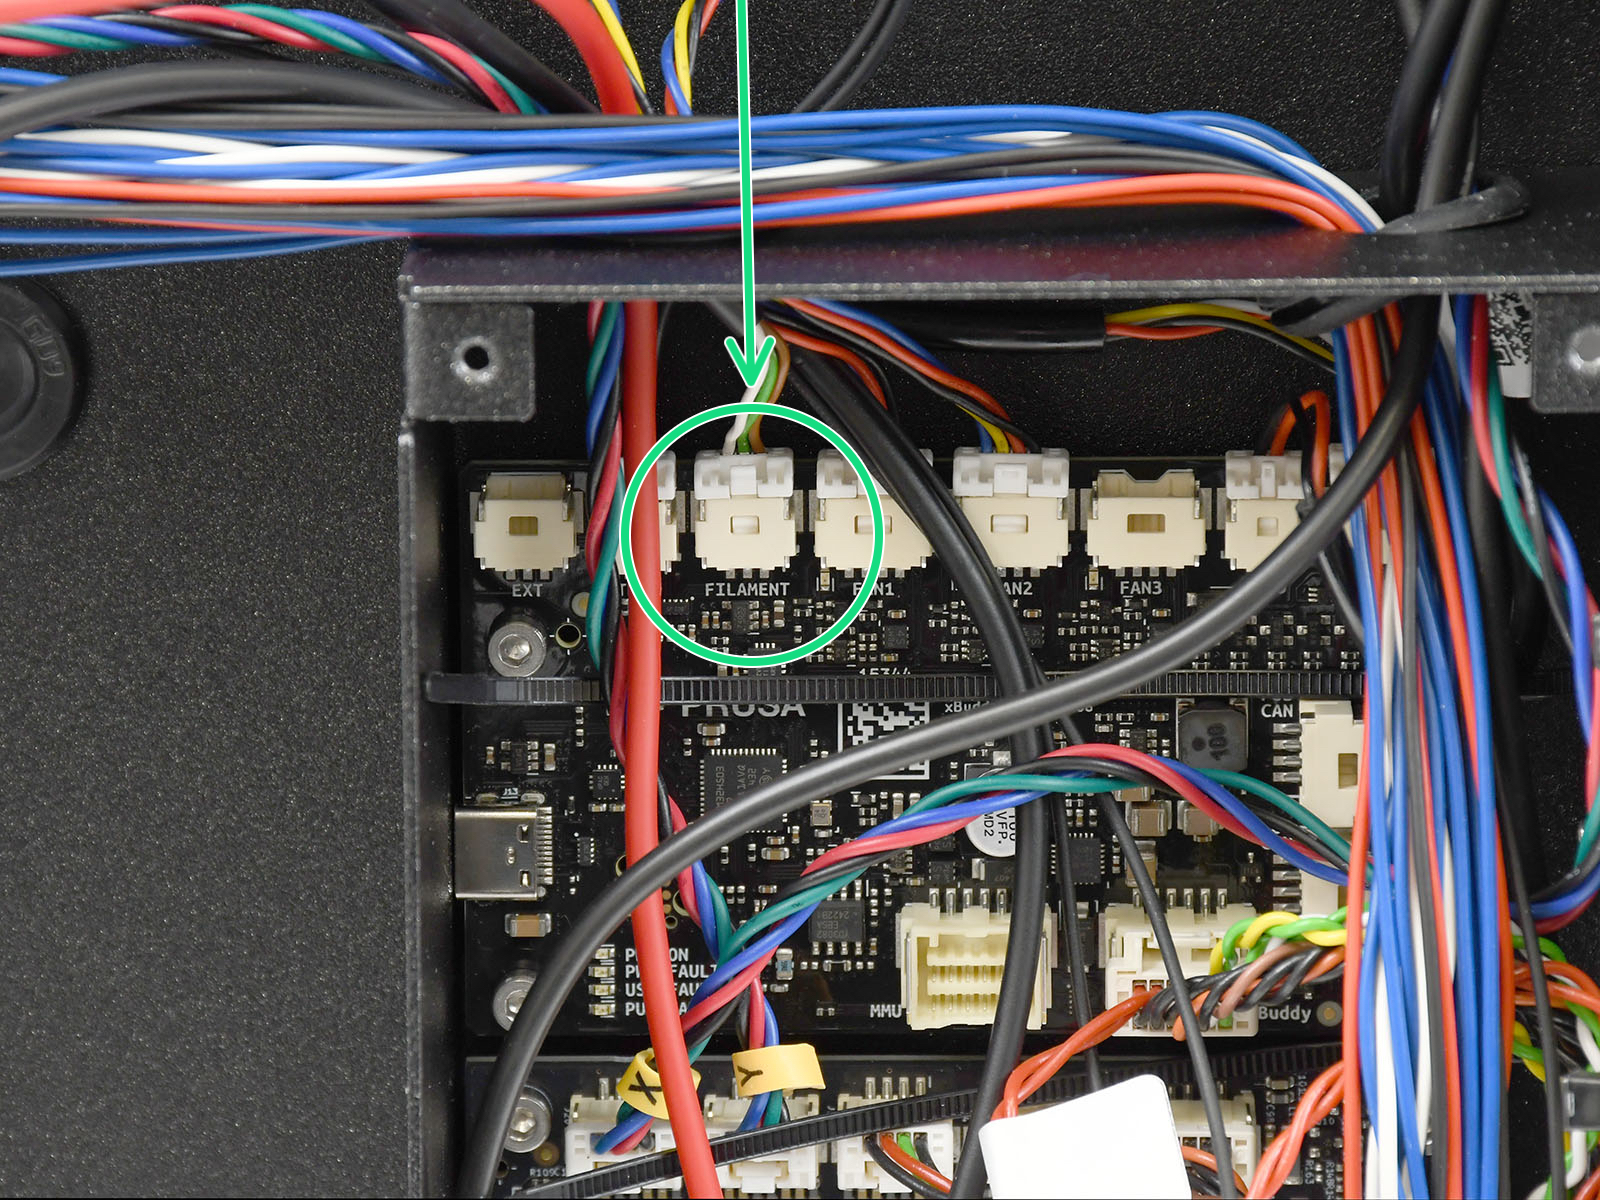
- Versichern Sie sich, dass der Filament-Sensor des Extruders korrekt mit dem LoveBoard verbunden ist.
- Versichern Sie sich, dass der seitliche Filament-Sensor korrekt mit der xBuddy- Erweiterungsplatine verbunden ist.
- Prüfen Sie das Kabel des seitlichen Filament-Sensors auf eventuelle Schäden.
- Wenn der seitliche Sensor ein Problem darstellt, überprüfen Sie, ob der Hebel nicht zu fest angezogen ist.
|  |
 |  |