Čeština
Login
3D tiskárny
Materiály
Díly & příslušenství
Pro firmy
Software
3D modely
Komunita
Podpora
Kurzy
Blog
O nás
Podpora
Prusa CORE One L
Údržba tiskárny
How to replace the White LED strip (CORE One L) | Začít s montáží
1. Začít s montáží
Krok 1 z 52 (Kapitola 17 z 17)
Obsah
Komentáře
Obtížnost
Vysoká
Dostupné překlady
Začít s montáží
Obsah
Údržba tiskárny
Jak naistalovat Nextruder V6 adaptér trysky (CORE One L)
Jak vyměnit trysku Prusa (CORE One L)
Jak vyměnit sestavu hotendu (CORE One L)
Jak vyměnit ventilátor hotendu (CORE One L)
Jak vyměnit boční senzor filamentu (CORE One L)
Jak nainstalovat Pokročilý filtrační systém (CORE One L)
Jak vyměnit kabel kamery Buddy3D (CORE One L)
How to replace a Hotend Heater (CORE One L)
Jak vyměnit termistor hotendu (CORE One L)
Jak vyměnit senzor filamentu Nextruderu (CORE One L)
Jak vyměnit tiskový ventilátor (CORE One L)
How to replace the Accelerometer (CORE One L)
Jak vyměnit chladič hotendu (CORE One L)
How to reverse the door orientation (CORE One L)
Jak vyměnit desku Loveboard (CORE One L)
Jak vyměnit termistor hotendu (CORE One L)
How to replace the White LED strip (CORE One L) [Překládá se]
Začít s montáží
Introduction
Nářadí potřebné pro tento návod
Preparing the printer
Disconnecting the camera
Odstranění panelu dvířek
Removing the plexiglass cover
Removing the metal side cover
Protecting the heatbed
Accessing the corner profile screw
Removing the corner profile (Part 1)
Removing the corner profile (Part 2)
Reattaching the LCD panel
Removing the LED panel
Accessing the cables (part 1)
Accessing the cables (part 2)
Removing the Wi-Fi module
Removing the electronics covers
Disconnecting the cables
Disconnecting the PSU cables
Checking the cables
Removing the heatbed cables
Detaching the back panel
Removing the back panel (part 1)
Removing the back panel (part 2)
Removing the back panel (part 3)
Removing the cable clamps
Removing the LED cable
Removing the old LED strip
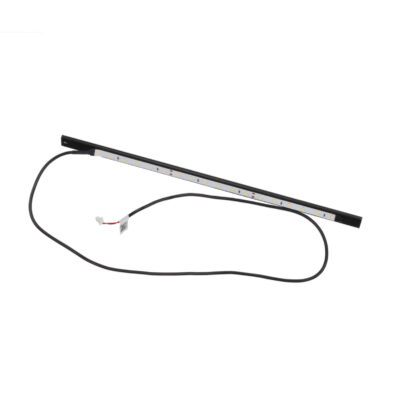
Parts preparation: White LED strip 300 mm
Attaching the new LED strip
Attaching the new LED cable
Reattaching the back panel (part 1)
Reattaching the back panel (part 2)
Reattaching the back panel (part 3)
Reconnecting the xBuddy power cables
Reconnecting the main FE cable
Reattaching the heatbed cables
Reconnecting the cables (part 1)
Reconnecting the cables (part 2)
Checking the cable length
Covering the electronics
Reattaching the Wi-Fi module
Reattaching the cable clamps (part 1)
Reattaching the cable clamps (part 2)
Reattaching the LED and the door sensor
Reattaching the corner profile
Reattaching the LCD panel
Attaching the side panel
Attaching the door panel
Testing the new White LED strip
Well done
Komentáře
Pro přidání kometáře se prosím
přihlaste
Zatím žádné komentáře