The LCD screen is vital for operating the printer. Should you encounter any kind of trouble, such as a dead screen, corrupted text, or other issues, please refer to the guide below.
First of all, unscrew the LCD screen from the printer frame, remove both M3x10 screw holding it the LCD board in the plastic casing, and remove it from the casing. See if the problem still appears when the LCD is not pressed by the casing.
Squares or random signs on the LCD screen
Firmware updates are necessary to keep your printer up to date. However, the installation of incorrect firmware can lead to letter corruption on the LCD screen. There's an easy fix, though:
- Go to the Drivers and Apps page and download the correct firmware version for your printer setup.
- Once you download the correct zip file, simply follow How to update firmware (MK3S+/MK3S/MK3) and you are good to go.
Blank LCD screen
This problem usually appears only on user-assembled printers. If your printer's LCD screen remains blank or displays corrupted symbols after you turn on the printer, there is a chance it is caused by incorrect wiring. Follow these steps to fix the issue.
- Turn the printer off, remove the power cord and unplug the printer's USB cable from your PC
- Open the cover of the electronics board.
- Double-check that all cables are properly seated and they are not visibly damaged. Depending on the model of your printer, please refer to the following guides for information on how to make sure the cables are properly connected: Einsy RAMBo electronics wiring (MK3/MK3S/MK3S+) and Mini RAMBo electronics wiring (MK2S, MK2.5, MK2.5S).
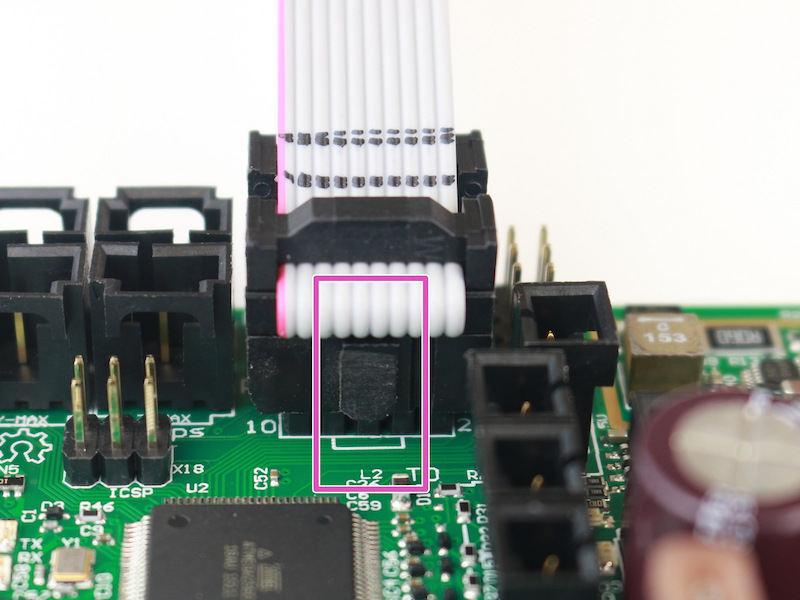
- Make sure that the LCD ribbon cables are not warped at any spot and that they are fully seated in the correct connector with the correct orientation.
- If you suspect that the LCD ribbon cables connectors are not firmly seated in the slots, disconnect the LCD ribbon cables and check the slots for any bent pins. If there are bent pins, you can use tweezers to fix them. However, be very careful not to break the pin(s) completely.
- Gently push the connectors back into their respective slots. Then reconnect the power cord and turn the printer on again.
- If none of the above resolved the problem, turn the printer off again and try to unplug both of the cables, lay them down on a flat surface and gently stretch them. Then plug them back in and turn on the printer.
15 comments
-Extruder heater
-Heatbed thermistor
Por que aparentaban estar deteriorados, de nuevo arranque la impresora y de nuevo, se veía el fondo de la pantalla LCD azul y los cuadrados en vez de letras.
Además probé instalar de nuevo Firmware en PrusaSlicer del PC, pero al tener la última versión me decía: Error avrdude.
No se que más puedo hacer llevo varias semanas leyendo el montaje de la impresora 3D-I3 MK3S y tengo todo igual que las instrucciones, pero no logró solucionar nada.
Por la descripción parece un problema con la unidad LCD o sus cables.Para confirmar esto, intenta conectar la impresora con el cable, y Pronterface, a un ordenador.
https://help.prusa3d.com/es/article/pronterface-y-cable-usb_2222
Contáctanos luego con el resultado y te ayudaremos hasta que esté resuelto.
https://help.prusa3d.com/es/article/atencion-al-cliente_2287
Un saludo,
I have uploaded a photo with the problem of the screen to the forum:
https://forum.prusaprinters.org/forum/original-prusa-i3-mk3s-mk3-hardware-firmware-and-software-help/problems-with-my-screen/#post-579241
Hi! Sometimes, the conductive pad right underneath the LCD looses contact. I had this happen for example due to thermal expansion when bringing the printer into a cold room. Check the reply in the forum thread :)