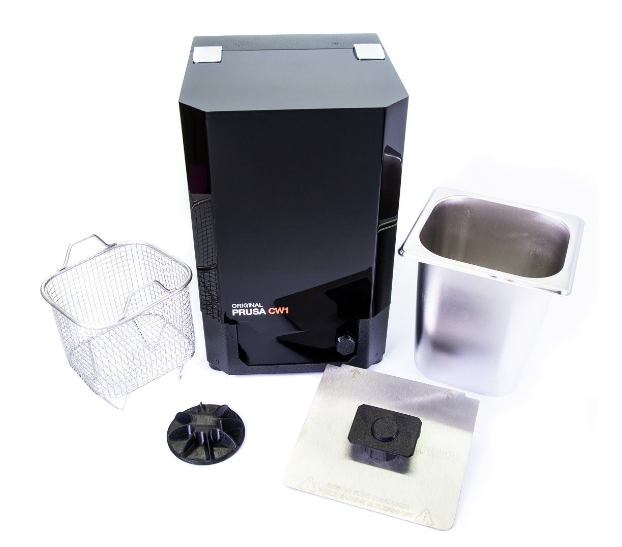
The Original Prusa Curing and Washing Machine (CW1) is a 3-in-1 device designed for quick and easy post-processing of objects printed from liquid resins.
Objects printed from liquid resin are usually a bit soft and sticky. To clean them and give them optimal surface properties, the objects need to be washed, dried, and cured. This process involves washing the object in isopropyl alcohol, drying using hot air, and curing using UV light. The Original Prusa Curing and Washing Machine (CW1) can take care of all these actions in 10 minutes. However, some caution needs to be exercised when handling liquid resins and isopropyl alcohol.
Package contents
- Stainless steel liquid container (gastro pan)
- Magnetic propeller
- Metal basket - for small object washing
- Metal container lid with a print platform attaching mechanism
- External power supply unit

Recommended accessories (not included):
- Gloves
- Respirator
- Protective Glasses
- Plastic tablecloth
Isopropyl alcohol is not included in the package! Please buy a container with at least 92% isopropyl alcohol from your local hardware store / online shop. The tank in the CW1 can hold 4 liters (approx 1 gallon) of liquid
After you open the box, remove the accessories case first (1), then remove the top foam (2). Grab the box using the two handles on the side and pull it up (3). Open the cardboard locks (4) and remove the foam protectors along with the protective wrap (5). Finally, take the unpacked CW1 and place it on a stable surface (6)
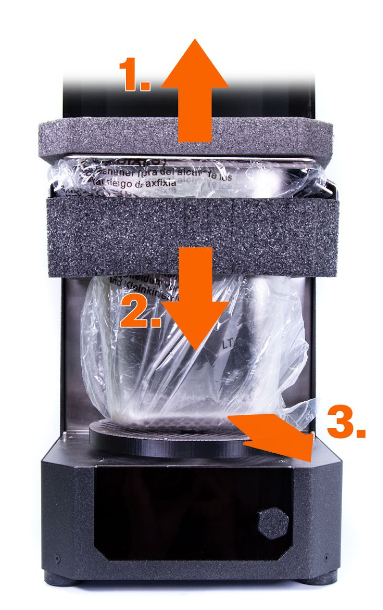
 Open the CW1’s acrylic lid, remove the top foam protector (1), then slide down the lower foam protector (2) and pull the liquid container along with the protector towards you (3). Remove the plastic wrap from the tank and take out the metal basket

- To ensure safe and optimal work experience, the CW1 should be placed in a location that meets the following conditions:
- Place the machine in a horizontally stable position - the best place is a workbench. A good practice is to put a plastic tablecloth under the machine in case a resin / IPA spill occurs.
- The external power supply should be placed in such a manner that will prevent anyone from tripping over the cable or damaging it.
- Do not place the device next to a source of water or into a wet environment