Trinamic drivers on the EINSY board can detect skipped steps and prevent layer shifting caused by a nozzle crash. It works only in the Normal mode (not in the Stealth mode). The thresholds for crash detection are set for higher speeds because layer shifting usually happens when the extruder moves quickly between objects and hits a piece of a curled-up print.
How to fix it
When you find out that the crash detection does not work, it is most likely going to be a hardware problem within the printer, which is quite easy to fix. Simply follow these instructions:
Power mode
Make sure that the printer is running in Normal mode, not Stealth mode where crash detection is not available. The current mode can be checked in the LCD Menu - Settings - Mode [Stealth/Normal]. For more information on Power modes, please see Power-modes.
Rods and bearings
Clean the smooth rods with a dry paper towel. Then apply a little bit of lubricant on the smooth rods.
If you feel the heatbed or the extruder is not moving smoothly when pushing it by hand, you can dismount the Y or X-axis, remove the bearings from their smooth rods, and lubricate them on the inside. Be careful not to damage the bearings when inserting the smooth rod back.
Check the tension of your belts
Make sure that your printer's belts and pulleys are properly tightened and that the belts cannot jump over the pulleys. If you have an MK3 or MK3S, check the Belt Status numbers via LCD menu -> Support -> Belt Status. The values should not be under 240 and above 300, but there is no single ideal value. The number does not represent any quantity.
- If your value is under (or close to) 240, you need to loosen the belt
- If your value over (or close to) 300 -> you need to tighten the belt
- The values are updated every time you run the Selftest.
The MK2.5, MK2/S, and lower models do not have the belt status option. The clue we can give you is that the belt should sound roughly like a low bass string when plucked. It should be possible to pinch the two sides together with your thumb and index finger, but you should feel a little bit of resistance.
Check your X/Y axis motors and pulleys
Make sure the pulleys are not spinning around the motor shaft. The X and Y motor have to be tightened in the motor mount, the pulley has to be secured on the motor shaft and aligned with the pulley on the opposite end, and the pulley has to move freely. Both grub screws need to be tight, one of them has to be tightened against the flat part of the motor shaft. A loose pulley is usually the main cause of staircase layer shifts.
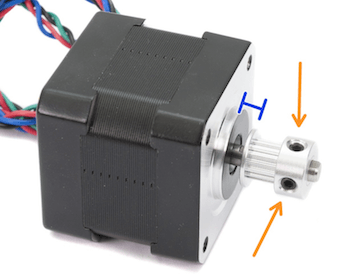
Both pulleys on both axes also have to be aligned, meaning the motor pulley has to be well centered. The belt should not travel from right to left while the pulley is turning.
Connectors
After inspecting the motors, open the einsyRAMBO case and re-seat the connectors for the motors, so you are sure they are plugged in properly.
Print geometry and settings
Objects with overhangs are generally harder to print. Some overhangs might even warp upwards during the print, and the nozzle might crash into them. The same can happen in some cases if you choose too small infill percentage when slicing the 3D model.
To prevent printing overhangs, you can cut the object (check out our article on the Cut tool). You can also try to increase the print fan speed or increase the Z-hop distance in PrusaSlicer. Print fan speed in Filament settings -> Cooling and Z-hop distance in Printer Settings -> Extruder 1.
None of this solved the problem?
No worries, at least you have checked some of the most important parts of the printer, and you can now be sure they are OK. Please try to print one of the G-codes that were on the SD card when you first used it. If you have deleted them, download them again at Printables.com.
You may also try to toggle the Crash Detection off (LCD Menu - Settings - Crash. det. [on/off] or, during the print LCD menu - Tune - Crash Detection). It also usually helps if you slow down the print speed (in the PrusaSlicer or during the print by turning the knob counterclockwise).
16 comments
Hello. Crash detection should pause the print, home the printer (moving the printhead away to its home position), and then return to printing.
I have re-printed all of the prints that suffered from Crash Detection in the past without any issues whatsoever since I disabled it.
I can't figure out what is causing the false Crash Detections, but after a false detection I found that it was impossible to complete the print as there were disturbances and/or thick strings deposited while the MK3S+ returned to X, Y, home position and these disturbances were enough to trigger genuine Crash Detection.
Hello, thank you for the comment and sorry for the late response here. If this is still an issue, I'd recommend contacting our Customer Support, since the prints go well without the crash detection, it is less probable that we have the mechanical causes that we listed in the article, there might be some firmware or electrical related causes. By contacting our Support, we can check the situation in more detail individually, having the printer info, some pictures and videos, and see a possible solution from there.