It is recommended to regularly take some time to maintain your Original Prusa XL. This should be done even if the printer is working perfectly. The inspection and maintenance of its various components should be done every ~200-300 hours of print time.
Useful tools
Besides the usual tools, such as Allen keys, needle-nose pliers, and IPA (IsoPropyl Alcohol) + paper towels, you might need:
- Compressed air: also known as canned air. Be sure to not hold it upside down while spraying - otherwise, you could damage any electronic components while trying to clean them.
- Brush: a small brass brush is a useful tool for cleaning the heaterblock. If you don't have a brass brush any brush with hard bristles will do the job.
- Prusa Lubricant: a tube of Prusa Lubricant is included with the Original Prusa XL. It is used in the Z-axis leadscrew paragraph.
- Linear rails lubrication set: a set that includes Microlube GL 261, Dosing needle SSS15 2, Cartridge with manual piston 2/2,5mm, and two nitrile gloves.
Linear rails
Ensure that there is no debris or dust on the linear rails. If there is, clean them using a clean paper tissue or a clean cloth with no degreaser and no chemicals, as these may damage the rubber in the carriage.
We recommend lubricating the linear rails every 3-6 months, using the dedicated linear rails lubrication set, and following the steps in the linear rails lubrication guide.
On linear rails, DO NOT use Prusa Lubricant or other products that are not part of the linear rails lubrication set.
Z-axis leadscrews
After ~500 hours of print time, lubricate the Z-axis leadscrews.
- Ensure you have the Z thread greaser printed part.
- If you haven't printed it, download and print it from the XL printed parts page. The part is listed under Files -> Parts for maintenance.
- Go into the printer menu to Control -> Autohome.
- Clean the Z-axis leadscrews, using a clean paper towel.
- Lubricate the Z-axis leadscrews, applying moderate quantities of Prusa Lubricant in the Z thread greaser positioned onto the Z-axis leadscrews.
- Go into the printer menu to Control -> Move axis -> Move Z, and move the axis all the way down.
- Autohome the printer via the printer menu Control -> Autohome.
After that, the Z-axis leadscrews are lubricated.
Belt
Over a long printing time, the belt can slightly loosen, causing issues such as layer shifting, or bad printing quality. The easiest way to check the belt tension is to print a circular object. If the result is not perfectly round, a belt adjustment is needed. The full instructions on belt adjustment are in a dedicated article.
Side filament sensor
The side filament sensor on the printer may accumulate leftover filament over time. To prevent false readings, follow the guide How to clean the side filament sensor (XL).
Flexible steel sheet
All flexible steel sheets should be cleaned regularly to ensure adhesion, but the exact methods and washing solutions can differ depending on your type of sheet.
You can find more information on how to take care of your flexible steel sheet in this article.
Fans
The Original Prusa XL is equipped with a hotend fan, and with a print fan. The printer can detect if any of its fans stop spinning. However, that does not mean you should not check them during maintenance. Dust or plastic build-up can decrease their efficiency or even damage them.
Both fans should be checked and cleaned after a few hundred hours of printing. With the fan not moving, dust can be removed with compressed air in a spray can, small plastic threads can be removed with tweezers.
Do not blow compressed air on a running fan: the fan can get damaged this way.
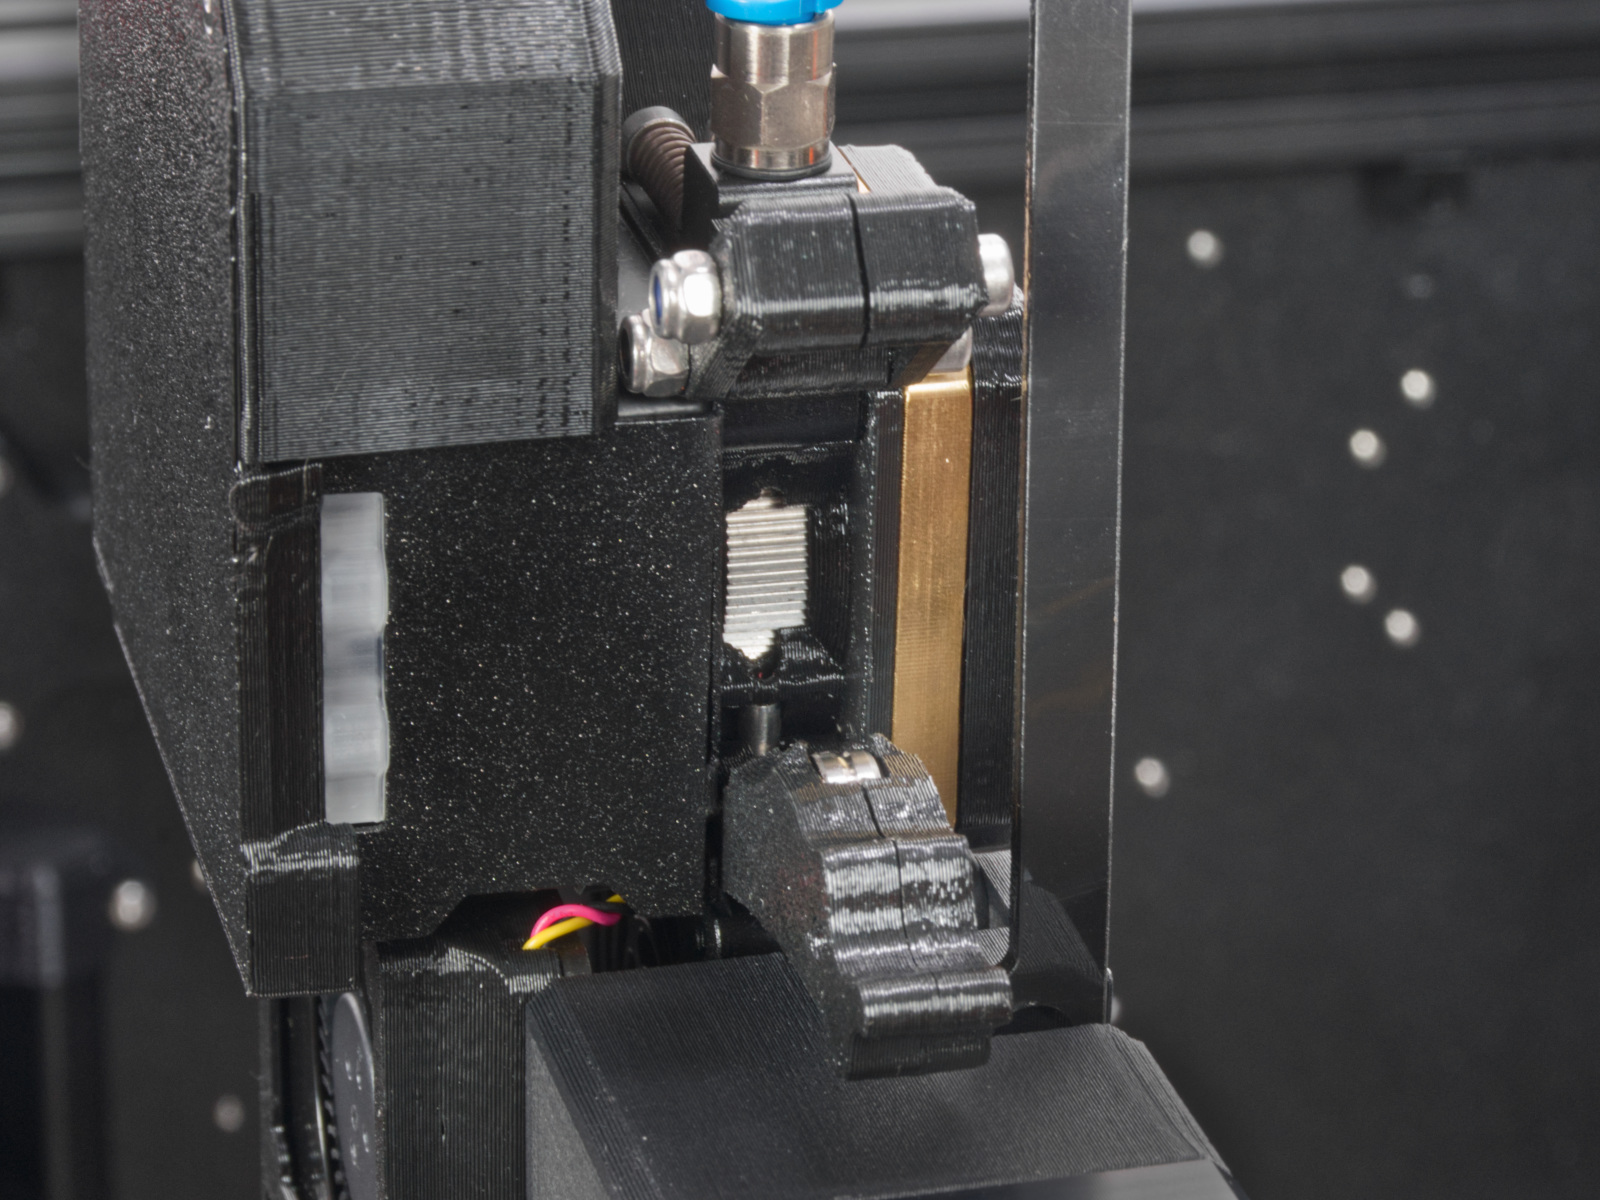
Nextruder
The primary gear and the bearings attached to the Idler Shaft in the extruder do not need any lubricant. Over time, a deposit of filament debris can form in the grooves of the primary gear, which then causes insufficient filament extrusion.
Access the extruder by lifting the Idler Nut, and then moving the Idler Shaft. You can blow away the dirt with compressed air, or use a brass brush or an ordinary toothpick. Use the access hole on the front of the extruder/tool head.
 |  |
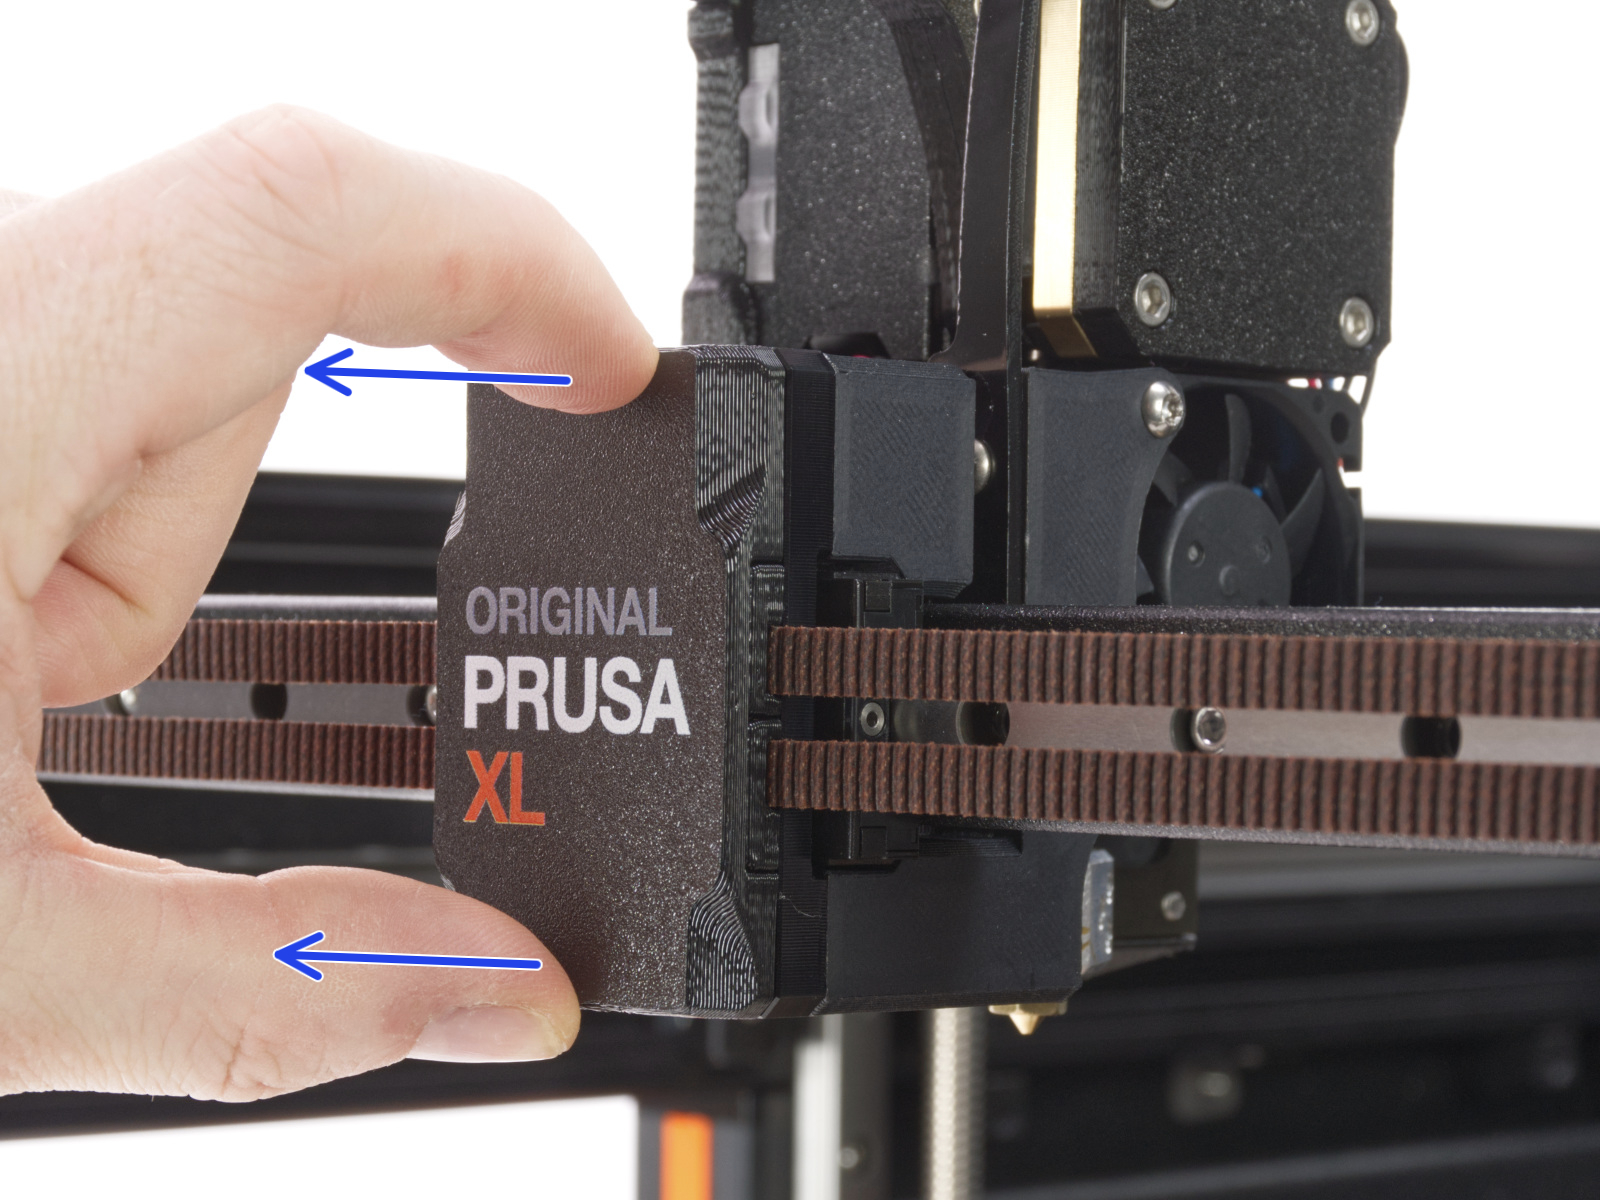
Heaterblock
If the heaterblock is covered with plastic, it can affect its thermal properties. To clean it, heat the nozzle for 3 to 5 minutes at 250 °C, and turn the printer off. Immediately after that use a small brass brush to clear away any old plastic stuck on the nozzle and heaterblock. Be extra careful around the fragile wires that join the heaterblock.
You can also use the Nextruder silicone sock to protect your heater block.
Nozzle position and tightening
On single-tool XL, after removing the x-carriage cover, hold the heater block (make sure that the nozzle is not heated!), and use the Torx TX8 key as shown in the picture to tighten the set screw. Do not use extra force while tightening, as it may damage the hotend tube. The nozzle must be approximately at a 35°-40° angle to avoid damaging the hotend cables.
 |  |
On the multi-tool XL, identify the tool that has the nozzle to be checked, and park it. Hold the heater block (make sure that the nozzle is not heated!), and use the Torx TX8 key in the part shown in the picture to tighten the set screw. Do not use extra force while tightening, as it may damage the hotend tube. The nozzle must be approximately at a 35°-40° angle to avoid damaging the hotend cables.
Electronics
Every ~600-800 printing hours, access the electronic boards for a visual check.
- Check if there are any pinched or worn cables on the printer.
- Access the electronic boards and blow compressed air in between the cables to get rid of dust.
- Check the connection of all of the wires on the electronic boards.
Firmware and software
You should always be using the latest stable firmware version that we have published for your specific printer model. You can check the firmware version you have by navigating to LCD menu - Info - Version info.
We also recommend using the latest version of our PrusaSlicer, as it enables you to enjoy all the features of your printer. It even saves information about the printer model, nozzle diameter, and firmware version directly into the G-code file so that the printer can warn you if anything is out of date or incompatible.
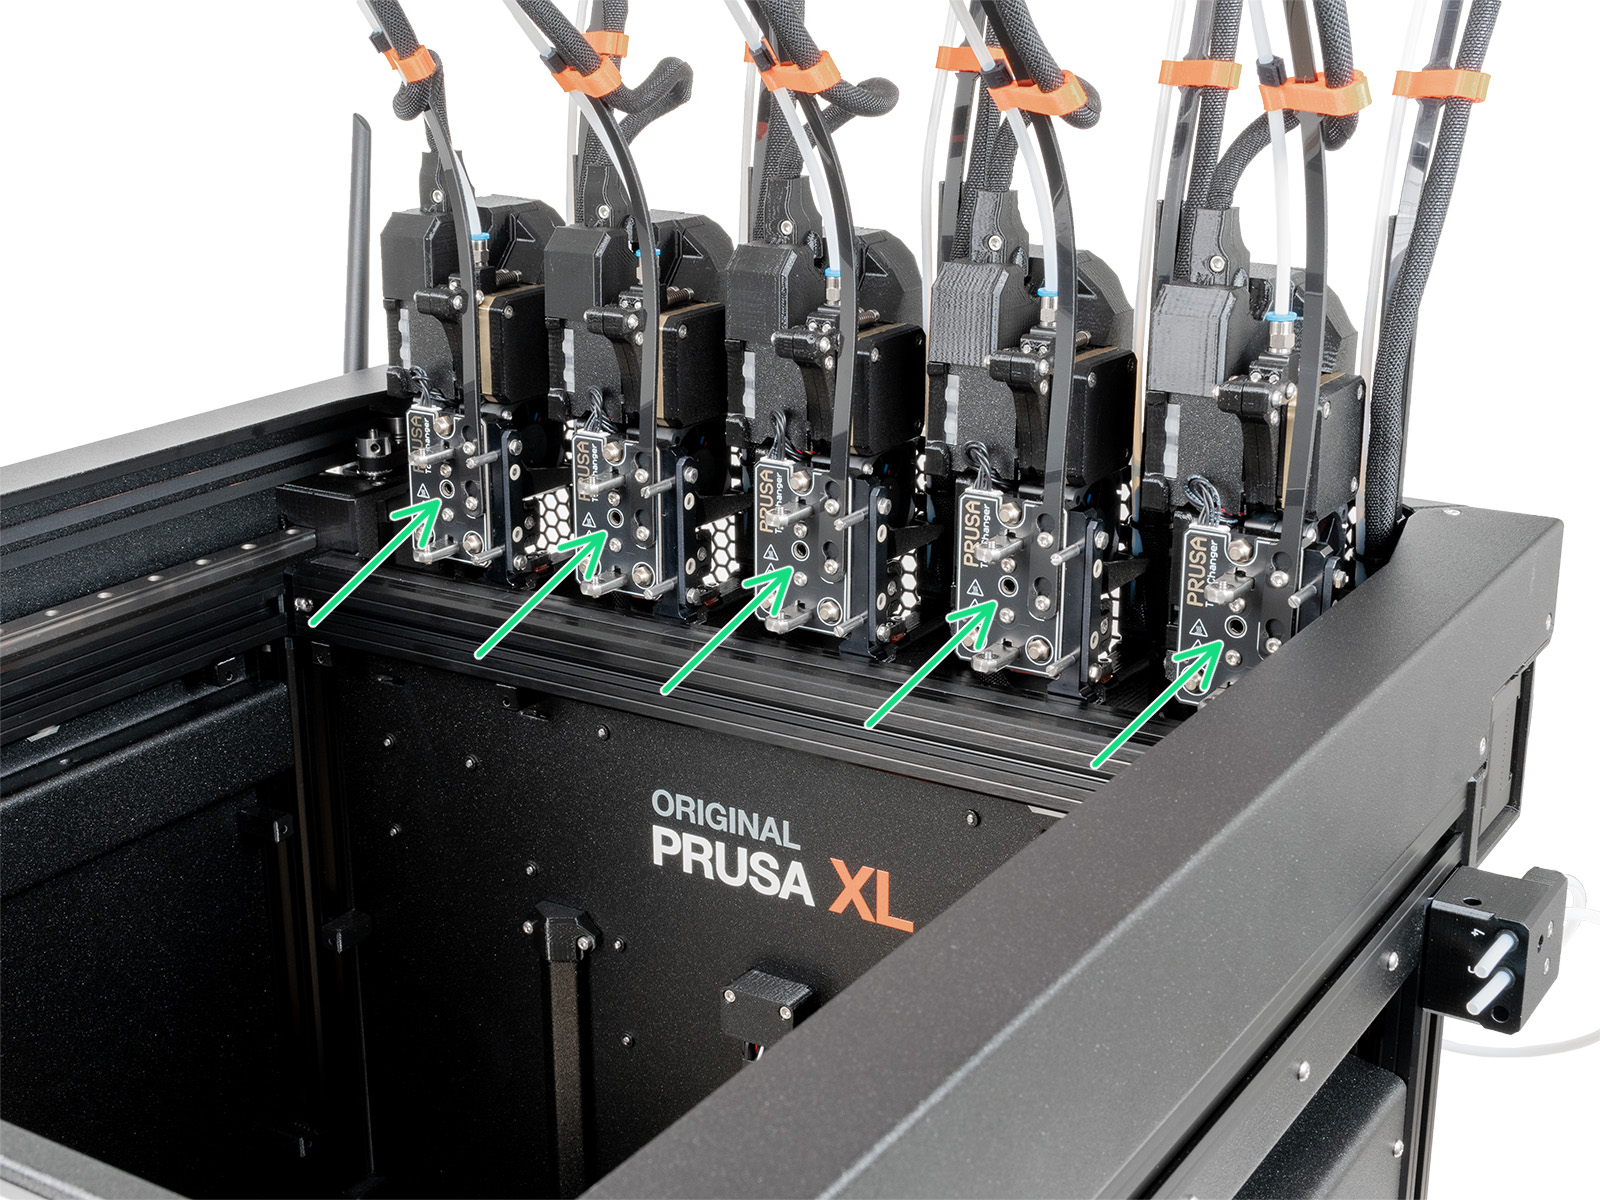
Tool-changer/ToolHead cleaning
This can be made along with the rest of the maintenance, or it can also be done if you notice that your prints have banding or ringing issues. The metal connection of the ToolHead and the ToolChanger needs to be lubricated to work smoothly. For that, use the guide How to lubricate the coupler pins on Original Prusa XL (Multi-Tool).
12 comments
The intervals are already in this article, so Prusa just have to make simple triggers based on either days passed or print hours passed since the last maintenance done. Then I as a user can check off when I have done the maintenance. And if the counters were visible in PrusaConnect or on the printer UI, I could also check once-in-a-while to see if maintenance is coming up soon.
This would greatly increase the likelihood that I as user will perform the maintenance in time before I run in to problems. It is especially useful if you use the printers in a setting like a company where there are many printers and user. At my work we have MarkForged printers where they have a maintenance schedule utility for this: https://support.markforged.com/portal/s/article/Maintenance-Schedule-Utility
- What are "moderate quantities"?
- Should I drag the greaser along the entire leadscrew or just put some lubricate on in one position and let the printer drag it out over time?
A regular step-by-step guide with images or a video could be nice.