In this article, we will outline the preparations and configurations necessary to outfit your MK3S with Octoprint using a Raspberry Pi Zero. Here we will go through how to solder the correct GPIO pins and connecting the Raspberry Pi to the printer.
If you wish to use Octoprint, we recommend following the guide to creating your own Octoprint image.
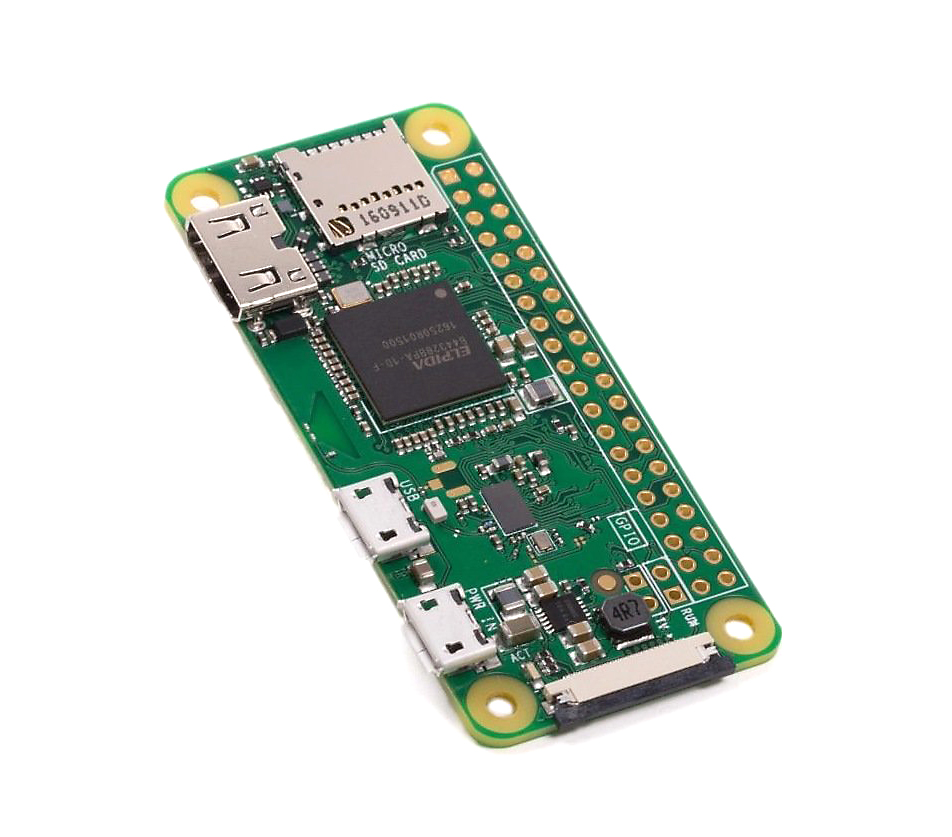
You can run Octoprint from most versions of the Raspberry Pi (Zero, 2, 3, 3B, etc.), but this is covered in a different article. We have chosen the Raspberry Pi Zero W for this tutorial, as it integrates neatly with the MK3s Einsy RAMBo with no need for an external power supply.
Parts and preparations
To complete this guide you need the following components:
- Raspberry Pi Zero W
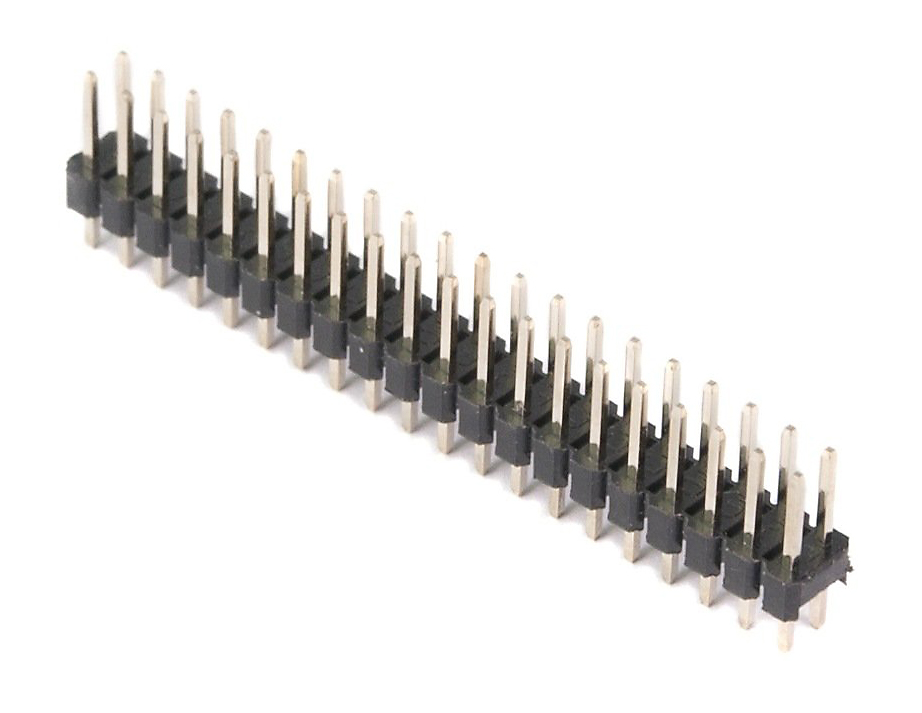
- 2x20-pin Strip Dual Male Header, with 18 mm pins.
- Micro SD card of at least 8GB (16 GB is recommended).
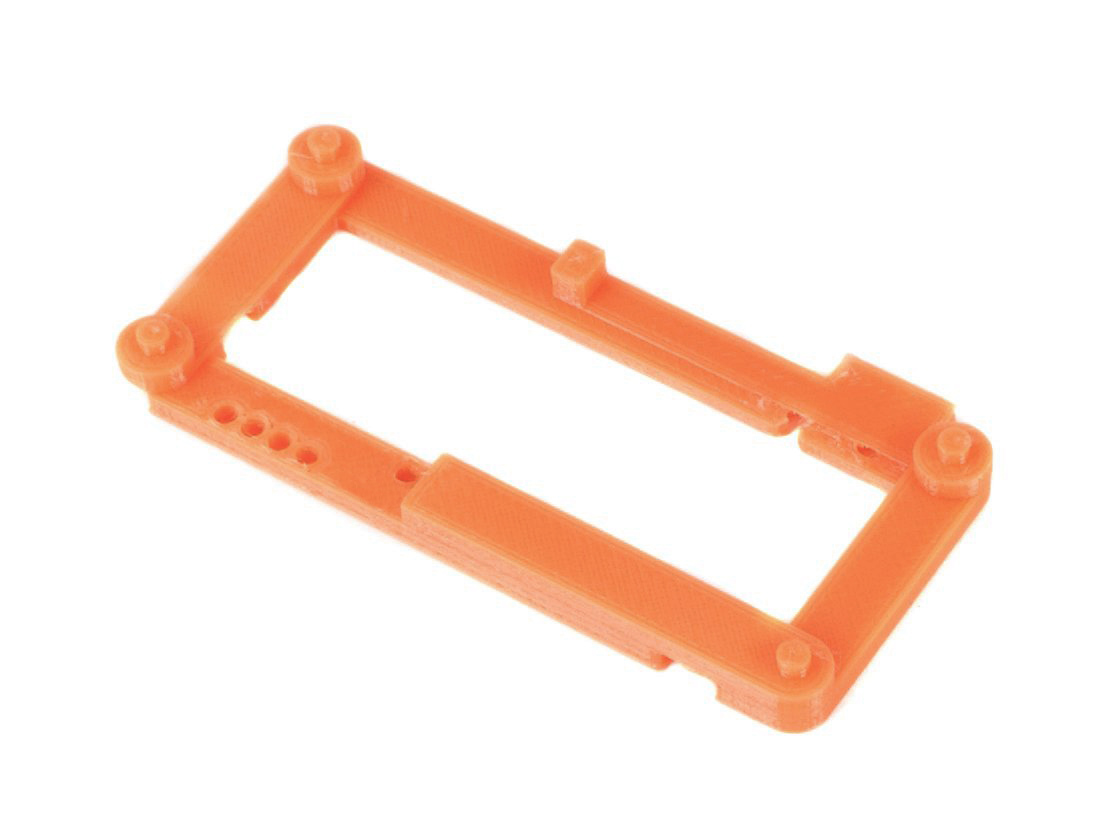
- Printed RPi Zero Frame.
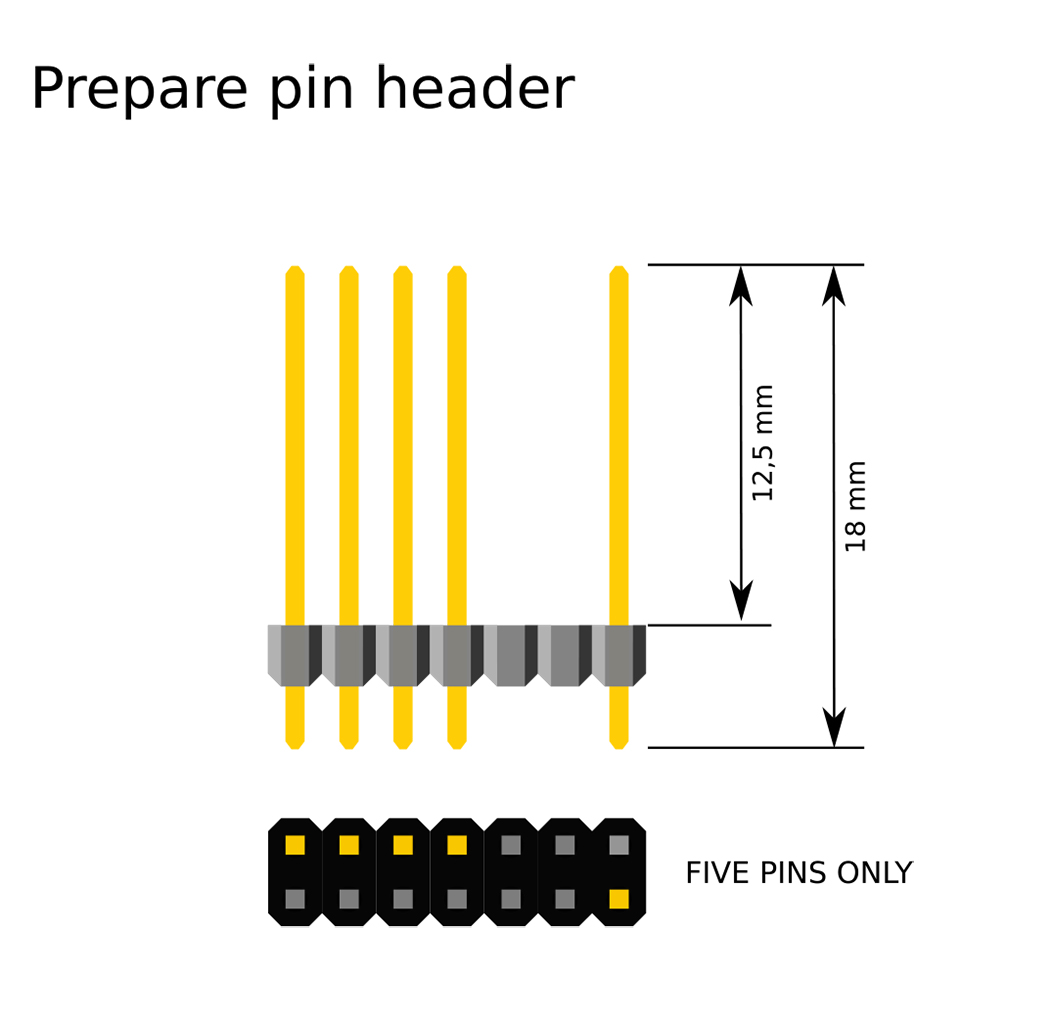
Soldering the GPIO pins
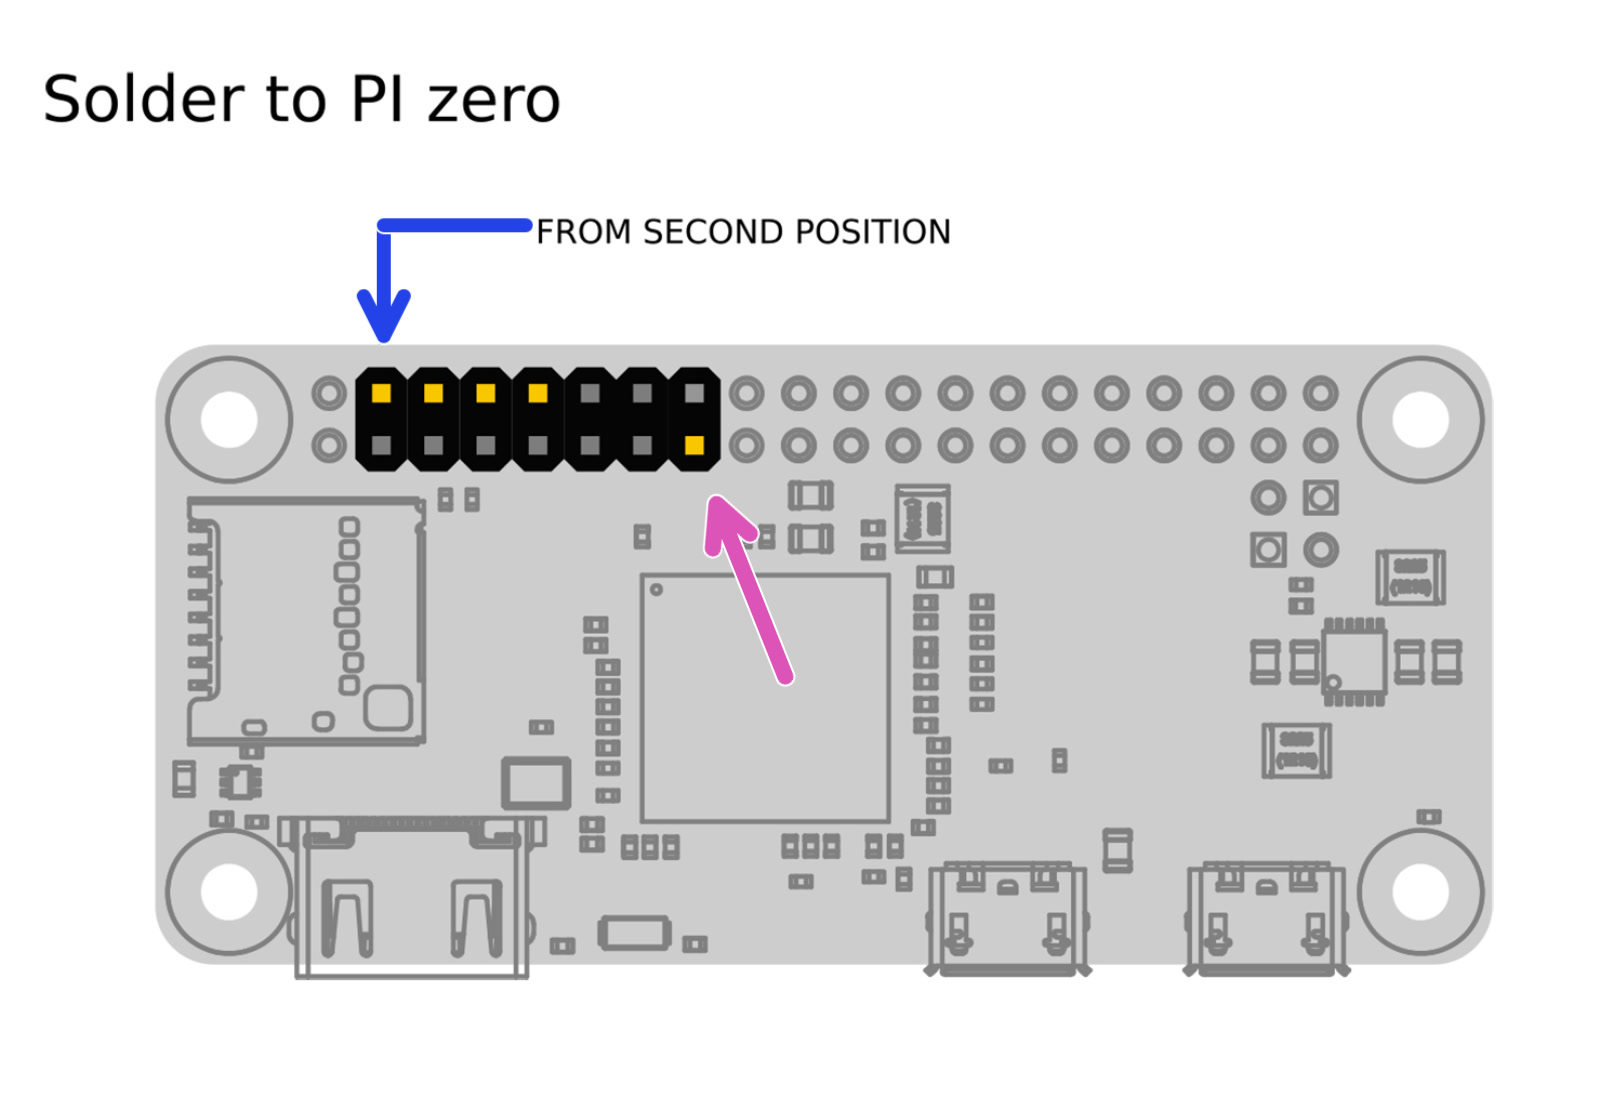
Prepare a piece of the GPIO-header, as in the illustration above, by simply breaking off the length you need and pulling out the pins you do not need with some pliers (right picture).
 |  |

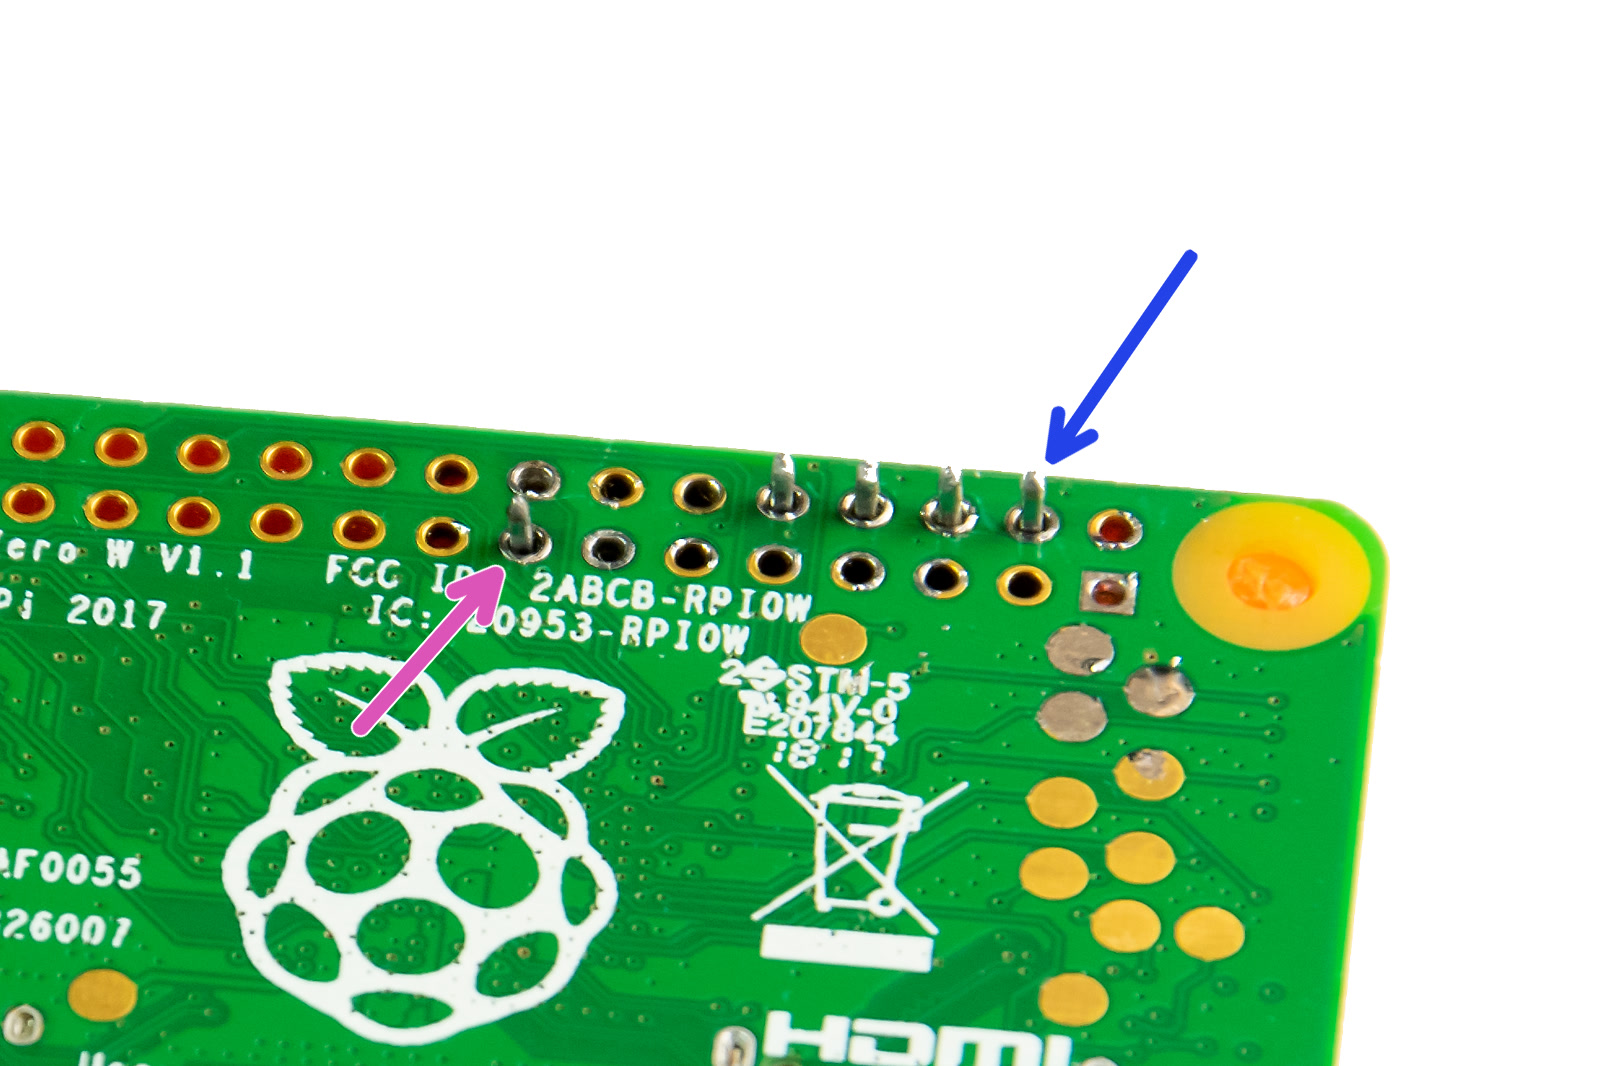 |  |
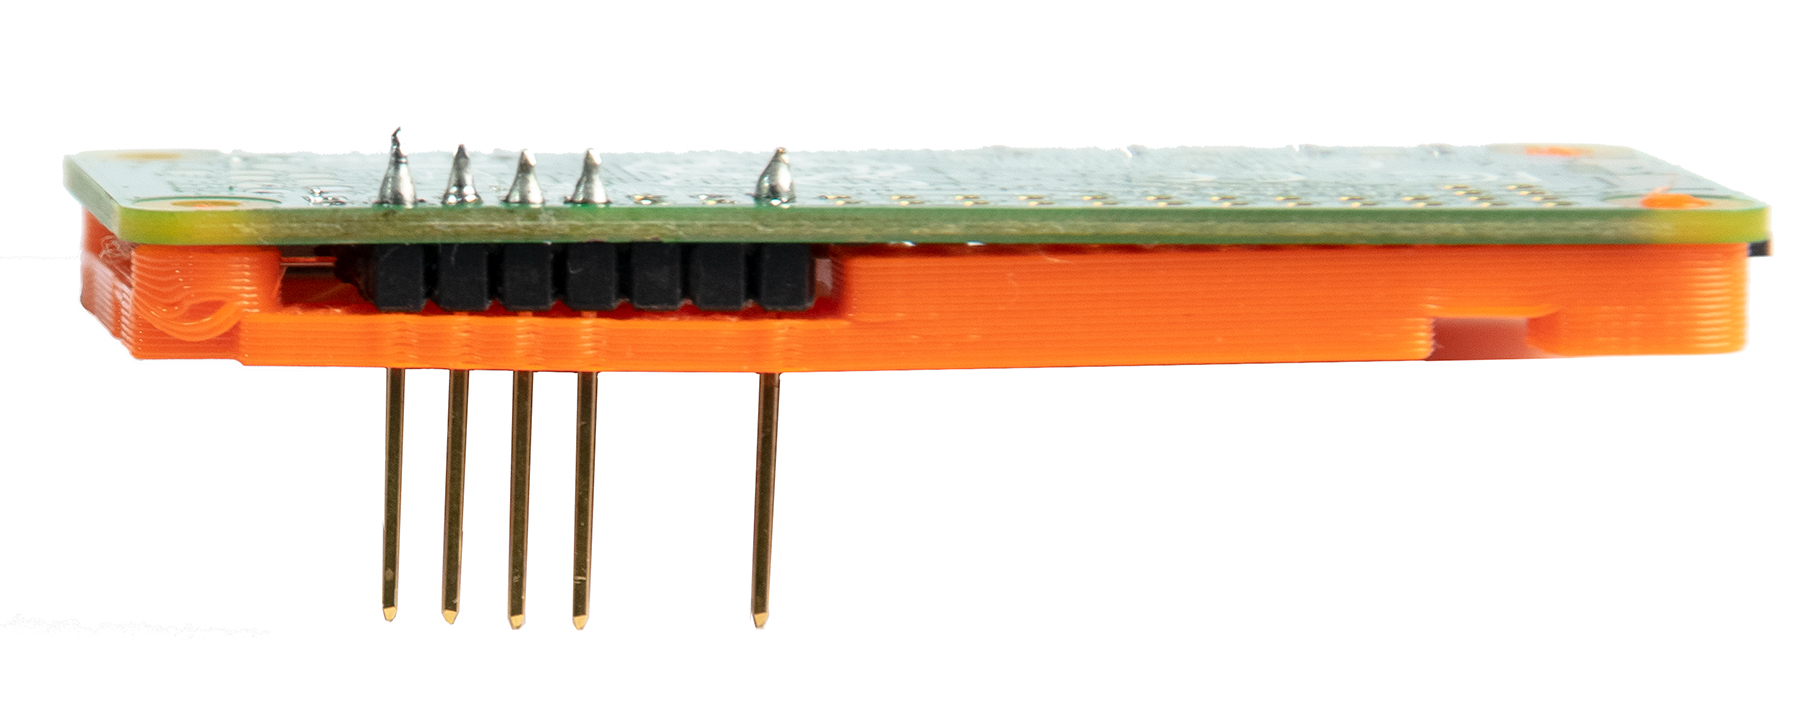
When soldering, you need the solder to "flow", creating a proper bond between the pins and the pads on the RPi Zero. If you end up with balls and blobs you need to reflow it for a proper bond. The solder needs to be clinging to the pins and the pads. You want "cones" as in the pictures above and below. Most solder will also turn shiny if done correctly. If you have no experience soldering we recommend looking up some videos on the basics.

Installation of SD card
Connecting the RPi Zero to your printer
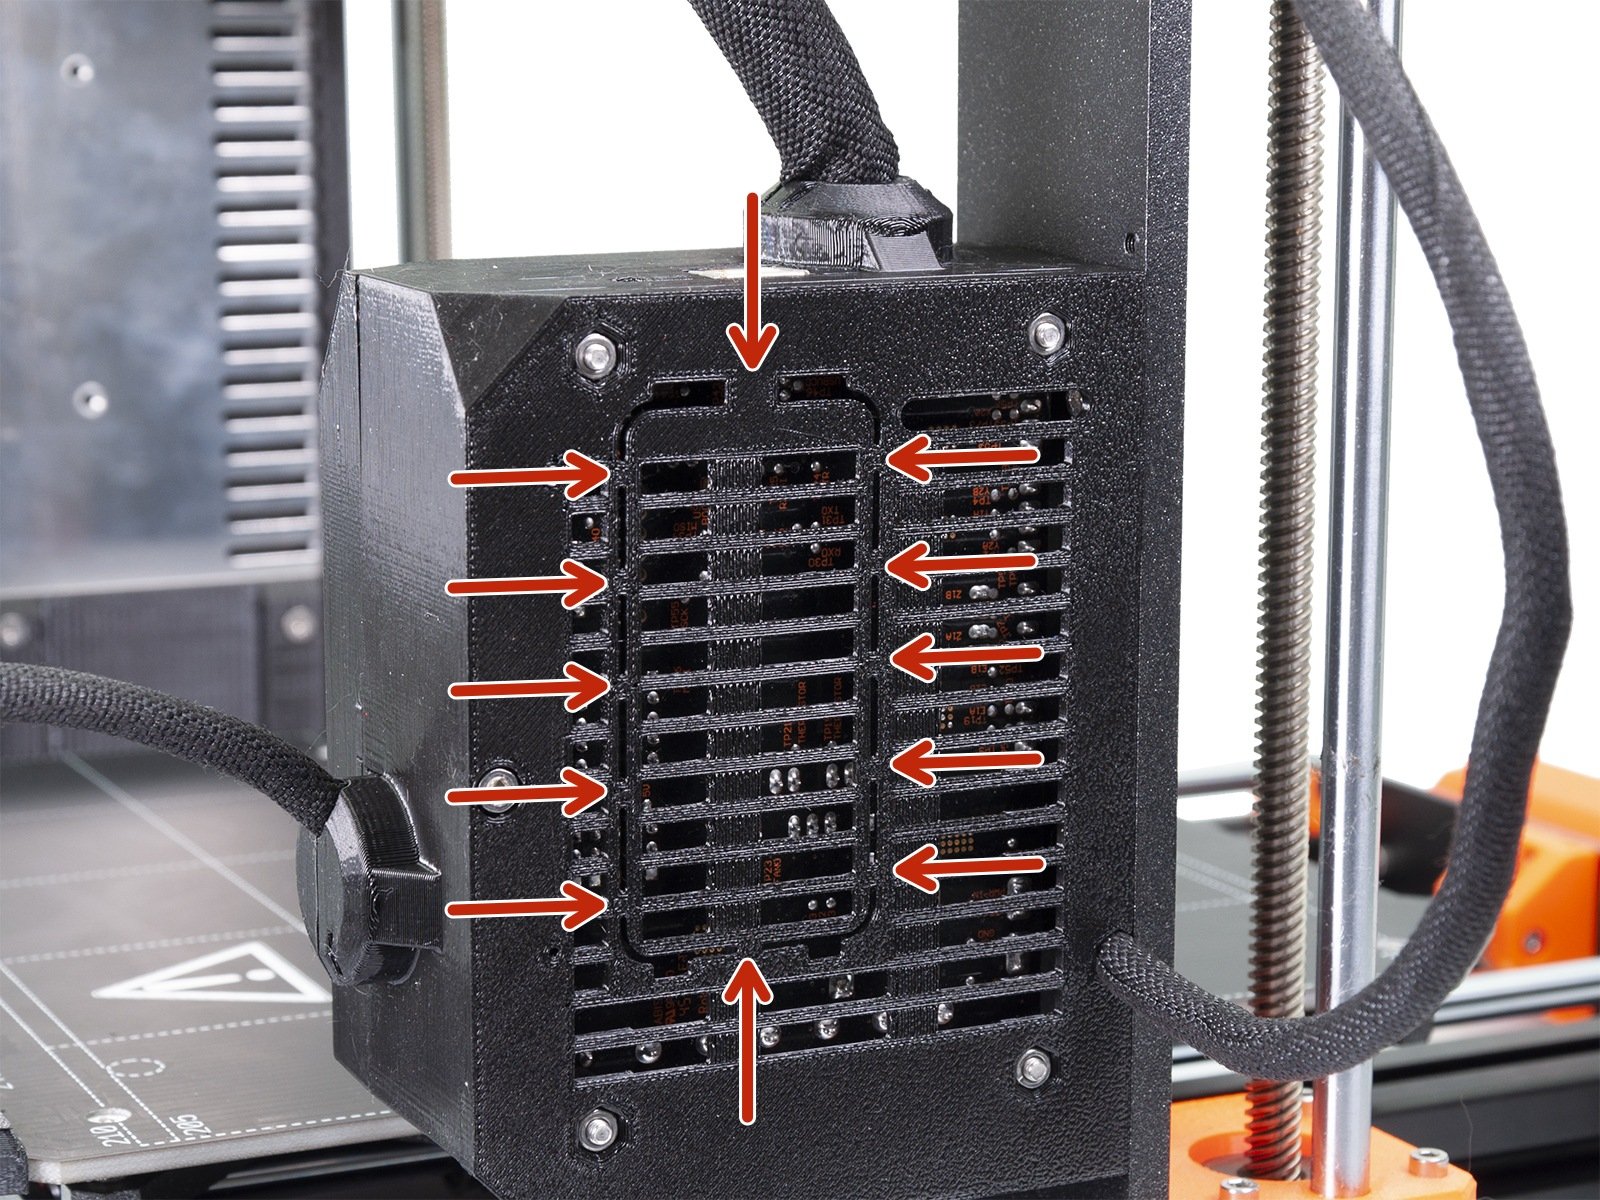
- Make sure the printer is turned off and carefully cut all the indicated plastic parts and remove the cut-out part. During the cutting process, MAKE SURE YOU DON'T CUT the Einsy board!!!
 | 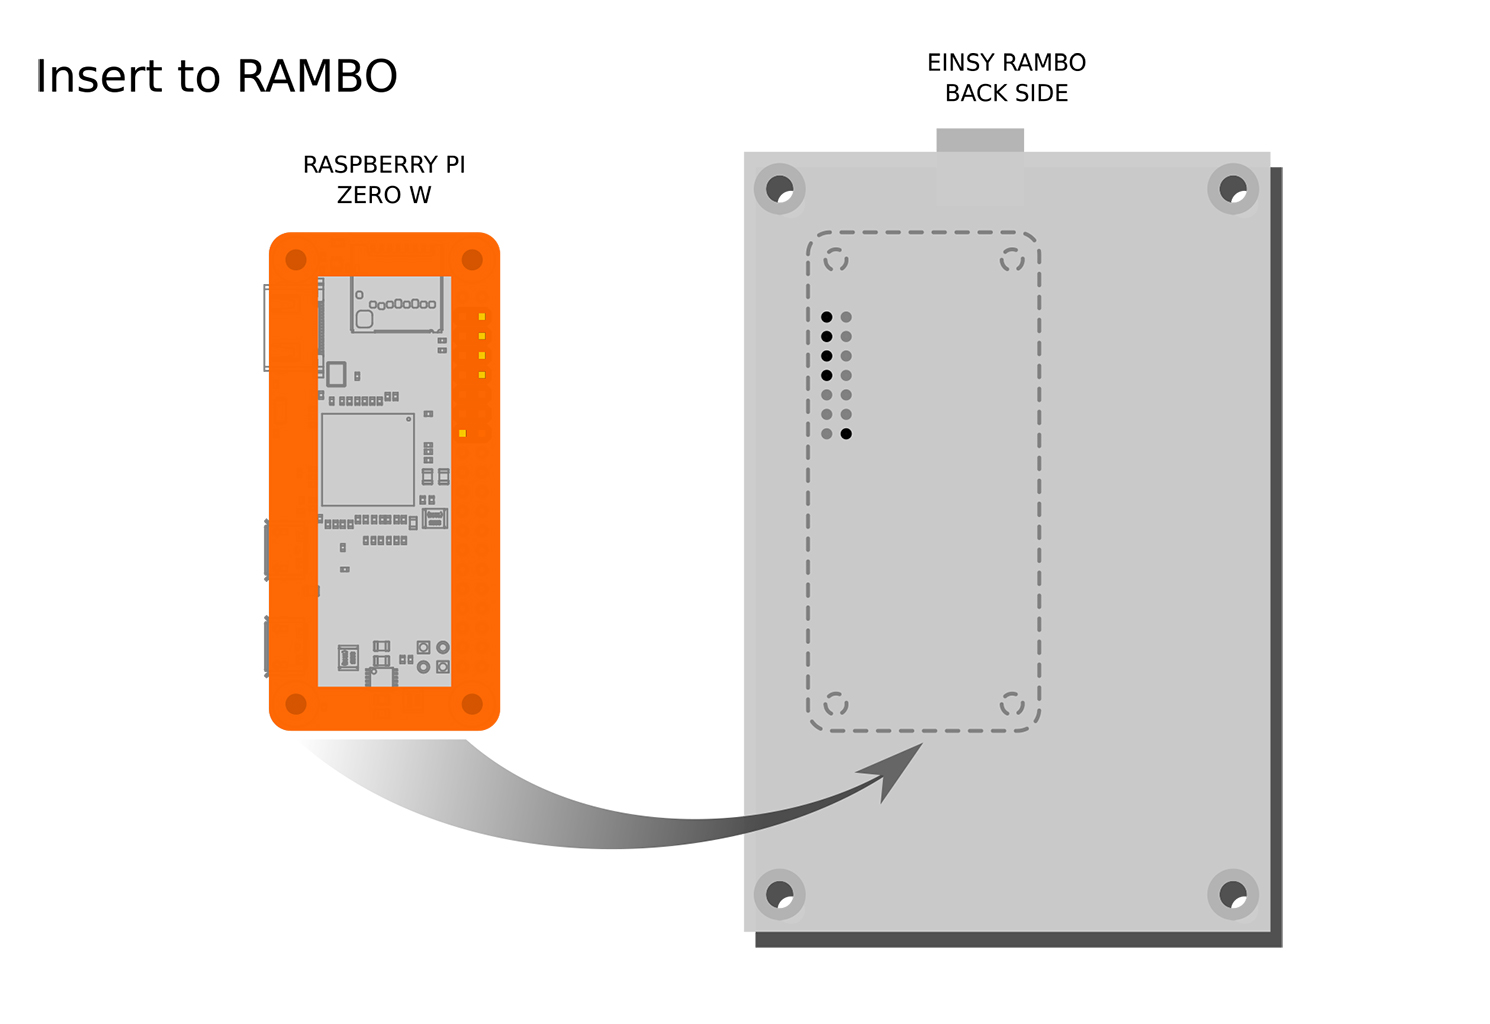 |
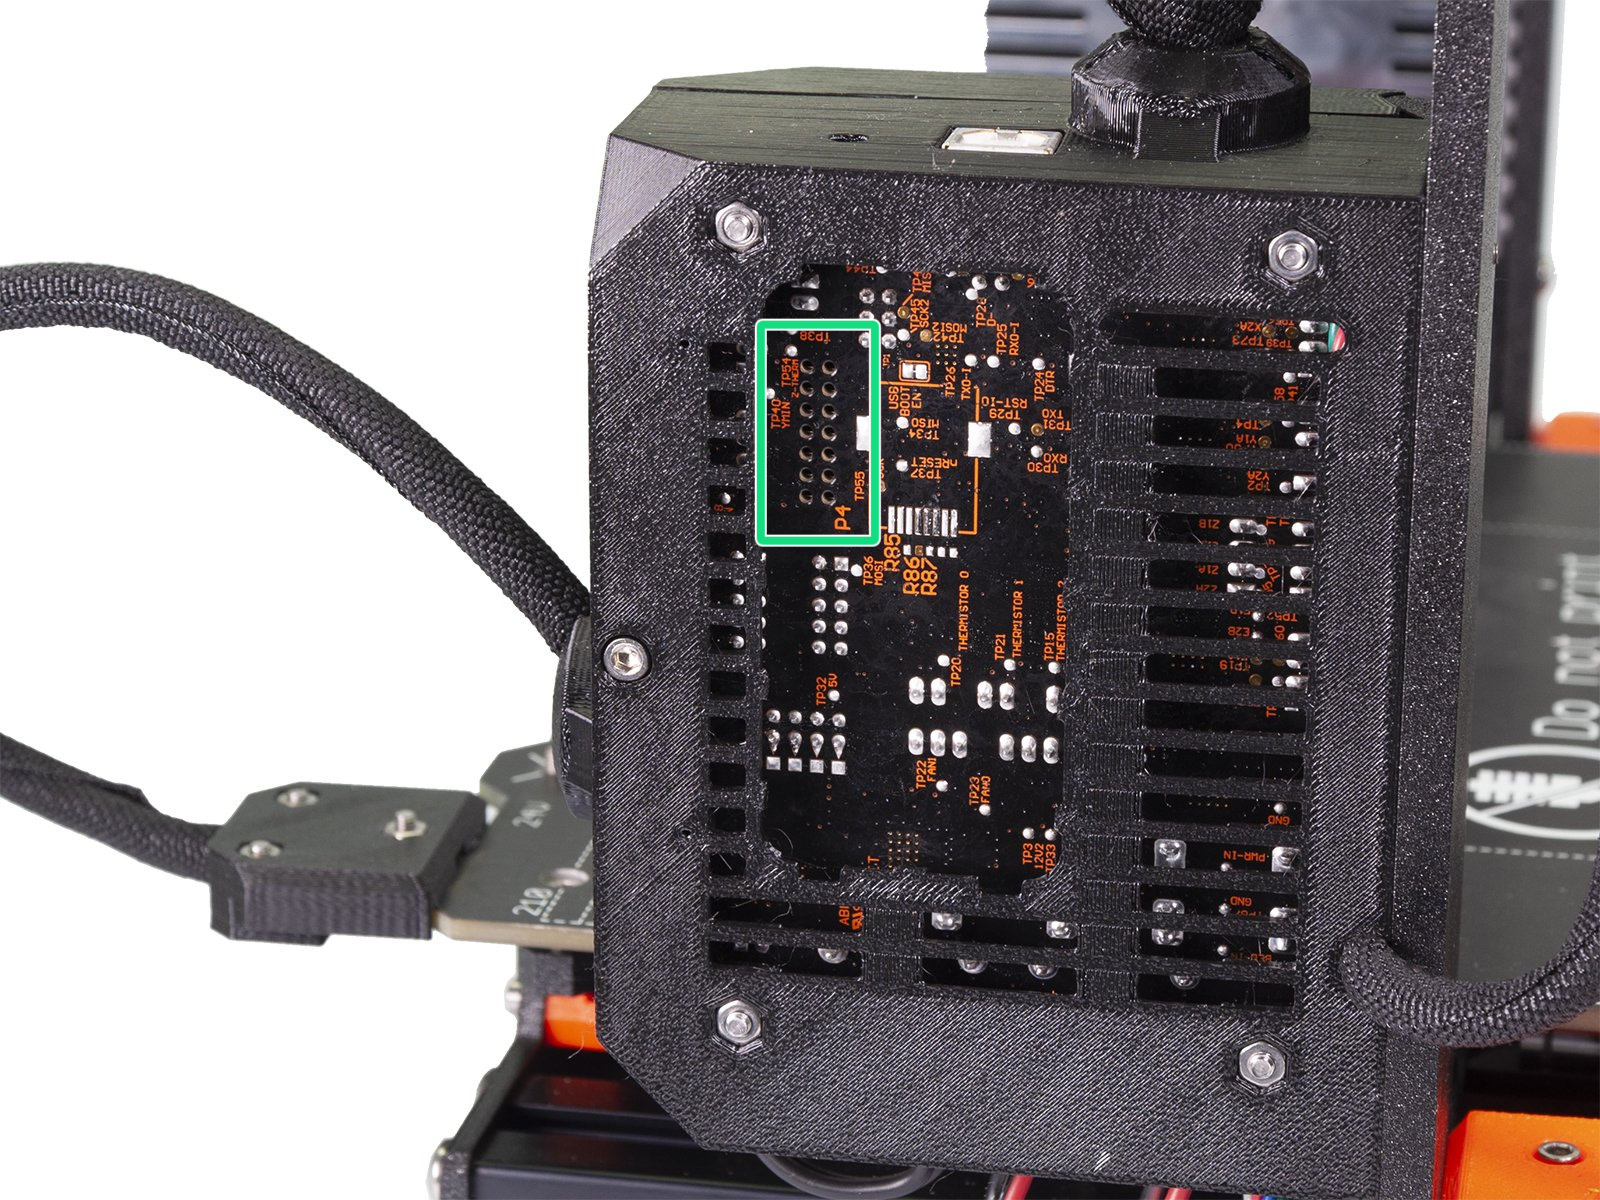
- Slot the RPi Zero, with its frame, into the connector holes indicated below (green square). Then fit the cover to protect the RPi Zero W (purple arrows).
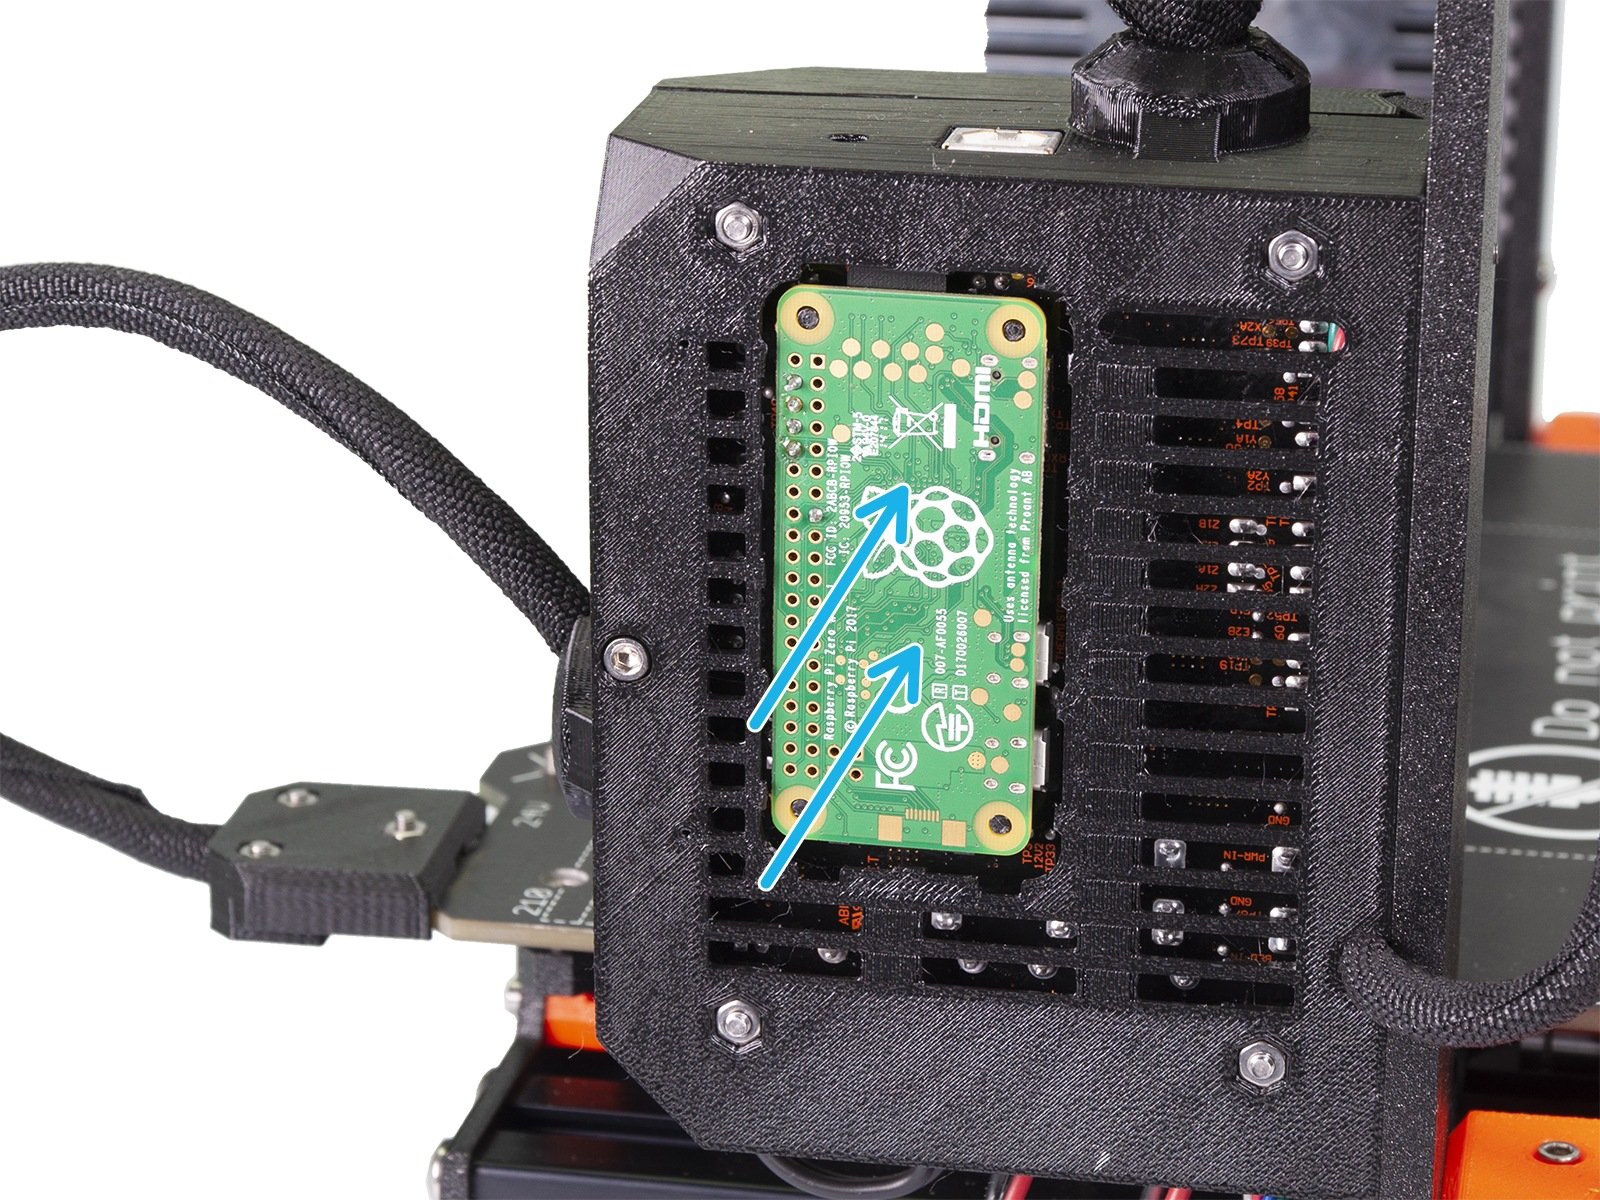 | 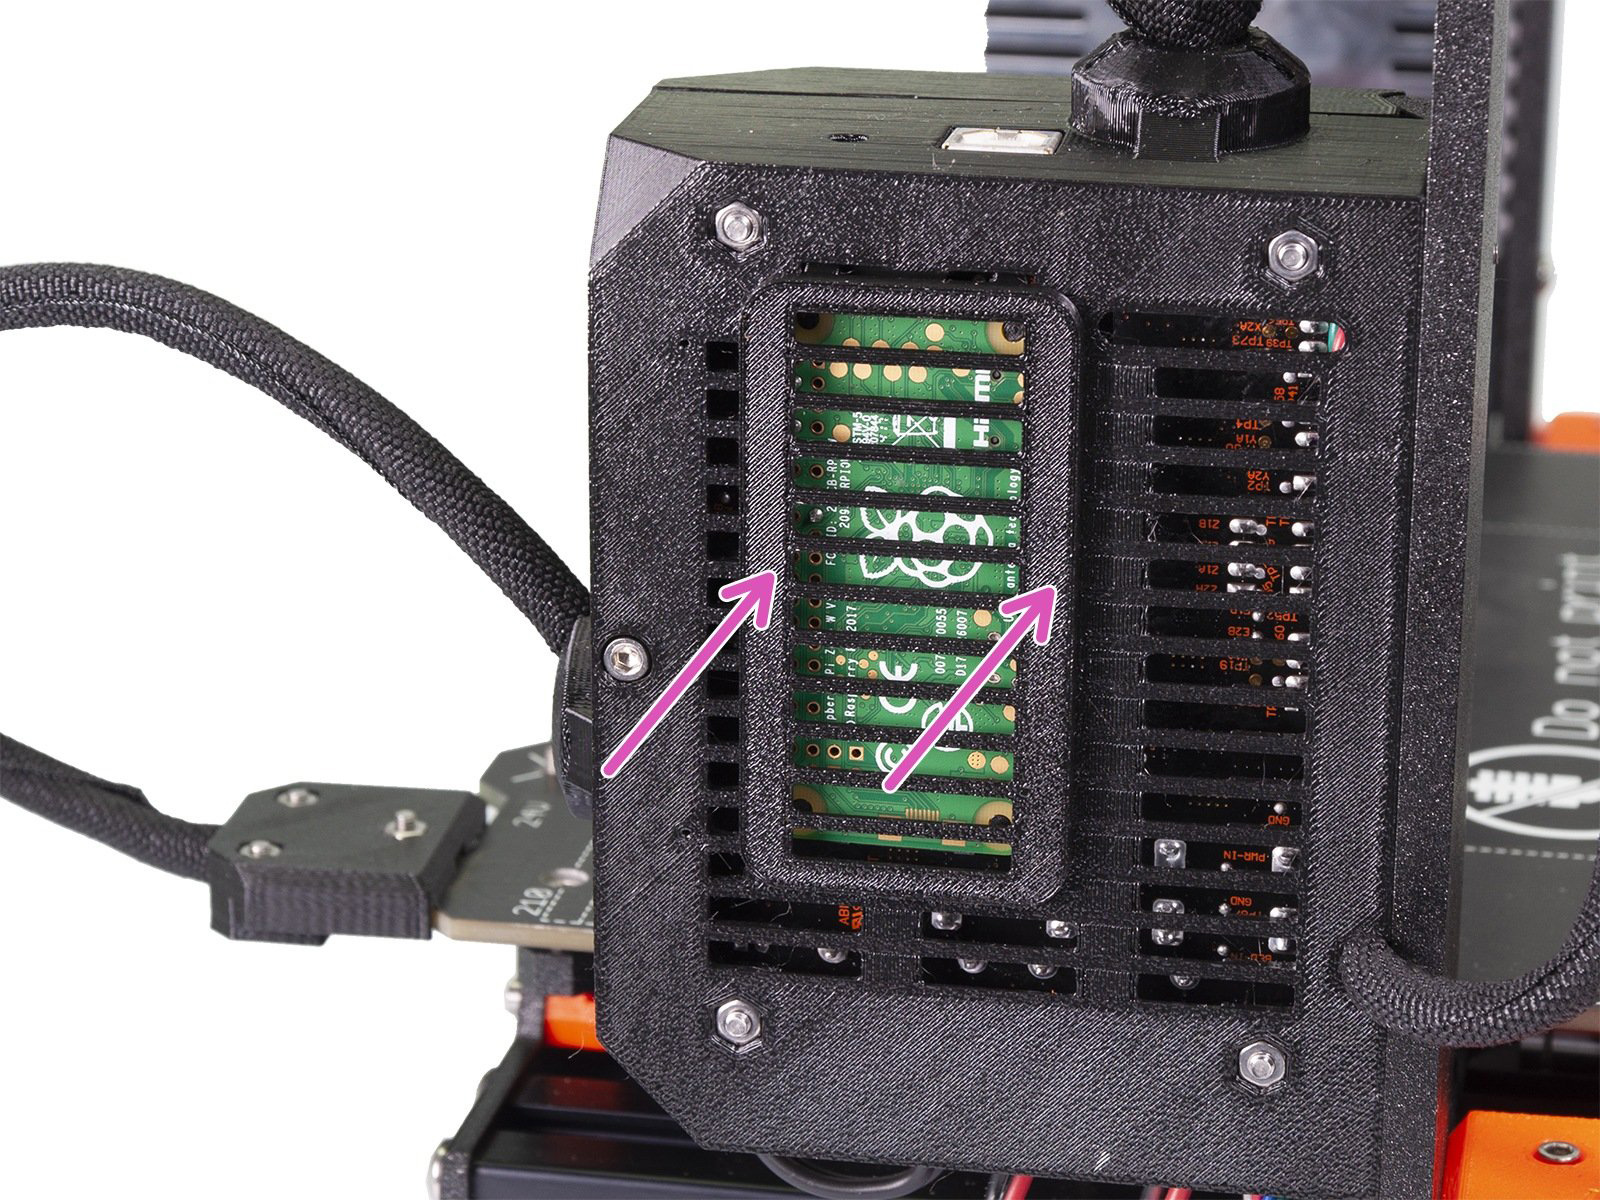 |
- Make sure the RPi Zero is properly installed by inspecting the connector on the other side of the Einsy Rambo (green arrows). Notice that the position of the support pin is in the corner (purple arrow).

Checking if the RPi works
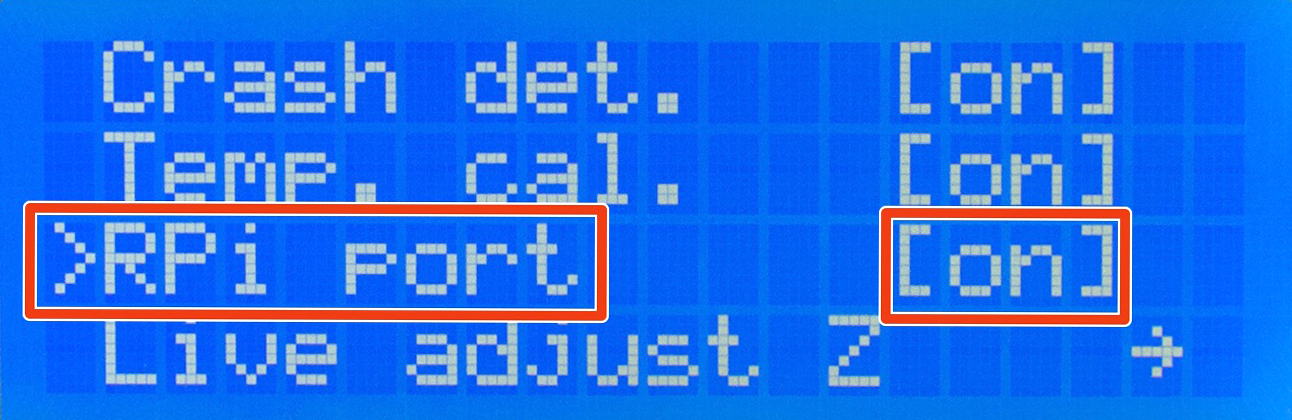
Go to the printer's LCD menu -> Settings -> RPi port, and make sure it is set to ON. Return to the printer's home screen. Now, wait for a few minutes. The RPi Zero is not a superfast computer and it needs time to boot.
Then open the browser and try opening a website: octopi.local. If octopi.local doesn't work, please use the following steps: Check your router for a new IP address, using an app like Fing, or wait until the address is displayed on the printer's display.
As soon as you have the IP, open a web browser on your PC, type it in, and hit Enter. If the Octoprint webpage loads, you can continue.
Troubleshooting
OctoPrint provided by Prusa Research is tested and is confirmed to be booting correctly. If you can't access the web interface, check the following:
- Is the RPi port enabled on your printer?
- Did you enter the correct Wi-Fi name (SSID) and password?
- Is the RPi Zero W correctly plugged in the EINSY RAMBo board?
- Are you connected to the same Wi-Fi network?
69 comments
Can I get a raspi setup that will connect to my mk3s+ through the usb port on the printer? And maybe connect a screen to the raspi and a camera to stream video. I am new in the 3D print world, and also have never done anything with raspberrypi. Advice appreciated.
Can I get a raspi setup that will connect to my mk3s+ through the usb port on the printer? And maybe connect a screen to the raspi and a camera to stream video. I am new in the 3D print world, and also have never done anything with raspberrypi. Advice appreciated.