Starting from PrusaSlicer version 2.9.0, you can work on multiple build plates. This functionality allows users to manage many objects efficiently and better organize their projects. The main advantages are:
- Organizing objects into groups across multiple beds (up to 9)
- Automatic arrangement of objects
- G-code preview for individual beds
- Comprehensive statistics for all beds
- Bulk slicing and exporting
Adding or removing beds
There are no buttons to add or remove beds. To add a new bed, you can drag the model from the plate being used outside of the bed, and the new bed will show up. Removing the object will remove the extra beds.
It is possible to organize objects in groups into up to nine beds. The beds can be added or removed as needed. One bed is always active, and you can select the active bed by clicking on it. All actions taken, like "Import STL" and similar are processed on the active bed.
Single-click automatic arrangement
There are two different Arrange buttons on the top menu. The Arrange [A] button arranges all objects independent of the bed they are on. If the objects don't all fit the bed, new beds will automatically be added, and the objects will be divided among them. The objects are always arranged so they occupy the least amount of space. If you have objects spread around multiple beds, this button will place them in the smallest possible space and might remove extra plates.
The Arrange current bed [D] will only arrange the active bed at that moment, including objects only partially on it.
G-code preview
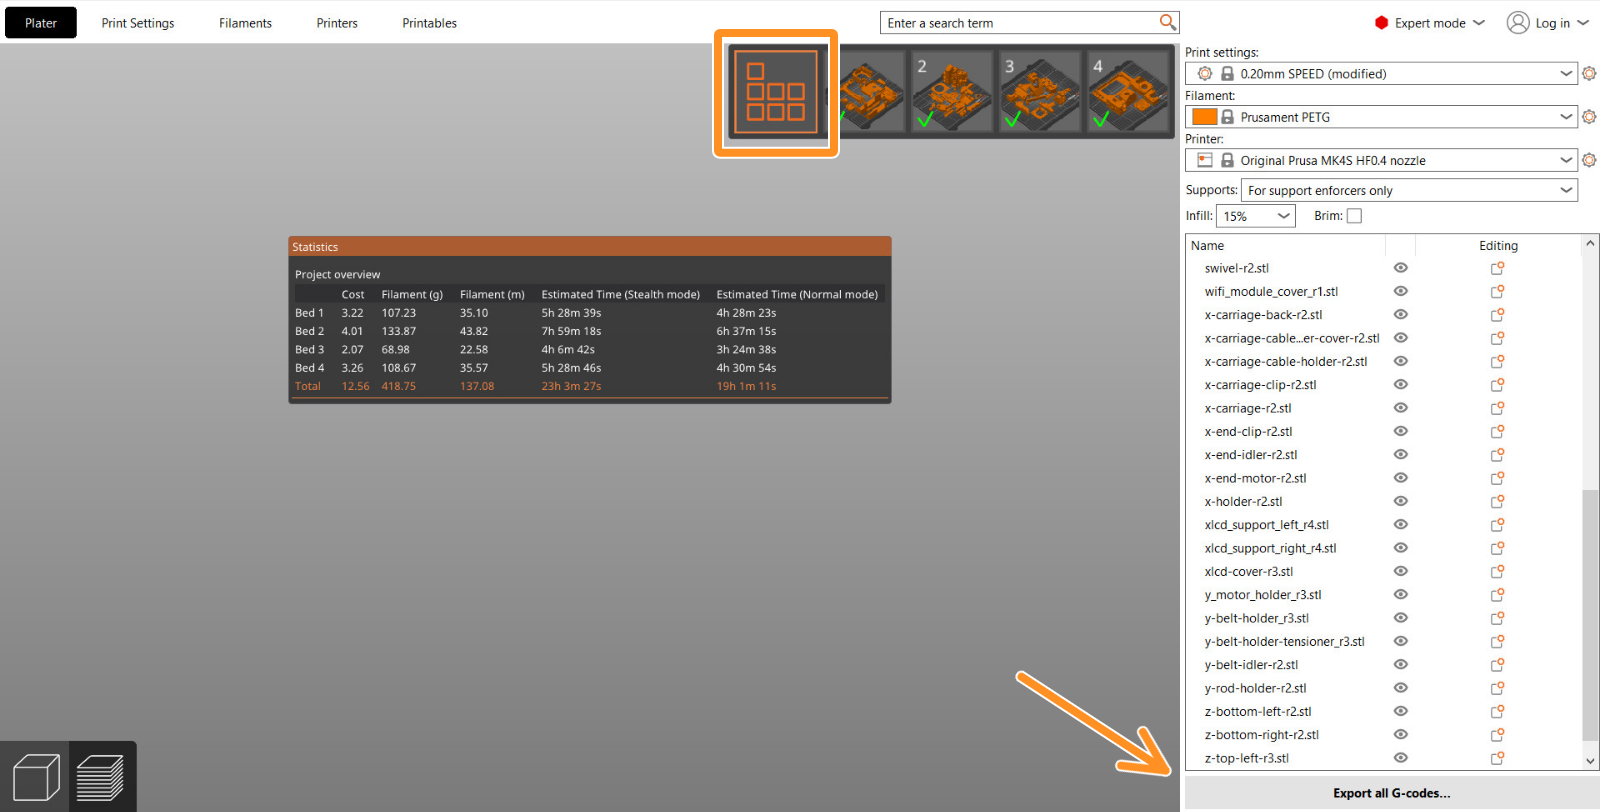
On the preview, click on a bed to make it the active bed. This will show individual beds so each bed can be viewed individually. This includes comprehensive statistics for all beds, including material usage and print time breakdowns.
Even if only one bed is active, all objects in the project are sliced. On the top right of the screen, there is a selector toolbar where you can move between the beds.
The 'Sliced Info' statistics and 'Export G-code' buttons on the right panel are related to the currently active bed.
Exporting
It is possible to export the G-code for all beds simultaneously and queue them for Prusa Connect. For that, go to "Slice All" in the Preview, and select "Export all G-codes..."
 Version compatibility
PrusaSlicer ensures compatibility if a project is opened in a version before 2.9.0 by inferring bed positions from object placements in 3MF project files, allowing new projects to load in older versions even if they do not have multiple build plates. Older projects with virtual beds are adjusted in PrusaSlicer 2.9.0 to fit within the actual bed grid.
10 comments
Thanks