If the selector of your MMU2S upgrade is not moving smoothly, or if it cannot reach a certain position, the cause is usually one of the following issues:
The selector blade is loose
The blade that is supposed to cut the filament strings was not attached properly or tightened enough during the assembly. It may have moved out of its socket and now it is blocking the movement of the selector.
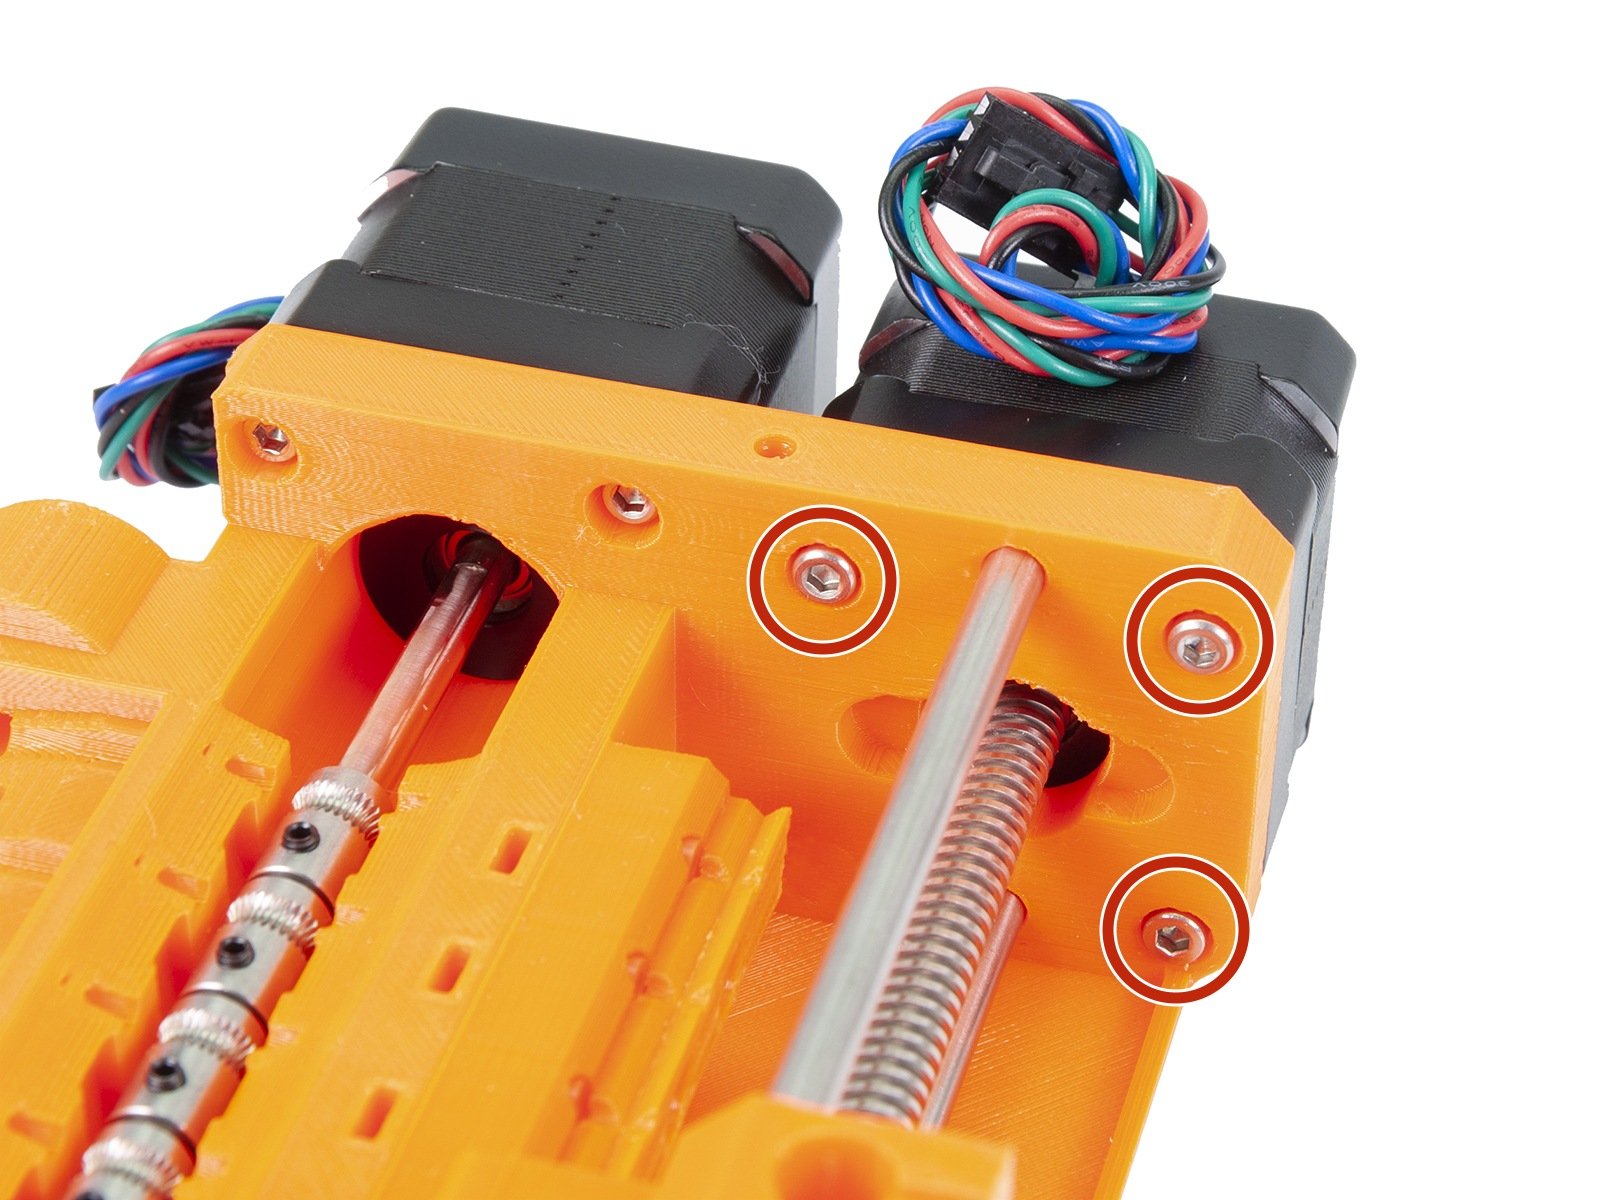
- Release the three screws holding the selector motor in place (left picture) and pull the motor out by turning the threaded rod of the black trapezoid nut. You can also release the two M3x10 screws securing the trapezoid nut.
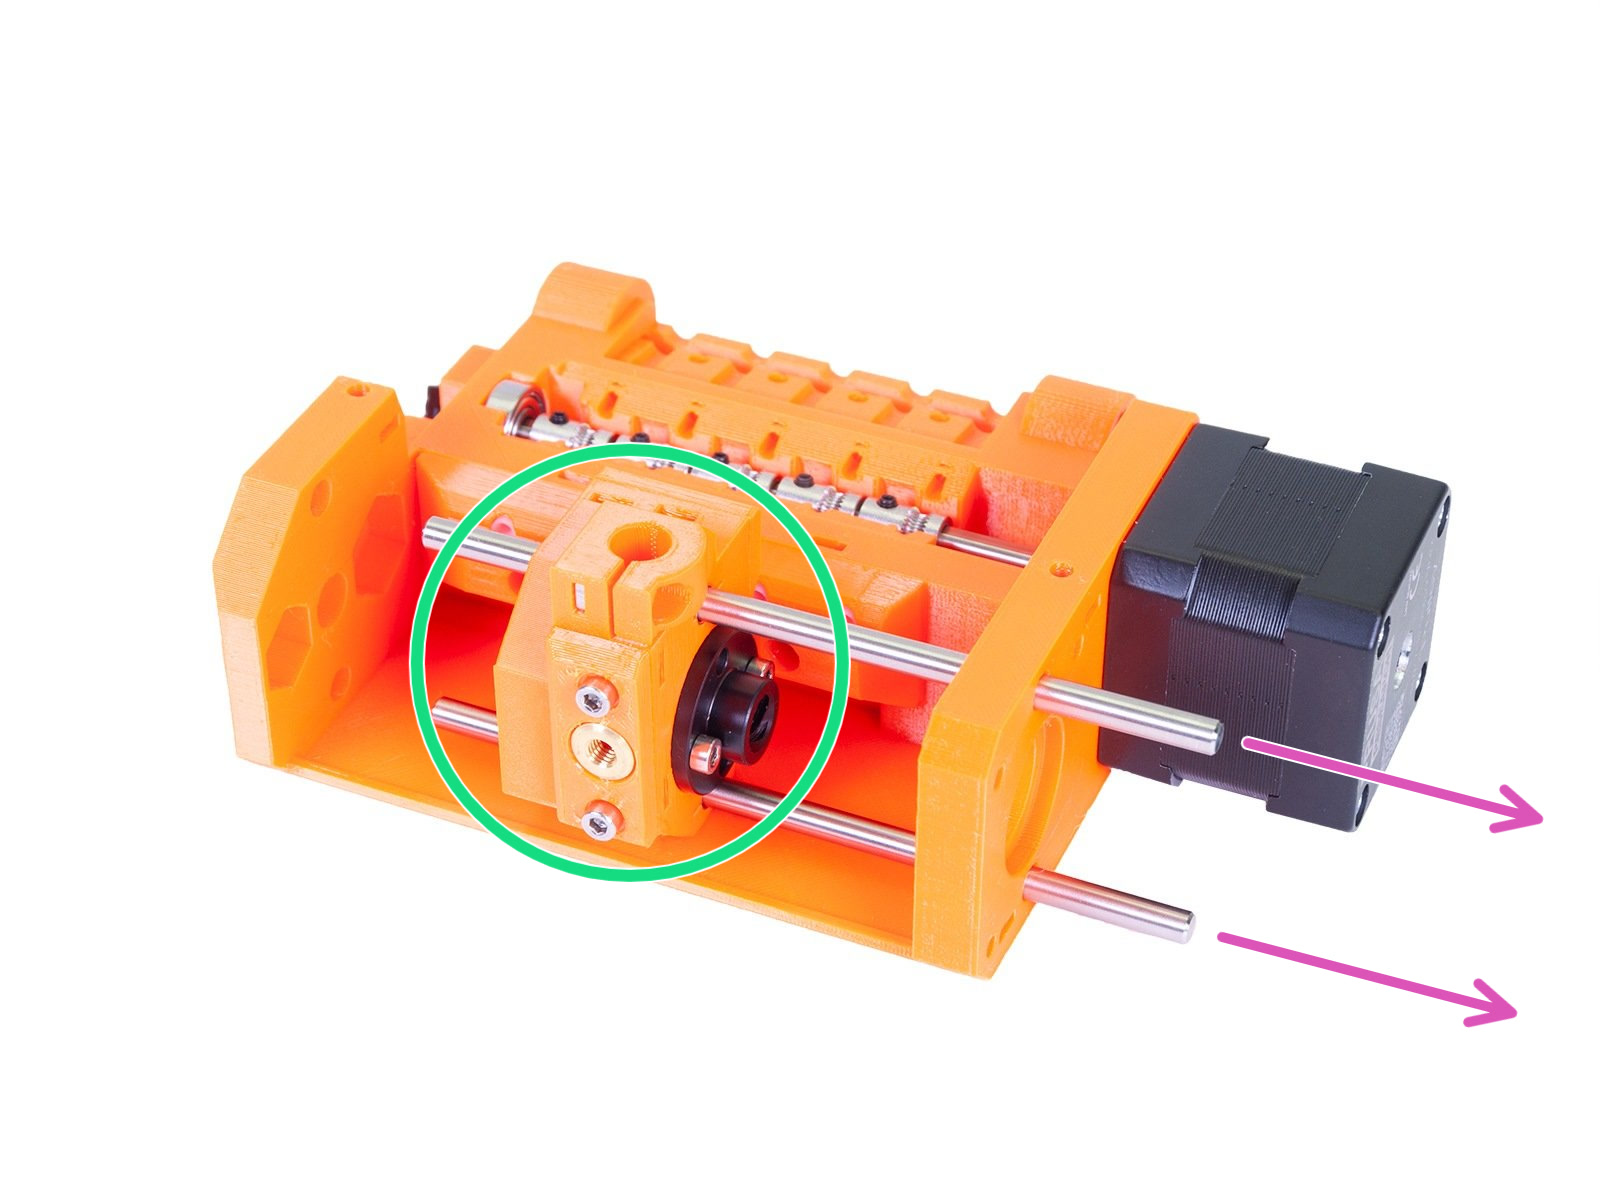
- Pull both of the small smooth rods out using the Allen key (right picture). Then remove the selector (green circle).
 |  |
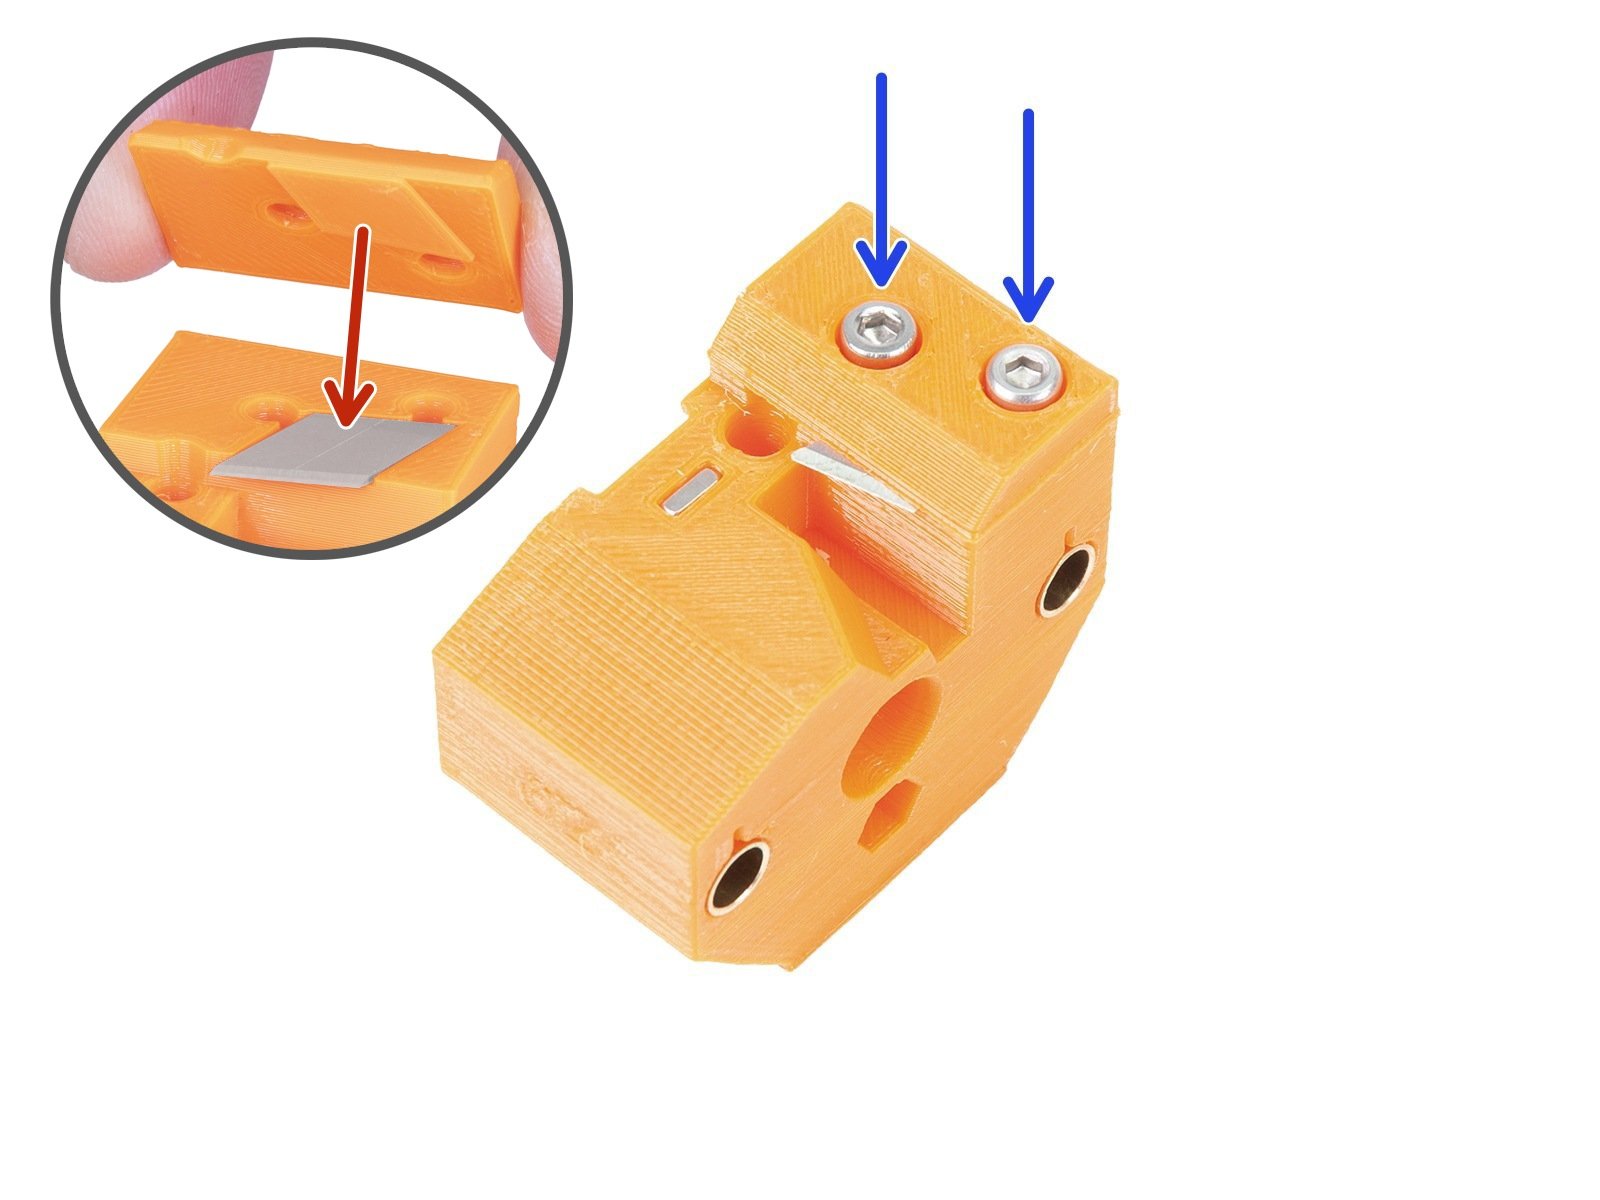
- Remove the holder's screws (blue arrows) and position the blade back in place and tighten its holder properly.
- Reassemble the unit back to its original state.
 | 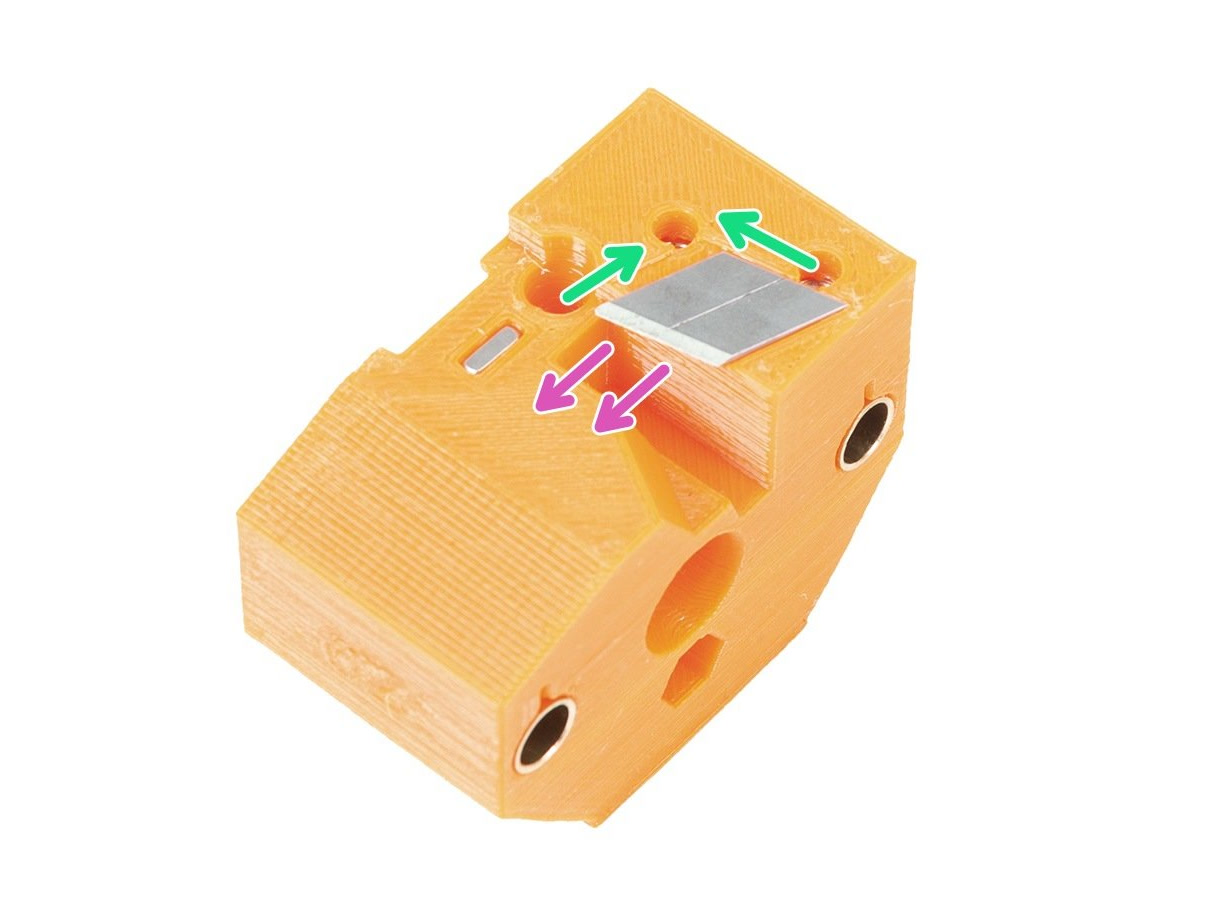 |
Updated selector blade holder
The blade equipped with the selector, which will cut the tip of the filament unloaded from the extruder, if needed. Until firmware version 3.9.0 of the MK3S/MK2.5S the cutting function was not enabled.
To start using this function, make sure you have:
- Firmware 1.0.6 or above installed in the MMU2S unit.
- Firmware 3.9.0 or above installed in the MK3S/MK2.5S.
The printed parts for the selector (mmu2-blade-holder and mmu2-selector-finda) were updated to provide a better grip of the blade and are available for download here. Print using PETG and PrusaSlicers 0.2 mm QUALITY preset.
The filament is bent and stuck in the selector
- Release the three screws holding the selector motor in place and pull the motor out by turning the threaded rod of the black trapezoid nut. You can also release the two M3x10 screws securing the trapezoid nut.
- Pull both smooth rods out (use the Allen key) and remove the selector.
- Remove the broken filament string from the selector and reassemble the unit.
The selector motor isn’t working
- First, try powering the printer off and moving the selector by hand, by turning the threaded rod.
- If that didn’t help or if you were unable to move the selector, release the three screws holding the selector motor in place (picture above) and pull the motor out.
- Push the smooth rods out with an Allen key. You can now easily remove the selector.
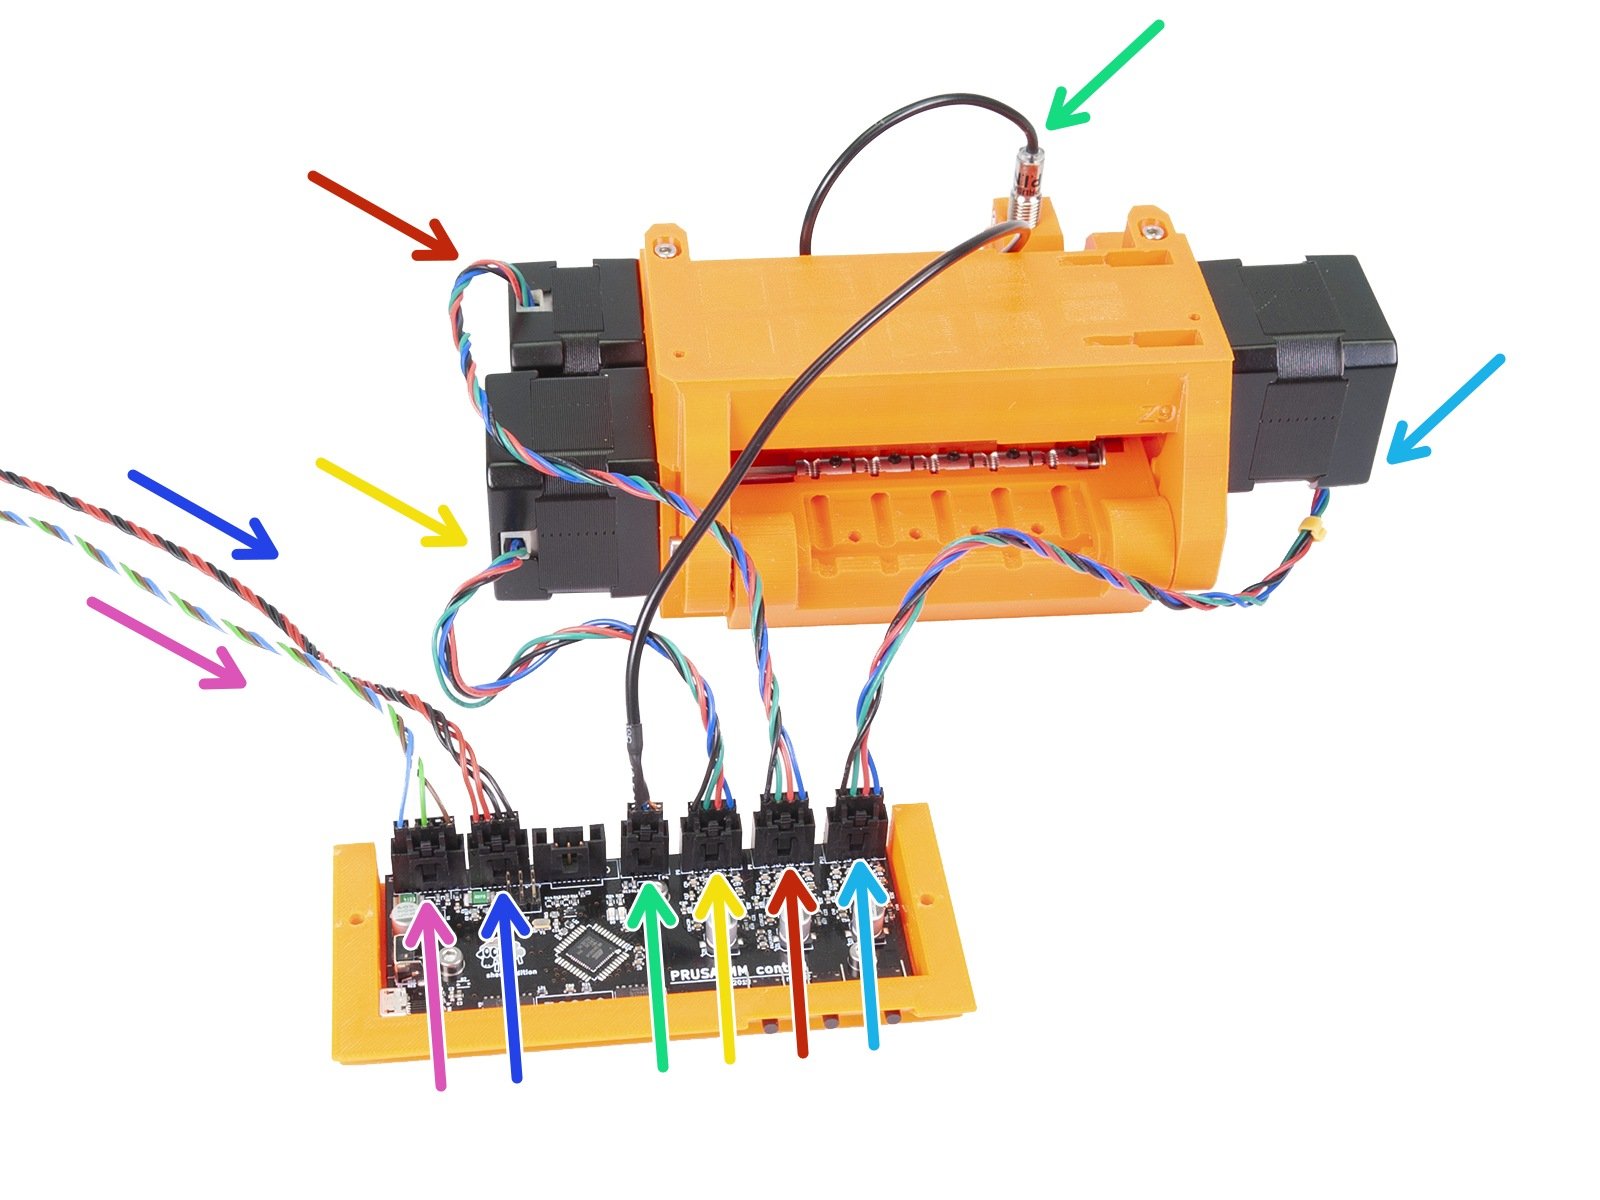
- Clean any stuck filament and try pressing the left and right control buttons. See if the motor’s shaft rotates. If not, the motor may be defective, or it is plugged incorrectly. Remove the MMU board with its cover and cross-check with the picture on the right to see if that is the case. Try also to unplug the cables and plug them back in to be sure.
 |  |
2 comments
I have had some success disconnecting and reconnecting the cables at the MMU2 circuit board. But the symptoms seem to return in hours or weeks.
Now I have tried also lightly spraying the connectors (both on the board and on the cable) with a little Contact Cleaner. I am hoping that will provide a longer lasting fix.
BTW the incoming power connector on the board is the 2nd from the right (with 2 red and 2 black wires).
I wonder if there is something unusual with the cable connectors or the board connectors that causes resistance to increase over time?
Hi! It is not usual that the Molex connectors loose conductivity over time for no reason. A cold joint on the board is more common. You might want to check if the cables aren't damaged on the way, for example where the Einsy-door meets them. Try to re-tighten the fork connectors at the Einsy. Check if there isn't a mechanical obstruction that would prevent the selector from moving. And please, let us know what you found out! ;)
Hi! Please, contact support via the prusa3D.com page if you don't mind. They might be able to help you with this ;)
Hi Michael! You are right. Another cause may be the steel ball stuck in the upper position or being pushed up by a leftover piece of filament or dirt.