The default nozzle diameter for most of today’s printers is 0.4 mm. If you decide to use a different diameter nozzle (you can read all about the benefits in our article) and there isn't a built-in profile for it, you'll have to make one yourself.
Rather than creating a brand new profile, it's best to start with an existing profile and just modify it.
The two main things that have to be adjusted are:
- Nozzle diameter in Printers tab -> Extruder 1
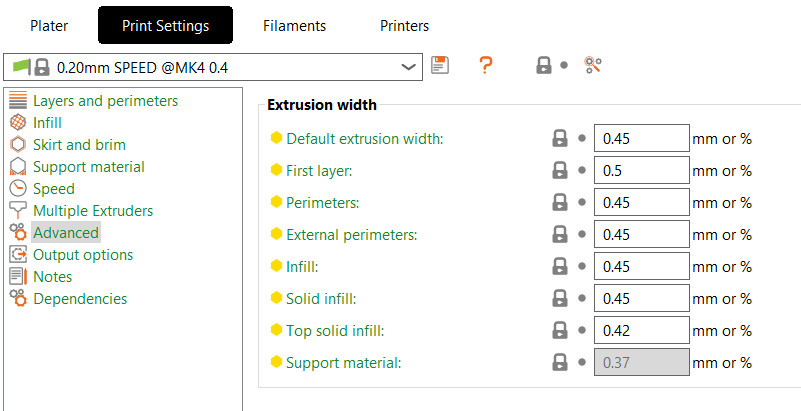
- Extrusion width in Print settings tab -> Advanced
That means you'll have to save not only a new printer profile but also new print profiles.
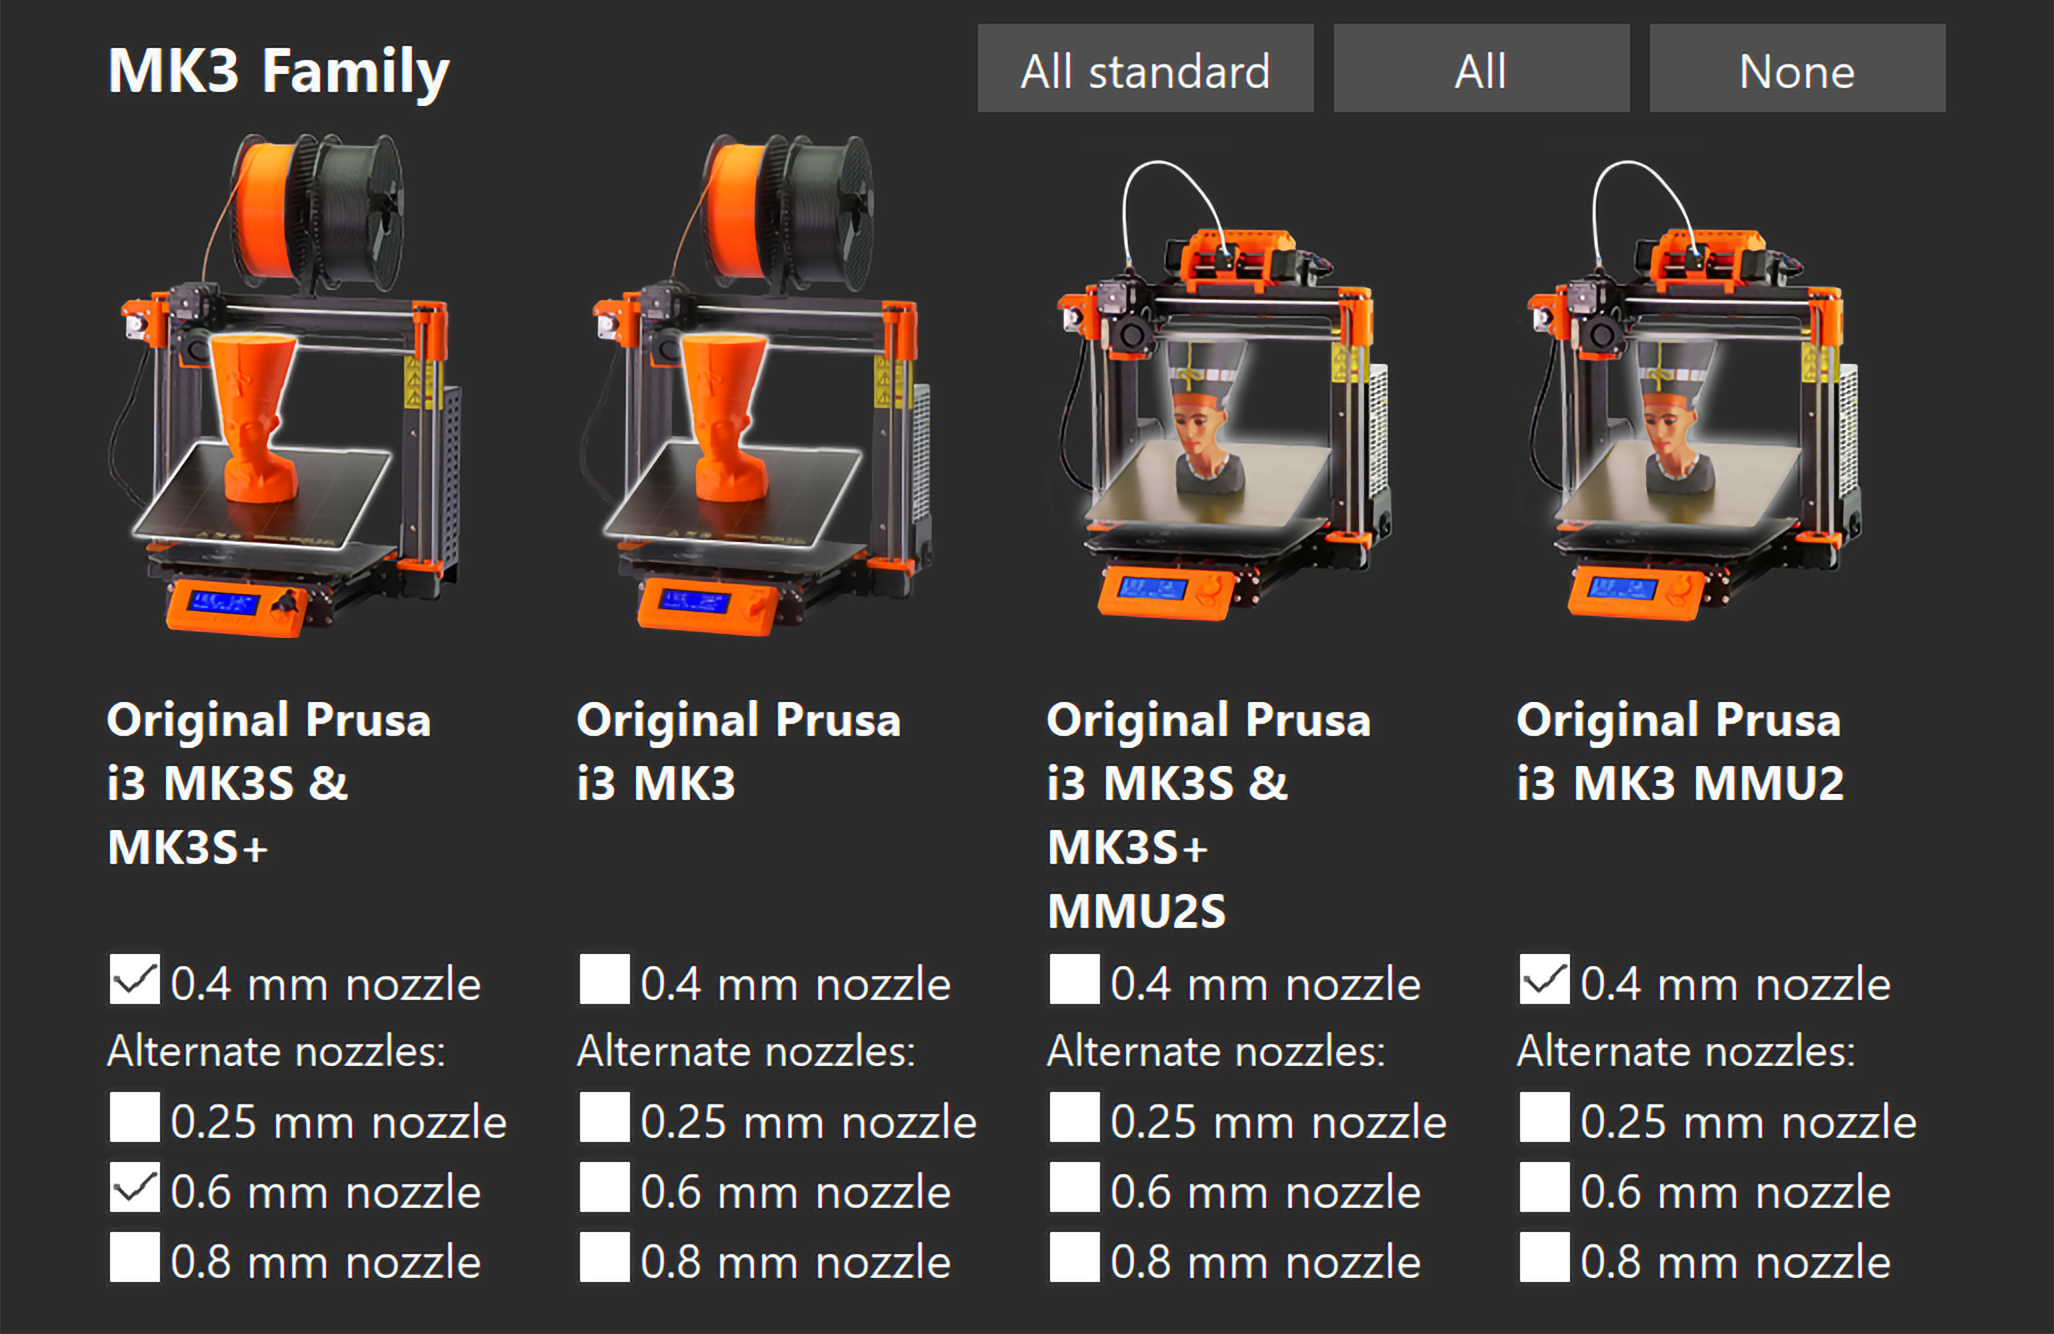
Go to Configuration - Configuration Wizard - Prusa FFF and tick the boxes for profiles you wish to import, e.g. "0.25 mm nozzle"

Nozzle diameter in extruder settings
Go to Printers tab -> Extruder 1 -> Nozzle diameter and enter the exact diameter of your new nozzle and if it is high flow or not.
This value is used in PrusaSlicer mostly as a machine limit. For example, you can't print with a layer height bigger than your nozzle diameter. Your layer height should be 70-80% of your nozzle diameter at maximum, otherwise, the layer adhesion will be significantly compromised. PrusaSlicer also notes the nozzle diameter in the exported G-code as a comment. This is very helpful because the printer can warn you if you accidentally try to print a G-code generated for a different nozzle size.
However, on its own, changing this value won't make PrusaSlicer generate thicker extrusion lines.

Extrusion width in print settings
Setting up the extrusion width is the most important thing when creating a profile for a new nozzle.
Go to Print settings tab -> Advanced.
You'll see a list of different extrusion width settings which can be added as a measurement in millimeters or as a percentage. The Support Material extrusion width is only enabled if the option "Generate Support materials" is selected in Print settings tab -> Support Material.
- Enter the Default extrusion width manually (e.g. 0.45 mm)
- If you enter 0 PrusaSlicer will derive the extrusion width from the nozzle diameter
- 1.125 × nozzle diameter will be used
- You can also enter a percentage (e.g. 120%)
- the percentage is calculated from the layer height, not the nozzle diameter

Extrusion width tips
Generally, you want your extrusion width to be about 110% of your nozzle diameter.
You can increase the extrusion width of the first layer to make it stick better to the print bed (e.g. 120-140% of nozzle diameter) at the cost of lower resolution in the XY plane.
By setting the extrusion width lower than the nozzle diameter you can make supports weaker and easier to remove.
Printer nozzle diameter check on the MK3/S
If you set up a profile for custom nozzle size and you're using the Original Prusa i3 MK3/S/+, disable the nozzle diameter check G-code.
Go in the printer menu to Settings -> HW setup -> Checks - Nozzle. Change it to Warn to receive a warning that can be skipped, or change it to None for the printer to ignore the different nozzle diameters.
Alternatively, you can delete the line directly from the Gcode in Prusa Slicer. Note that this is only recommended for advanced users. Go to Printers tab -> Custom G-code -> Start G-code and delete the line that saysM862.1 P[nozzle_diameter] ; nozzle diameter check
11 comments
It is not possible to overwrite the standard settings. You can save the new profile by clicking the save button near the profile name, and a box to create a new name will appear. The custom profile will then show as a User preset.