PrusaSlicer supports the following scenarios:
-
Single material printer (or MMU2 in Single extruder mode).
In this case, color-changes (manual filament swaps) can be added, but not extruder-changes. -
Multi-material printer with the same extruder assigned to all objects, to their volumes and to modifier meshes.
Color-changes (manual filament swaps) for an arbitrary extruder and automatic tool changes of an active extruder to another extruder can be added. -
Multi-material printer, where more than one extruder is assigned to objects, to their volumes or to modifier meshes.
Only color-changes can be added. Extruder-changes are already defined by extruder assignments on the Plater and we do not allow them to be extended or overridden by ColorPrint.
While in theory, it could be possible to combine extruder-changes of Plater with the extruder-changes of the ColorPrint, the result would be difficult to interpret by the user, so we decided to keep it simple.
Prohibited cases
When color/extruder-changes are added and later made invalid by switching a printer profile or changing extruder assignments at the Plater (going from scenario 2 to 3 above or vice versa), the invalid color/extruder changes are marked with an exclamation mark to alert the user.
Any such color/extruder change will be ignored during the G-code export. Further manipulation with the ColorPrint slider is blocked before these conflicts are resolved by the user.
Examples
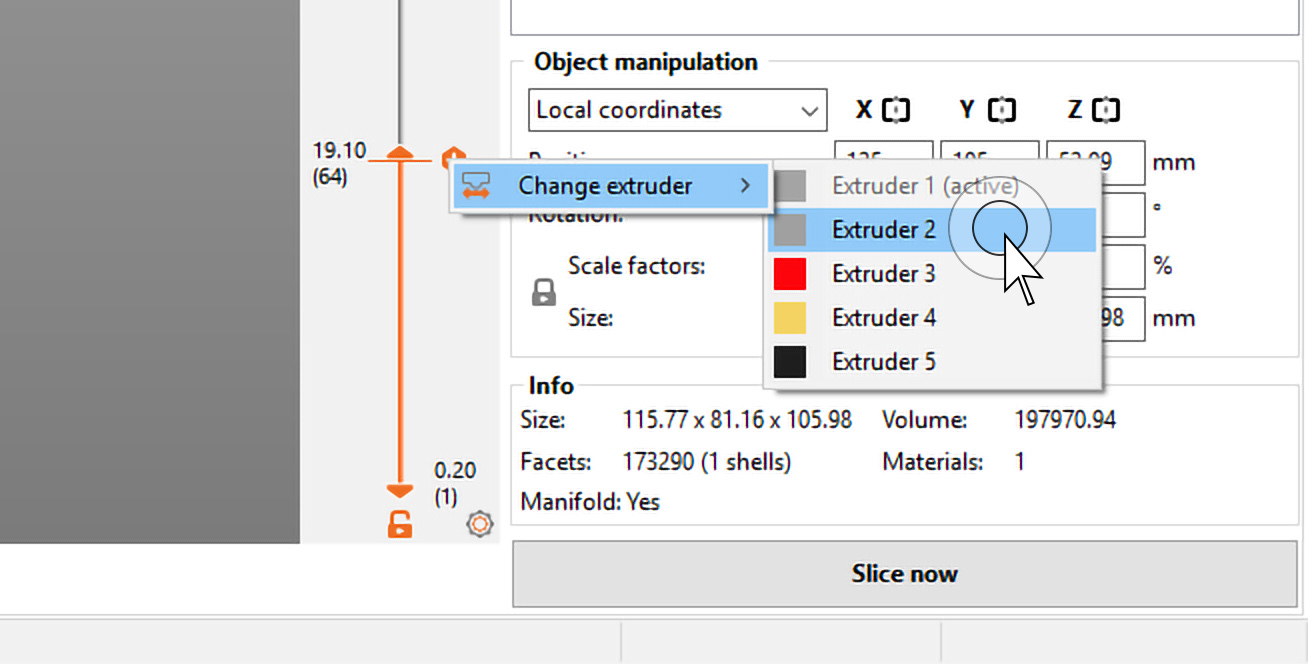
Automatic layer-based color change (ColorPrint - scenario 2)
Imagine this as a normal color change with the single-extruder printer. Each layer can have only one color at the same time. But rather than switching the color manually, you can pick which extruder to use next.
Move the layer preview slider to desired color change height, click on the orange plus icon and select Change extruder.
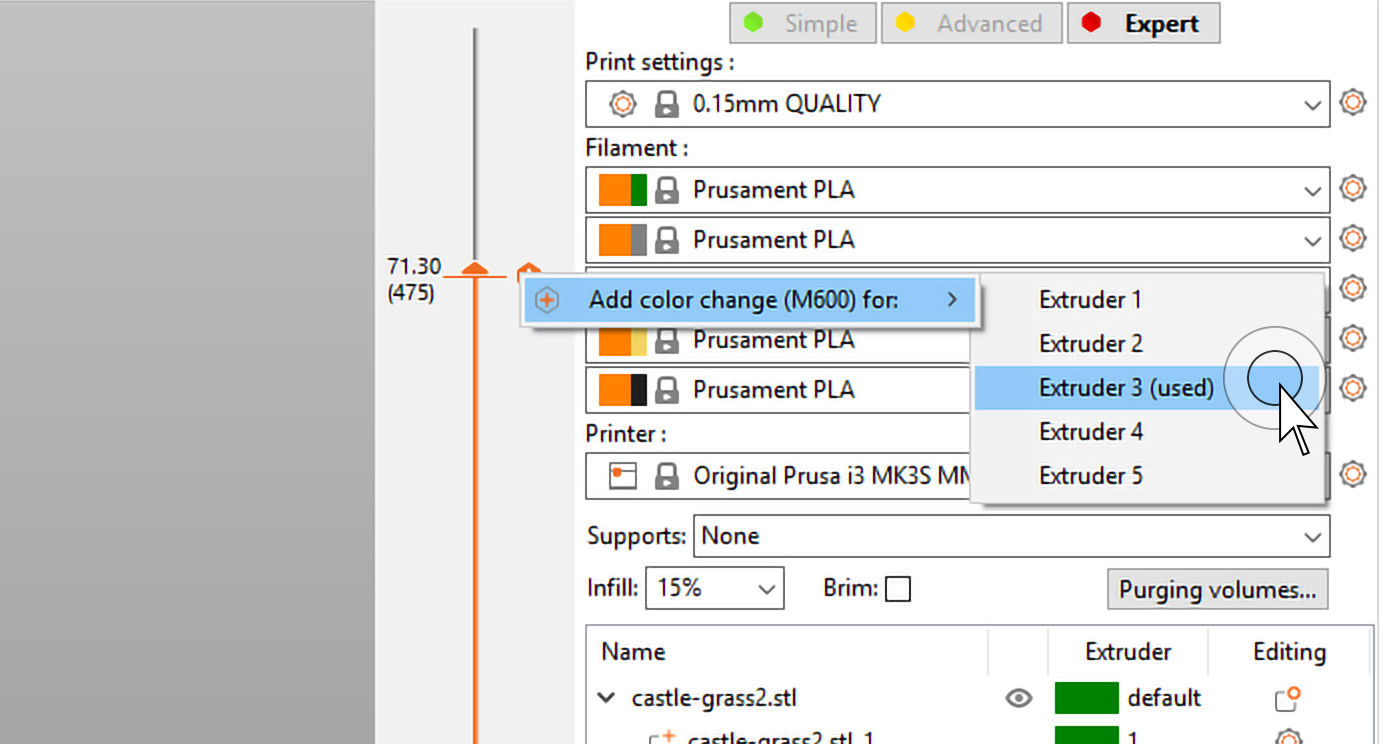
Printing with more than 5 colors at once with the MMU2S (scenario 3)
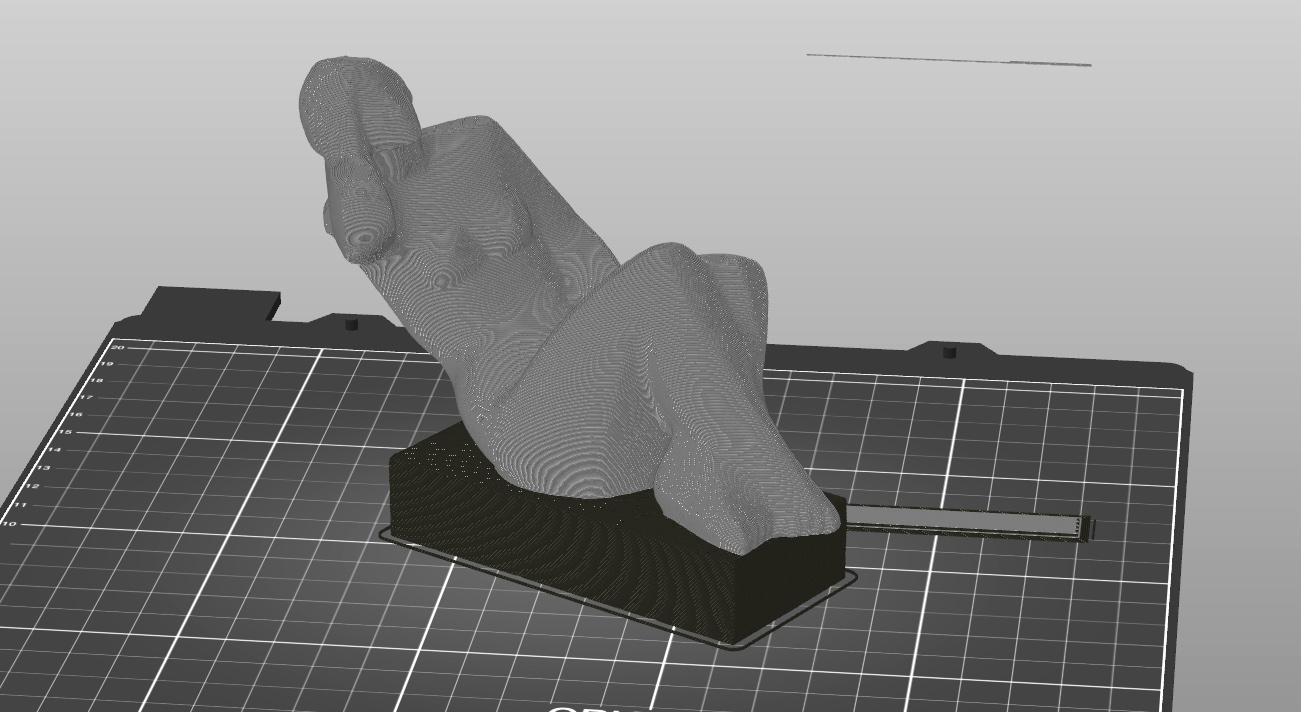
Let's say that you have a multi-material print with all 5 filaments already in use. However, you wish to use one more color by manually changing the filament in of the of the mmu slots.
Simply move the layer preview slider to desired color change height, click on the orange plus icon and select for which extruder you wish to add the color change. All extruders used in the current layer will be marked.
The resulting model with 8 colors used in total:
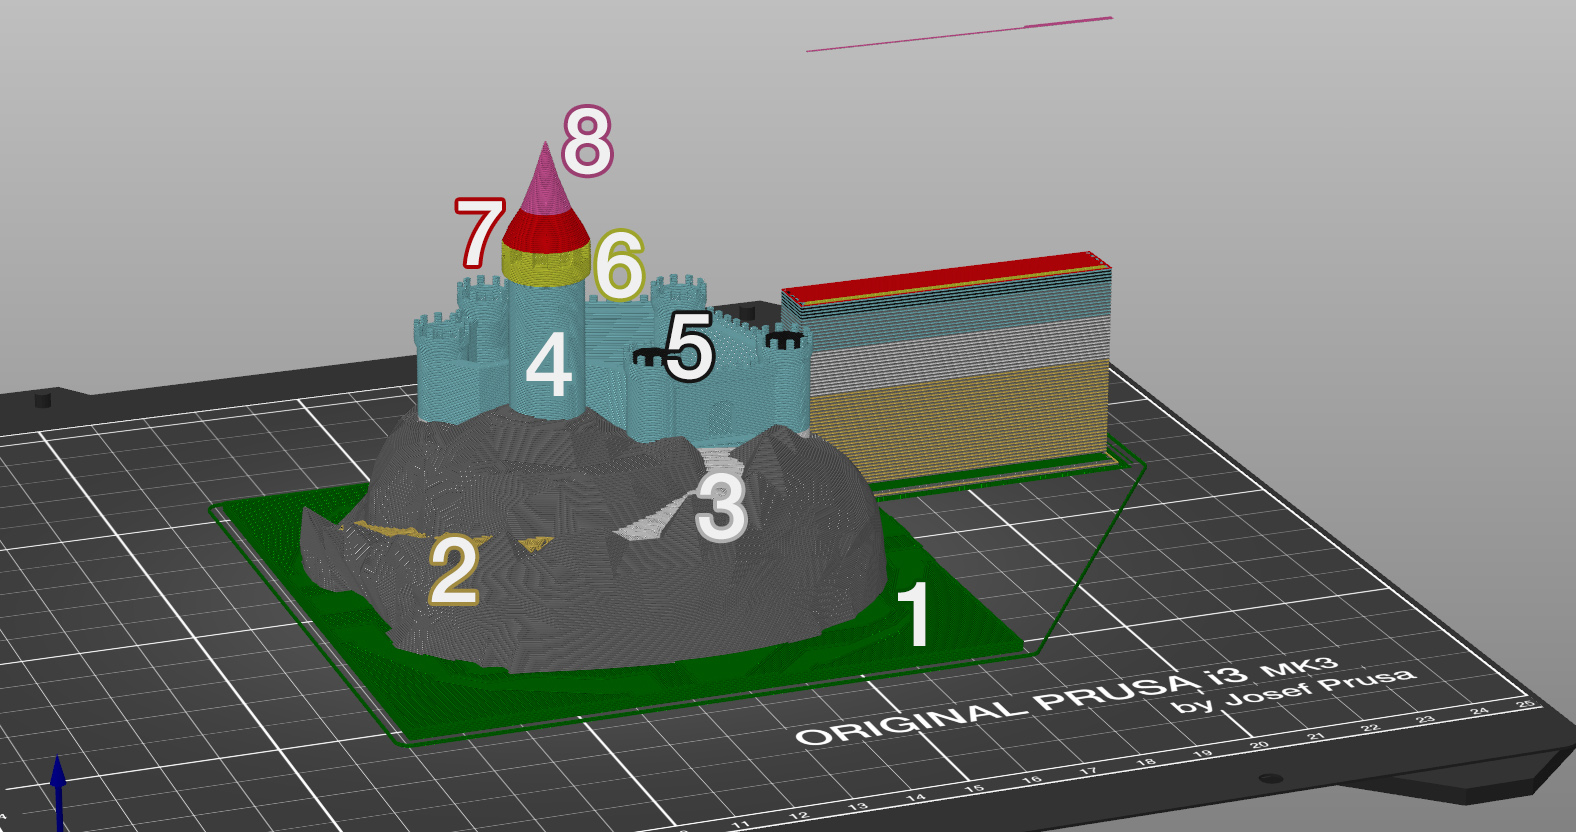
The action that's prohibited in this example is creating a layer-based color change by assigning a different extruder to a half of one part. E.g. the roof can be dual-colored (red/pink), but this color change can has to be done only manually. If you wish to make the change automatically by assigning different extruder, split the model into two separate models.
3 comments
Hi! Select the not-single MMU mode in printer: menu. Slice and select layer height you want to switch extruders in. Select which extruder number (filament position/color) to switch to - as seen in the example in the article above :)