PrusaSlicer lets you schedule a filament change at a certain layer. This can be used to print basic multicolored models. The printer automatically pauses the print as soon as it reads the color change in the G-code (M600 command) and prompts the user to proceed with the filament change.
- Slice your model normally. A preview will show how the part will be printed.
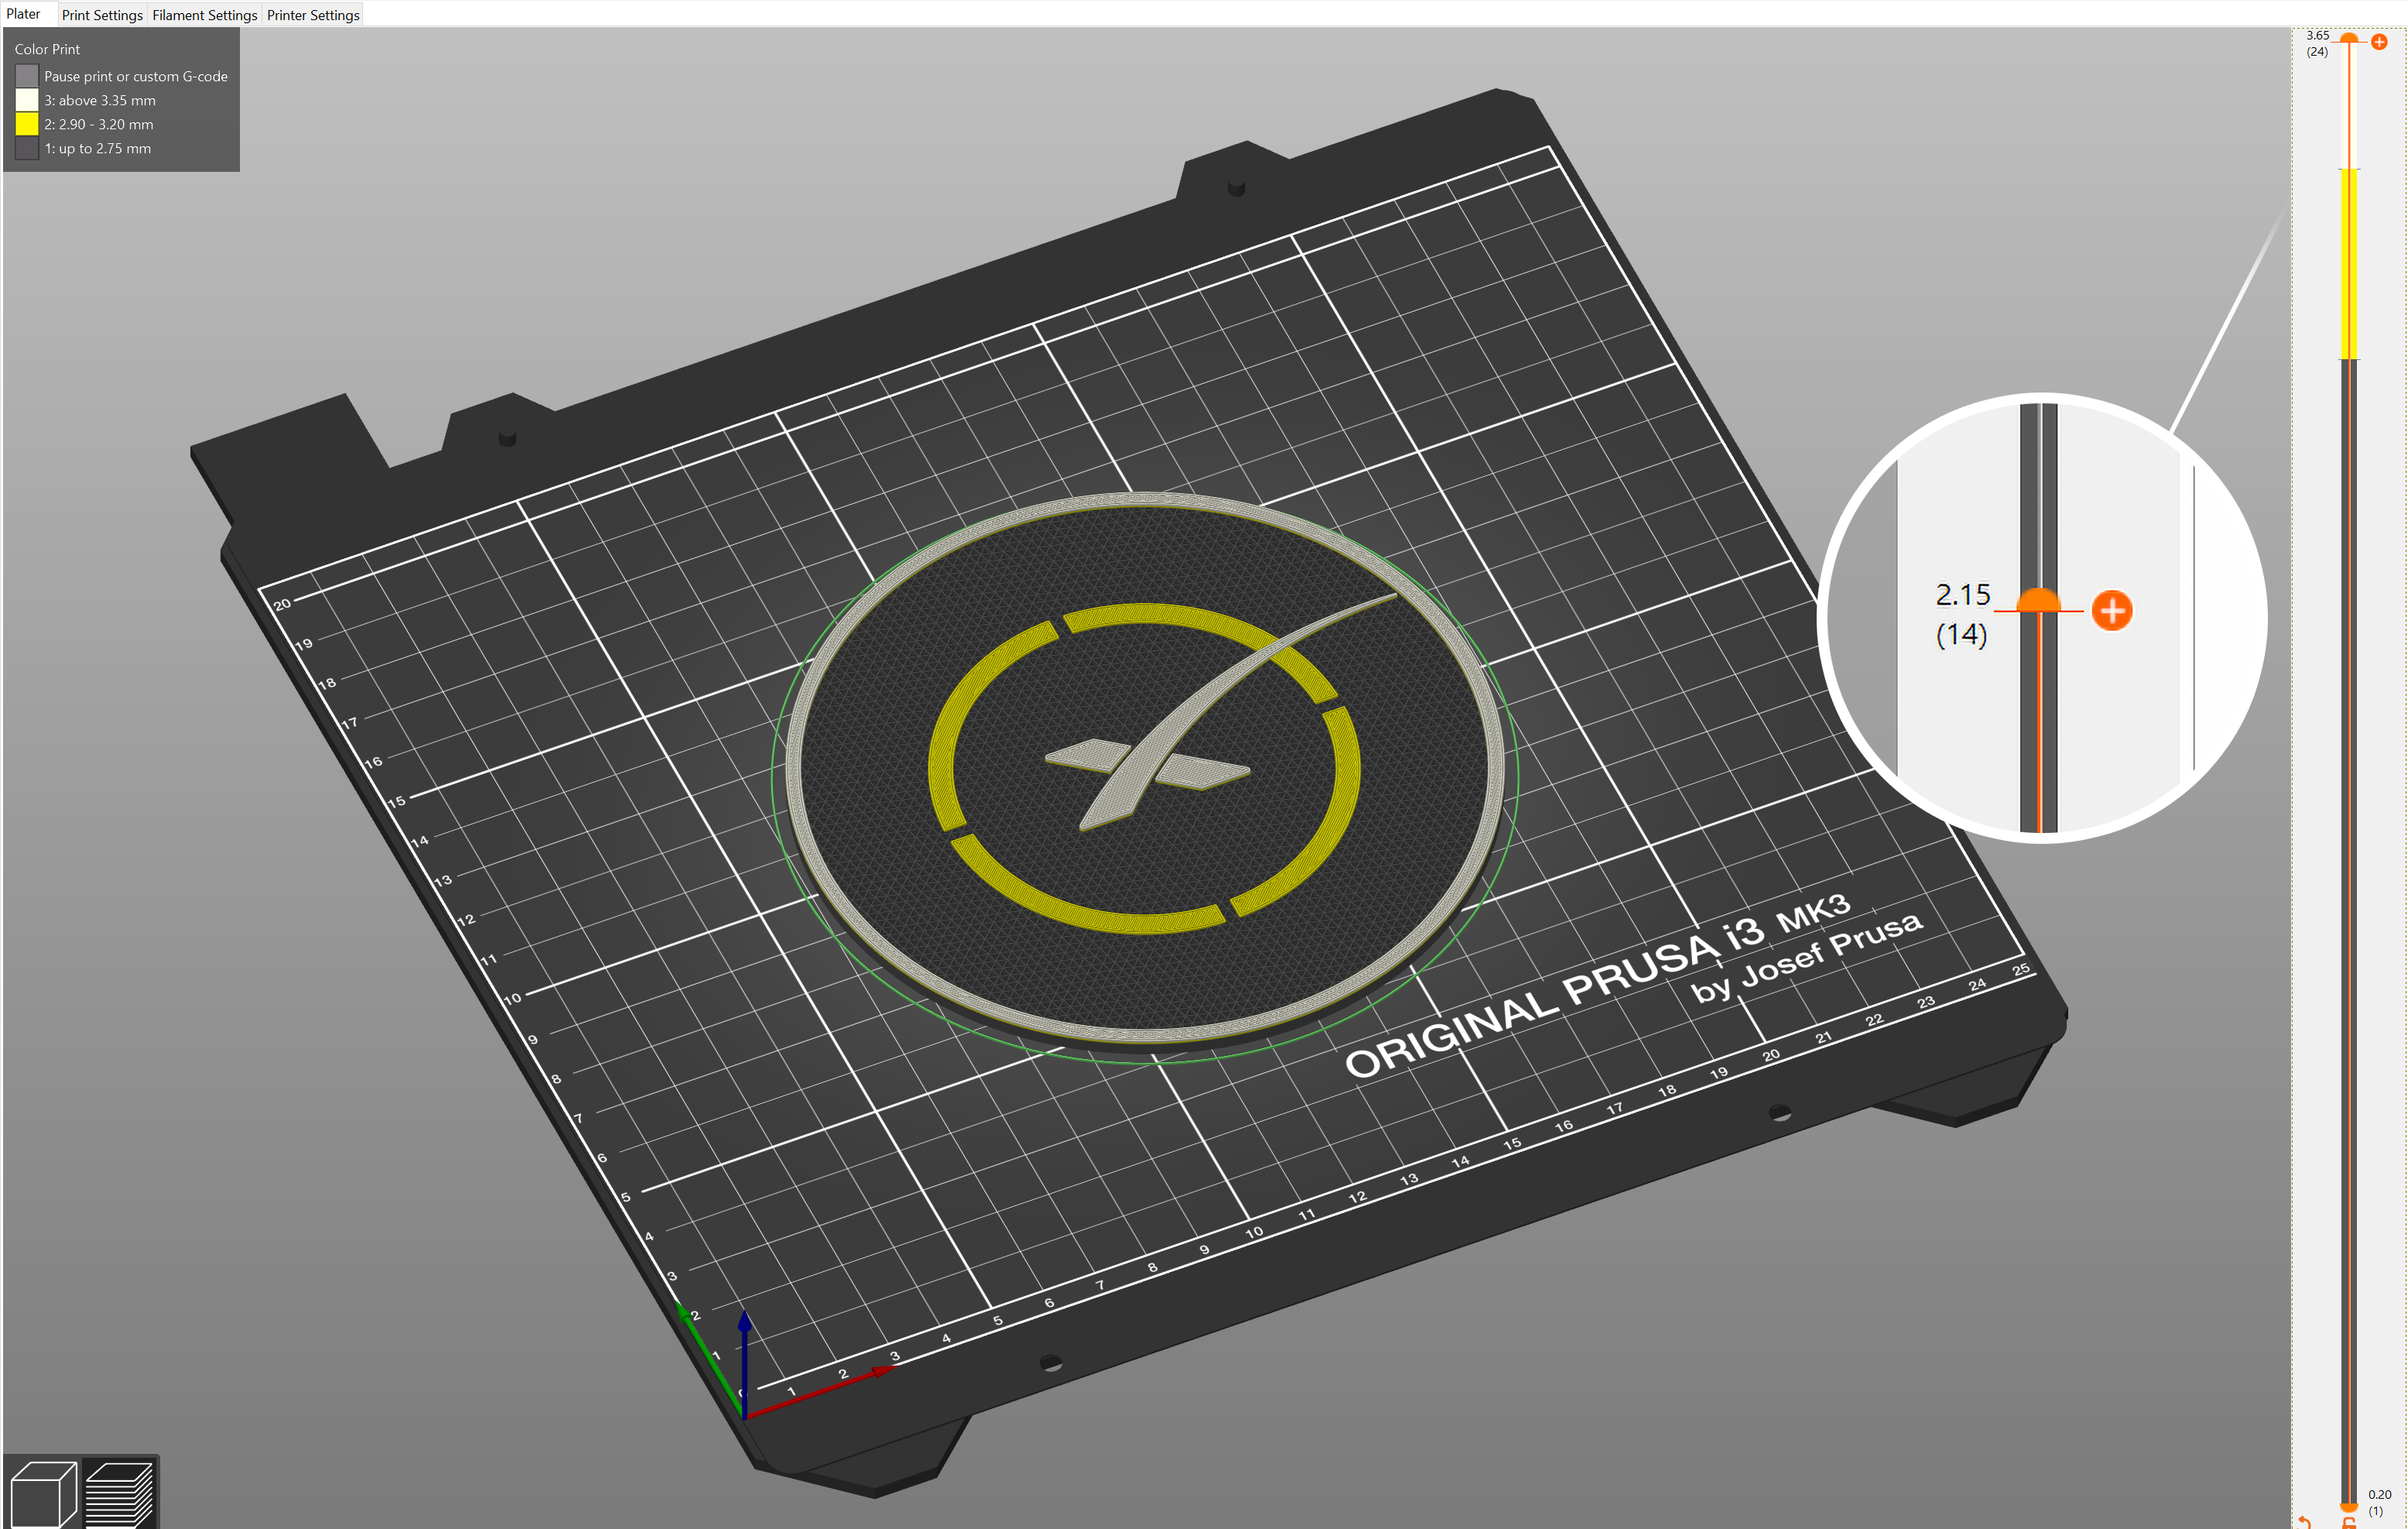
- On the right side, you will see a layer slider. Drag the layer slider on the down to select the target layer
- You can either
- Left-click on the orange plus icon to add a color change (random preview color)
- Right-click on the orange plus icon and select Add color change. A color picker window will appear allowing you to pick the desired color to get a more accurate preview
- Repeat, you add as many color changes as you like
You can remove a color change by moving the slider to the target layer and left-clicking on the grey cross icon.
The first color can be edited by clicking on the colored rectangle next to the filament profile name in the top right corner. The colors after the change can be edited by right-clicking anywhere on the colored bar. The preview colors are there just to visualize the final print, they do not affect the generated G-code.
About the color change feature, note that:
- A preview is displayed instantly so you’ll see exactly how your model will look with color-change.
- Use filaments of the same type. Always mix PLA with PLA, PETG with PETG and so on. Mixing materials of different kinds will most likely lead to a failed print as they don't adhere well to each other.
- The color change doesn't work in combination with Sequential printing.
- It is also possible to Insert pause or custom G-code at layer.
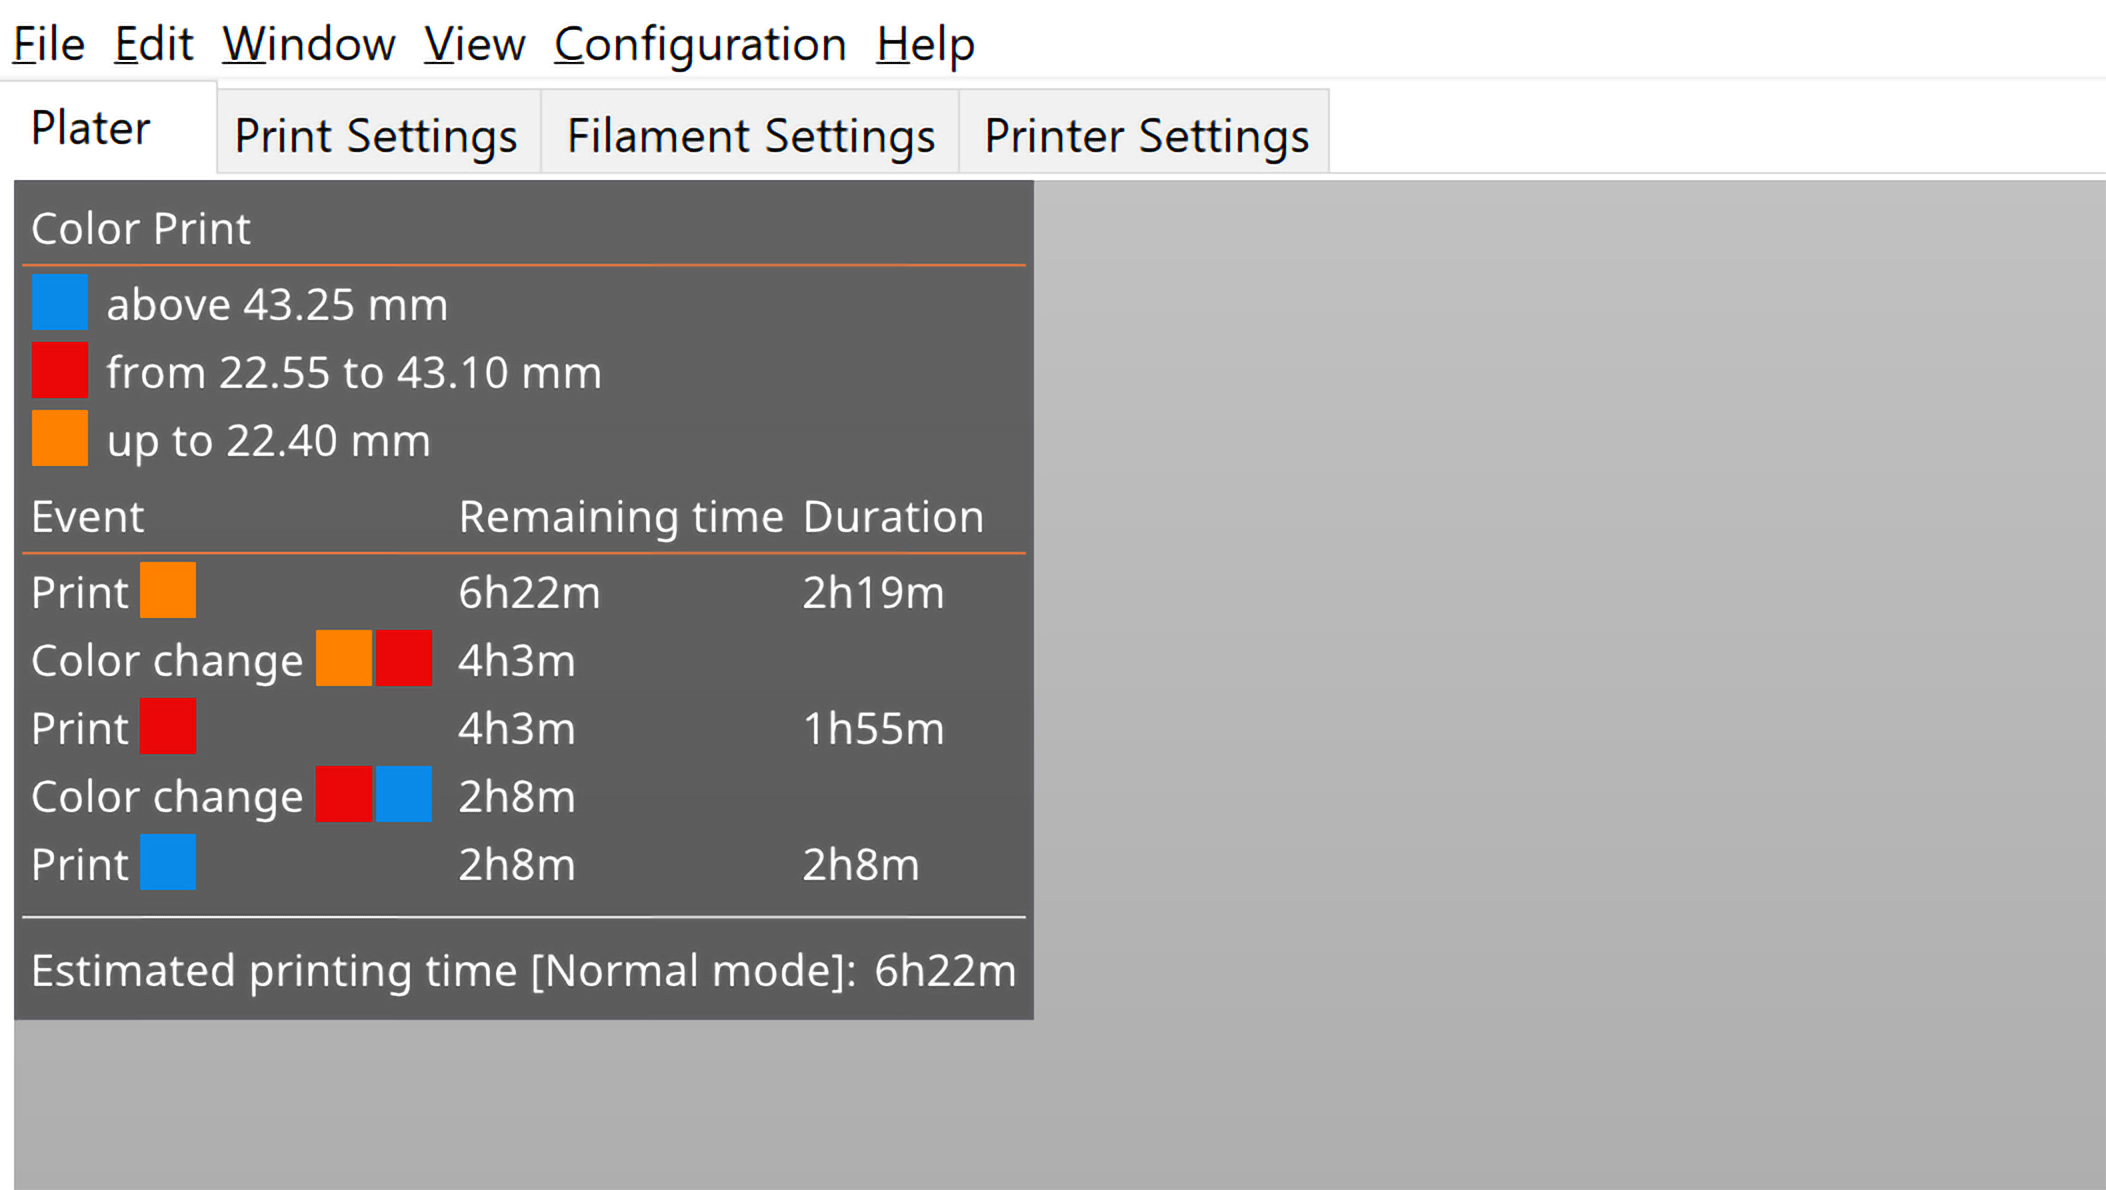
Color change time estimates
When you add one or more color changes, the Platter legend will switch to "Color Print" mode and show time estimates till each change. Alternatively, you can switch to it manually using the select box "View" in the bottom left.
This lets you plan when to check on the printer to proceed with the color change.
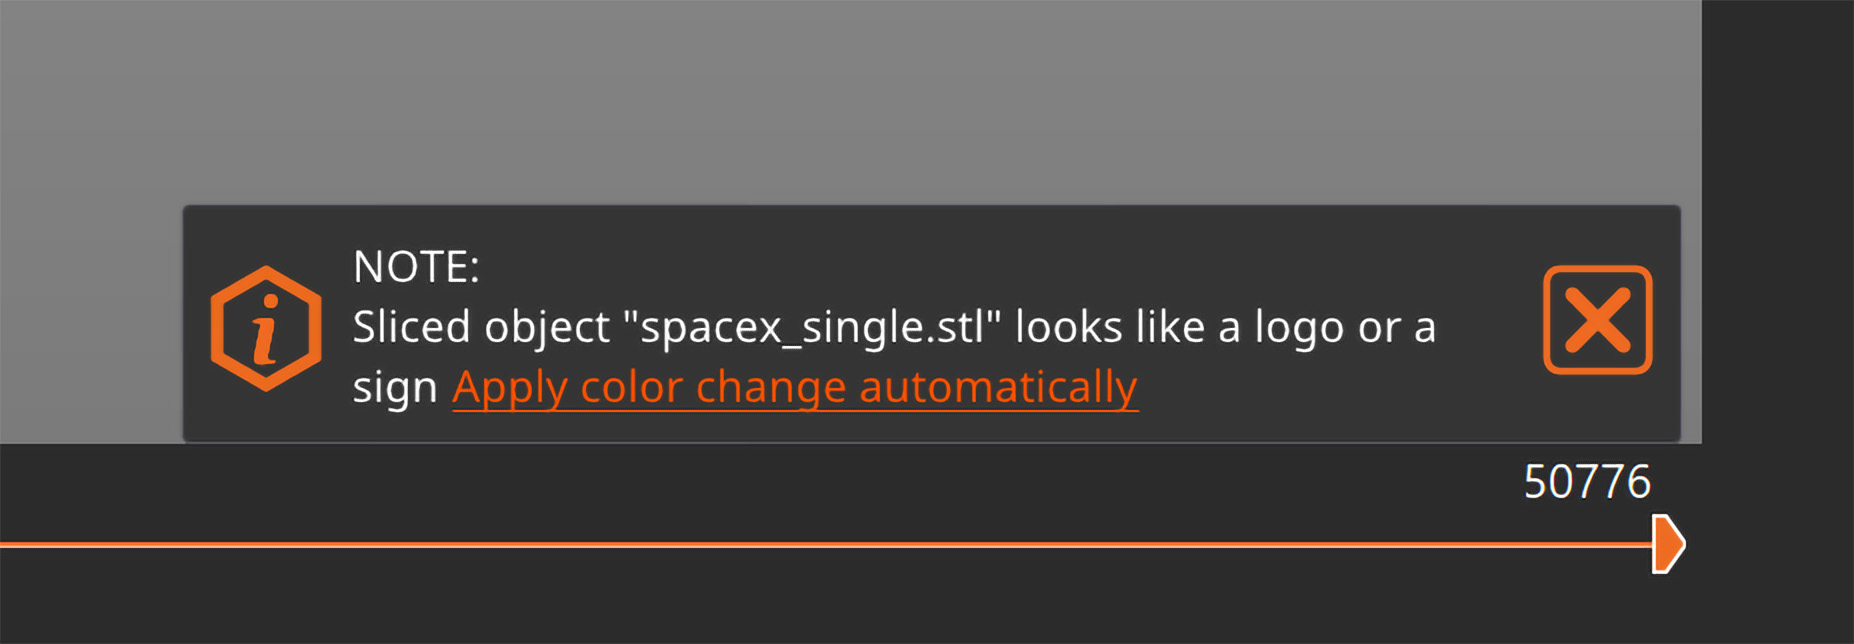
Automatic color change
When PrusaSlicer detects the model looks like a logo or a sign, a notification will offer you to automatically add color changes to the correct heights. This feature was proposed by Richard Horne, thank you for the suggestion! It saves you time and removes the guesswork from inserting the color changes at the right height.
Mute beeper when prompting color change
If the estimated color change time happens to be during the night or another inconvenient moment, you can switch your printer’s beeper sound to [Silent], [Mute], or [Once]. The option to change the sound mode can be found directly in the Settings menu or the Settings -> User interface, depending on which printer you have.
41 comments
but the start of the second color was not very nice looking. it asked me to change filaments, then purged and had me confirm the color. then it started printing. I briefly opened the door to remove the purged bit hanging from the nozzle, but it was still oozing until it got to the print point and that messed up the first letter. how can I fix this? is there something like being able to print a second purge line after a color change?
I am doing a manual filament swap with just one extruder and no mmu or anything.