Assigning tool heads/colors/extruders to different features
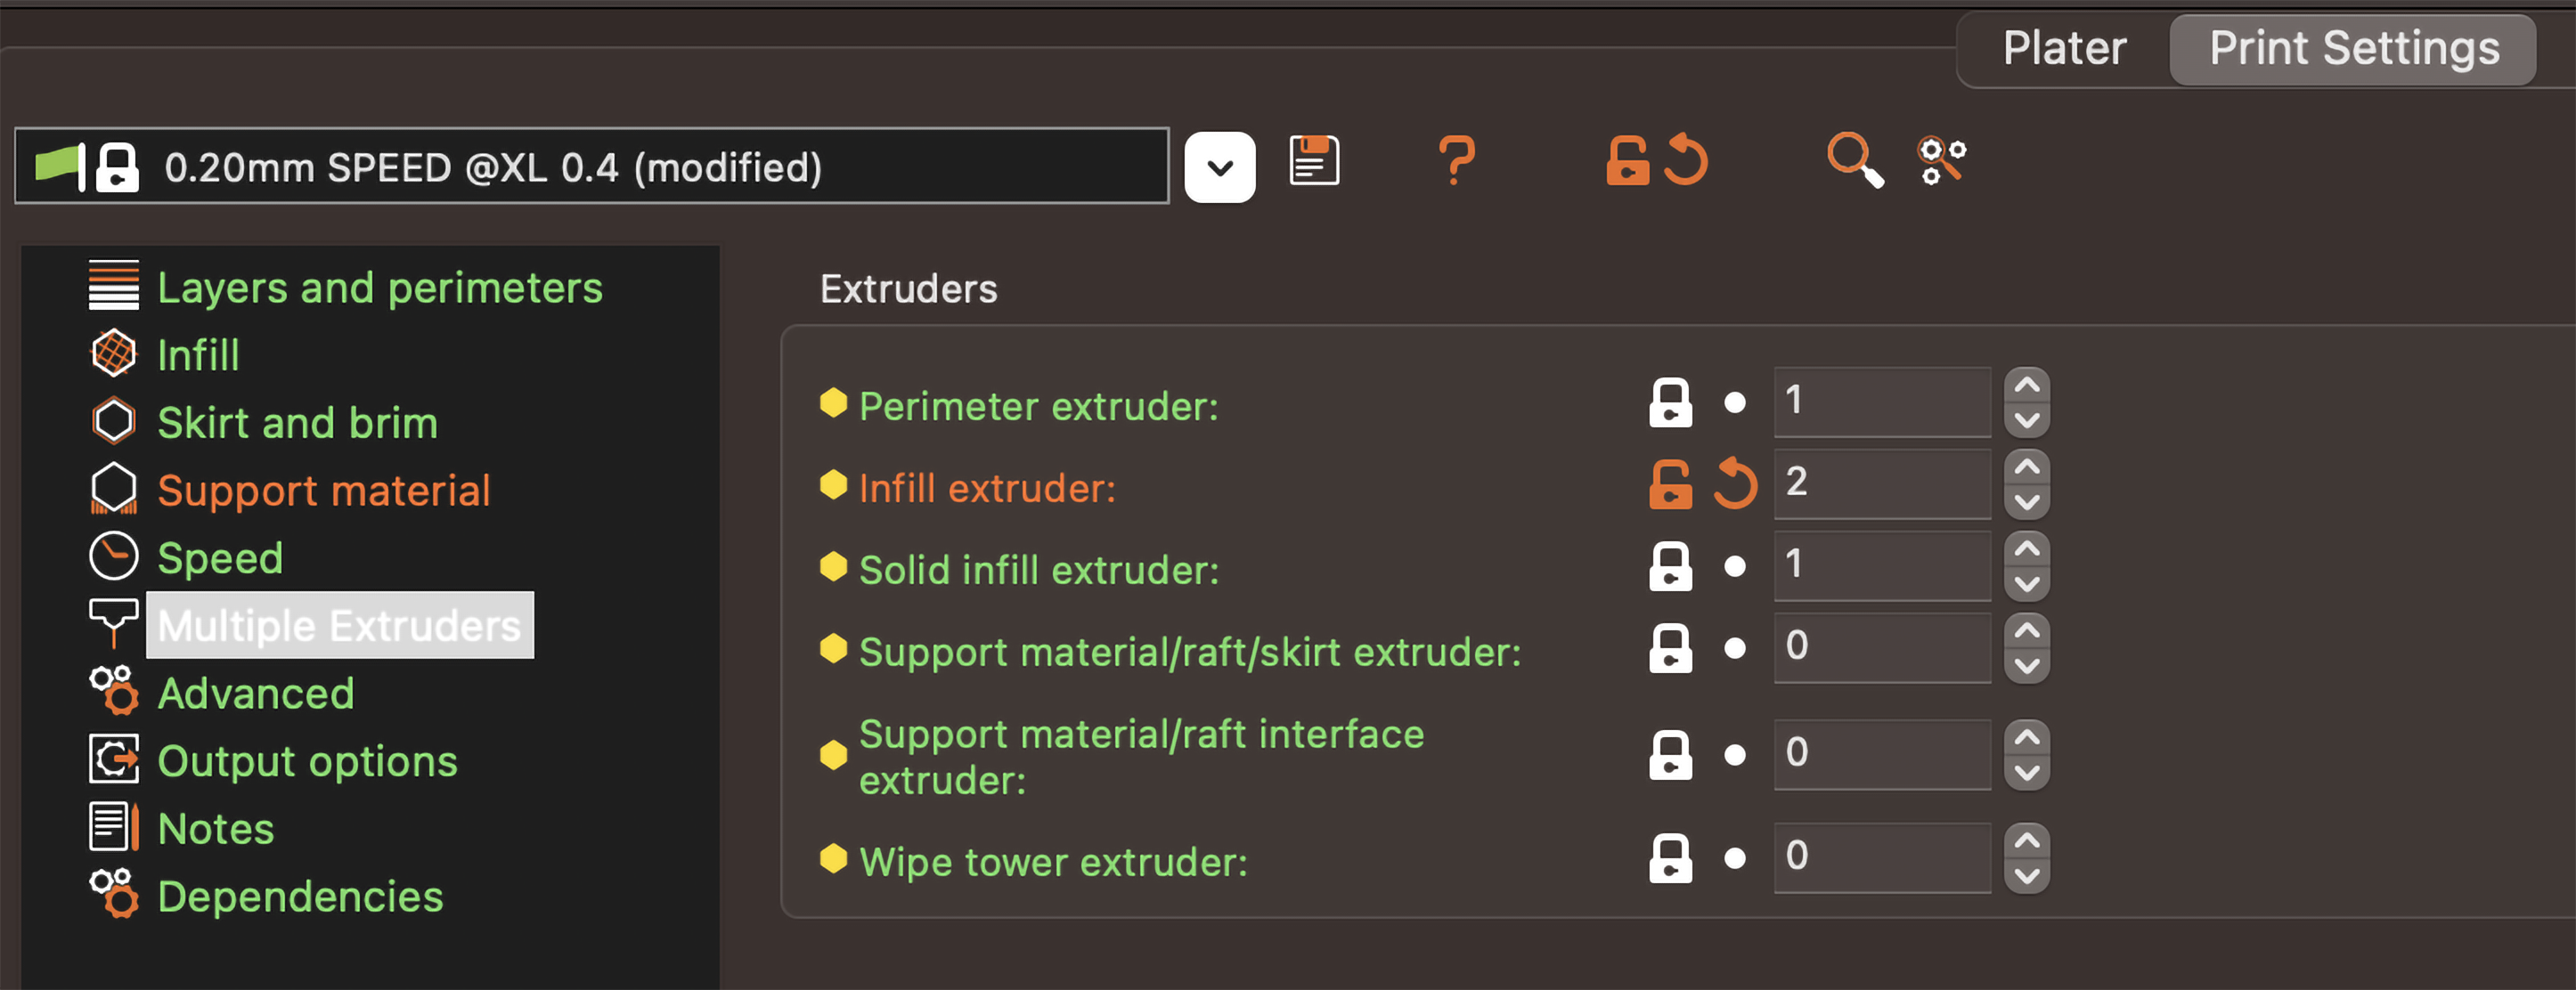
You can assign different print features to be printed with a different tool in the Print Settings - Multiple Extruders menu.
You can set a different tool for:
- Perimeters
- Infill
- Solid infill
- Support material
- Support material interface layers
- Wipe tower’s external perimeters
Assigning tool heads/colors/extruders to different models or parts of a model
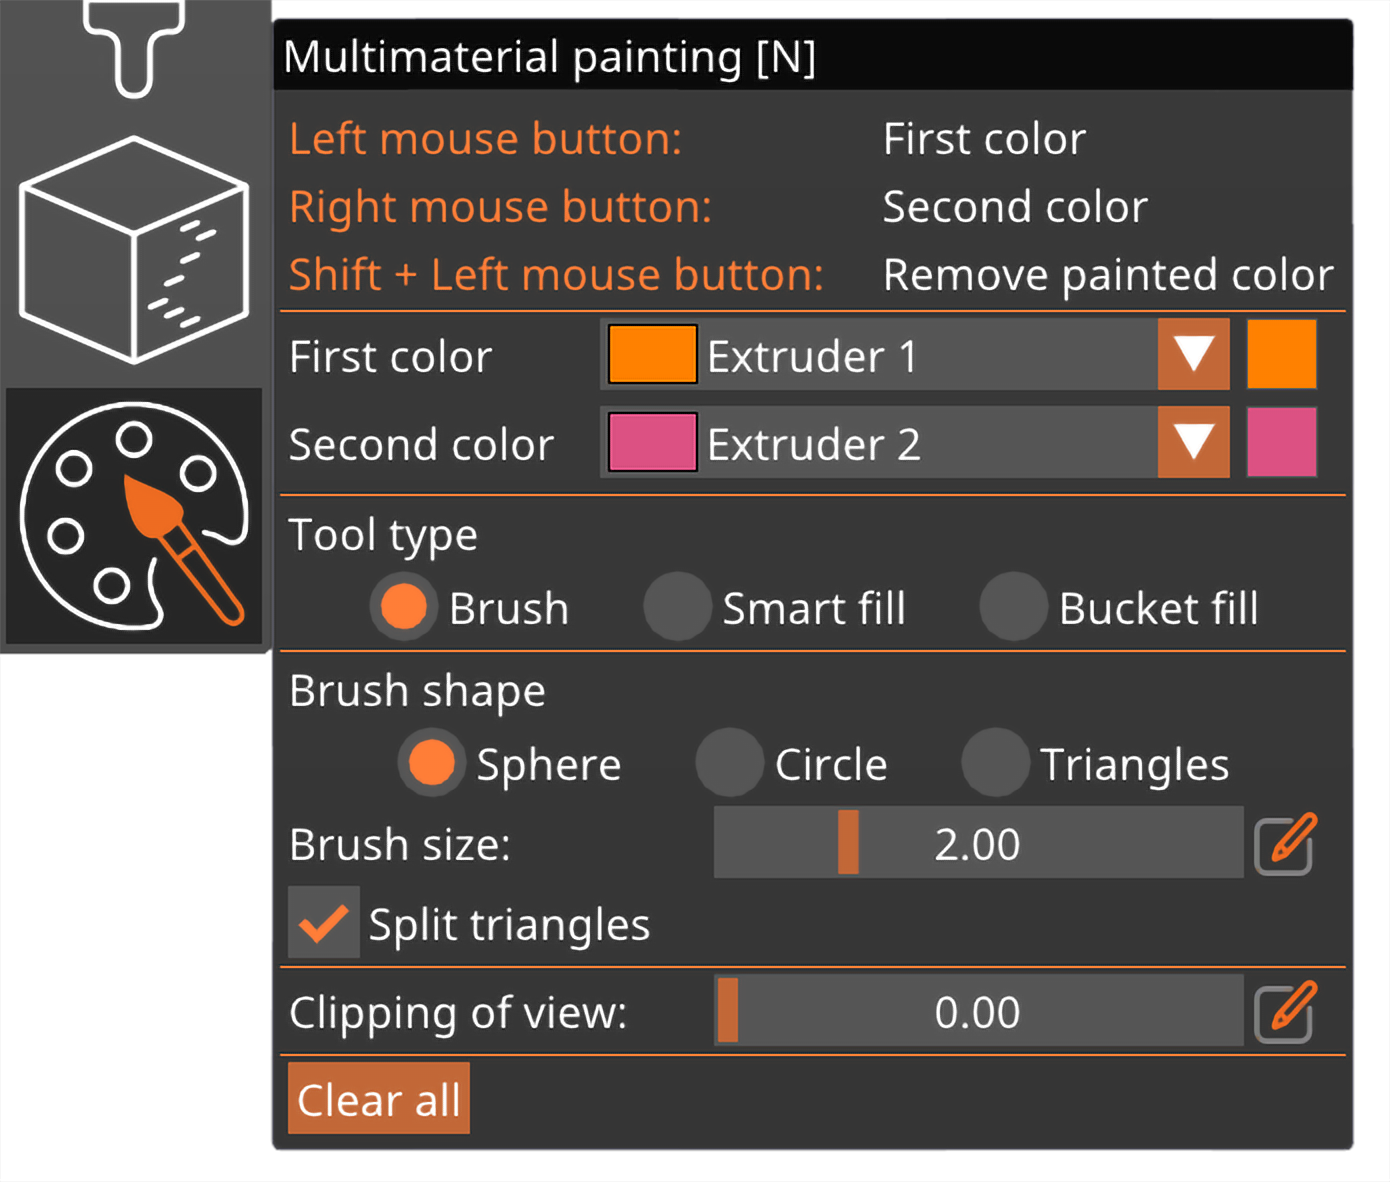
Painted models
If you've used the Painting tool to mark parts of the object to be printed with a different tool, you can assign the tools there directly.
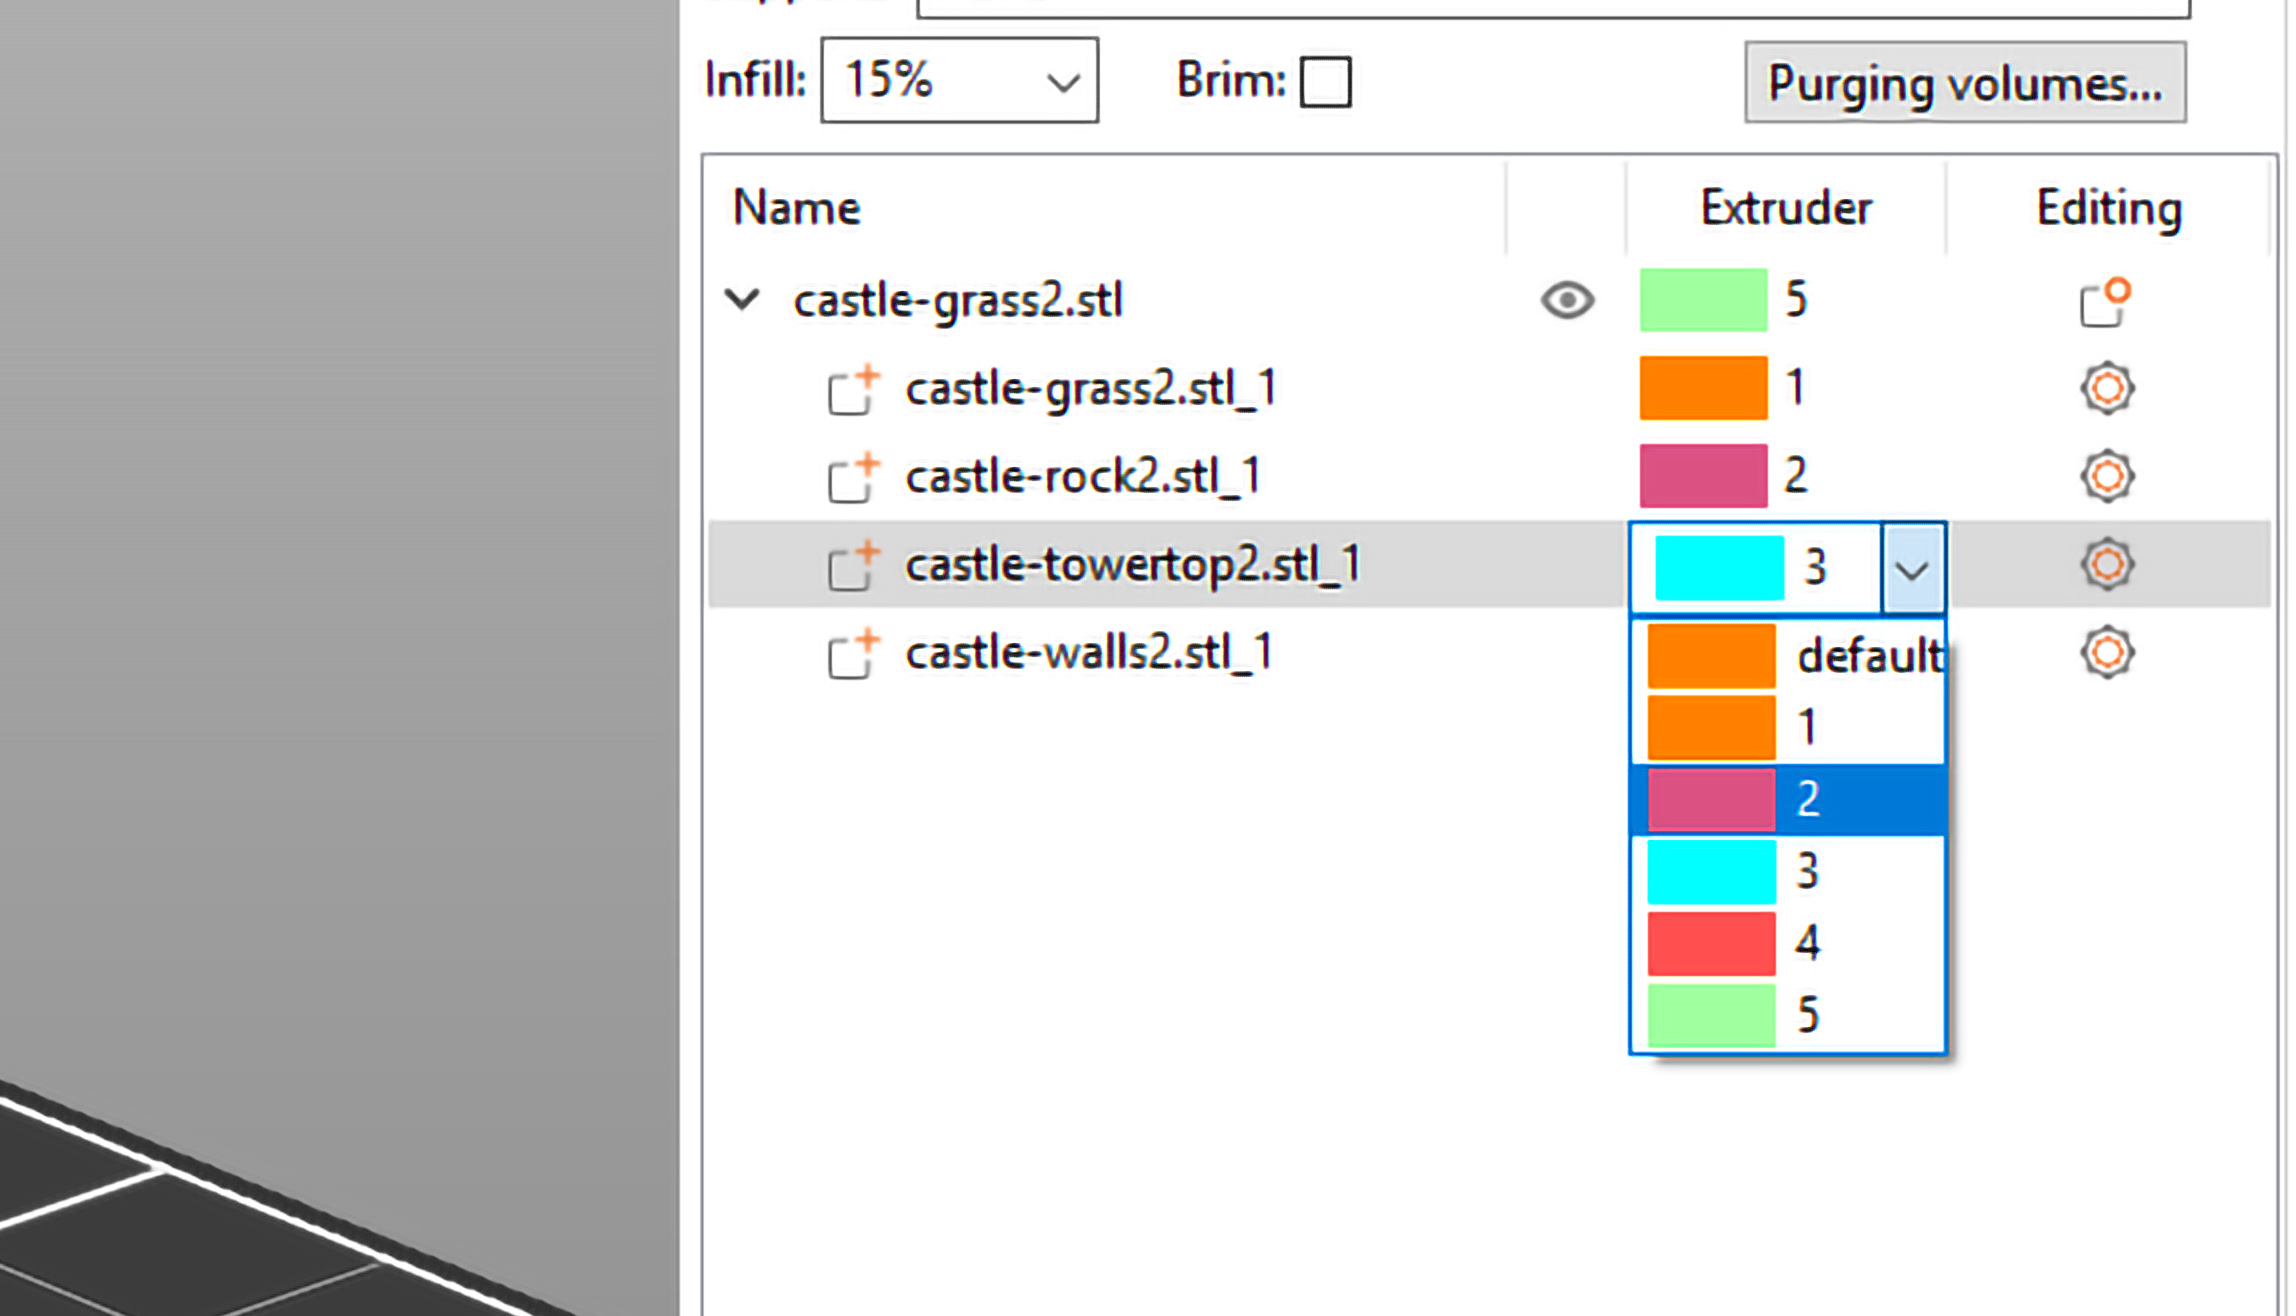
Models with separate shells
If your model imported correctly (Importing MMU model) you'll see each part in the object list on the right side. If you don't see the object list, switch to the Advanced or Expert mode.
You can assign a color (extruder) to a part by double-clicking on the colored rectangle in the Object list. You can also simply press a number key, e.g. "3" to assign the extruder to the selected model.
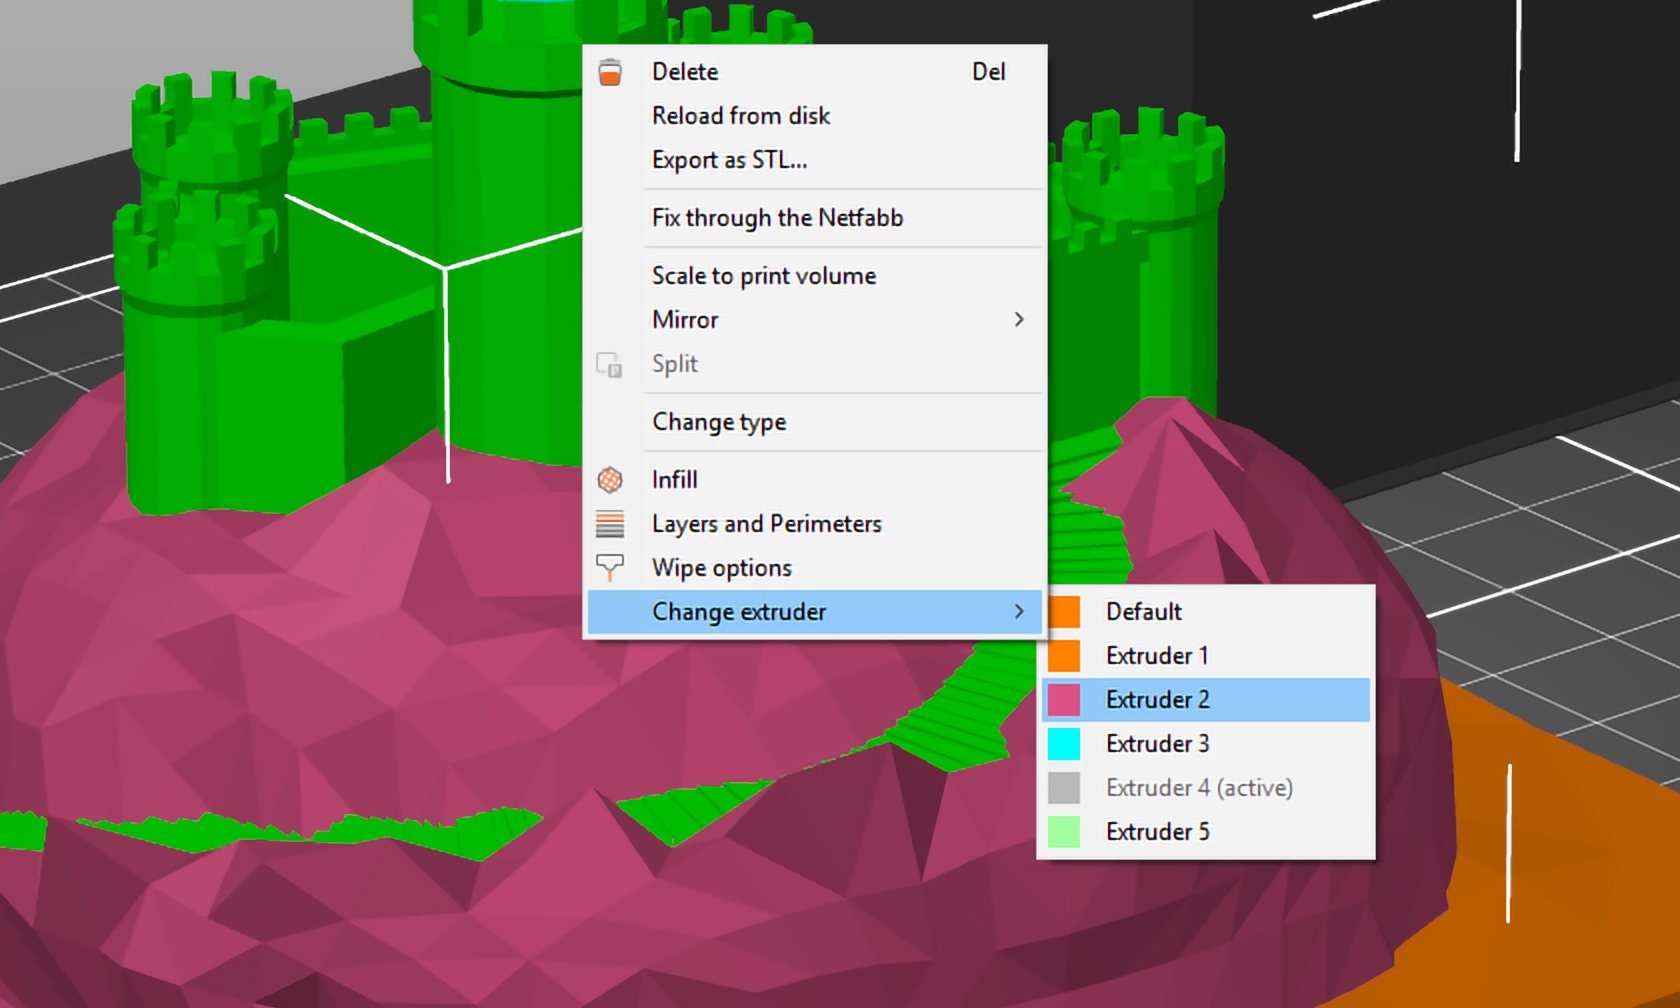
Alternatively, you can select a part in the object list, right-click on it in the 3D view and select Change extruder - Extruder [number] from the context menu.
Changing the preview color
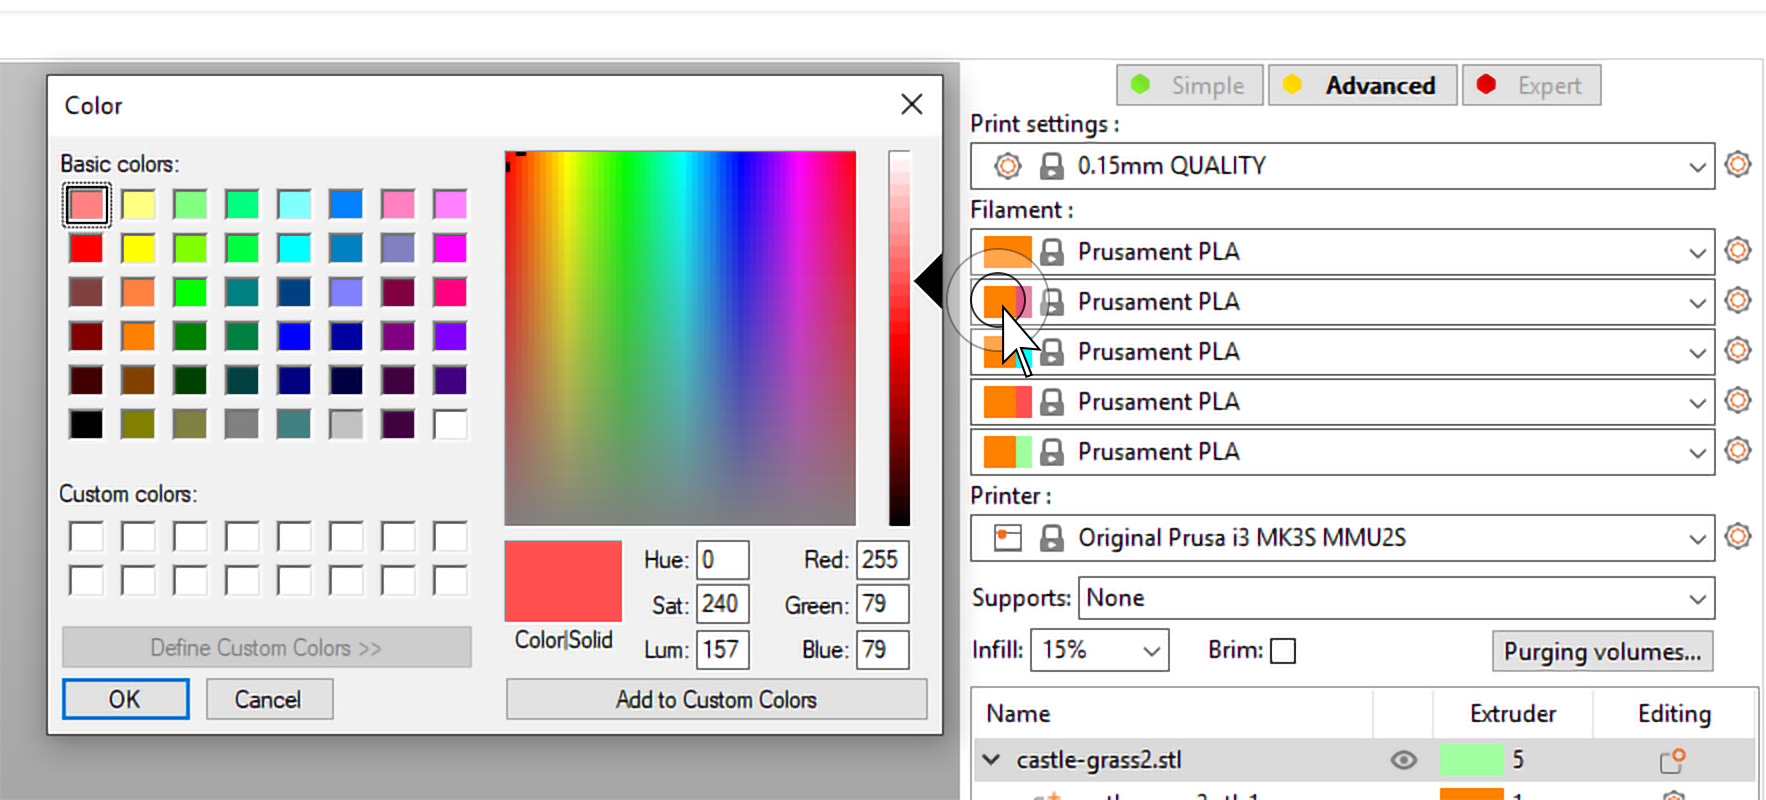
Changing the color of the individual "extruders" has no actual effect on the print, but it's a nice way to visualize it and it can help you select the right filament colors. You can change the color assigned to an extruder by clicking on the color box next to the profile name in the Filament profile selection.
9 comments