- Čeština
- Español
- Italiano
- Deutsch
- Polski
- Français
- Home
- Using the printer
- Material guide
- Resin yellowing and how to reduce it
Resin yellowing and how to reduce it
- 3D models
- Material guide
- ABS
- ASA
- Composite materials (filled with carbon, kevlar or glass)
- Composite materials (with metal or wood particles)
- CPE
- Drying filament
- Flexible materials
- HIPS
- How to use Prusament refill
- NGEN
- PETG
- PLA
- Polyamide (Nylon)
- Polycarbonate (PC)
- Polypropylene (PP)
- PVB
- Resin yellowing and how to reduce it
- The proper post-curing process
- The proper de-yellowing process
- Resins
- Tested resins
- Water soluble (BVOH/PVA)
- Slicing
- Printer maintenance
- Prusa Connect & PrusaLink
When printing various resins, you may notice a more or less significant yellowing effect after curing your models. This affects most MSLA materials, including all of our Prusament Model resins. The most significant color difference between the uncured model (usually called green body) and the post-cured model can be seen in Alabaster White resin.
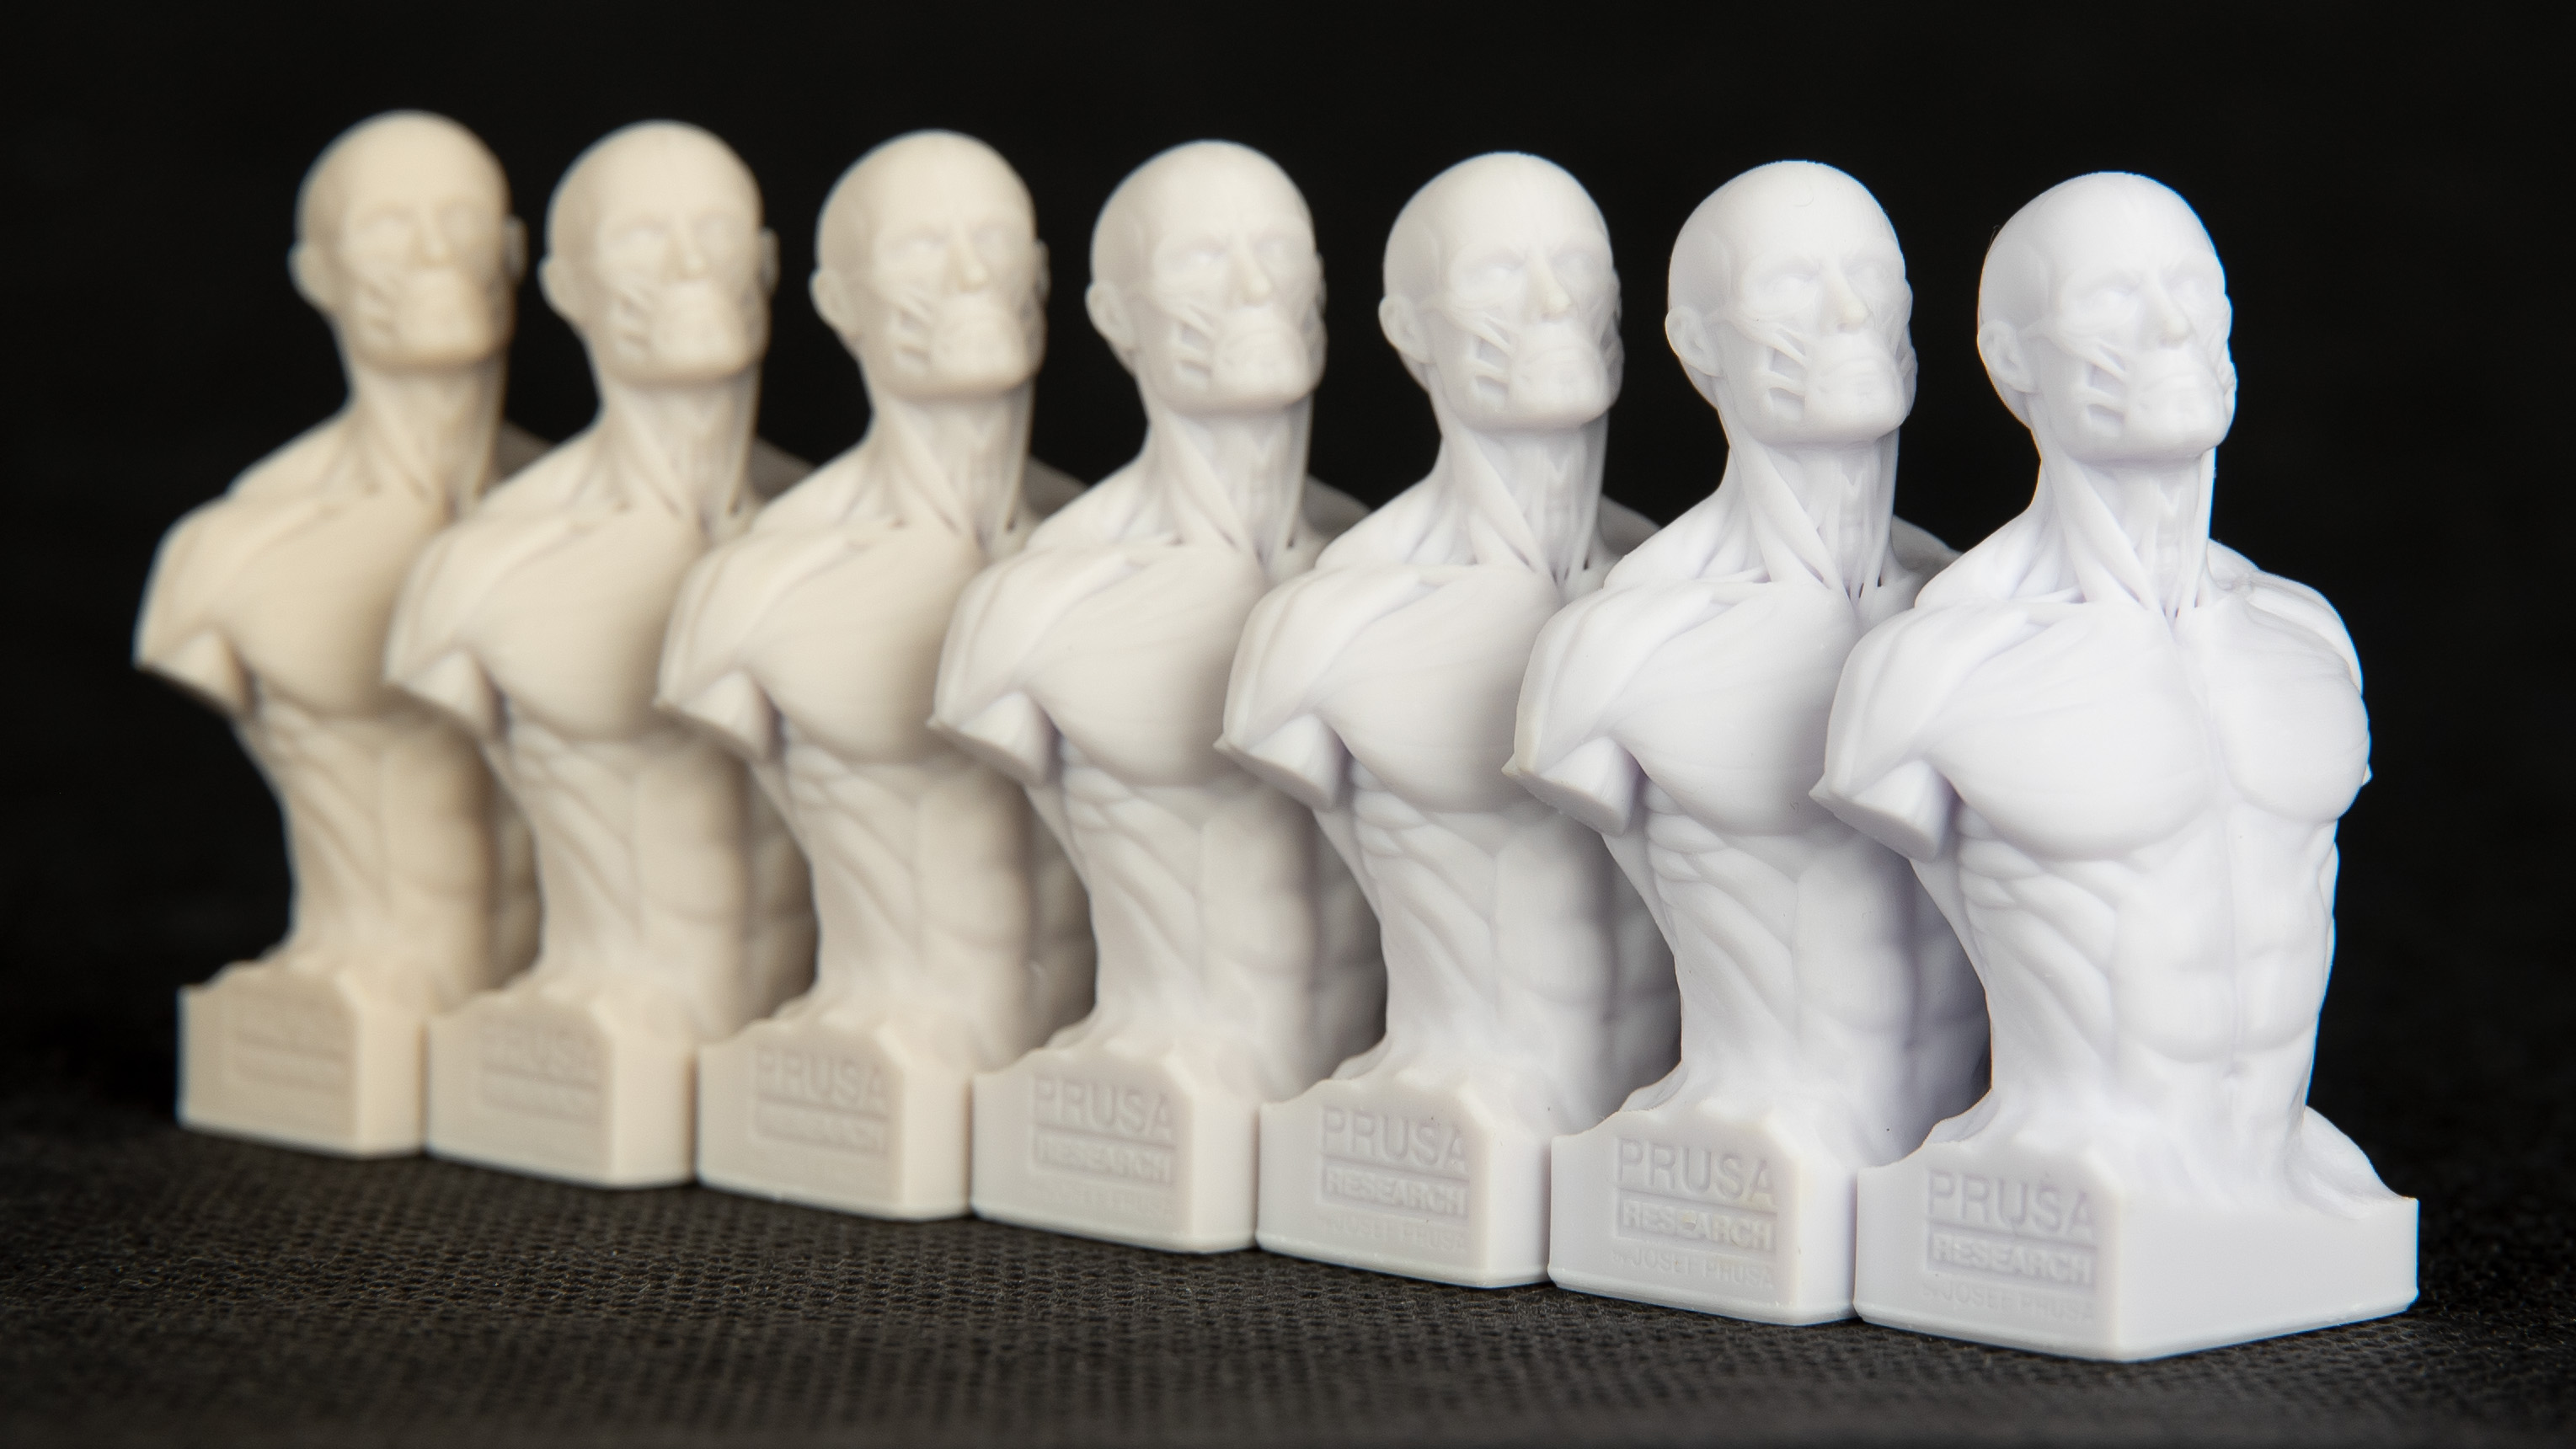
Yellowing gradient with various post-curing times. The whitest model is an uncured model (green body), the yellowest was post-cured for 60 min at CW1S.
However, the yellowing is a partly reversible process and with just a little help, it can be easily minimized. Under some conditions, the final post-cured model can reach a color tone very similar to the color of the liquid resin.
The proper post-curing process
The first important step is curing the model. This step is important for every freshly printed (and washed) MSLA part because it eliminates tackiness, reduces resin toxicity, and improves mechanical properties. However, the post-curing comes with noticeable yellowing, which gets more significant with long post-curing times. At some point, the yellowing effect might become pretty much irreversible. For example, with 60 minutes of curing time, the model will remain yellowish, even after the de-yellowing process.
Suppose you require the final color to be as close to the liquid resin as possible and don’t need the best mechanical properties. In that case, we recommend choosing shorter curing times (min. 3 minutes for Prusament Model resins).
In any case, the model surface should be exposed to the UV light as evenly as possible. Although the CW1S has an in-built rotating platform, some surfaces may remain uncured, for example, the model's base. This can be easily fixed by flipping the part during the curing process in CW1S. Remember that flipping the model during the curing prolongs the overall curing time.
The proper de-yellowing process
There are two ways of de-yellowing the color:
- Wait several days.
The photopolymerization process is a complex series of chemical reactions that occur not only during the printing and post-curing but even several days after, before becoming completely stable. This also includes the de-yellowing process. There is really no need to do anything to reach the final and stable color, although it takes some time. If you leave the model at room temperature, it will slowly lose the yellowish hue and return almost to its original (uncured) color in several days.There is no exact number of “de-yellowing days” as it varies a lot between colors and the length of the post-curing process. The color change is most significant during the first hours after post-curing, then gradually slows down until it stops. Generally, the golden rule is to wait as long as possible. - Heat the model at CW1S
Heating significantly accelerates the internal chemical reactions that take part after post-curing. What takes several days at room temperature may be done at increased temperature in a matter of hours. If you have the CW1S, simply use the resin preheat mode set to 60 °C and run it with the post-cured model as long as possible (at least a few hours). The 60 °C temperature is the highest that can be set on the CW1S and the highest temperature the Prusament Model resin should survive without deformation.You can use other machines for de-yellowing too. Also, in theory, even higher temperatures may be used for a more significant and faster effect. However, this will lead to a deformation and possibly even destruction of the model.

Comparison between the uncured model (left), freshly cured model (right), and de-yellowed model (middle). Both right and middle models were cured for 15 minutes at CW1S, but the middle one was de-yellowed for 120 minutes at 60 °C.
Comments


Still have questions?
If you have a question about something that isn't covered here, check out our additional resources.
And if that doesn't do the trick, you can send an inquiry to [email protected] or through the button below.