日本語
Login
3Dプリンター
マテリアル
部品 & アクセサリー
ソフトウェア
3Dモデル
応用事例
コミュニティ
ヘルプ
アカデミー
ブログ
会社概要
サポート
Original Prusa MMU2S
プリンタートラブルシューティング
Filament jam (MMU2S) | 組み立てを始める
1. 組み立てを始める
Step 1 of 7 (Chapter 1 of 3)
内容
コメント
難易度
ほどほど
利用可能な言語
組み立てを始める
内容
プリンタートラブルシューティング
フィラメント詰まり(MMU2S)
組み立てを始める
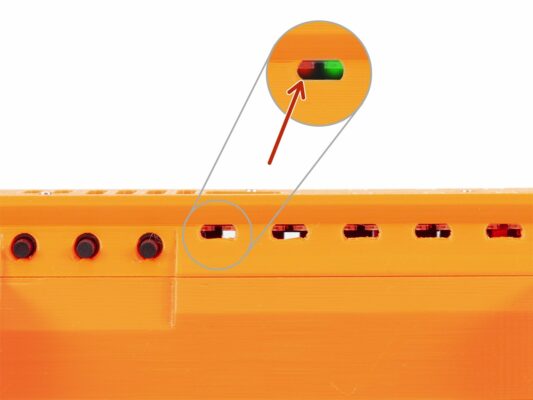
フィラメントのジャム(詰まり)
詰まっている場所を探す
Moving the filament through MMU unit
Cutting and straightening the filament
フィラメントの確認
フィラメント詰まりの解消に成功
サービスメニュー - 工場出荷時リセット
Service menu - Individual Filament Calibration
コメント
ログイン
してコメントを投稿する
コメントなし