English
Login
3D printers
Materials
Parts & Accessories
For Business
Software
3D Models
Community
Help
Courses
Blog
Company
Support
Original Prusa Enclosure
Original Prusa Enclosure assembly (external display mounting) (v1.03)
Hinged lid with MMU2S | Introduction
1. Introduction
Step 1 of 24 (Chapter 13 of 18)
Contents
Comments
⬢
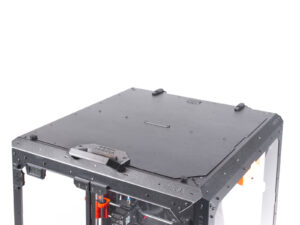
This chapter guides you through the installation of the MMU2S into the Enclosure.
⬢
The MMU2S can only be installed after the
Hinged Lid
is in place.
Loading...
Next
Contents
Original Prusa Enclosure assembly (external display mounting)
1. Introduction
2A. Preparing the printer (MK4/S & 3.9/S)
2B. Preparing the printer (MK3S+ Black PSU)
2C. Preparing the printer (MK3S+ Silver PSU)
3. Assembling the enclosure
4A. Installing the printer (MK4/S & 3.9/S)
4B. Installing the printer (MK3S+ Black PSU)
4C. Installing the printer (MK3S+ Silver PSU)
Manual changelog Enclosure kit
Fire Suppression System (add-on)
Hinged Lid (add-on)
Hinged Lid with MMU3
Hinged lid with MMU2S
Introduction
Removing the LCD
Removing the filament guide
Removing the printer
Removing the printer
Installing the MMU2S
Preparing the printer (MK3S+ with MMU2S)
Installing the printer
Installing the PSU
Adjusting the printer
Mounting the LCD: parts preparation
Mounting the LCD
Assembling the grommets: parts preparation
Assembling the MMU-grommets
Mounting the MMU-grommets
Mounting the MMU-grommets
Mounting the MMU-grommets (optional)
Guiding the PTFE tubes
Assembling the buffer feet: parts preparation
Assembling the buffer feet
Mounting the buffer feet
Mounting the buffer feet
Joining the buffer
That's it!
Advanced filtration system (add-on)
Mechanical lock (add-on)
Quick release PSU cable - MK3S+ Black PSU (add-on)
Quick release PSU cable - MK4/3.9 Black PSU (add-on)
White LED strip (add-on)
Comments
Log in
to post a comment
No comments