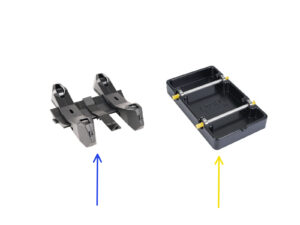
ES
  • English
  • Čeština
  • Italiano
  • Deutsch
  • Polski
  • Français
Iniciar sesión

8. Montaje Porta bobinas

8. Montaje Porta bobinas

8. Montaje Porta bobinas
Relevante para :
Ultima actualización a month ago
8. Montaje Porta bobinas
 Dificultad
Fácil
 Pasos
16
 Idiomas disponibles
ENCSPLDEITFR
Two Spoolholder types

In this chapter, we will assemble the spoolholders, but before we proceed, note there are two types of the spoolholder.

Inspect the box your kit came in. If the large portion of the box is occupied by the rectangular black trays, you have the first version, the older vacuum-formed spoolholders.

1. Classic vacuum-formed spoolholder

If you have this version, continue to the following step Vacuum formed holder parts preparation
2. New injection-molded spoolholder
This version comes in five packages inside a smaller box. If you have this version, skip to Injection molded spoolholder: parts preparation
Foam pads installation
Turn the spoolholder base upside down.
Peel off the yellow protective layer off the foam pads.
Attach the four foam pads into the bottom corners of the spoolholder base.
Rods and bearings assembly
Attach a bearing onto each end of both rods.
Attach the plugs onto the rod ends to fix the bearings on each rod.
Finishing up the Spoolholders (vac. form.)
Attach the rods with bearings into the base part so that the bearings engage into the corresponding grooves on the base.
There is a notch on the front part of the spoolholder.
Attach the PTFE holder onto the notched front part of the spoolholder.
Repeat the same steps to build the remaining spool holders until you finish all five.
Injection molded holder parts preparation
Para los siguientes pasos, por favor prepara:
Base soporte bobina (4x)
Guía de soporte de bobina (1x)
Rueda Soporte bobina (4x)
Wheels shipped after April 2024 are made of POM. We recommend using this version over the earlier models made from ABS.
sheet of Foam Pads (1x)
PTFE holder (1x)
Montaje de la base (parte 1)
Coge una pieza Base. Colócala como en la imagen.
Inserta las dos ruedas en la Base.
Cubre el montaje con otra pieza Base encima.
Montaje de la base (parte 2)
Empuja ambas piezas Base hasta que encajen completamente una en la otra.
Comprueba que las piezas de la base se mantienen unidas correctamente.
Repite los mismos pasos para el otro lado del soporte de bobina de filamento, hasta que tengas dos de estos.
Instalación de las almohadillas de espuma (parte 1)
Coge la lámina de almohadilla de espuma. Dóblala para separar las tiras individuales de almohadilla de espuma.
Hay una línea de doblado dentro de la abertura interior en la parte inferior de la pieza lateral del portabobinas.
Coloca una tira de almohadilla de espuma individual en el medio de la línea de doblado dentro de la abertura, como se muestra en la imagen.
Instalación de las almohadillas de espuma (parte 2)
Coloca otras cuatro tiras de almohadilla de espuma en las posiciones marcadas en la parte inferior de la pieza lateral del portabobinas.
Instala otras seis tiras de almohadilla de espuma en la otra parte lateral del portabobinas.
PTFE holder assembly
Take the spoolholder Guide part. Hook the end of the PTFE holder onto the Guide
Make sure the longer part of the PTFE holder is located at the narrower side of the Guide part.
Push the PTFE holder down onto the Guide until it fully engages and locks in place.
Finishing up the Spoolholders (inj. mol.)
Desliza las partes laterales sobre la parte Guía.

Repeat the same steps for the remaining Spool holders, until you assemble all five.

(Don't forget about the foam pads on the bottom!)

Joining the Spoolholder Guides

There are protrusions on each side of the Guide part.

Using these protrusions, the Guide parts can be joined together. To join them together, simply tilt in the Guide parts one into the other until the protrusions click in.
The Guides can be joined together in form of a straight line.
Or, if you flip one of the Guides around, they can be joined in an arc pattern. This is handy to form an arc of spool holders around the Buffer so that each filament path is as straight as possible.
Continue
Continue
Continue
If you’re installing the MMU3 on an MK4 printer, move to the chapter:
If assembling a new MMU3 Kit or installing MMU3 on a previously single-material MK3S+ or MK3.5 printer, move to the next chapter:
These chapters will get you through the required extruder modification.
If you’re doing the MMU2S to MMU3 Upgrade on MK3S+, continue to the chapter:
This chapter will take you through the MMU2S Extruder to MMU3 Extruder upgrade.
¿Fue útil esta guía?

Comentarios

¿Todavía tienes preguntas?

¿Todavía tienes preguntas?

Si tienes alguna pregunta sobre algo que no se ha tratado aquí, comprueba nuestros recursos adicionales.
Y si eso no lo soluciona, puedes enviar una petición a [email protected] o mediante el botón que hay más abajo.

Contacta con nosotros