When printing multiple objects at once, you can finish them sequentially, one at a time. This differs from standard printing, where all objects are built layer by layer simultaneously. The main advantages are:
- Reduced Stringing/Oozing: Less travel between parts as each is finished individually.
- Improved Layer Adhesion: Each object completes without interruption.
- Mitigates Print Failures: Failure of one part is less likely to ruin others.
- Multi-Object Vase Mode: Enables printing multiple items in vase mode sequentially.
This feature uses advanced collision avoidance automatically arranges and orders objects on the build plate in a way that the print head assembly (extruder, rods, cables) does not collide agaist already compelted objects.
Note that this is only available for supported Prusa Printers. When slicing for other printers, PrusaSlicer will fall back on generic clearance settings (Extruder clearance radius and Extruder clearance height) to define the simplified shape used for collision checks. The settings for Extruder clearance radius and Extruder clearance height are located in Printer Settings -> Sequential printing limits.
Using the feature
You can turn this feature on by enabling Print settings -> Output options -> Complete individual objects.

After that, in the Plater view, click to arrange icons or press the A key. This will automatically arrange the objects in a safe way for sequential printing.
If the items are moved and a potential collision is detected, an error message will appear identifying the affected object. The error does not block export of the G-code, but requires careful review.

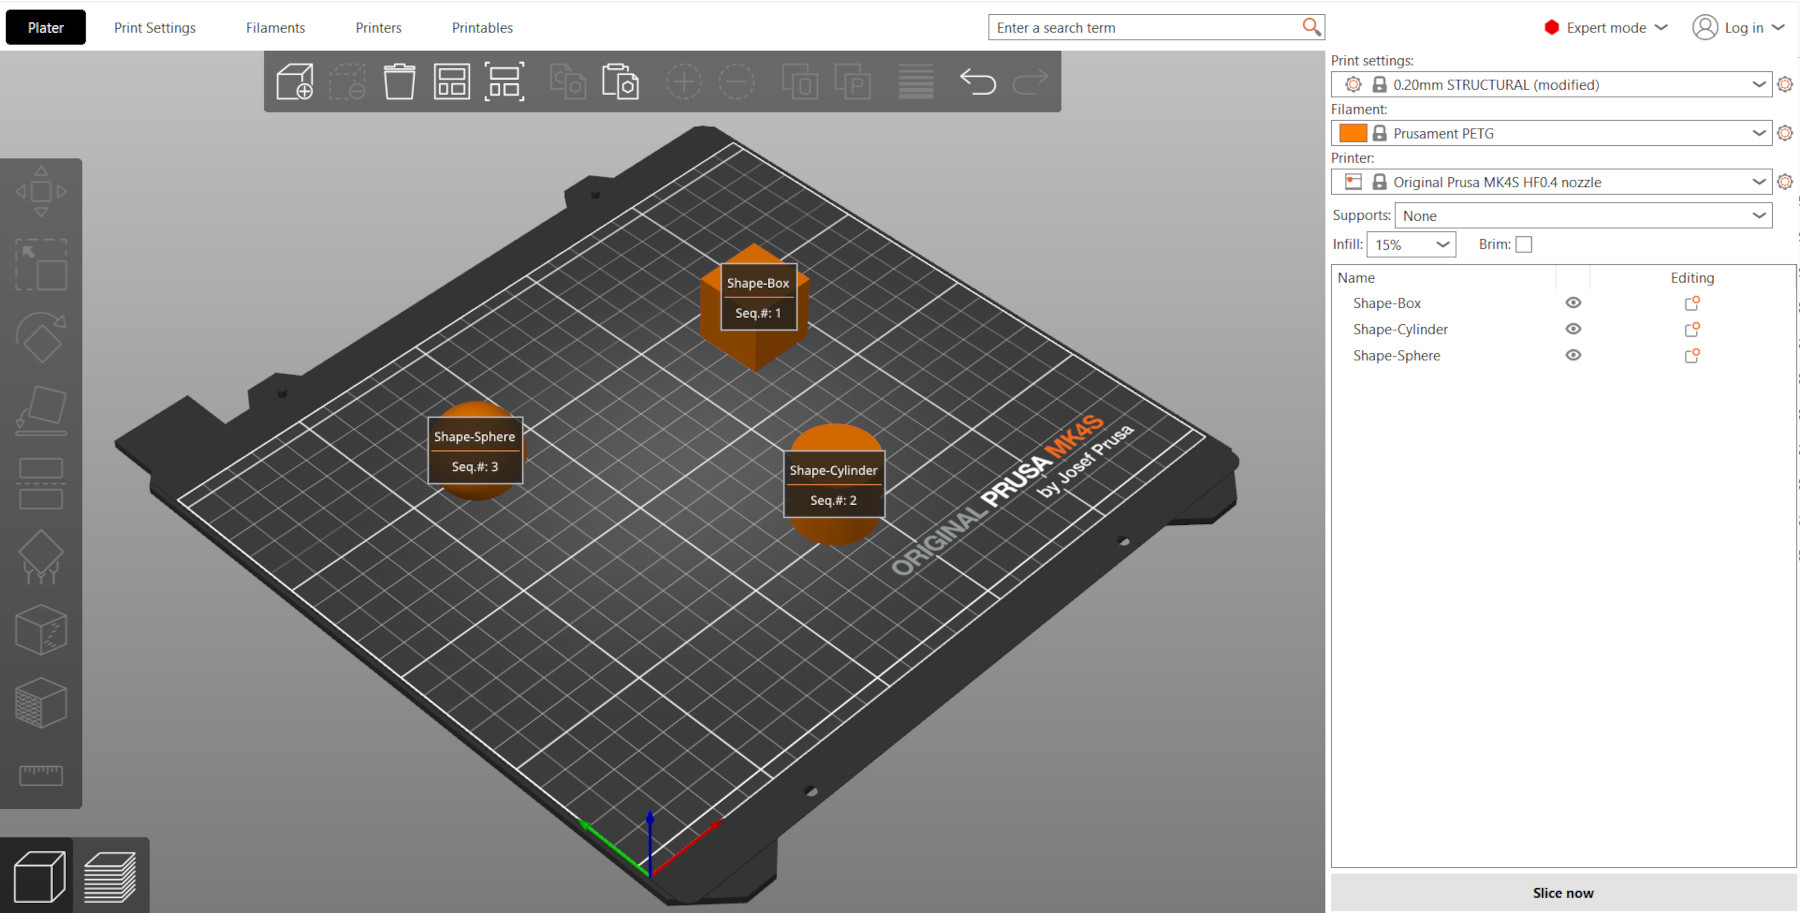
Print sequence
Check the print sequence. The print order is shown top-to-bottom on the Object list. You can manually reorder by dragging items here. Press E in the 3D view to visualize the printing sequence numerically on the objects.
G-code preview
Starting from the PrusaSlicer version 2.9.1, and exclusively for Prusa Printers, you are also able to see in the preview a 3d model of the extruder by using the horizontal slider. The standard mode will only show the preview of the top layer. By clicking on the gear on the bottom right of the plater and unchecking "Sequential slider applied only to top layer", you can see the preview of the entire print project.
36 comments
removal of the visual boundary when moving objects in 3d is especially frustrating. This has made the workflow of arranging the print bed manually much more tedious. I am rolling back to 2.9.0.
PrusaSlicer 2.9.2
Every G-code file contains this text at the top:
; external perimeters extrusion width = 0.40mm
; perimeters extrusion width = 0.40mm
; infill extrusion width = 0.40mm
; solid infill extrusion width = 0.40mm
; top infill extrusion width = 0.40mm
; support material extrusion width = 0.35mm
; first layer extrusion width = 0.40mm
However, if multiple platess are required and each plate is saved as a separate G-code file, this G-code file will contain the above text multiple times, one below the other, i.e., plate-1-gcode once, plate-4-gcode four times, etc.
Is this intentional?