Starting the firmware 4.0.5, you can monitor your Original Prusa MINI over your local network via the web interface called Prusa Connect Local. Prusa Connect Local is still in development and is an initial release of Prusa Connect.
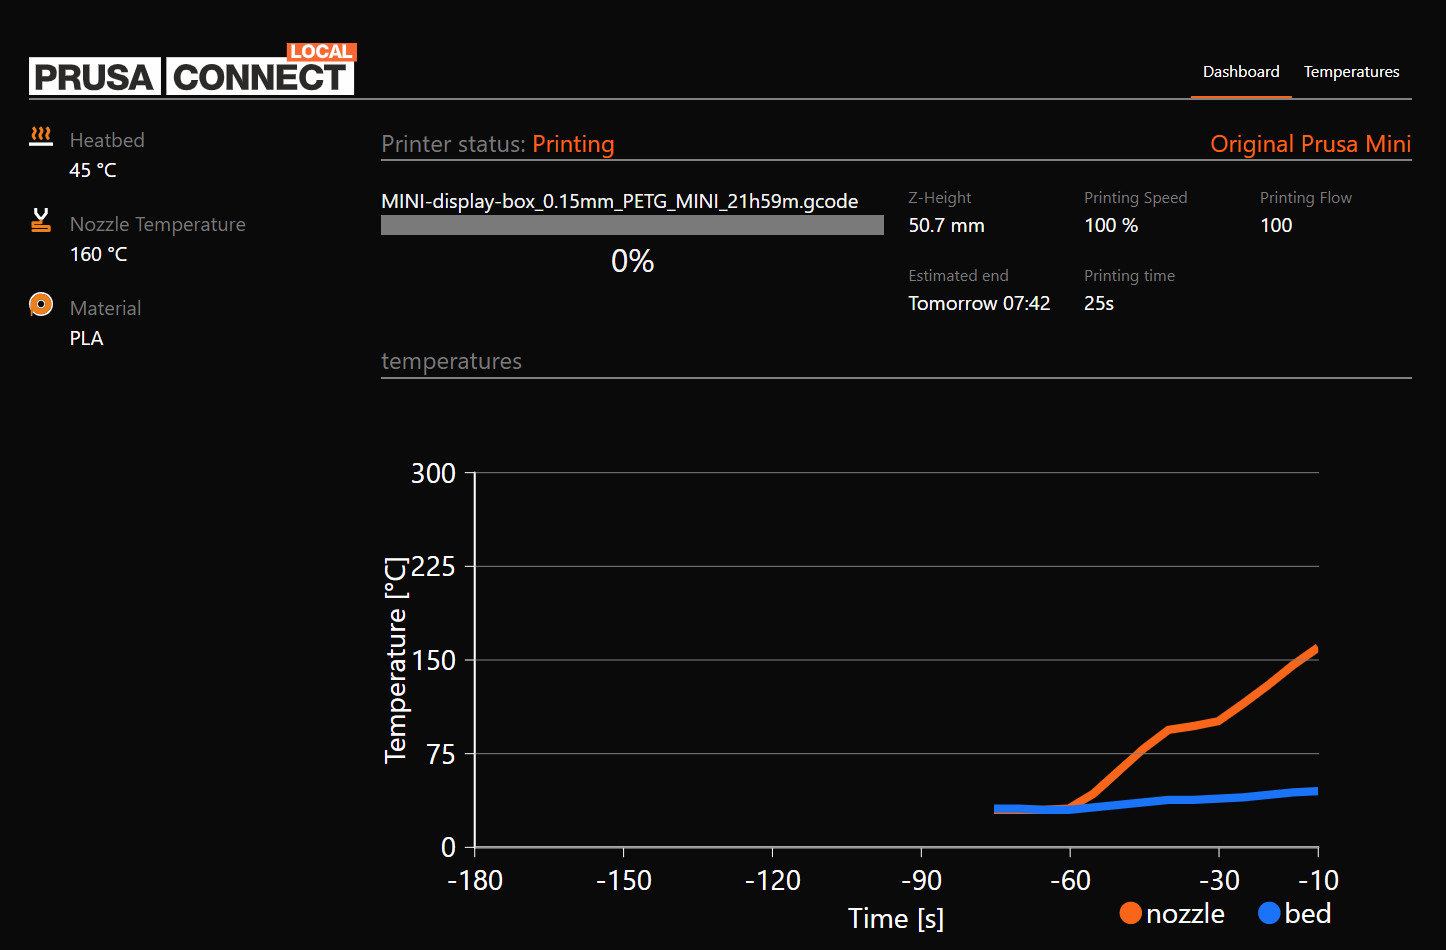
Screenshot from an internet browser where the printer's IP address is entered as URL.
It is a platform for full remote control of your printer, much like Octoprint. However, it can currently only provide a live view of your ongoing print's progression, give an estimated completion-time by connecting to an NTP Server (MINI) and your machine's temperatures. Full control of your printer will be added in future releases.
How to connect
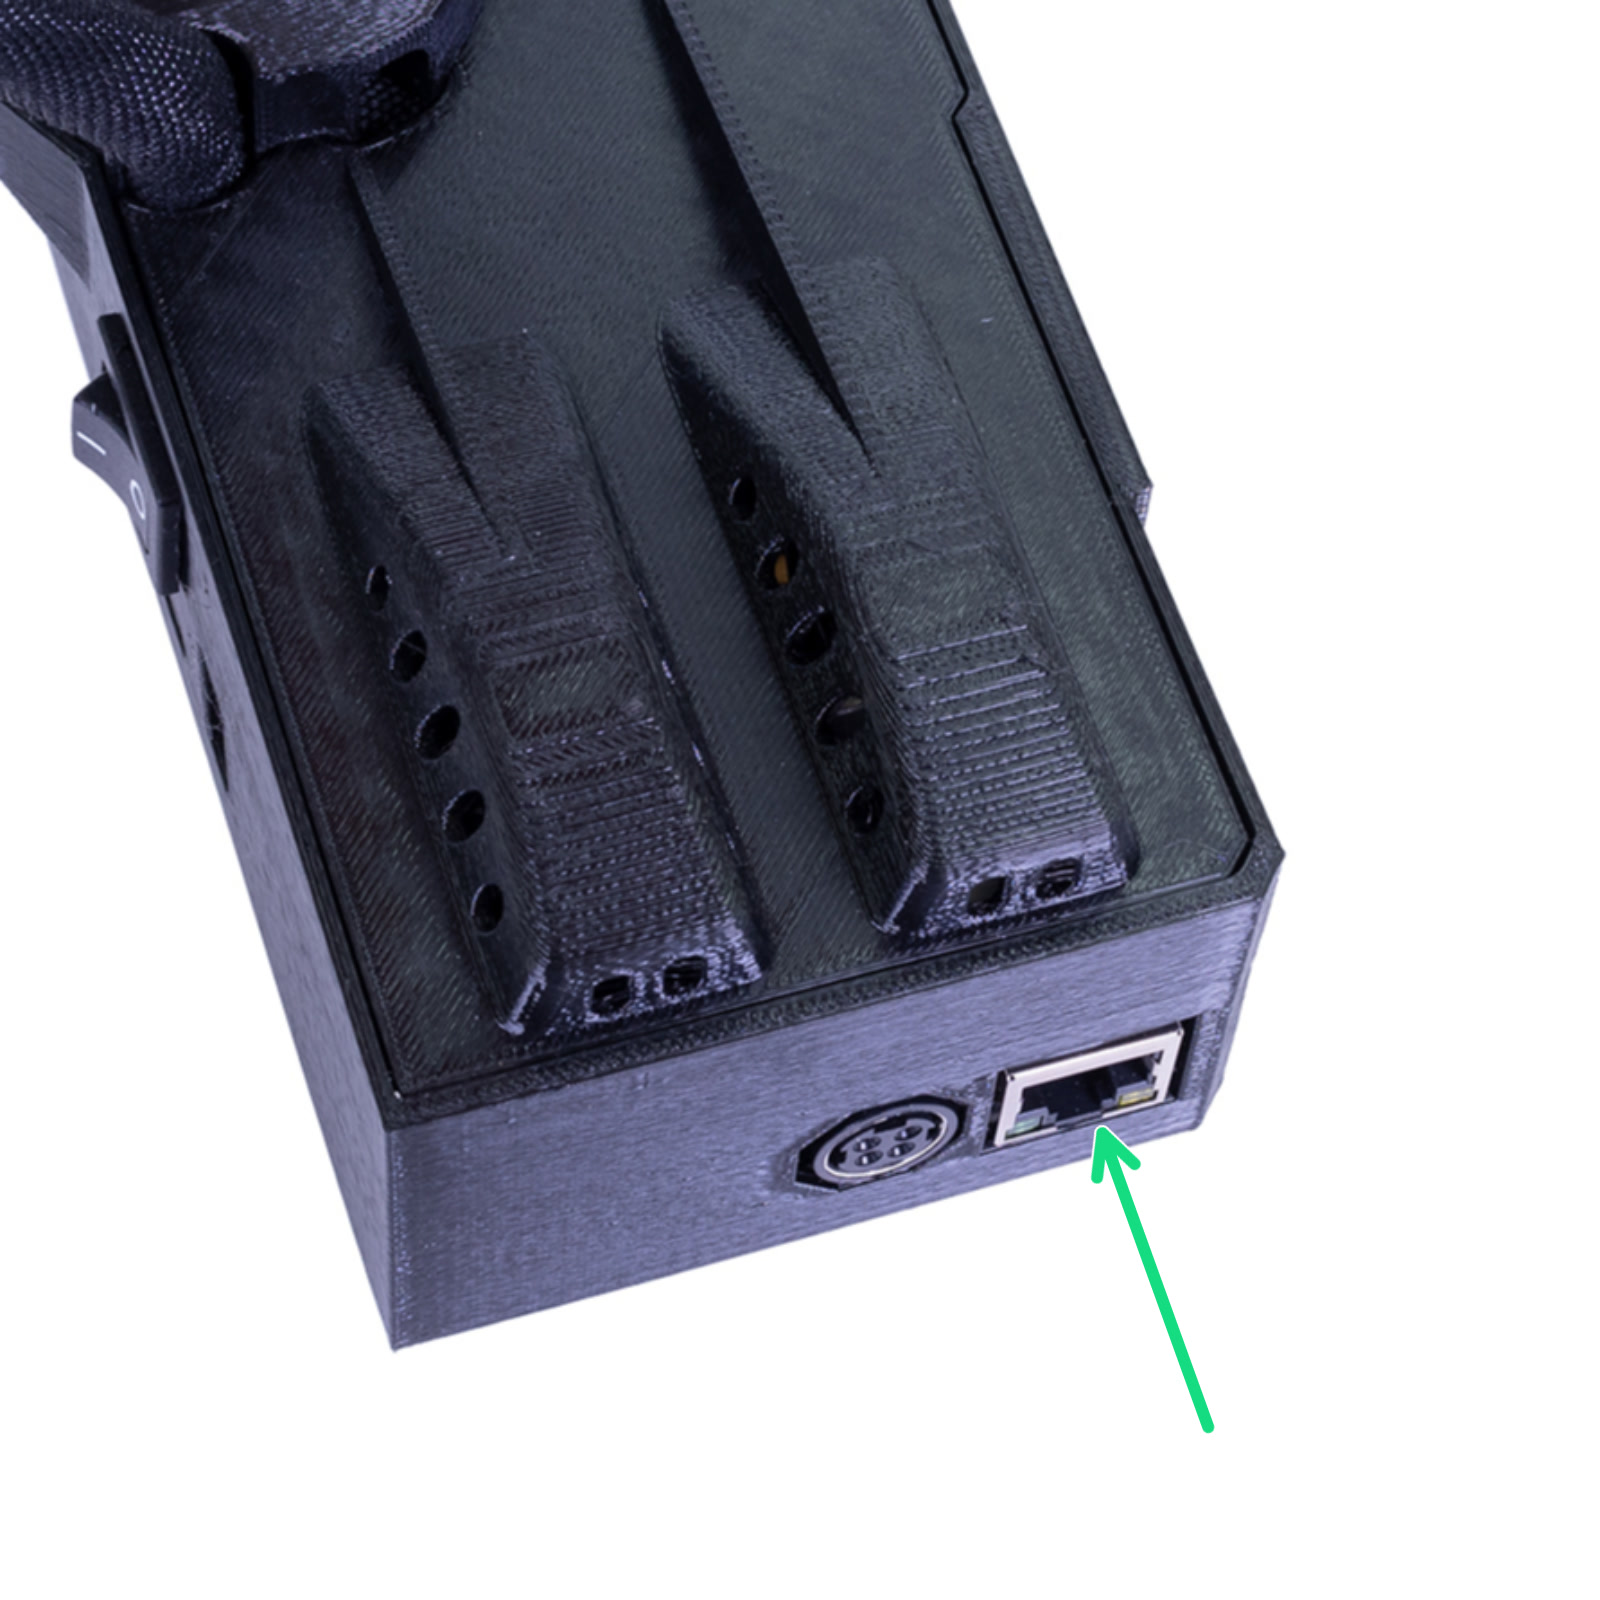
Connect the printer to your network using a LAN cable. The Ethernet connector (RJ45) is situated in the back of the electronics box (green arrow).
 The printer has DHCP turned on by default. Go to LCD Menu - Settings - LAN Settings and check whether the IP address has been assigned correctly. Common IP-ranges are 192.168.0.X or 10.0.0.X. Since it is connected by cable directly to your router, you do not need any password as you would with WiFi.
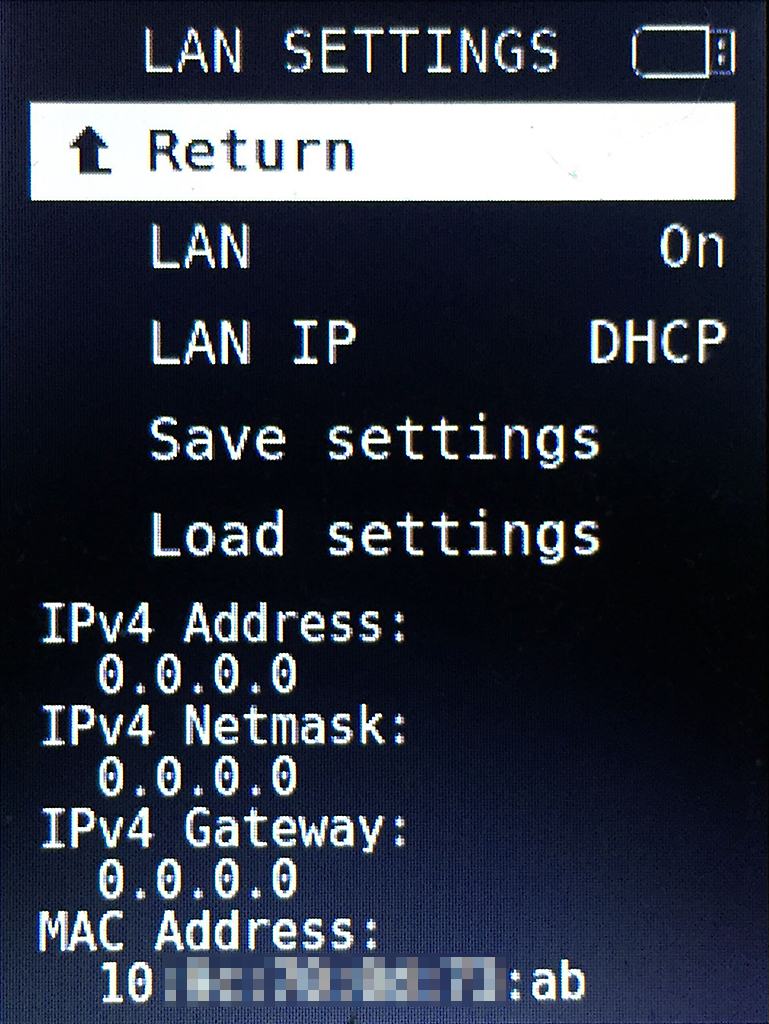 | 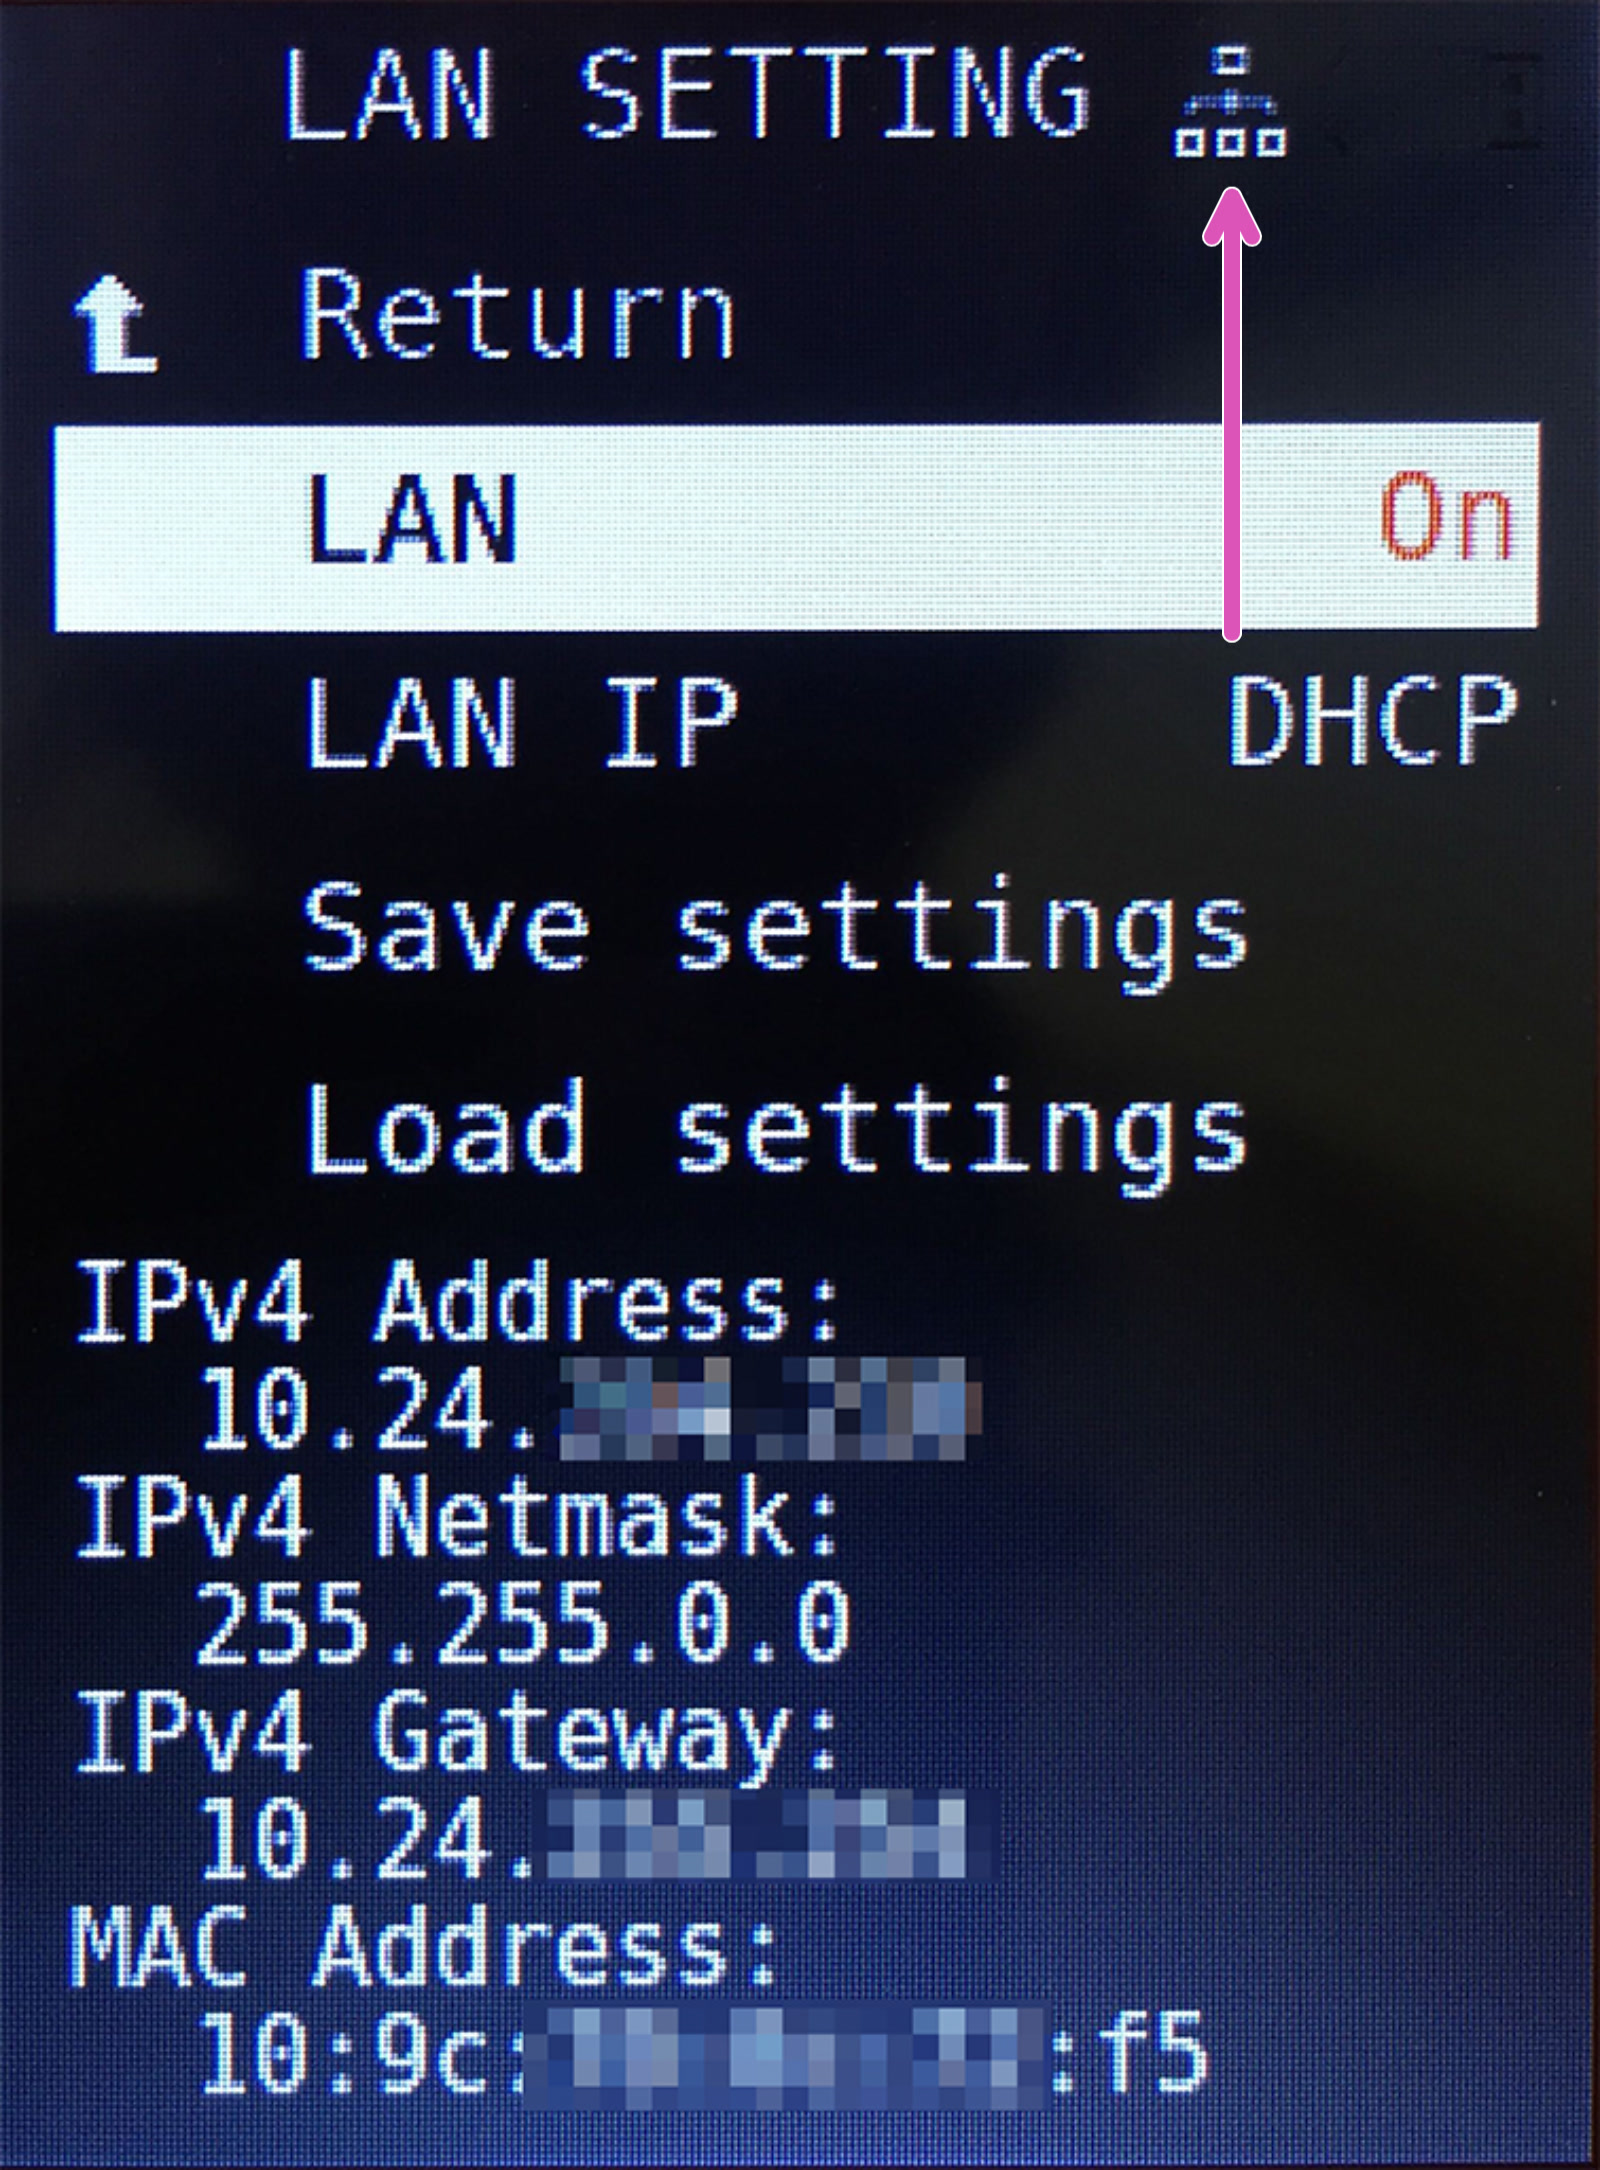 |
| Not connected | Connected |
On your PC or smartphone, open a web browser of your choice, enter the 'IPv4 Address' into the address field then hit Enter. It will now load the Prusa Connect Local web interface.
Save/Load Settings
Save Settings options will create an INI-file on the USB drive containing your IPv4 address, netmask, gateway, and MAC address. It can be edited from your computer using a text editor, should you have the need, for instance, if you are setting up a static IP address for your printer. This file can be loaded to any Original Prusa MINI, using the option Load Settings.
[lan_ip4]

type=DHCP //or "STATIC" (UPPERCASE!), if a static IP is set up in your router's config.

hostname=PrusaMINI // Optional.

address=0.0.0.0 // From your router's config.

mask=0.0.0.0 // From your router's config.

gateway=0.0.0.0// From your router's config.
Troubleshooting
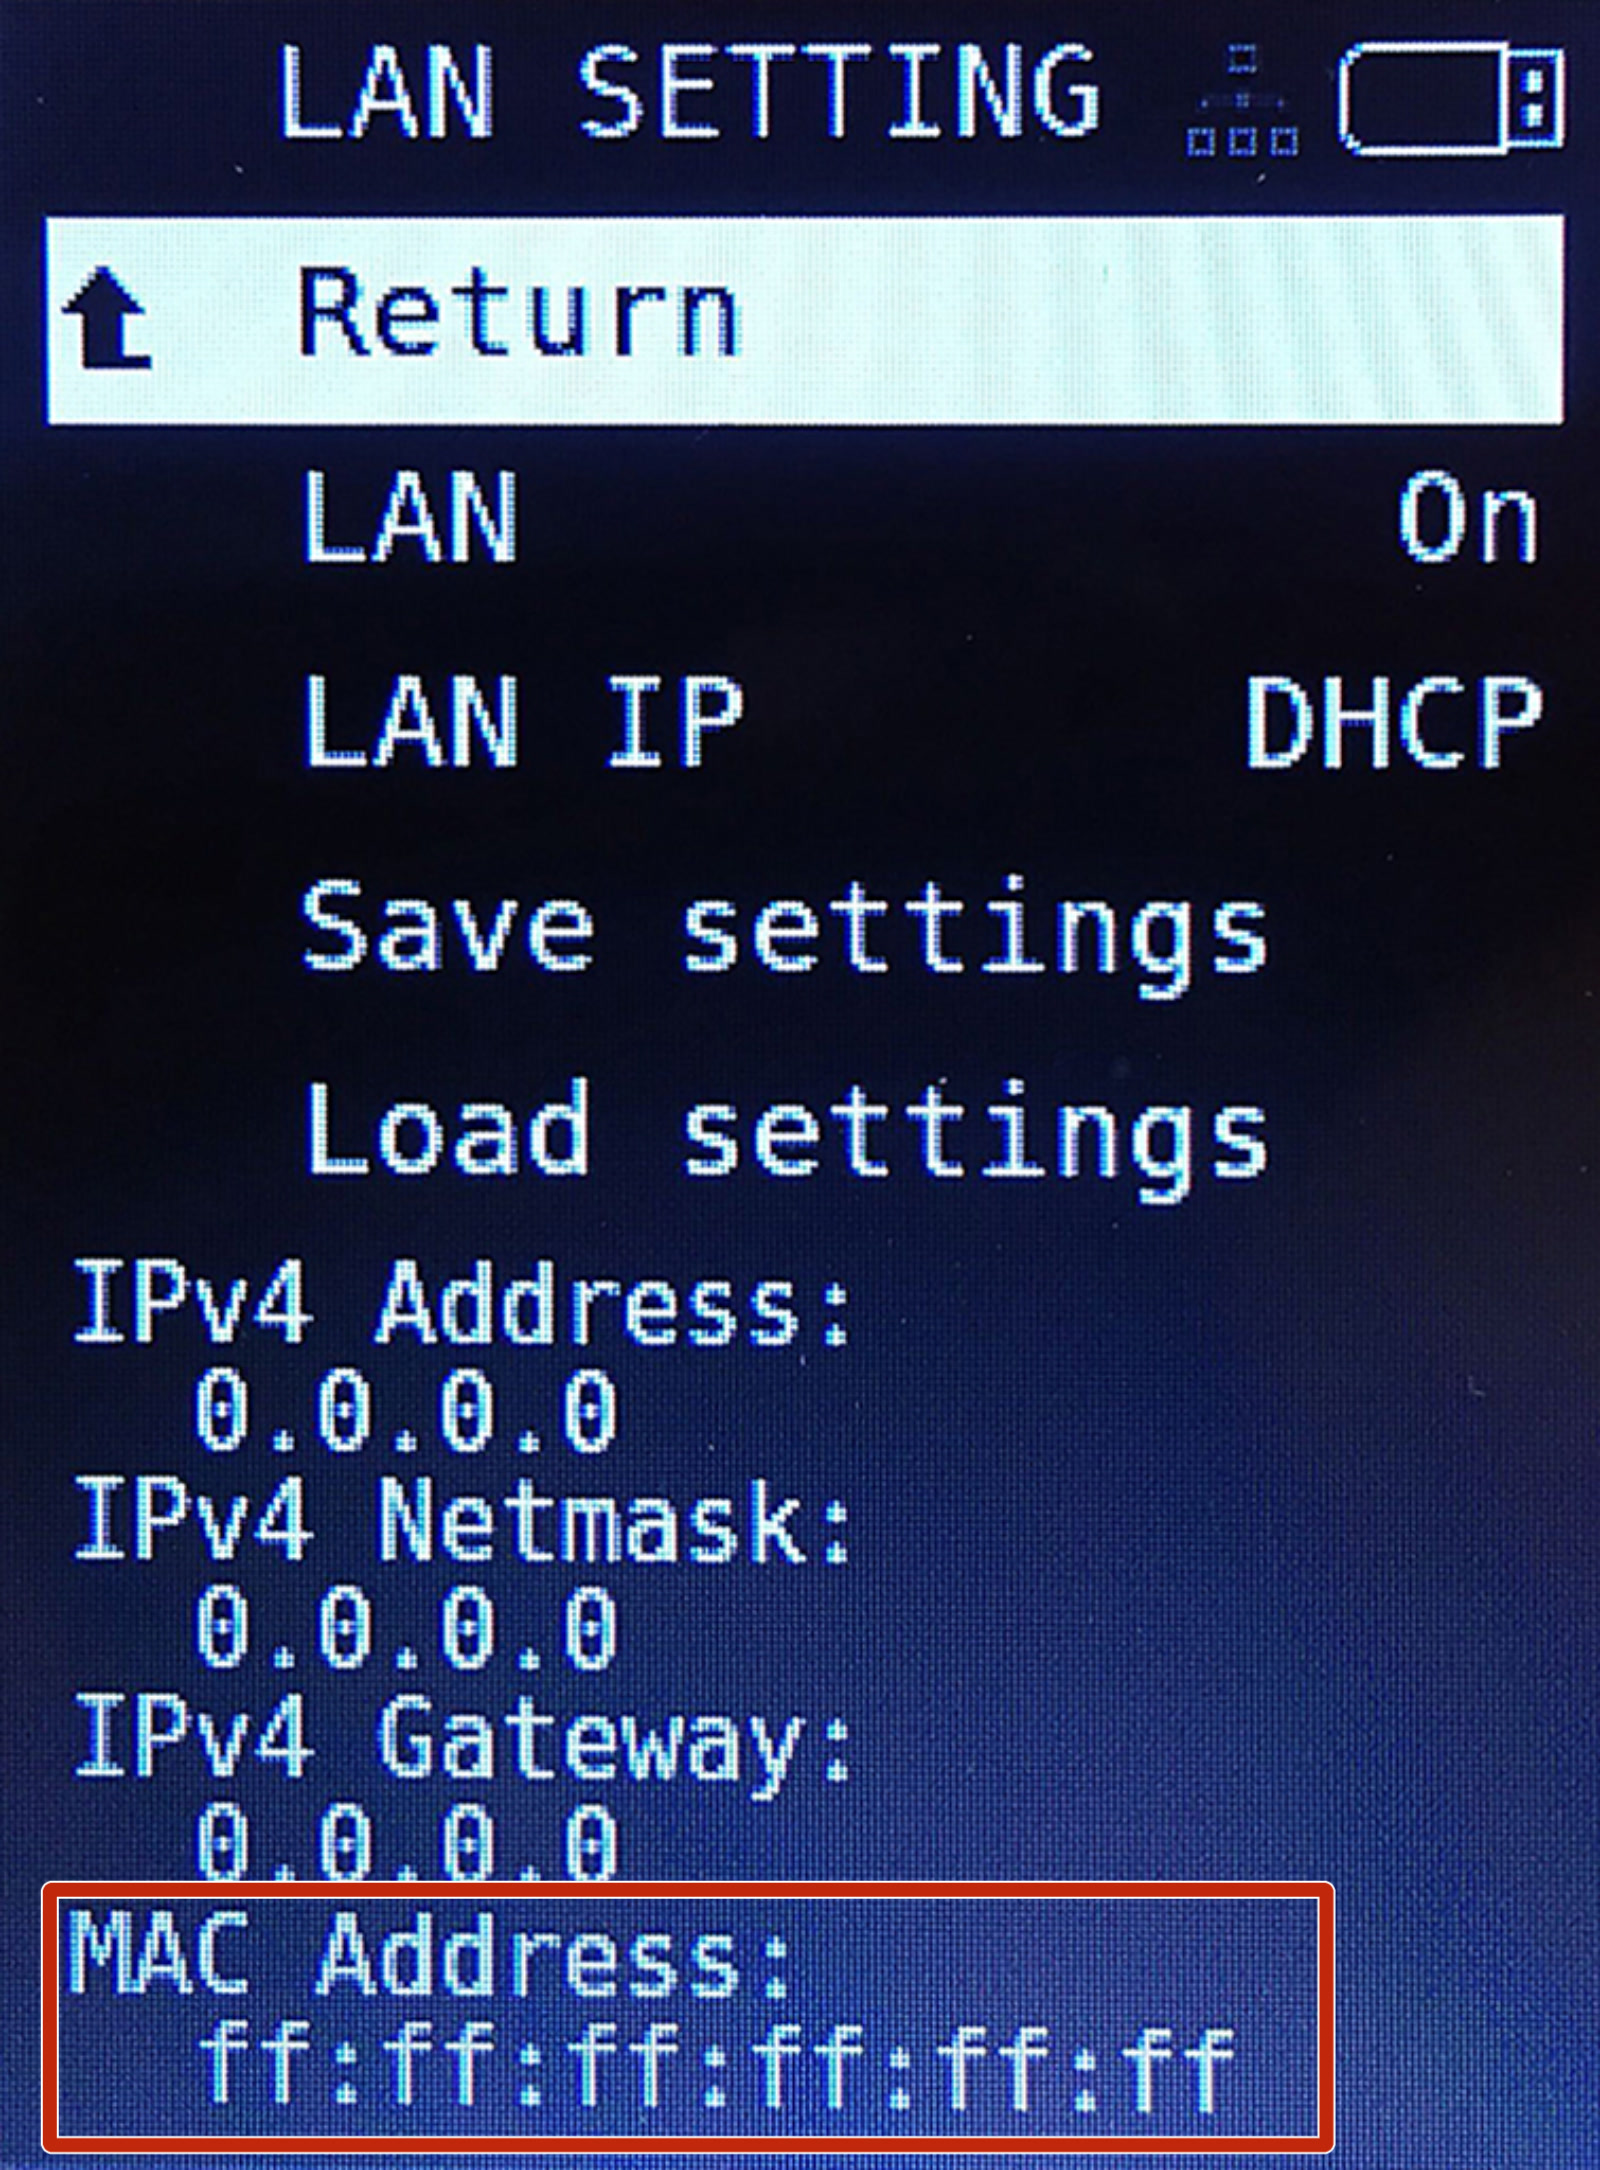
As routers and networks have different configurations, it is hard to provide support in this respect. Please check the documentation of your network to whether you need to grant access for the printer or similar. However, if the MAC Address, within 'LAN Settings', is displayed as "ff:ff:ff:ff:ff:ff" (red square picture below), it may indicate an issue with the Buddy mainboard. If this is the case, please contact Customer support.
29 comments
[lan_ip4]
type=STATIC
hostname=PrusaMINI
address=192.168.100.52
mask=255.255.255.0
gateway=192.168.100.1
There are no extra lines or spaces after the gateway. The information is not loaded on boot up and no static ip is set. Can anyone assist?Oh, and WOW I love being able to send G-Code remotely to the minis. We have 8 at our school and the kids dont have to touch the memory sticks any more!!!!
Hi, in the menu "Settings" there is an option "Load settings from File". This should load the network settings as well. Let me know, if it worked.
Prusa MINI - switch - router - modem/router
I changed it to
Prusa MINI - modem/router
This immediately resolved the dhcp request. I have no idea why my regular router network that has 50+ wireless and wired devices would not resolve dhcp. I also had problems with wireless via esp on this network.
It may be worth noting for anyone with similar struggles that the network I bypassed was a Google Nest Wifi. This is a pretty basic consumer product that does not allow for things like dhcp reservations. Perhaps there is something particular to Google mesh or Nest wifi that caused my issues.
For the Mk3 it is possible, and then only through a raspbery , so why not infest in the development of PRUSA LINK for the mini.
After all, the mini already has an ethernet connector
Very disappointed