The FINDA sensor, sometimes referred to as F.I.N.D.A. is essentially the MK2/S PINDA sensor (without thermistor), upcycled to be used as a filament sensor. It is triggered by the proximity of the stainless steel ball. When the filament is pushed through the selector, it raises the ball towards the FINDA. There is a small red LED light on the top of the sensor that turns OFF when the filament is detected. When the filament is removed, the stainless steel ball falls back down and the red light turns ON.
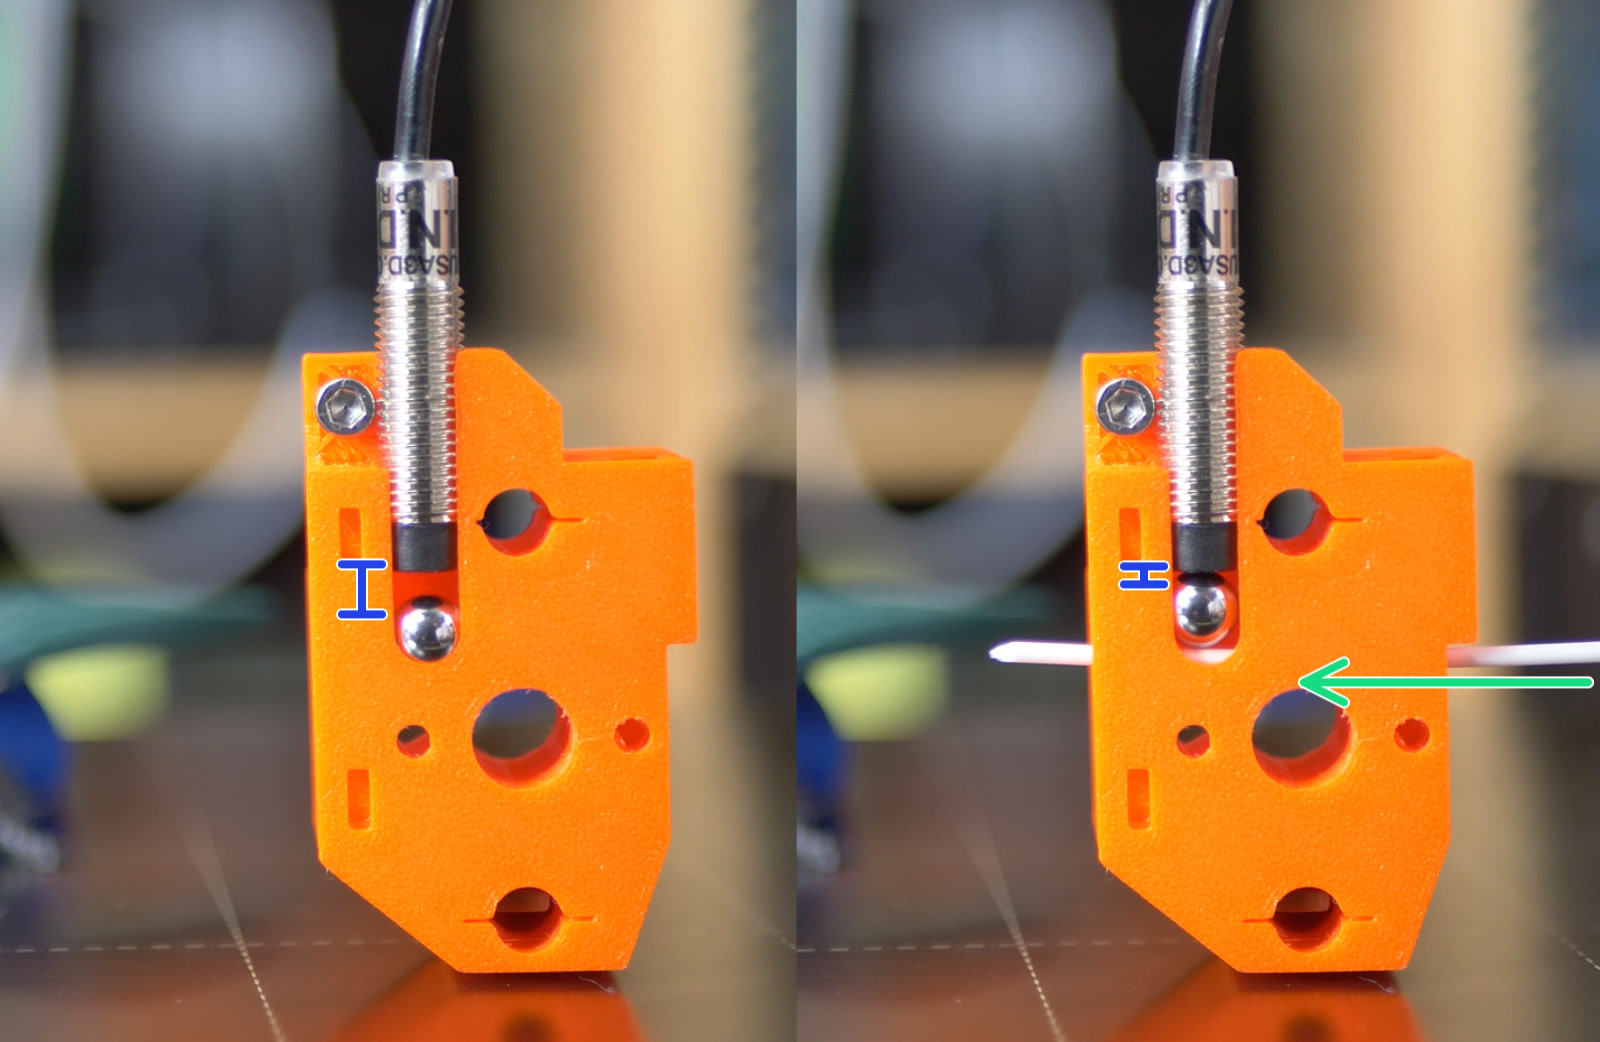
The FINDA sensor must be distanced correctly from the steel ball (blue ruler - left picture) so it is triggered only when filament is present (green arrow - right picture), pushing the steel ball higher.
FINDA height setup
The FINDA sensor has to be properly inserted into its socket: not too low, not too high. Check out our assembly manual, specifically this step, to see how the FINDA fits in.
- Supposing the steel ball and the FINDA are still in the selector, loosen the M3x10 screw holding the FINDA in place. Do not remove the screw, you just need to be able to move the FINDA up and down.
- Open the LCD menu -> Support -> Sensor info and focus on the FINDA value.
- Insert any 1.75 mm filament into the selector. The FINDA value should turn from 0 to 1.
- If it does not change from 0 to 1, push the FINDA down a little bit. Keep in mind you must be able to move with the filament freely!
- If it does change reliably from 0 to 1 as long as the filament is inserted, the calibration is done.
Finally, tighten the M3x10 screw to prevent the FINDA from moving. The steel ball, however, has to move freely!
FINDA troubleshooting
Debris in the selector
As explained in the first paragraph, the steel ball has to move freely. Sometimes, however, filament debris, dust, or strings may amass in the hole or even in the FINDA/ball socket. Use compressed air to clean it.
Faulty sensor
You can always check the proper functioning of the sensor by inserting a piece of filament and observing the red light on top of the sensor. You can also go to the LCD Menu -> Support -> Sensor info to see the FINDA status. It should be 0 when the filament is out (red LED on) and 1 when the filament is inserted into the selector (red LED off).
In some situations, the FINDA itself may be working but its cable might be damaged and fail to transfer the information to the logic board. In most cases, it can be damaged during the assembly while doing cable management. It can be also damaged by opening the Idler body all the way and having it hang on the cables.
The best way to check the cable is to insert a piece of filament into the selector and go to the Sensor info menu. The FINDA value should be 1. Then wiggle with the cable and see if the value flickers and changes to 0 at any point.
Wiring
In case the FINDA value in the Sensor info menu is N/A during manual testing, check the cable connection to the MMU logic board and the MMU cable connection into the RAMBo board (MK3S / MK2.5S). Pay attention to the order of the colors of the individual wires. However, during load and unload, the FINDA value in the Sensor info menu will be N/A.
6 comments
Hi Francis! You can sort of observe the state of the FINDA probe when looking at the top of the probe. There is a small red LED light inside which lights up when there is no filament detected.
Hi! Have a look from above, at where the cable enters the FINDA. The light of the LED isn´t too strong to be honest but you should be able to see it from around the cable :)