The Original Prusa MK2.5/S, MK3/S/+, and MK3.5/S use the E3D V6 Hotend. Any nozzle that is compatible with the E3D V6 Hotend can be installed on it. The stock nozzle that accompanies the printer is an E3D V6 0.4 mm brass nozzle, but other types and diameters can be used as well. The following procedure applies to all nozzles, except the Olsson Ruby.
Why change the nozzle?
There might be two main reasons for replacing the nozzle:
- The nozzle is worn out and needs a replacement.
- You want to print using a different nozzle type, and/or diameter.
Tools necessary
- 2.5 mm Allen key (Included with assembled printers and kits)
- 7 mm spanner/socket or pliers (7 mm spanner/socket not included with assembled printers and kits)
- 17 mm spanner (not included with assembled printers and kits)
- Small plate or aluminium foil (not included with assembled printers and kits)
Procedure
The following procedure assumes that a firmware version from 3.12.0 or above is installed. In case your printer has a previous firmware version, we recommend upgrading to the latest version. If you did not flash a newer firmware version, follow the procedure, except for "Step 3 alternative" instead of step 3.
- Unload the filament, if it is loaded, from LCD Menu -> Unload Filament. Optionally, perform a Cold pull (MK3/S/+, MK2.5/S, MK3.5/S).
- On MK2.5/S and MK3/S/+, navigate to LCD Menu -> Settings -> HW Setup -> Nozzle Change.
- The printer will display a message with a link to this guide.
- Click the LCD encoder: the printer will auto-home, and subsequently move the Z axis to the topmost position, and the X axis to the center. In the meantime, the printer will automatically heat the nozzle to 280 °C. Heating the nozzle is essential for this process.
- Once the nozzle is at 280 °C, the printer screen will display the following message: "Hotend at 280C! Nozzle changed and tightened to specs?". Do not click on the LCD encoder for now.
On MK3.5/S, gain better access to the nozzle by moving the extruder as high as possible, go to LCD Menu -> Control -> Move Axis -> Move Z. Spin the Knob to adjust the height. Once this is done, preheat the nozzle to 280 °C from LCD Menu -> Control -> Temperature -> Nozzle Temperature.
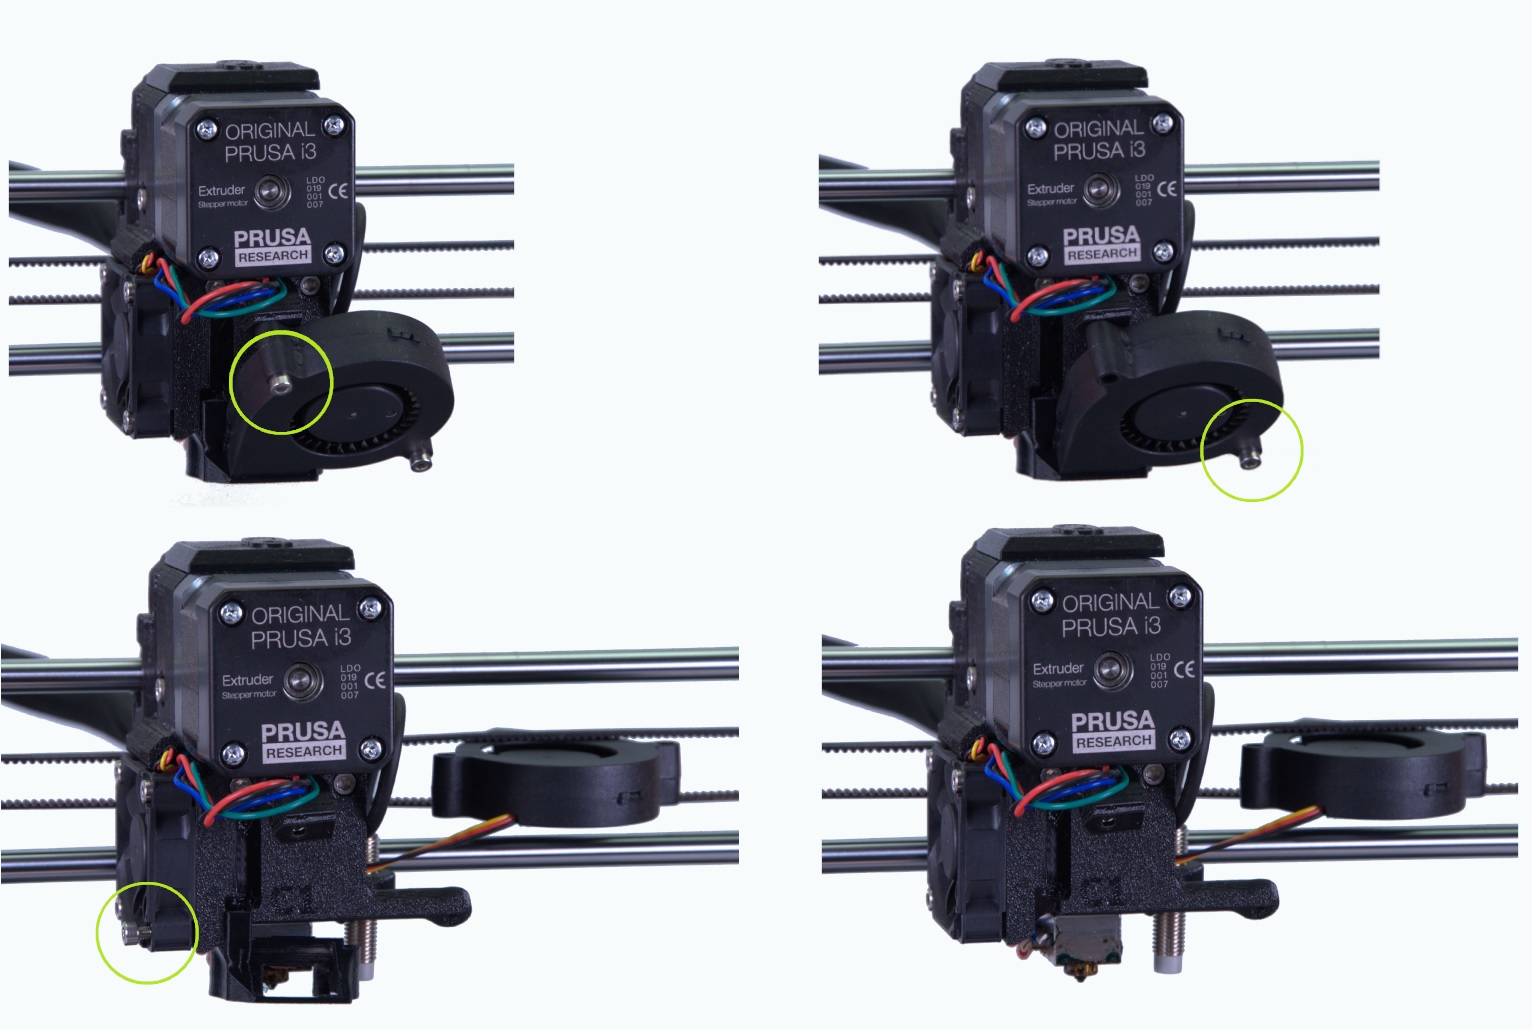
- Unscrew the two screws on the print fan and the single screw securing the fan shroud. Remove both parts (picture below).
- Hold the heater block with a 17 mm spanner (M10) or adjustable wrench.
- Unscrew the nozzle using the supplied pliers. If you are using the E3D nozzles from our online store, use a 7mm spanner (M4) or 7 mm socket. Be careful, the nozzle is still hot! Place it out of the way on your non-flammable surface.
- Make sure that the printer is still on the screen described in step 3c, and that the set temperature (280 °C) didn't change. Holding the heater block with your spanner, carefully screw the new nozzle in and tighten it gently, but firmly. Do not use excessive force!
Final inspection
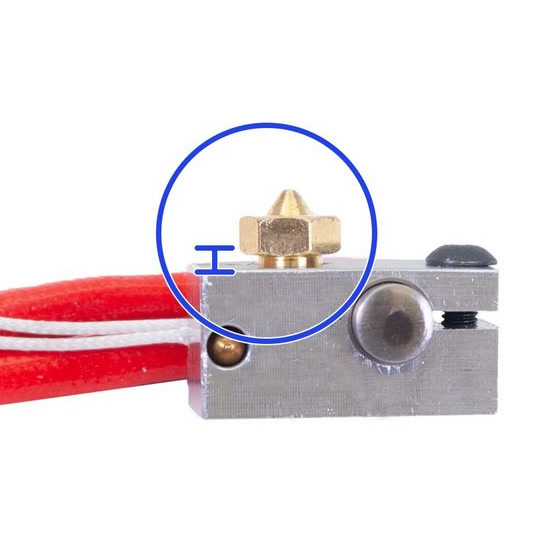
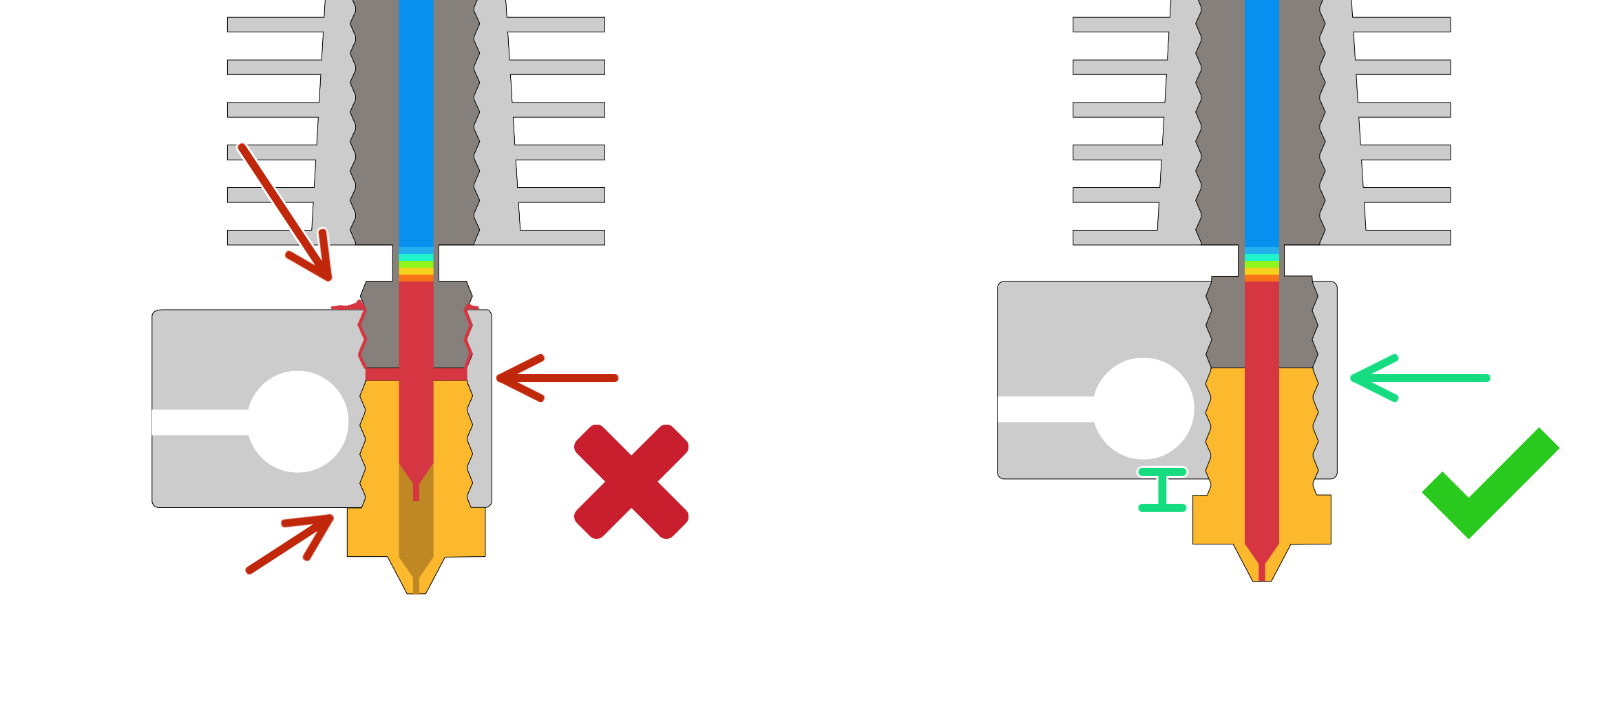
There must always be a gap (~0.5 mm) between the nozzle and the heater block (left picture). The nozzle must be tightened/secured in the heater block, and locked against the heat break while heated (right picture). Failing to do so will cause leaks (center picture).
 |  |
51 comments
It would great if there was some place safe to grab the heat block, some place not occluded by wires that are very flexible at print temperature. Another machine I have here runs the wires out at a right angle which yields a lot more surface area.
And why doesn't that fan simply swing out on a hinge with a latch (or a screw) to hold in in place? Someone with more skill than I have can redesign that, surely.
I suppose I can just use wrenches (adjustable or vise-grips) but it seems like a lot to work in such a small space. Not 100% convinced this is necessary to solve the problem I'm seeing but I may as well learn how to do this.
The feature heats the hotend to 280C AND the build plate to 85C. Why heat the heat bed? It's easier to get burned that way. ---> Same with unloading filament. Why heat the heatbed up when it's only necessary for the nozzle?
The thermal protections are turned off using this feature, which is good for changing the nozzle. However, there should be an option to turn off the thermal protections even without using this feature. In my case, I tried to manually raise temperature and move the extruder to the top, but as soon as I started unscrewing, the thermal errors stopped the heating of the hotend.
Lastly, the feature should ask you what type of nozzle you are changing to so one does not forget to change it in the settings (0.25/0.4/0.6 mm etc)
Hi Miguel, thanks for the feedback. It makes sense to make some changes you proposed, like not heating the heatbed. I will talk to the devs :)