

プリンターのスイッチが切られており、電源ケーブルが差し込まれていないことを確認してください。
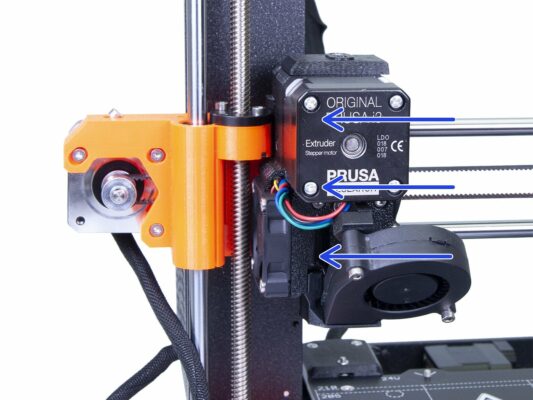
エクストルーダーを動かしている間は、X軸 モーターは発電機として働きます。これにより、少量ながら電気が作り出され、LCDが点滅することがあります。エクストルーダーはできる限りゆっくりと動かし、今回以降は必ずプリンターのコントロール機能を使用するようにしてください。
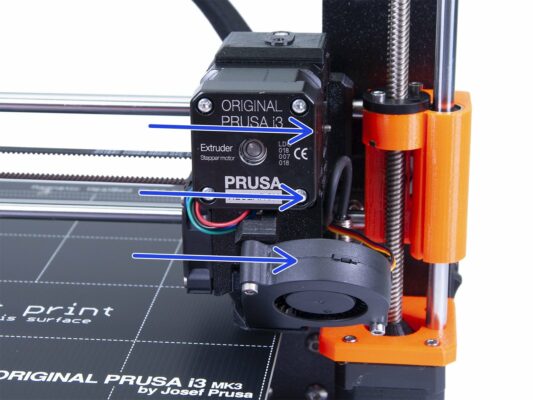
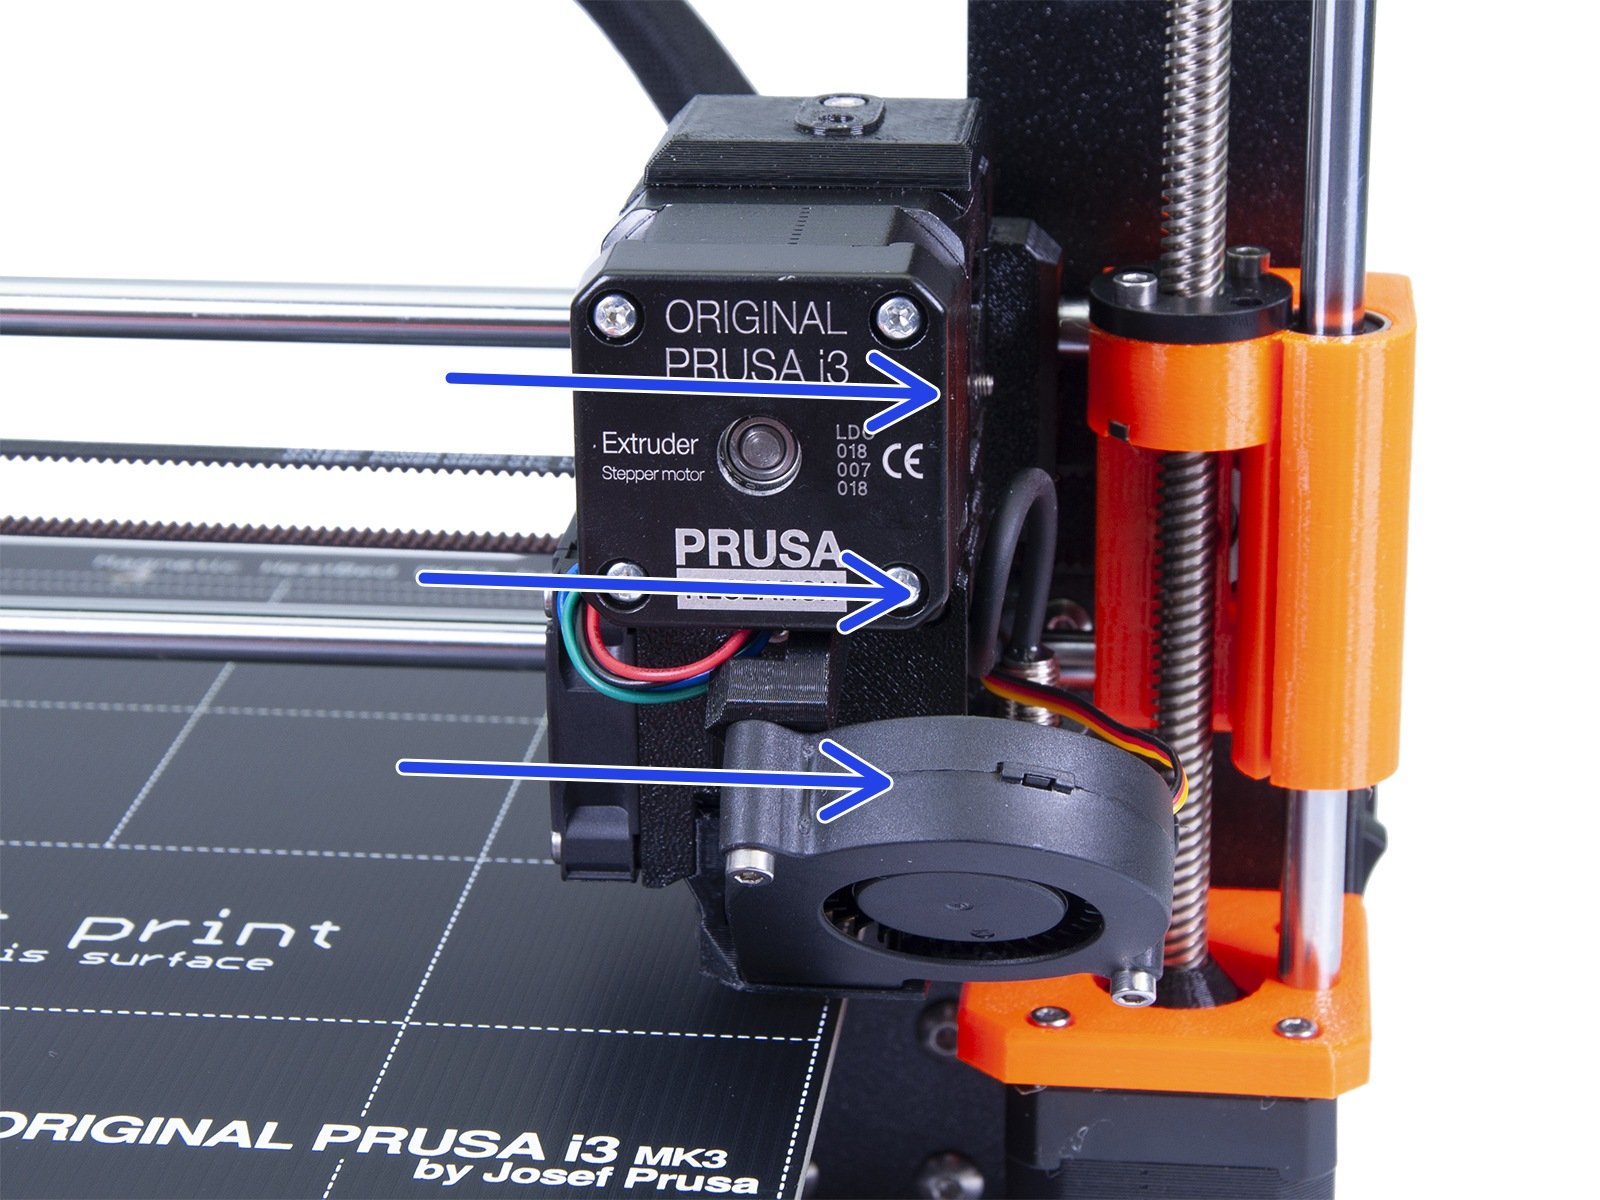
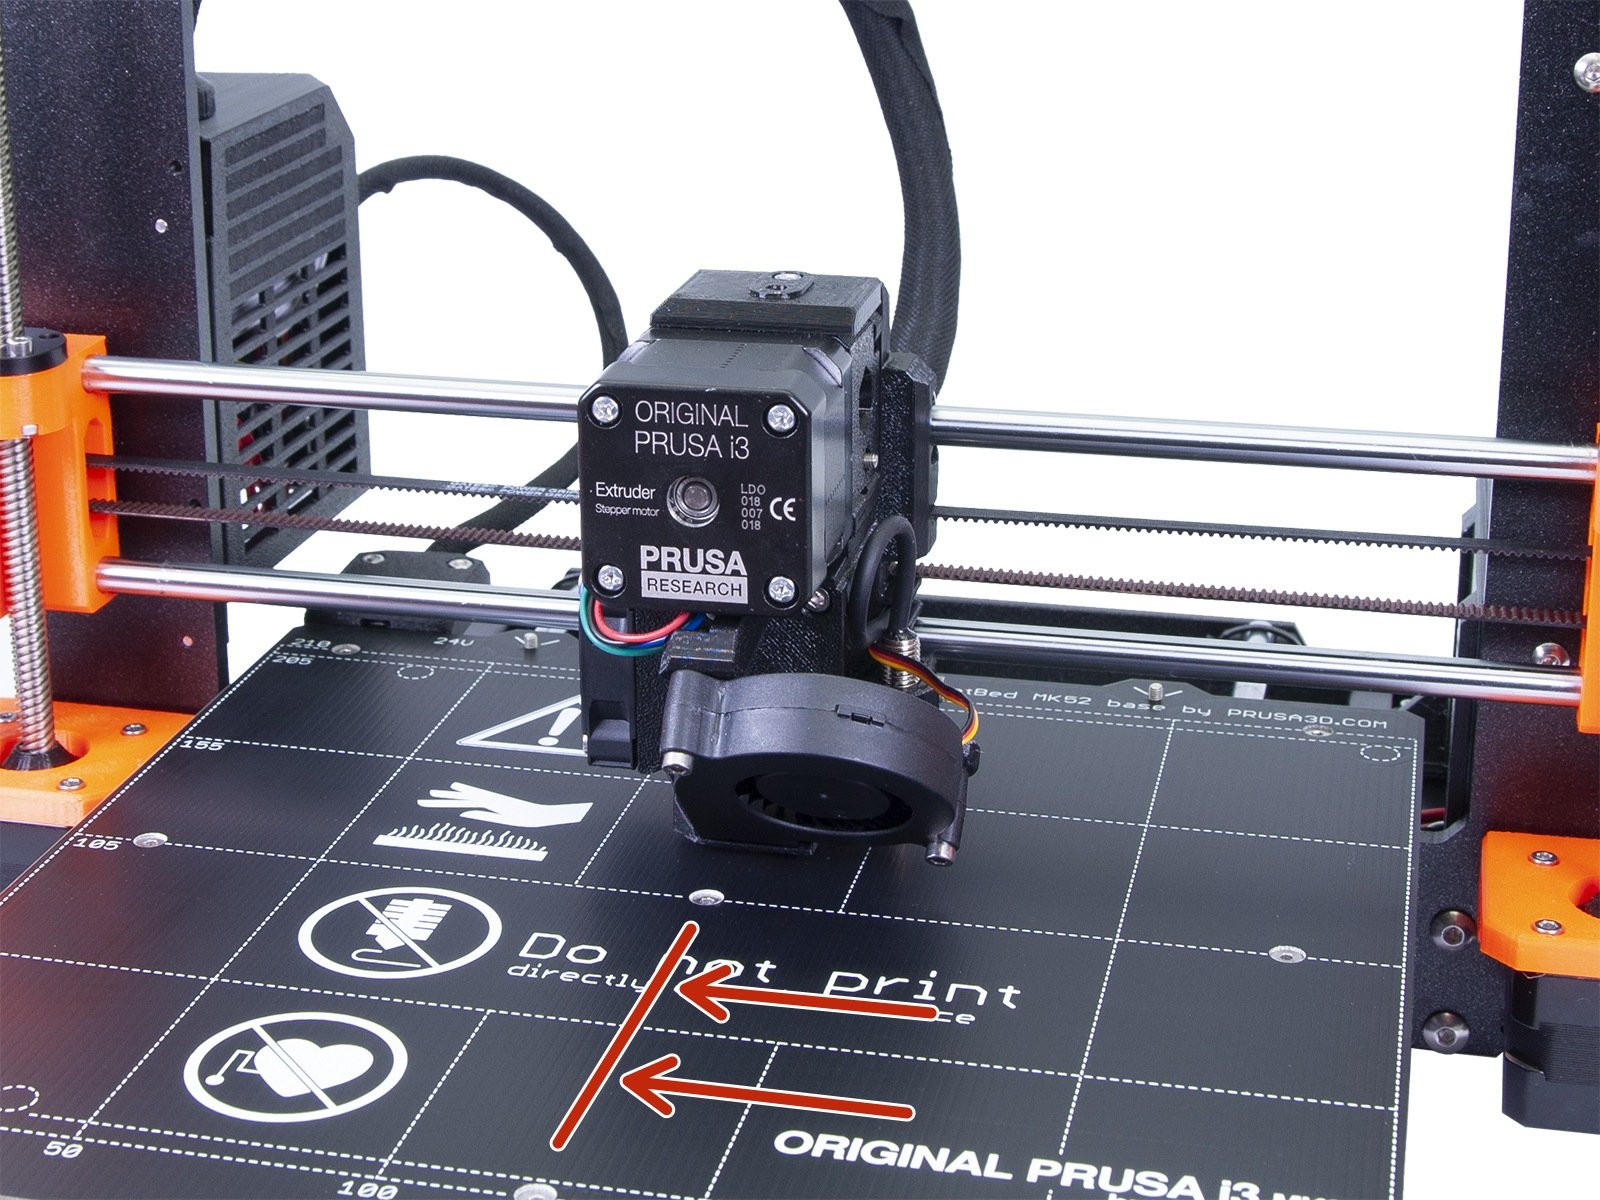
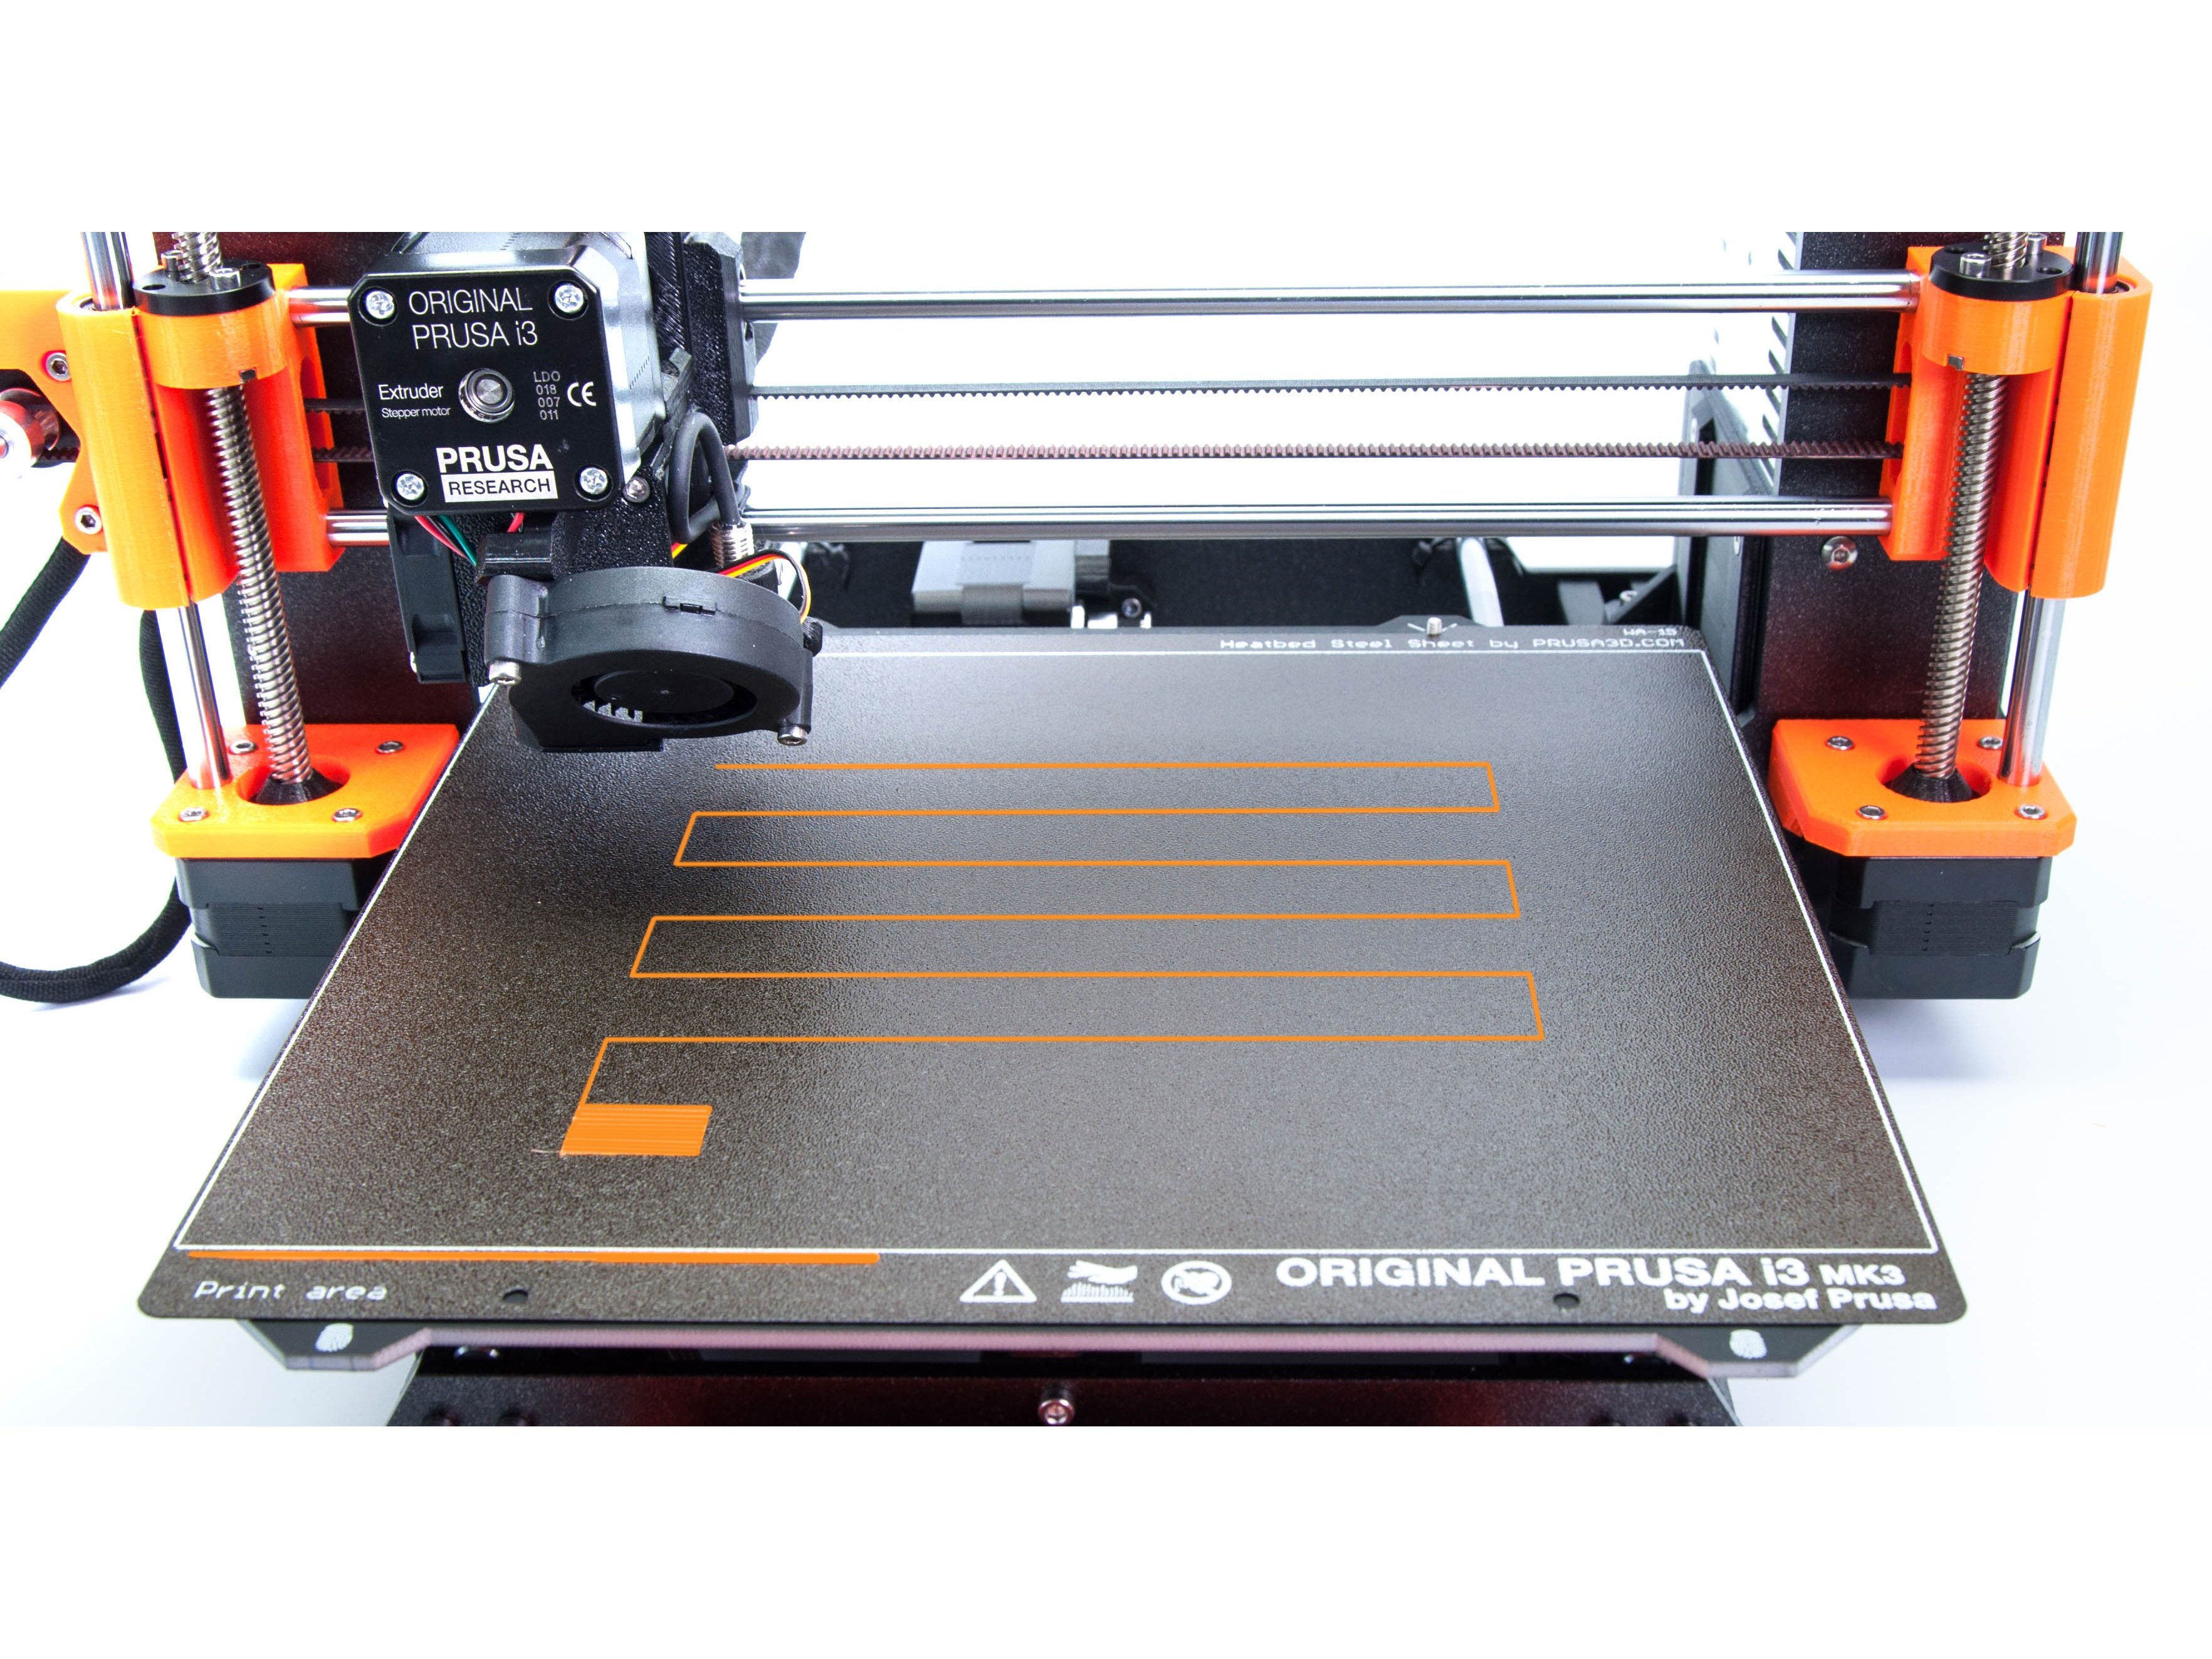
⬢エクストルーダーを、手で一番左まで動かします。
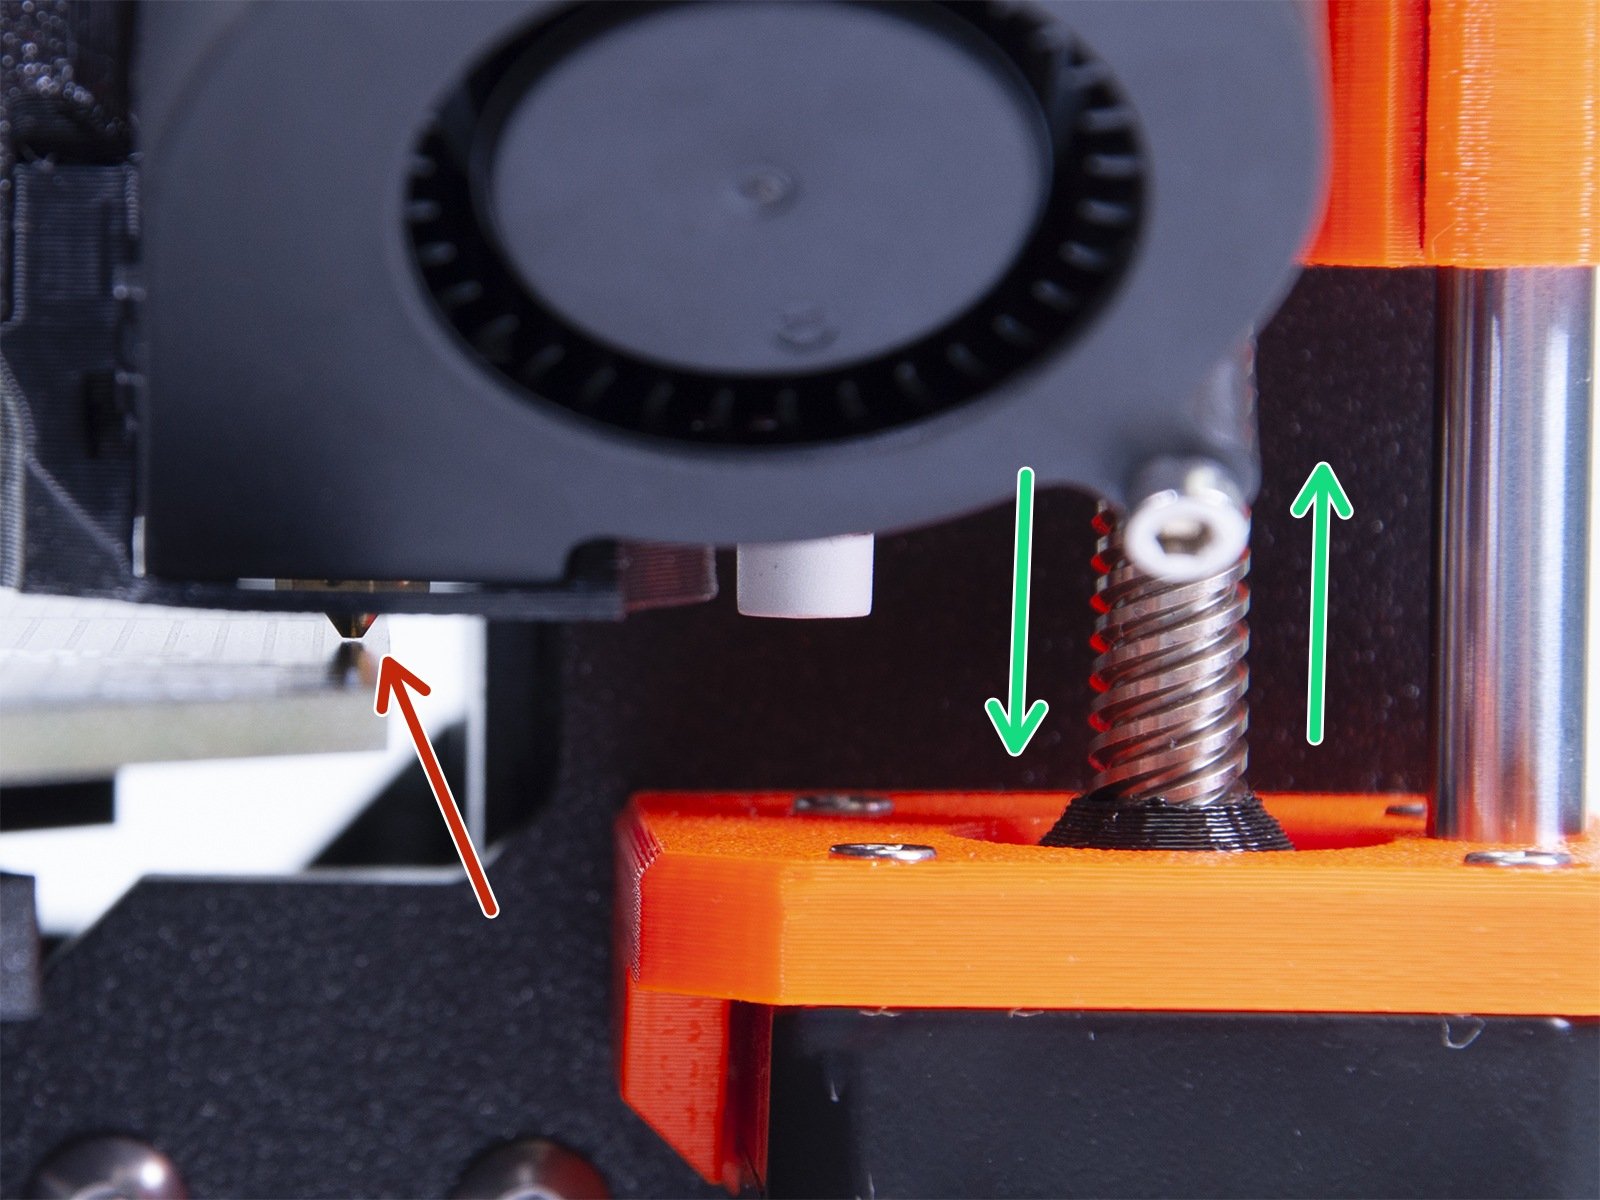
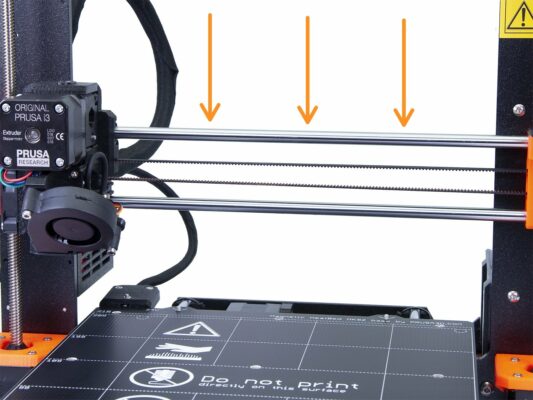
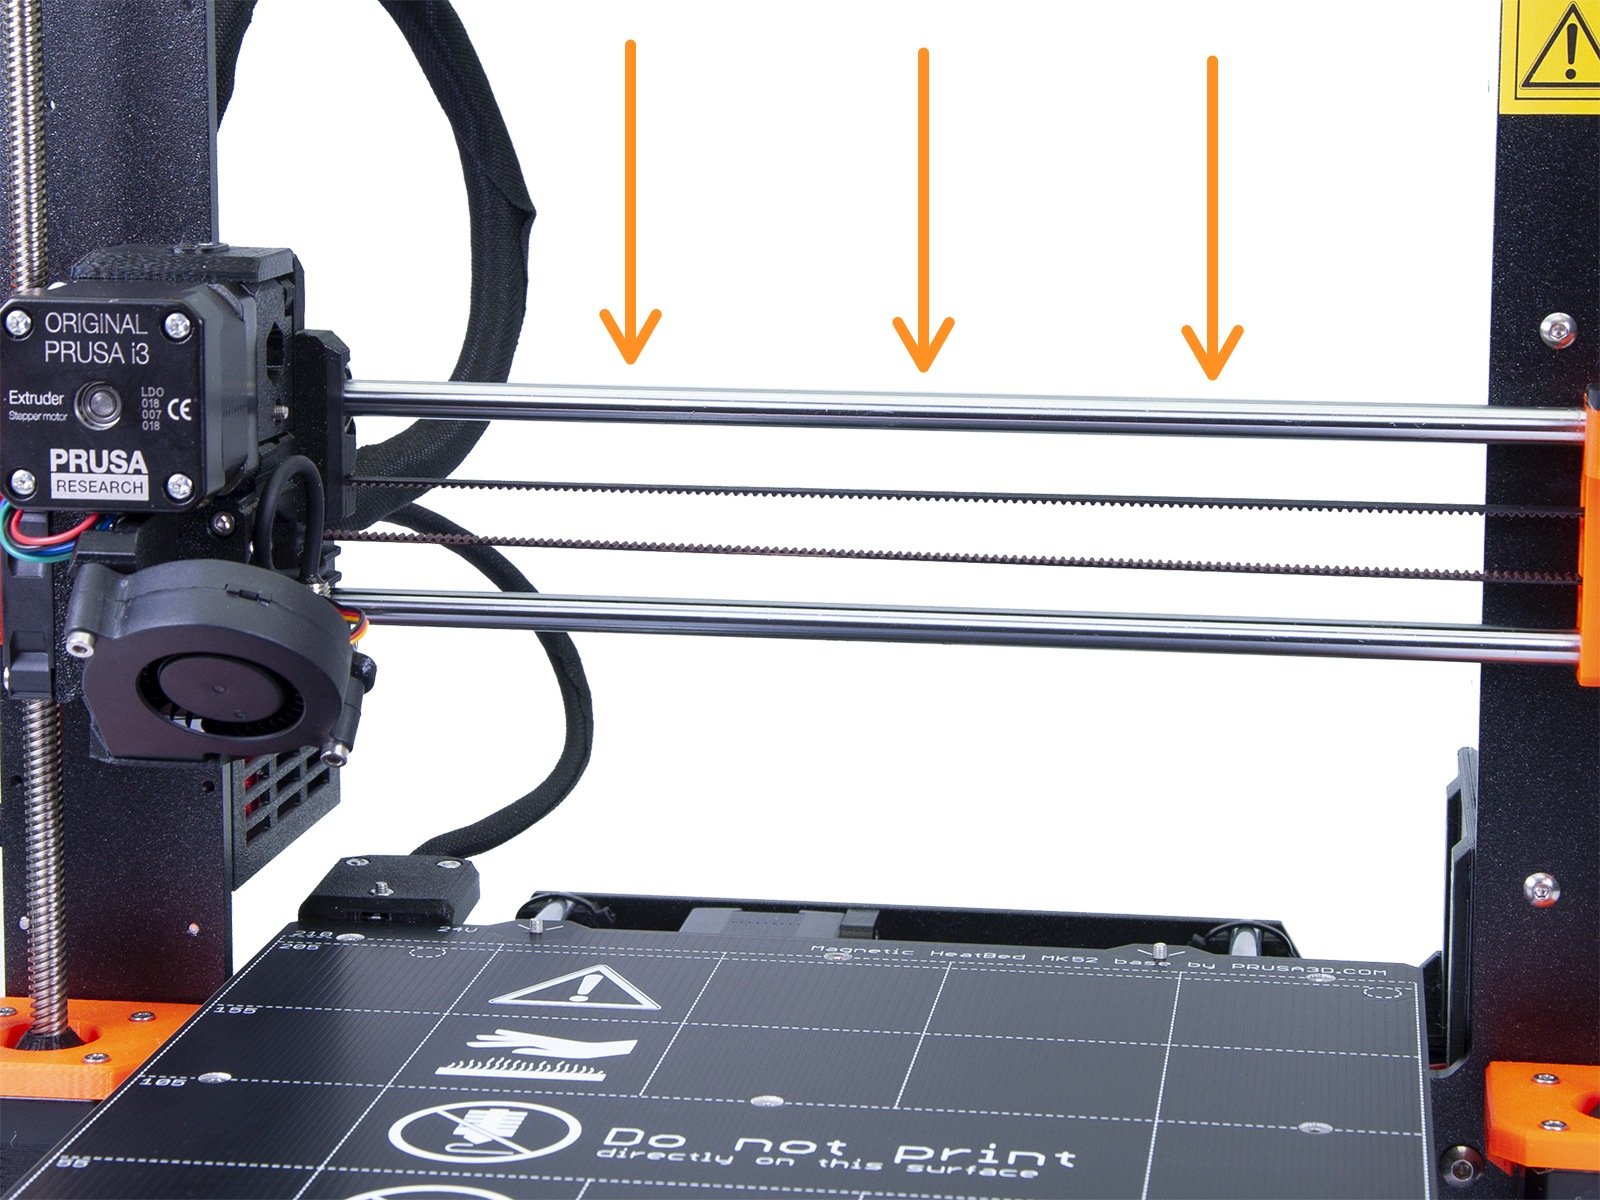
⬢Z軸の 両方 の台形ネジを同時に回転させて、ヒートベッドに当たるまでノズルを移動します。それぞれのロッドは均等に回してください!
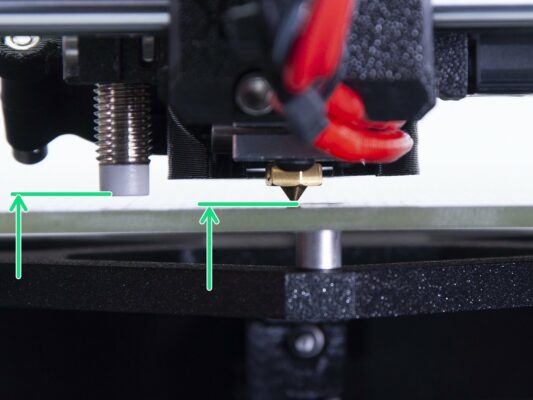
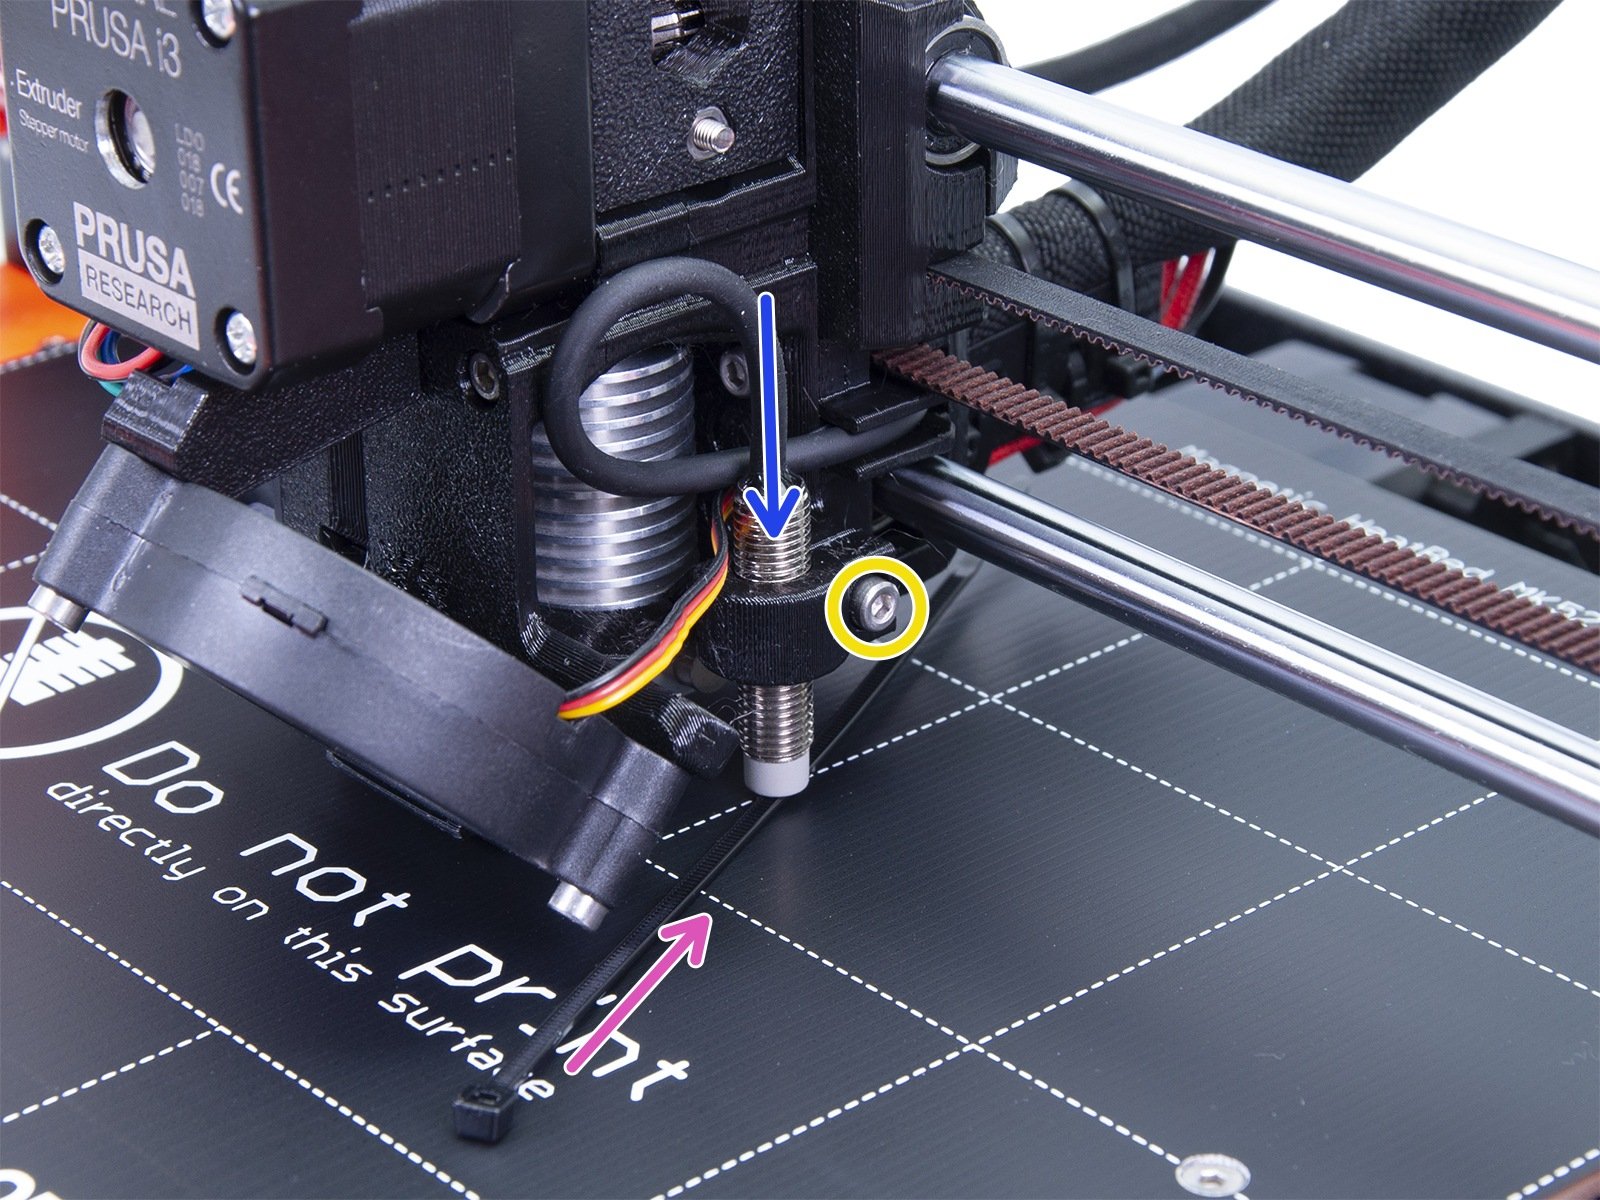
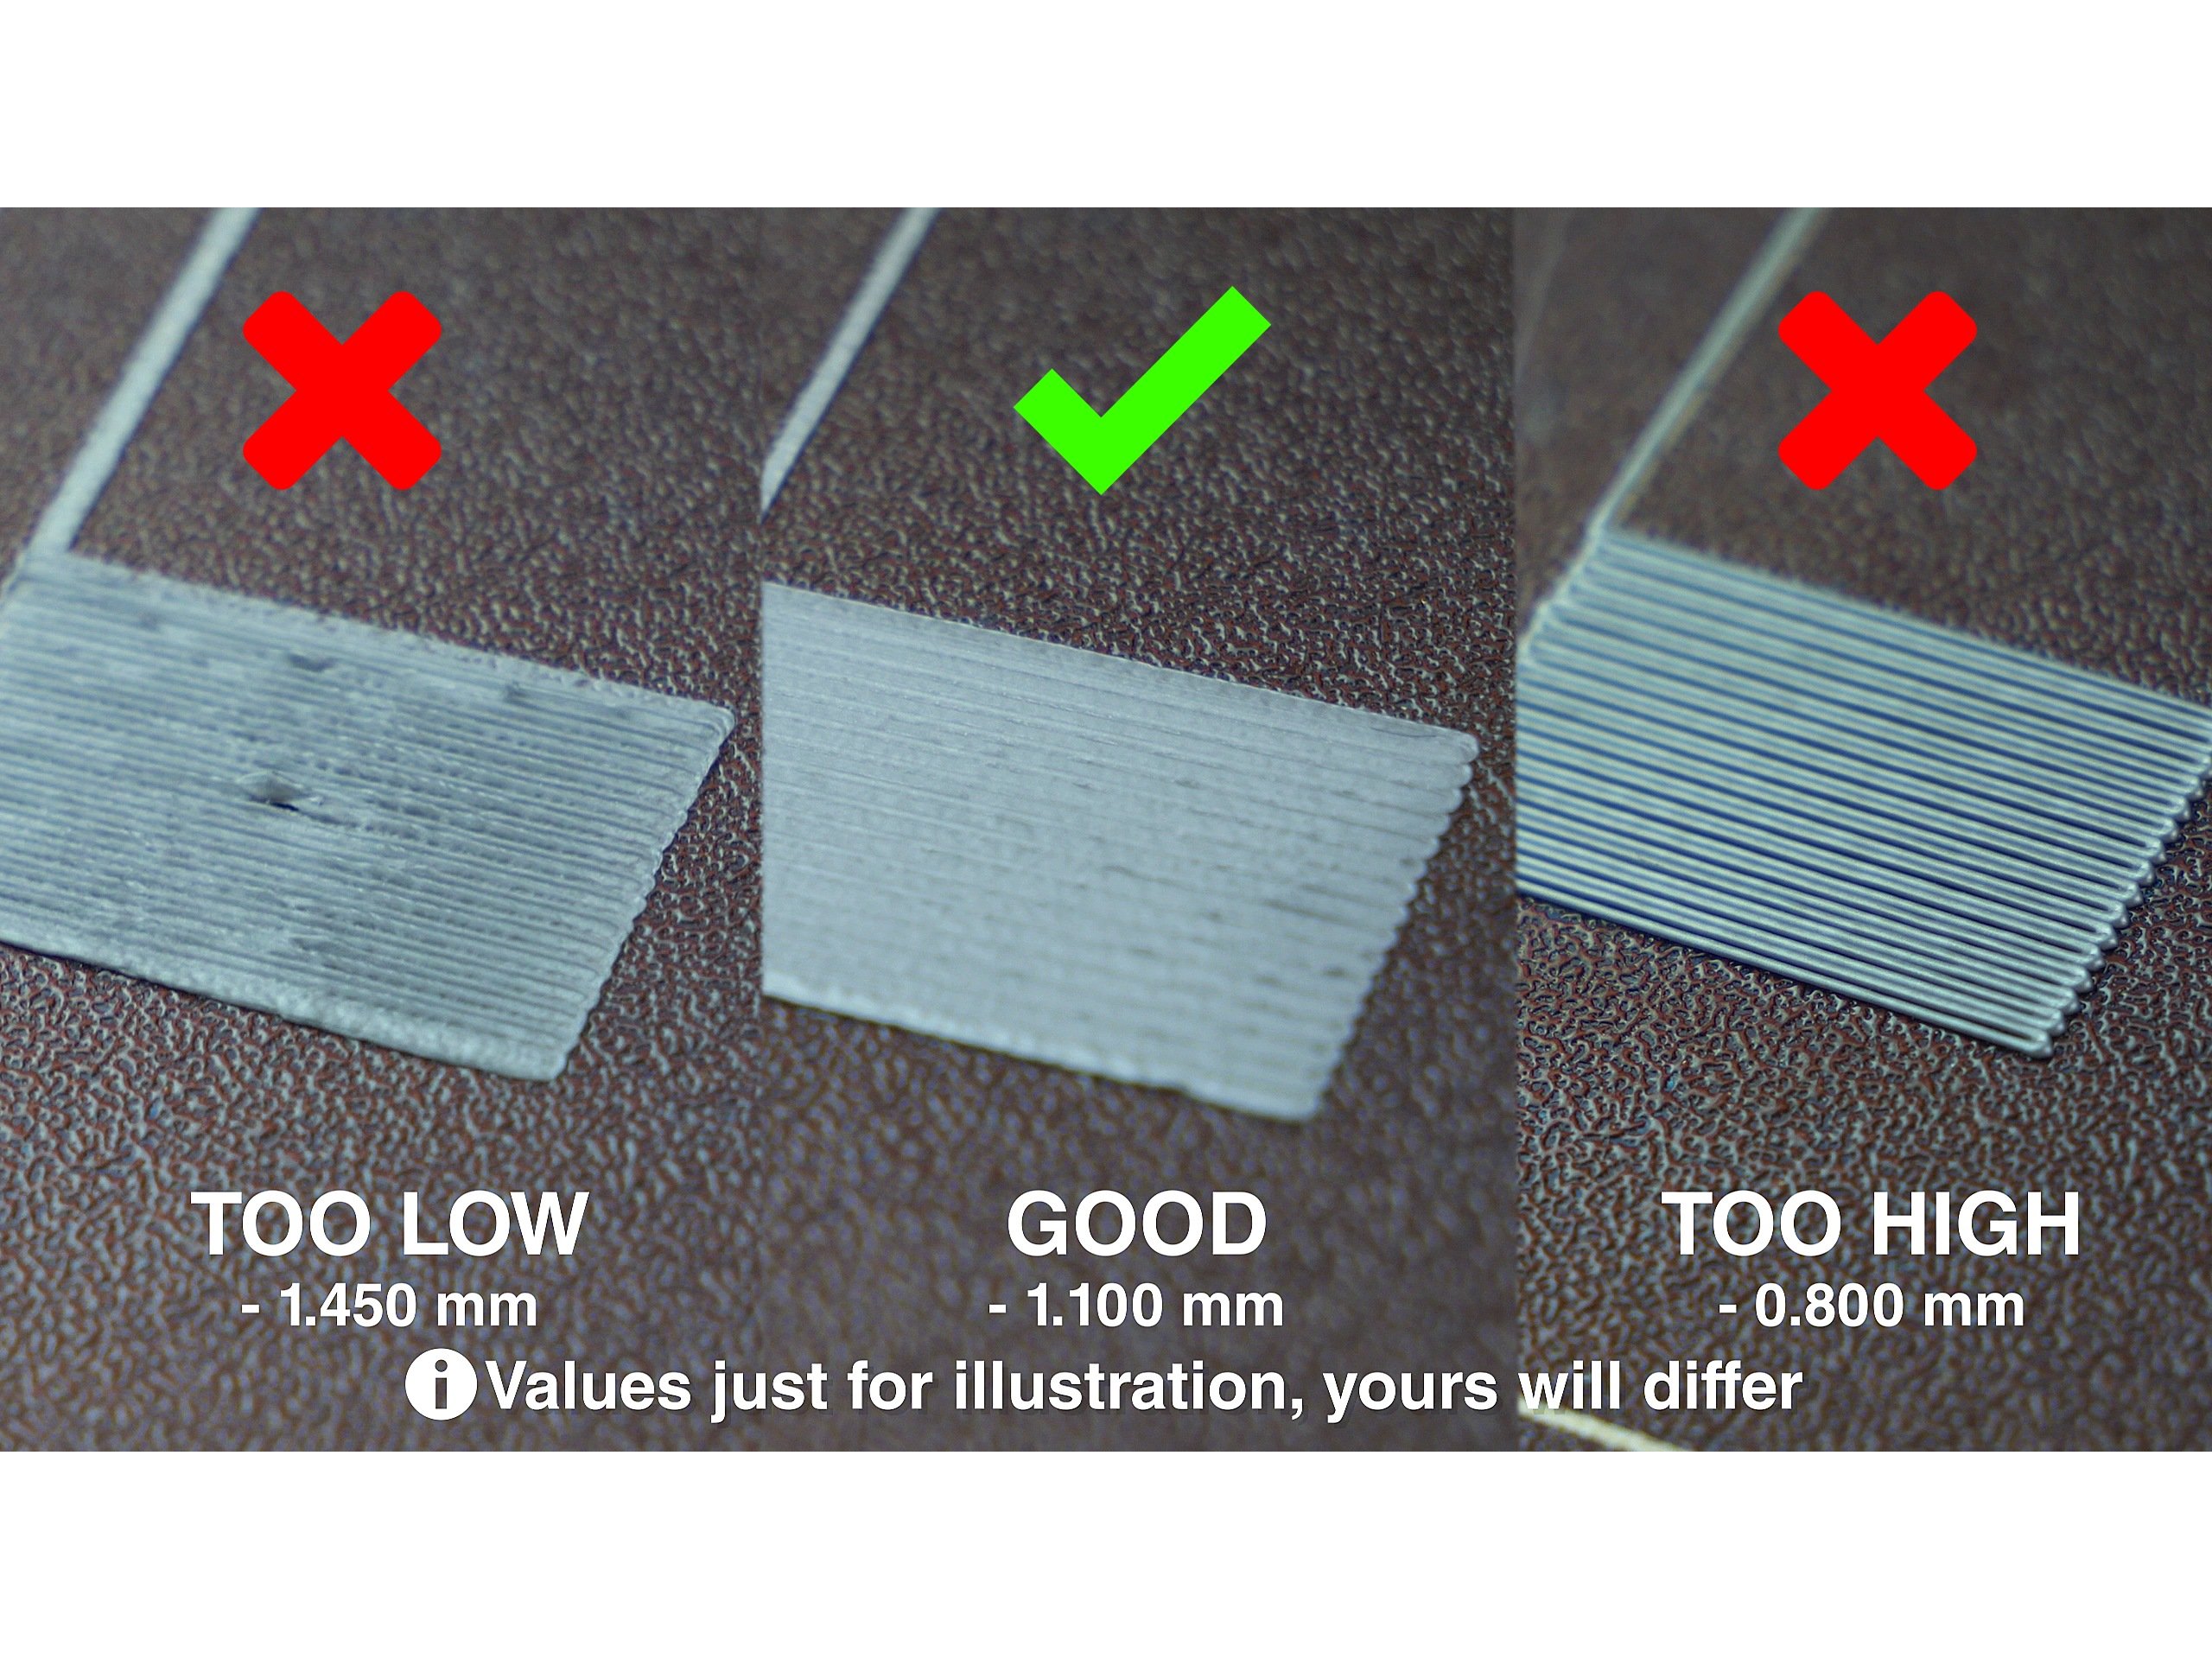
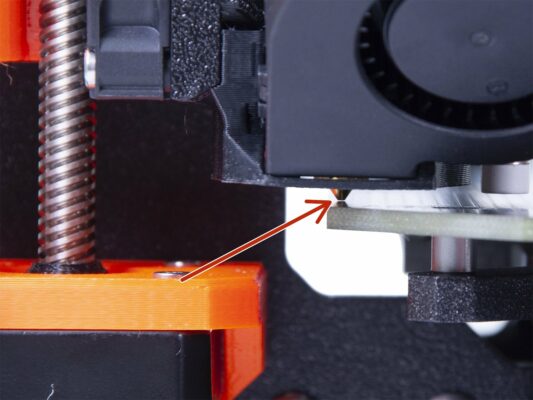
別の角度から見て、ノズルがヒートベッドに少しだけ触れていることを確認してください。ヒートベッドは曲げないようにしてください!
P.I.N.D.A. プローブの調整作業がすべて終わるまで、スチールシートは置かないでください。XYZキャリブレーションが終わるまでお待ちください。