Your Original Prusa MINI and MINI+ printer may be causing some vibrations during use. In most cases, this will not cause any printing issues, however, we will show you how to minimize it or get rid of it entirely.
Identify the noise
Go to the Printer display -> Settings -> Move Axis, and Move X and Move Y individually to see if the noise can be narrowed down to a single axis. You can also start a print and during operation/noise, try placing your hand on various components and hear if it dampens the sound.
Components such as:
- Heatbed
- Motors
- LCD assembly
Some sounds can be hard to identify and some may only present themselves with certain simultaneous movements of the X- and Y-axis. Therefore, we recommend inspecting all points outlined in this article, even if you are not sure exactly where the noise is coming from.
Inspect your printer
Foam pads
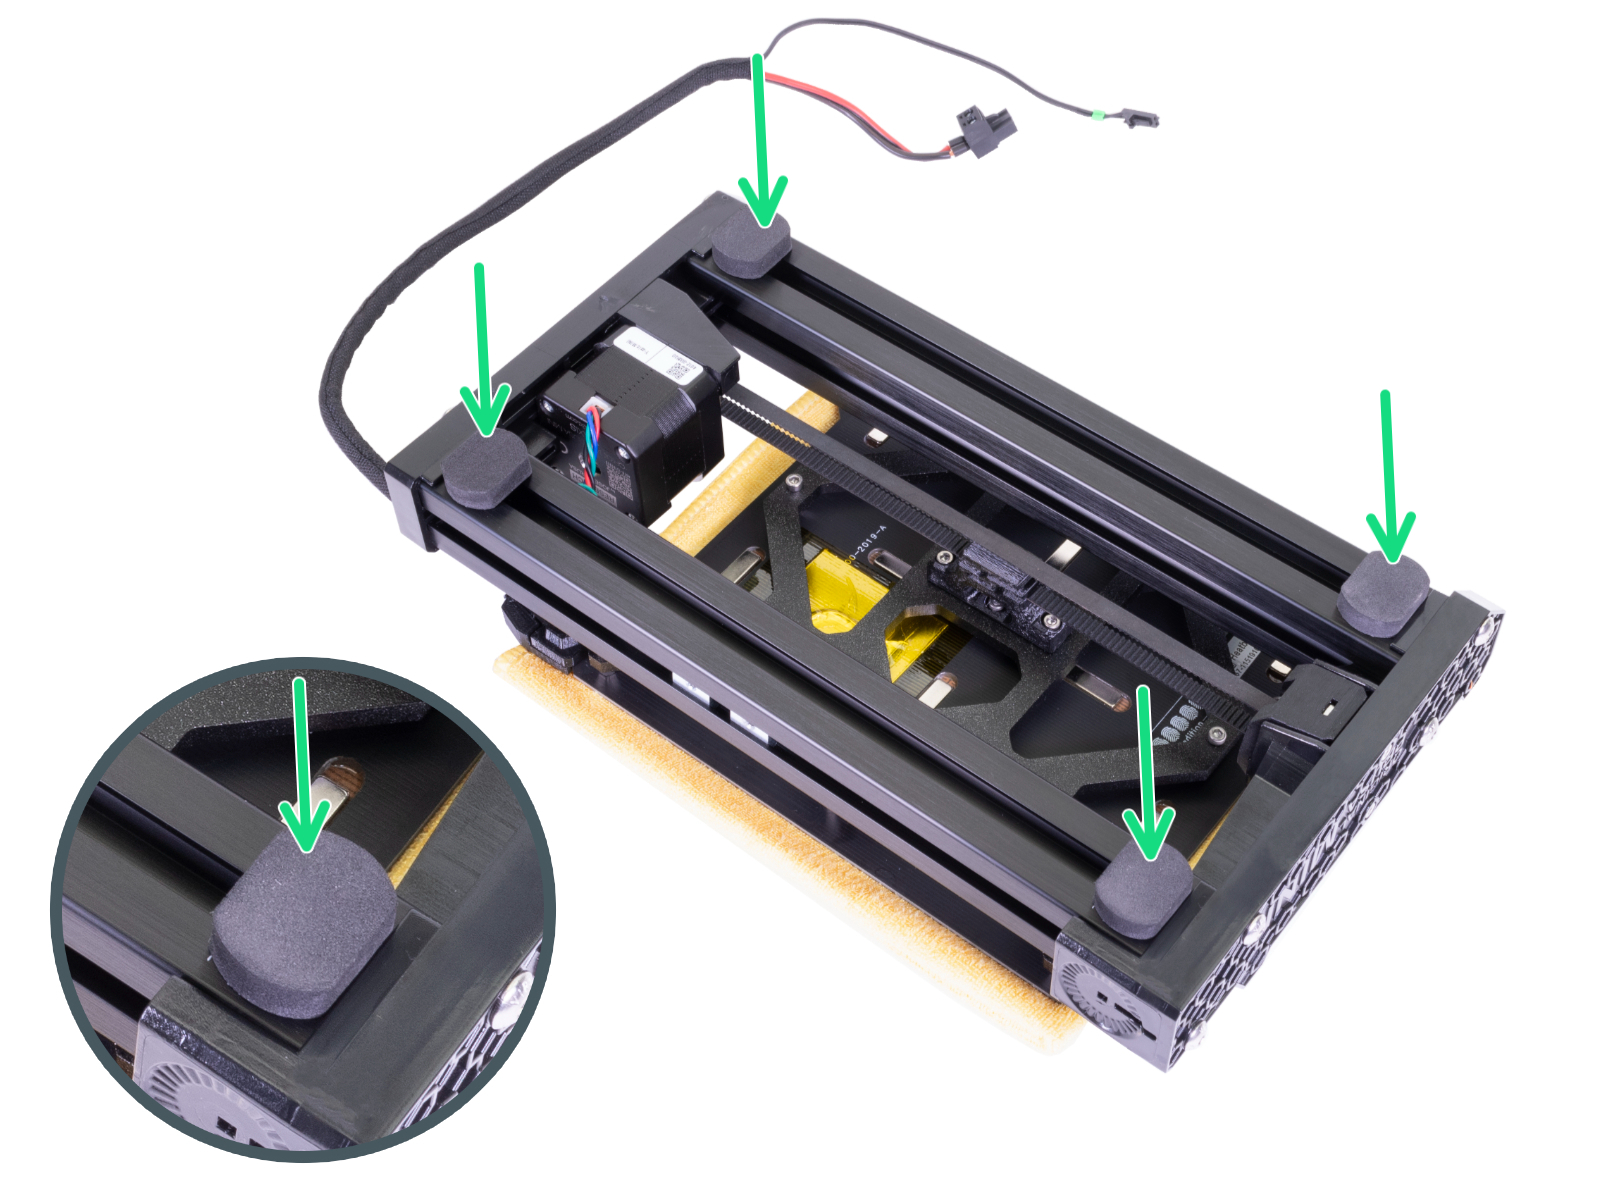
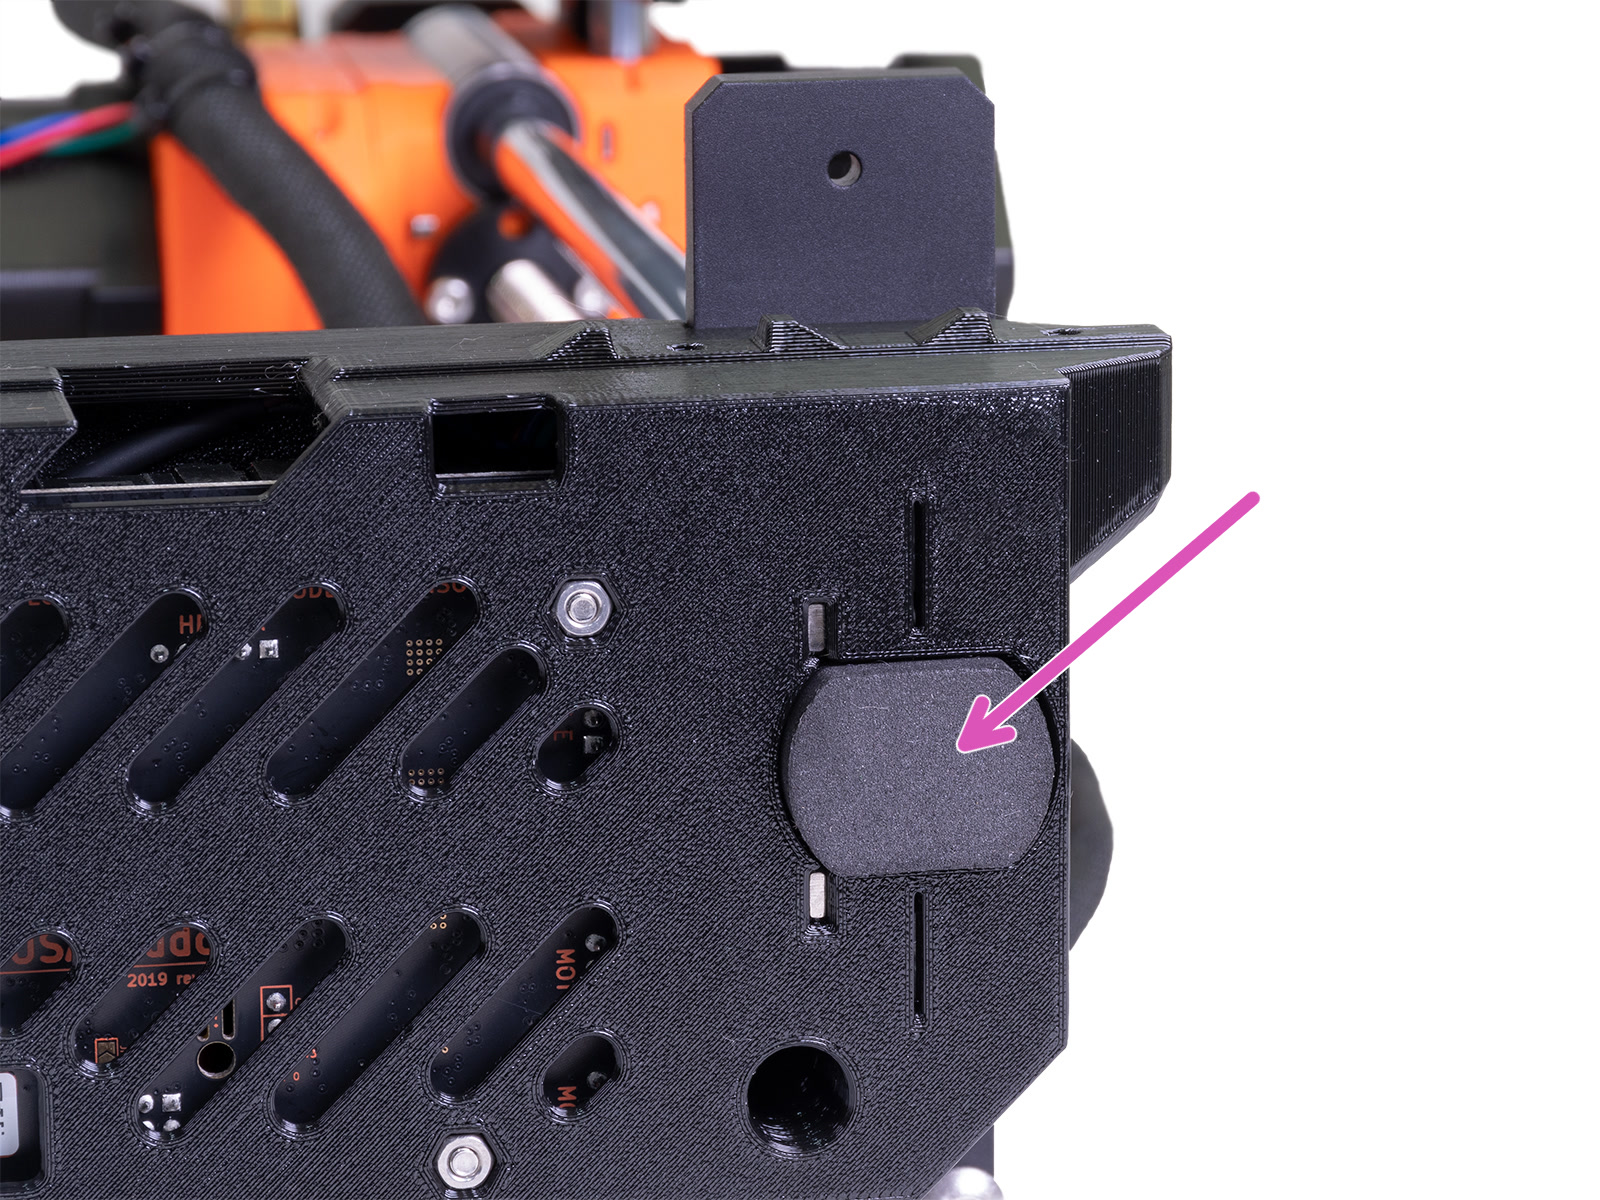
The printer comes with 5 foam pads that should be placed in the correct positions. There are 4 onto the ends of the frame's aluminium extrusions (green arrows), and a 5th below the electronics box in a space reserved for it (purple arrow).
 |  |
Lubricating rods and bearings
New noises coming from the printer after many hours of use is likely a sign that the rods and bearings could use some attention. For more information on how and with what to lubricate check out our guide.
X-axis
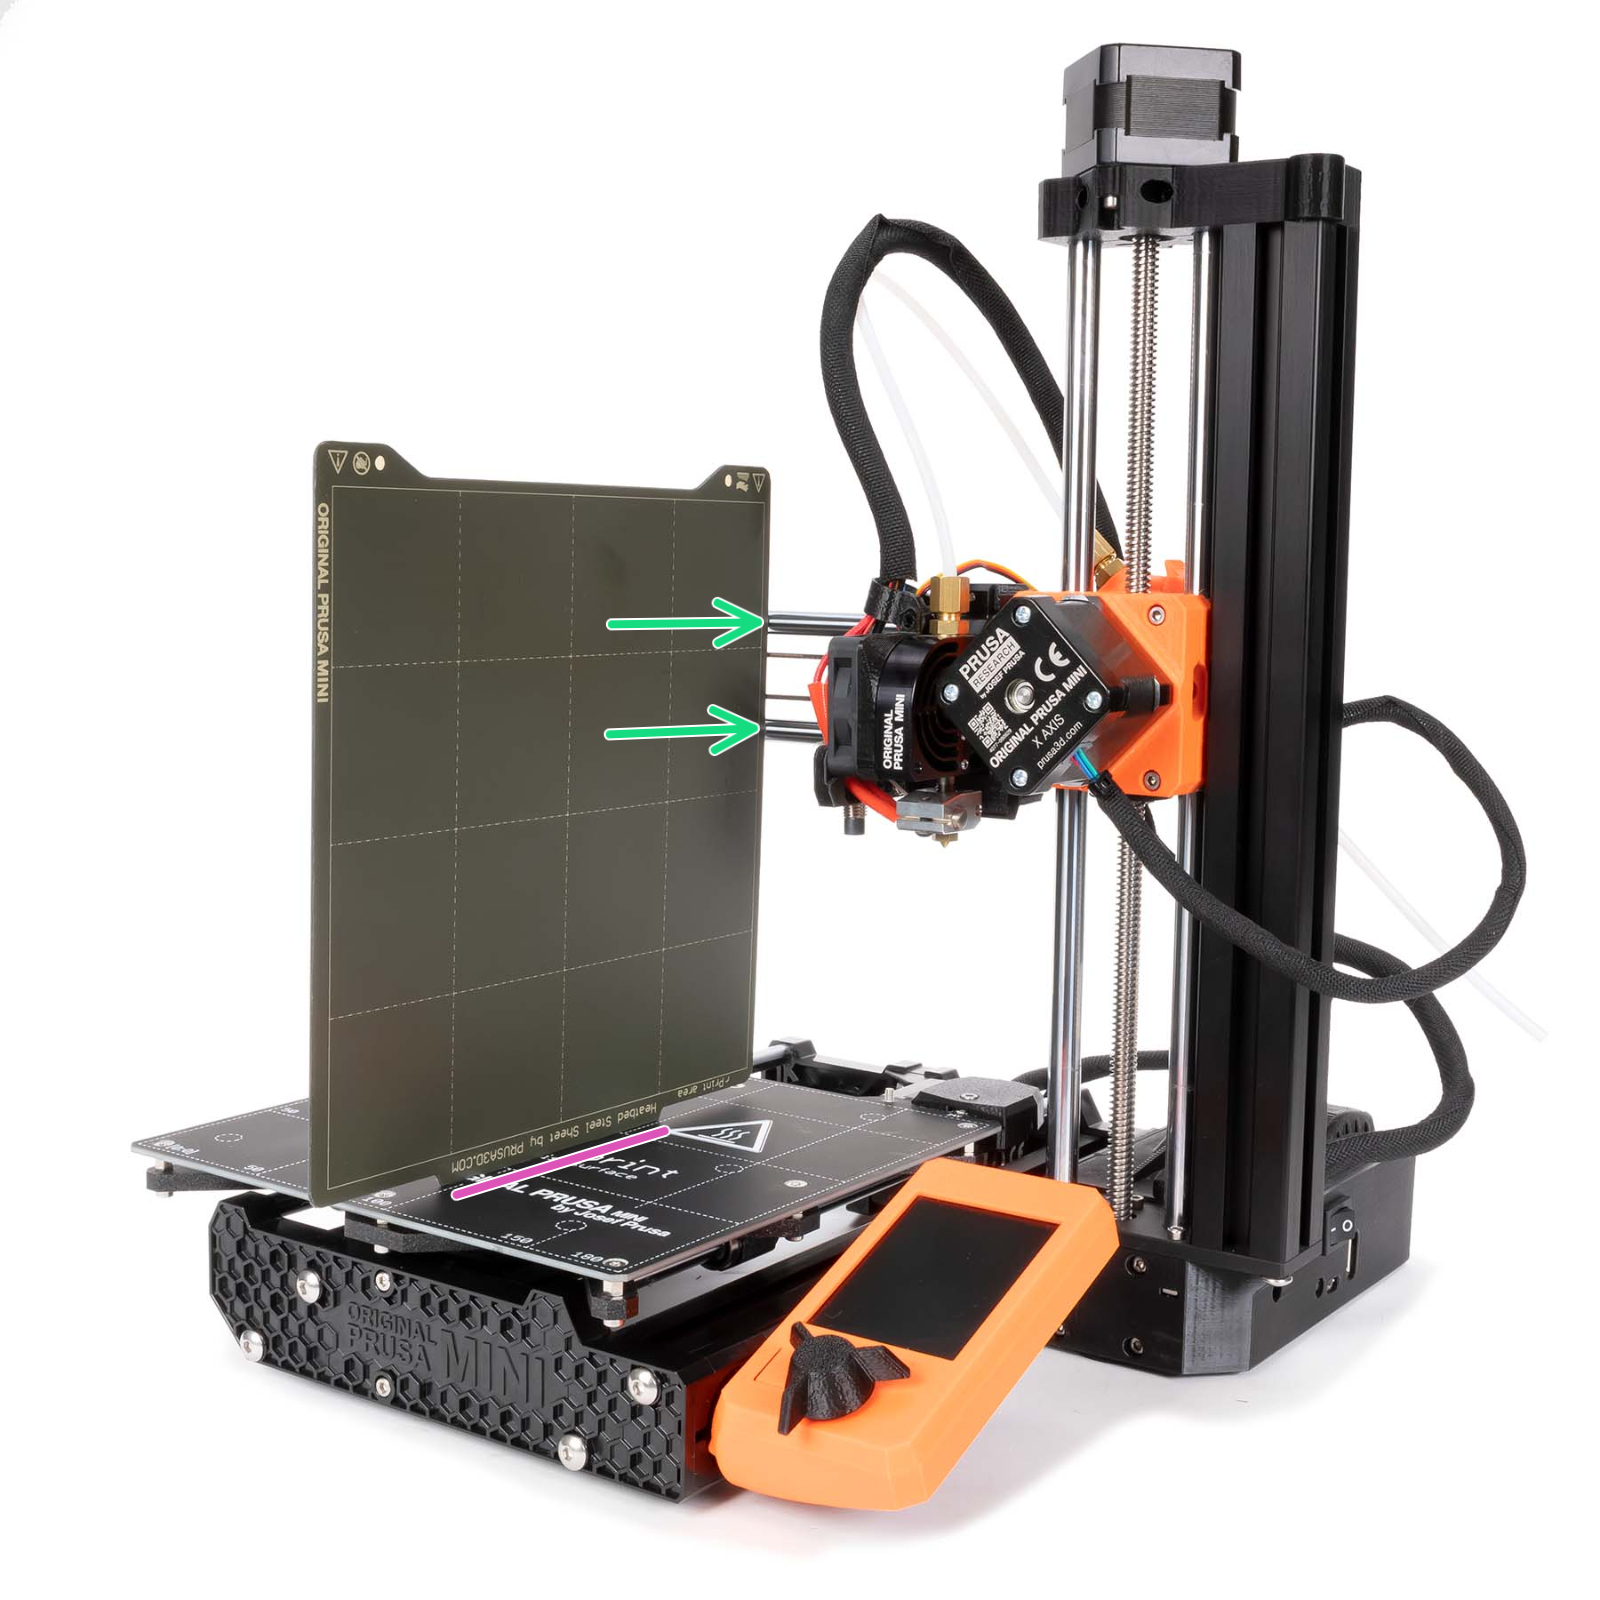
Look at the X-axis from the side. Align the X-end parallel to the Z-axis smooth rods by twisting the plastic part. Do not use too much force when twisting. You may damage the X-axis. You can use the steel sheet to check the rods against the heatbed.
 |  |
Y-axis
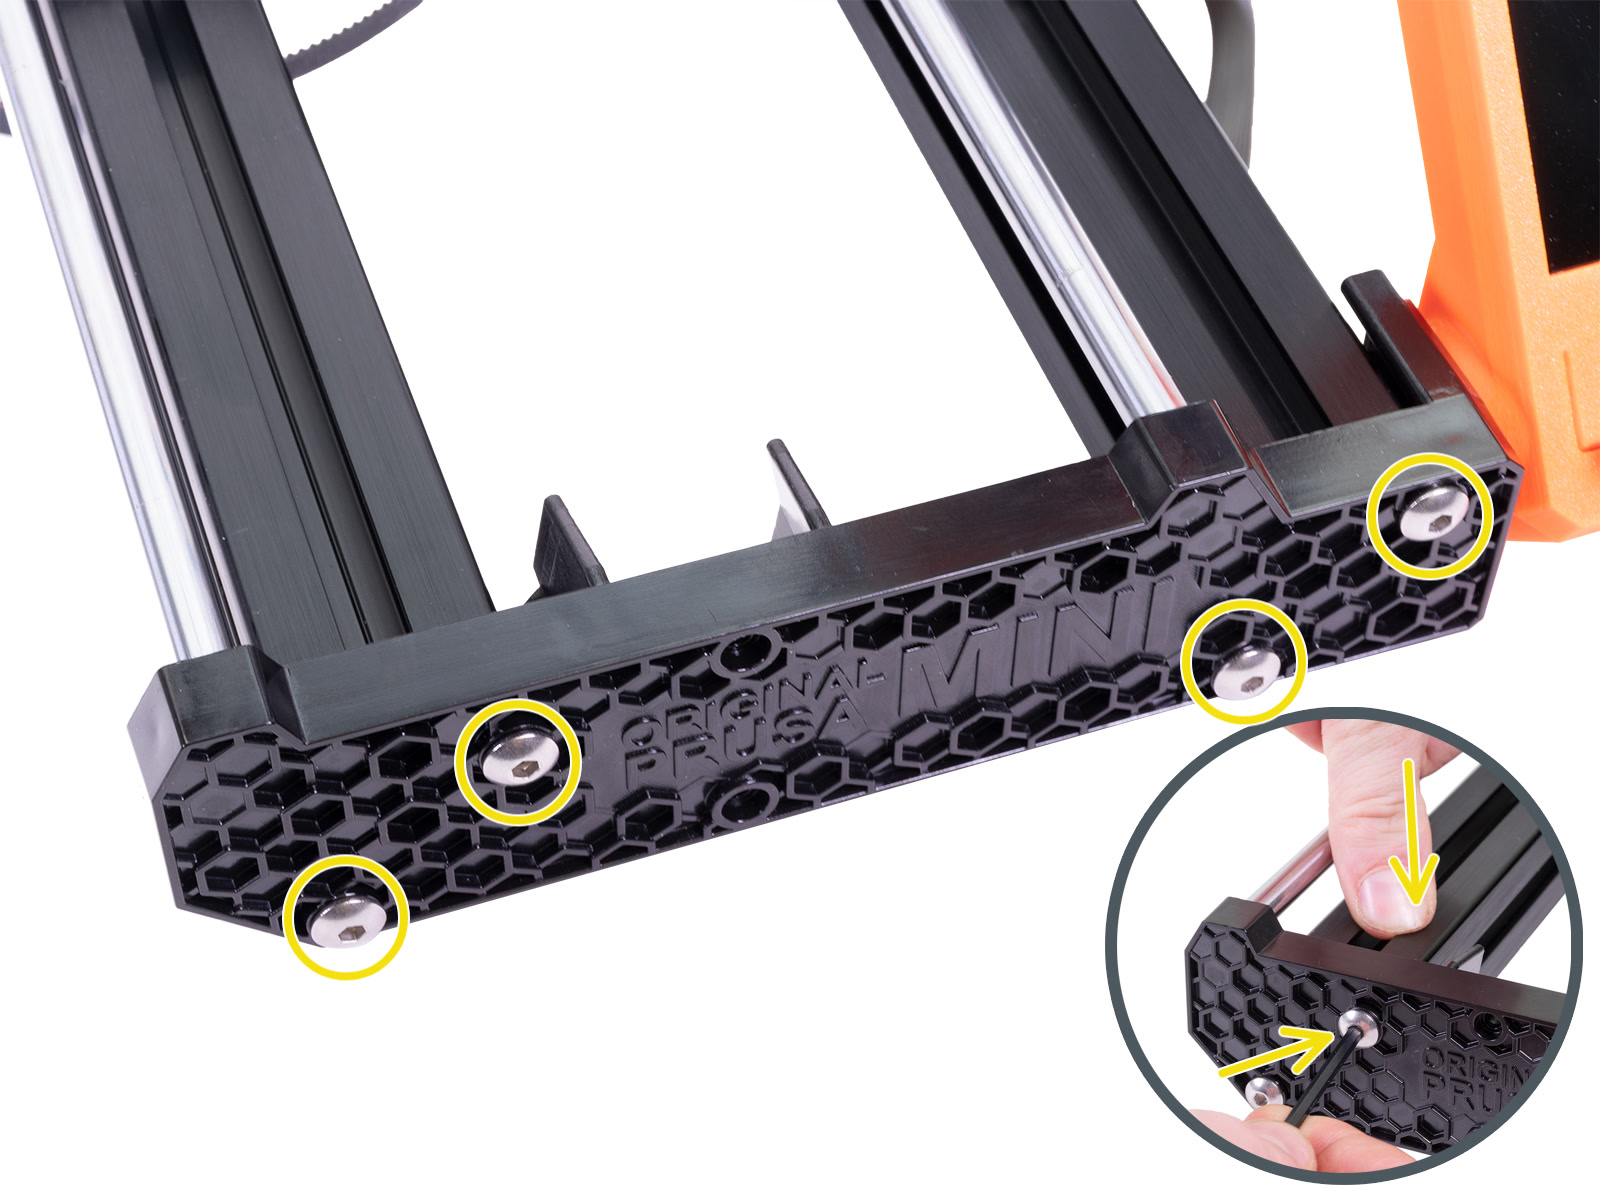
Make sure that both the front and rear plates are well secured. Go over each screw with a 3 mm Allen key. When tightening the M5x20r screws, push on the extrusion from above.
 Heatbed screws
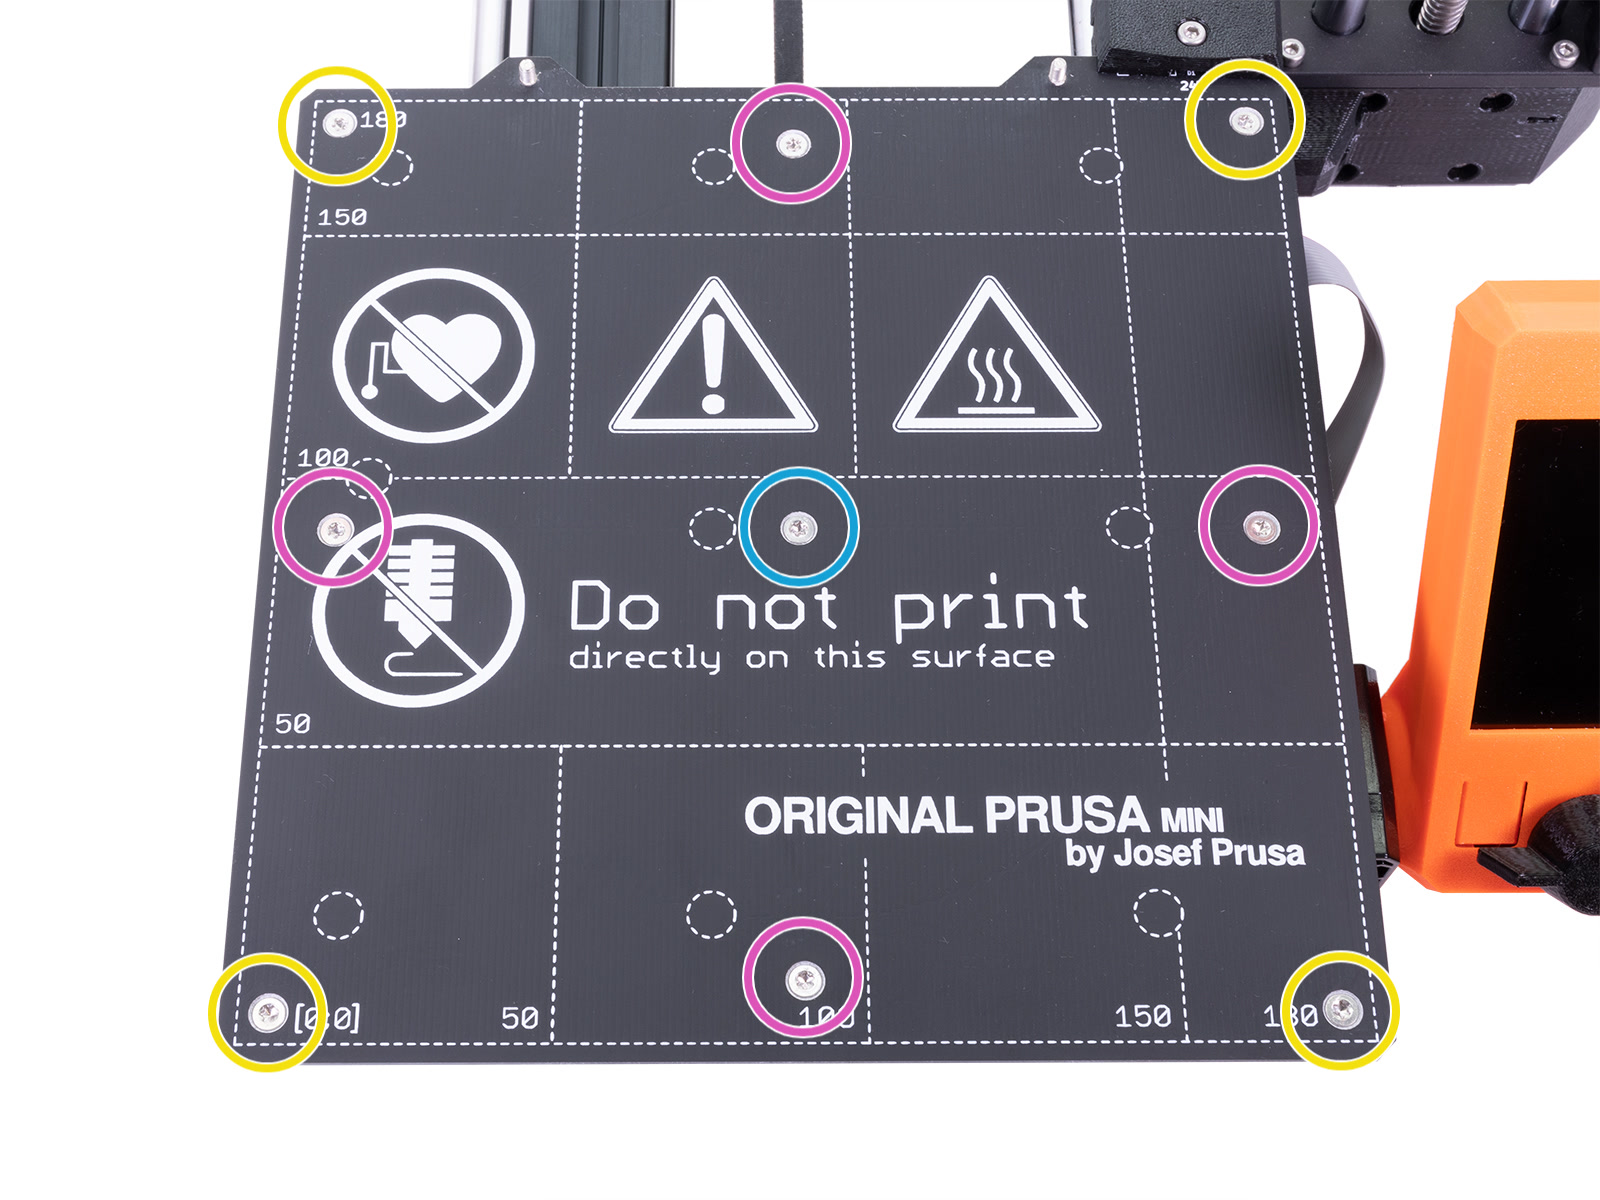
Check the 9 screws on the heatbed if any might be loose. If these are not well secured, the heatbed, screws, and spacers can rattle during movements. When tightening, always follow the correct order of:
- The center screw (light blue circles)
- The four edges (purple circles)
- The remaining four corners (yellow circles)
 Y-axis pulley
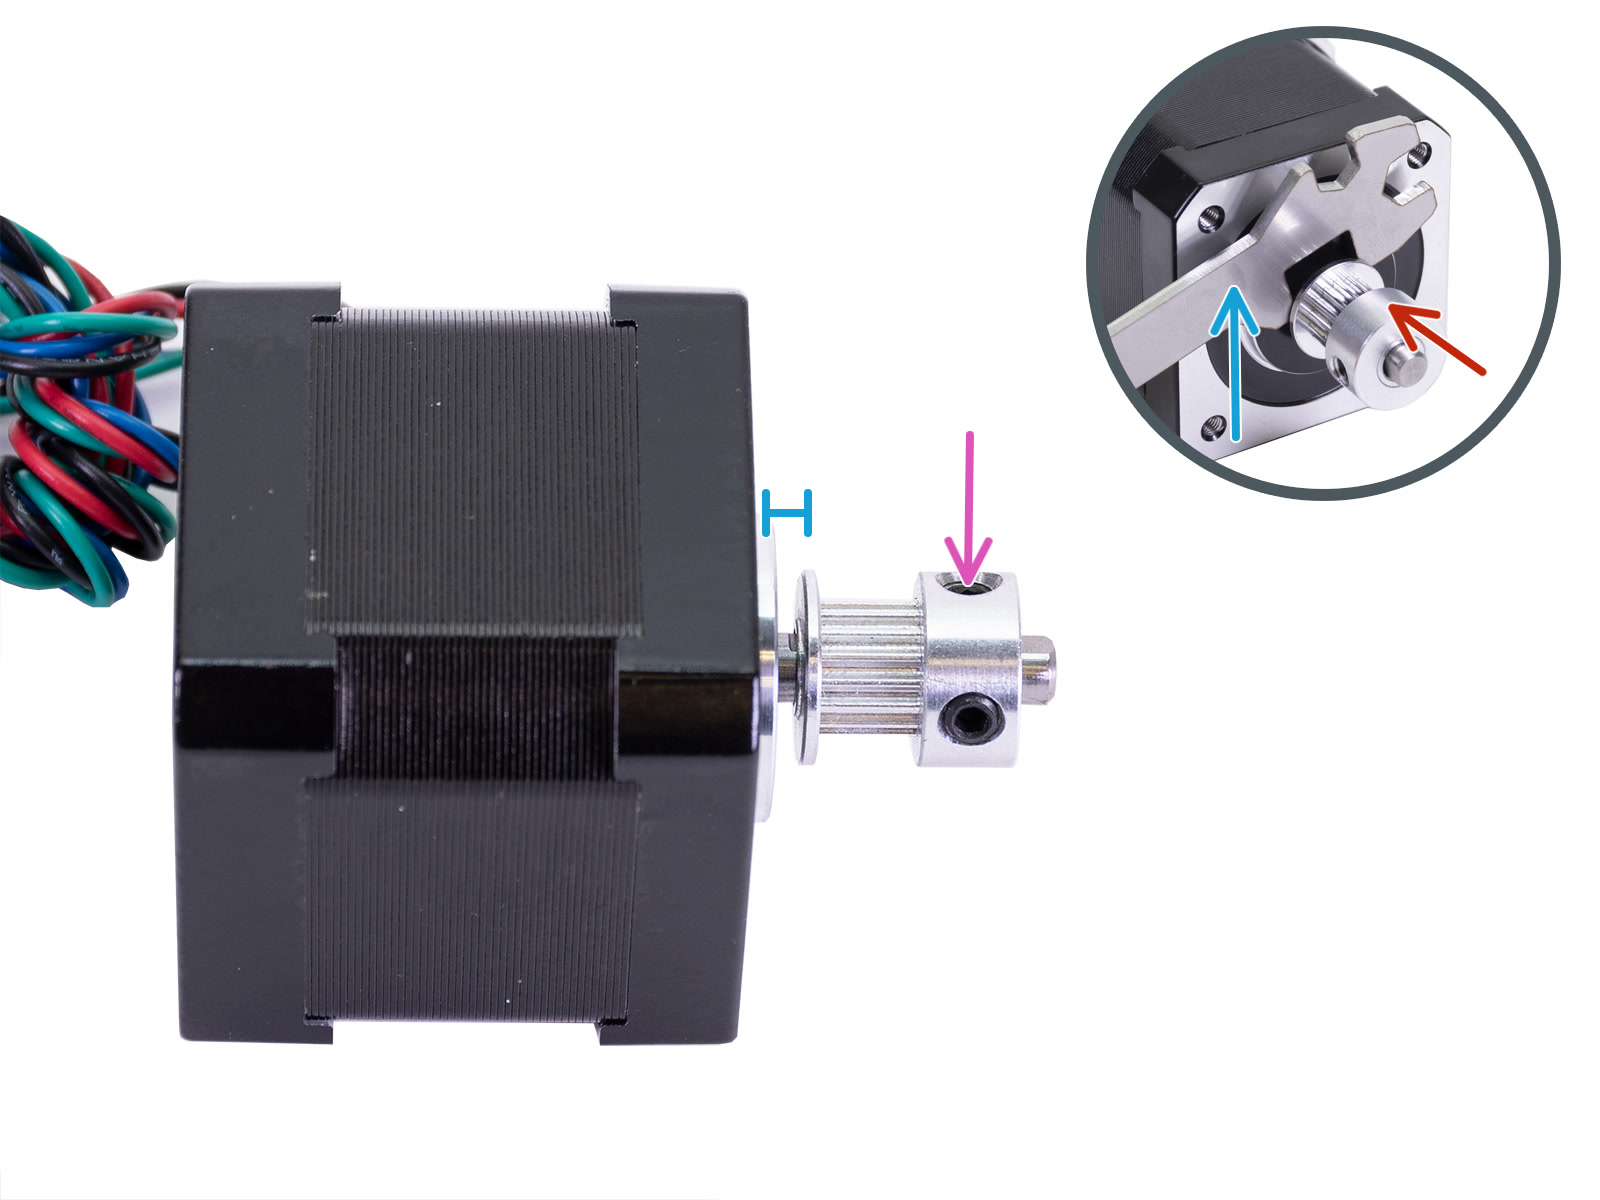
If the pulley Y-axis is touching the motor, even just slightly, it adds resistance which can lead to vibrations and even printing issues. Ensure that the spacing is the correct 2 millimeters, the pulley is oriented correctly, and secured by the set screw on the flat side of the motor shaft (purple arrow).
Other tips and tricks
Surface the printer stands on
The surface that the printer is on can amplify any of the vibrations and noises coming from the printer. The surface the printer is on should be steady and firm, and should not wobble during printing or if pushed by hand. A hardwood table is an example of this.
This can be enhanced further by placing the printer on a concrete slab/tile which would eliminate any vibrations traveling into the table/desk the printer is standing on.
Padding under the printer
An easy solution to dampening the noise and vibration of your printer is to add some sort of additional padding underneath the printer. This will dampen any sound resulting from the resonance between the
printer and the surface the printer is resting on.
You can use something you have around the house. Such as a folded towel or foam padding like you may find in children's play areas.
5 comments