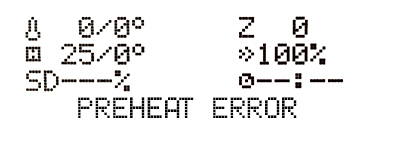
The Preheat error message occurs when there is a problem with the preheat process before your print starts. Therefore, there is something preventing the printer from heating up in proper time.
Make sure to distinguish between the Preheat error and the Bed preheat error.
- Preheat error - a problem with preheating the hotend.
- Bed preheat error - a problem with preheating the heatbed.
Troubleshooting
Preheat error
- Make sure that the ambient temperature is stable and there is nothing cooling the printer down, such as a nearby air-conditioning unit or an open window.
- Make sure the thermistor and heater are properly plugged into the electronics board. You can doublecheck that by following these guides: Mini RAMBo electronics wiring (MK2S, MK2.5, MK2.5S) or Einsy RAMBo electronics wiring (MK3/MK3S/MK3S+).
- Check if the fuses are not blown.
- Make sure that your hotend assembly is correct.
- If the issue persists, then there is something wrong with your printer's thermistor or heater. In order to find out which one of these two is malfunctioning, perform the simple test described below.
Bed preheat error
- Make sure that the ambient temperature is stable and there is cooling down the printer, such as a nearby air-conditioning unit or an open window.
- Make sure the heatbed thermistor is properly seated under the heated bed and secured with the golden Kapton tape. If not, then simply put it back and make sure that the thermistor cable has some space for movement.
- Make sure that the thermistor and heatbed are correctly plugged into the electronics board. You can doublecheck that by following these guides: Mini RAMBo electronics wiring (MK2S, MK2.5, MK2.5S) or Einsy RAMBo electronics wiring (MK3/MK3S/MK3S+).
- Check if the fuses are not blown.
- If the issue persists, there is something wrong with your printer's thermistor or heater. In order to find out which one of these two is malfunctioning, perform the simple test described below.
Testing the thermistor and heater
You can also verify if the thermistor or heater are damaged using a multimeter
It is not very common, but there is a chance that only the thermistor is defective. You can check it using the following test:
- Use a hairdryer to blow hot air at the heatbed or hotend.
- In the meantime, check if there is any temperature change on the LCD screen.
- If there is a positive temperature change it means that the heatbed or hotend thermistor is working. Which means there is something wrong with the heater or heatbed. In both cases contact our support and they will provide assistance.
- If there is no change at all, the hotend or heatbed thermistor is defective.
Was this article helpful?
This action is available only to registered users. Please log-in.
11 comments
The board was outputting stable 23.95V whereas the voltage at the heatbed connectors was fluctuating between 18 and 22V.
After removing the sleeve from the heatbed (and thermistor) cable I found that the cable was crimped and actually 95% severed by the connectors for the heatbed..
I tried the troubleshooting mentioned above, and ther hair dryer does make the thermister go up. I also tried testing the voltage on the pins for the thermal couple, both without a heating load, and with a heating load. I tried two spare thermalcouples, one red, and one white (I think 1 is from E3D directly and the other from Amazon). Neither heated, and Neither had a voltage load across the pins.
I also updated the firmware to the lastest Firmware 3.11.0, and still no voltage or heat on the nozzle. The bed heats fine, but the nozzle thermalcouple just won't heat.
Is there something else I can try? Is my controller board shot?
They sent me a few other articles about potential issues, and I discovered that it was a blown fuse. And after further review on the help articles, I noticed that I had installed the wrong heater. I had installed the 12 volt heater. Now, after replacing the 5 Amp fuse, and putting in a 24 volt heater, everything seems to be working.
I just need to recalibrate my machine for the different Nozzle.